Getting your hands on the best camera for portraits is the first step to professional portraiture. Finding the perfect portrait camera isn’t easy. You need to think about the type of camera you want and the portraits you want to shoot.
But no matter which road you go down, we have a portrait camera for you! Our list includes cameras from Canon, Nikon, Sony, and Fujifilm. And we look at both DSLR and mirrorless cameras.
The Canon EOS 90D is our favorite camera for portraits. It has the best image quality of any APS-C DSLR camera. It has fast and accurate AF with eye detection. And you get 10 fps (frames per second) in burst mode. It’s a brilliant camera for portrait photography.
Finding the Perfect Camera for Portraits
There are plenty of excellent portrait cameras out there. We’ll show you 20 of the best cameras for portrait photography. But we’ve broken our list into two sections to make it easier to find the best camera.
The first section looks at DSLR cameras. And the second looks at the best mirrorless cameras for portrait photography.
Best DSLR Camera for Portrait Photography
This section looks at the best DSLR cameras from Canon and Nikon. You’ll find APS-C and full frame DSLRs. And we’ve included cameras to suit all skill levels and budgets.
- Excellent 32.5 MP APS-C sensor
- Dual Pixel AF with eye detection
- Decent frame rate of 10 fps
- Good, 1,300-shot battery life
- Live View and 4K/30p Ultra HD video
- Long-exposure presets
- Plenty of autofocus (AF) points
- Nice, uncropped 4K video capabilities
- Dual memory card slots (UHS-II)

- Fantastic image quality
- Impressive 45-point AF system
- Built well and nice to handle
- Handy built-in Wi-Fi and GPS
- Excellent image quality
- Eye detection AF
- Great ISO range and low-light performance
- 4K/25p and Full HD/120p video
- Fantastic overall image quality
- Excellent 3D continuous AF tracking
- Long, 1,840-shot battery life
- Durable, weather-sealed construction
- Sharp 4K/30p Ultra HD video
- Excellent image quality
- Guide mode for beginners
- Easy to use and wide functionality
- Long battery life
- Quality sensor produces detailed and vibrant images even at high ISOs
- Dual Pixel AF with eye detection
- User-friendly touch-to-focus screen
- 900-shot battery life
- Cinema-quality (DCI) 4K video

- Excellent low-light performance
- 10 fps RAW burst with 200-image limit
- Weather-sealed body
- Long-lasting battery life
- 4K video with ports for external sound recording
- Excellent value
- Compact body for a DSLR
- Insanely good battery life
- Fully articulating screen is helpful for capturing video
- Solid 4K video quality
- Great value for money
- Smaller, compact DSLR body
- Easy to handle and hold
- Long battery life
10 Best DSLR Cameras for Portraits
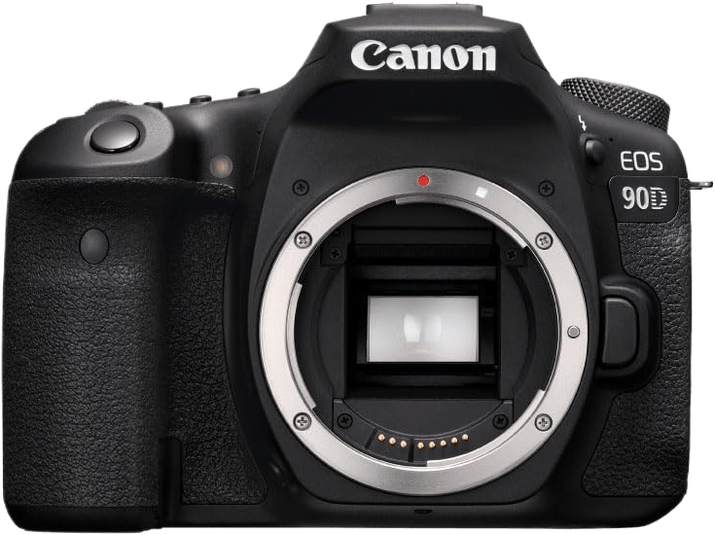
1. Canon EOS 90D
| Brand |
Brand
Canon
|
| Sensor Format |
Sensor Format
APS-C
|
| Lens Mount |
Lens Mount
Canon EF/EF-S
|
| Megapixels |
Megapixels
33 MP
|
| Autofocus Points |
Autofocus Points
45
|
| Minimum ISO (Native) |
Minimum ISO (Native)
100
|
| Maximum ISO (Native) |
Maximum ISO (Native)
25600
|
The Canon EOS 90D is the best DSLR camera for portraits. The powerful sensor gives you incredible image quality. It has an impressive 32.5 MP resolution. You won’t find many APS-C cameras with that kind of image resolution. It’ll give you glorious and glowing portraits.
The autofocus system is as good as any found on an APS-C DSLR. It uses 45 cross-type focus points, giving you good coverage across the frame. Portrait photographers will also appreciate the autofocus system’s face and eye detection features. It’s quick to find faces, locking on so you don’t miss the perfect shot.
You can use the burst mode for lively portraits. And 10 fps is fast enough for portrait photography.
You also have stunning 4K video options. And the EOS 90D can be used as a webcam with the EOS Utility app. Wi-Fi connectivity is another handy feature for the modern portrait photographer.
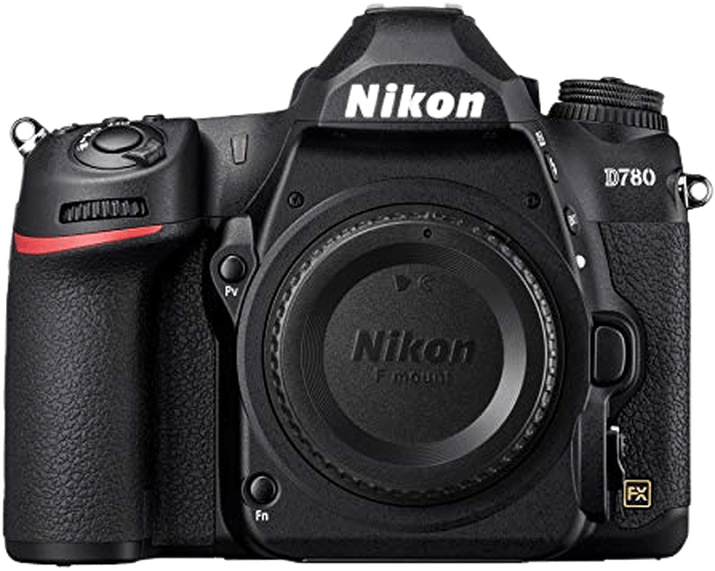
2. Nikon D780
| Brand |
Brand
Nikon
|
| Sensor Format |
Sensor Format
Full Frame
|
| Lens Mount |
Lens Mount
Nikon F
|
| Megapixels |
Megapixels
25 MP
|
| Autofocus Points |
Autofocus Points
51
|
| Minimum ISO (Native) |
Minimum ISO (Native)
100
|
| Maximum ISO (Native) |
Maximum ISO (Native)
51200
|
The Nikon D780 is a fantastic full frame DSLR. It produces stunning images. The creative features are ideal for portrait photography. And you get your pick of Nikon’s extensive F-mount lenses.
The full frame sensor gives you 24.5 MP resolution. That might not sound like much for a full frame camera. But when paired with the EXPEED 6 image processor, the results will impress even the harshest critic.
This DSLR has two fantastic autofocus systems. It uses 51 focus points when using the optical viewfinder. Then there’s a 273-point system in Live View. The Live View AF system also has eye detection, making it ideal for shooting portraits.
You also have two continuous shooting modes. The 7 fps mode with the optical viewfinder is perfect for portraits. And you have 12 fps when shooting in Live View. This is handy for more lively shoots like weddings or group portraits.
The D780‘s 4K video is excellent. And there’s a time-lapse mode for extra creativity. You also have focus stacking, wireless connectivity, and creative picture controls.
3. Canon EOS 6D Mark II
| Brand |
Brand
Canon
|
| Sensor Format |
Sensor Format
Full Frame
|
| Lens Mount |
Lens Mount
Canon EF
|
| Megapixels |
Megapixels
26.2 MP
|
| Autofocus Points |
Autofocus Points
45
|
| Minimum ISO (Native) |
Minimum ISO (Native)
100
|
| Maximum ISO (Native) |
Maximum ISO (Native)
40000
|
The Canon EOS 6D Mark II is a portrait photographer’s dream. It is a full frame DSLR camera. It produces stunning images with a 26.2 MP sensor. You’ll get intricate detail and lovely color rendering.
The AF system is perfectly suited to portraiture. It has 45 focus points with a wide coverage area, so no time is wasted finding focus. A 6.5 fps burst mode isn’t record-breaking. But that’s fast enough for a portrait shoot.
It’s a durable camera with dust and weather sealing. You can shoot on location in all conditions. You can shoot lovely 4K videos. And there’s time-lapse and Wi-Fi connectivity. The EOS 6D Mark II is the complete package.
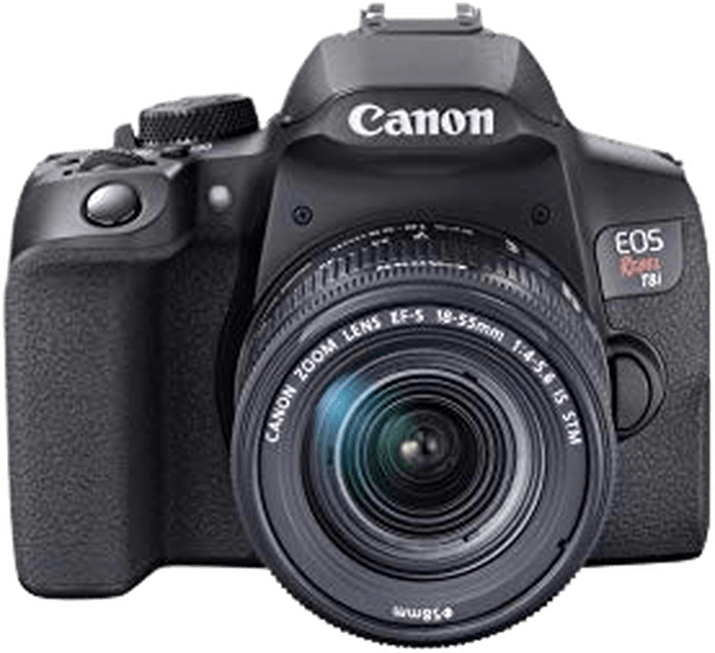
4. Canon EOS Rebel T8i
| Brand |
Brand
Canon
|
| Sensor Format |
Sensor Format
APS-C
|
| Lens Mount |
Lens Mount
Canon EF/EF-S
|
| Megapixels |
Megapixels
24 MP
|
| Autofocus Points |
Autofocus Points
45
|
| Minimum ISO (Native) |
Minimum ISO (Native)
100
|
| Maximum ISO (Native) |
Maximum ISO (Native)
25600
|
The Canon EOS Rebel T8i is Canon’s best entry-level DSLR. It has everything a beginner needs to get started. And the results are sure to fuel your enthusiasm for photography.
It’s a good all-rounder. And you’ll be able to shoot some fabulous portrait photos.
The APS-C sensor gives you a 24.1 MP resolution. It’s a huge step up from smartphone cameras. And you’ll see the benefit in all your portraits and self-portraits. The detail and true-to-life color rendition will take your portraits to a new level.
The 45-point autofocus system has face-detection options. That’ll help you with your portrait photography. And you have eye detection for pinpoint sharpness in Live View mode.
The EOS Rebel T8i is packed with additional features. There’s a 7 fps burst mode for action. You can shoot 4K videos. And there’s a vari-angle LCD screen for easier shooting and composition.
It’s a brilliant beginner DSLR. And it’s ideal for a fresh-faced portrait photographer.
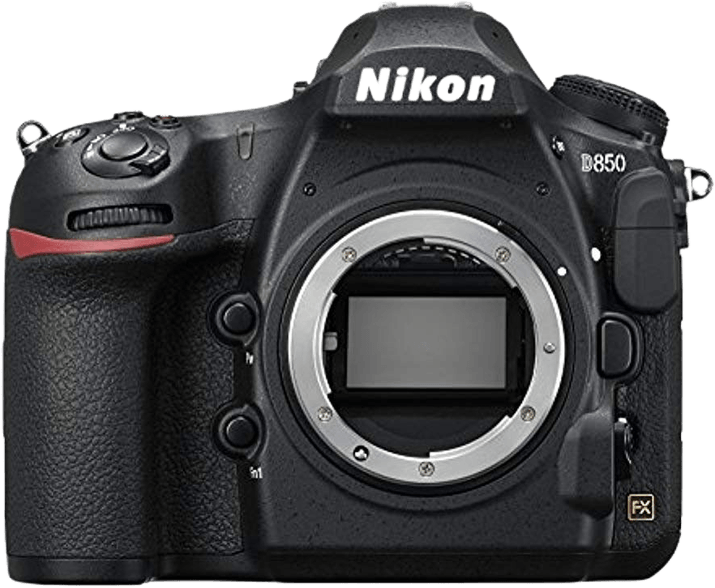
5. Nikon D850
| Brand |
Brand
Nikon
|
| Sensor Format |
Sensor Format
Full Frame
|
| Lens Mount |
Lens Mount
Nikon F FX
|
| Megapixels |
Megapixels
45.7 MP
|
| Autofocus Points |
Autofocus Points
153
|
| Minimum ISO (Native) |
Minimum ISO (Native)
64
|
| Maximum ISO (Native) |
Maximum ISO (Native)
25600
|
The Nikon D850 is one of the best professional DSLRs on the market. And if you want to take professional portraits, you need a professional camera like the D850. It isn’t cheap, but it’s a worthy investment if you’re going pro.
The full frame sensor gives you incredible image quality. With a resolution of 45.7 MP, you get exquisite detail, true-to-life colors, and a wide dynamic range. It’ll take your portrait photography to a completely new level.
The D850 uses F-lens mount. That gives you a wide selection of lenses from their F lens series. You have plenty of fantastic portrait lenses to choose from.
There’s a 9 fps continuous shooting mode. You can record 4K videos with slow-motion options. And you have Wi-Fi and Bluetooth connectivity. The dual memory card slots are another handy feature for busy professionals.
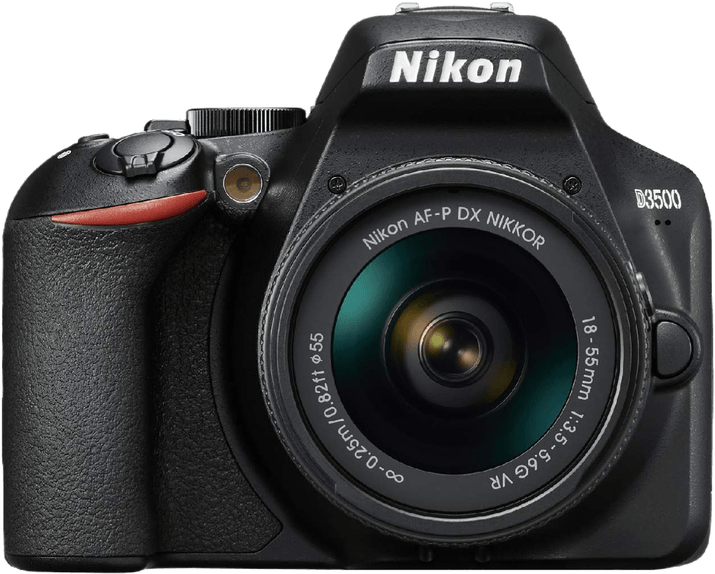
6. Nikon D3500
| Brand |
Brand
Nikon
|
| Sensor Format |
Sensor Format
APS-C
|
| Lens Mount |
Lens Mount
Nikon F
|
| Megapixels |
Megapixels
24 MP
|
| Autofocus Points |
Autofocus Points
11
|
| Minimum ISO (Native) |
Minimum ISO (Native)
100
|
| Maximum ISO (Native) |
Maximum ISO (Native)
25600
|
The Nikon D3500 is the best camera for beginners. It has excellent guide modes for absolute beginners.
And you have a selection of shooting modes to help you become more independent with settings. These include portrait and night portrait modes. That’s why the D3500 is perfect for beginners interested in portrait photography.
With an image resolution of 24.2 MP, you’ll be encouraged by the results. The quality is a striking improvement from smartphone cameras. And you have far more reactive options. The low-light performance is also excellent.
The D3500 has no 4K video recording. But the Full HD video option is still excellent for beginners. You also get a 5 fps burst function for action or lively portraits. And you get Wi-Fi connectivity. You also have your pick of Nikon’s F-mount lenses.
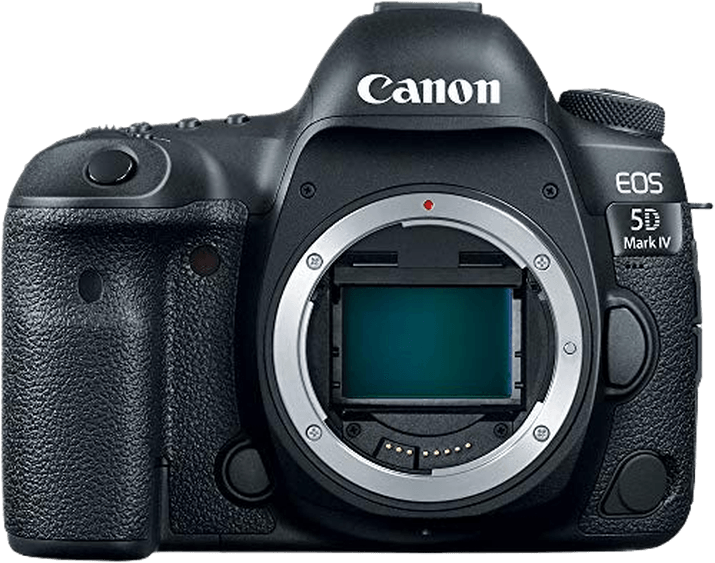
7. Canon EOS 5D Mark IV
| Brand |
Brand
Canon
|
| Sensor Format |
Sensor Format
Full Frame
|
| Lens Mount |
Lens Mount
Canon EF
|
| Megapixels |
Megapixels
30.4 MP
|
| Autofocus Points |
Autofocus Points
61
|
| Minimum ISO (Native) |
Minimum ISO (Native)
100
|
| Maximum ISO (Native) |
Maximum ISO (Native)
32000
|
The Canon EOS 5D Mark IV is a powerful full frame camera. Its main focus is image quality. And it delivers on that promise.
The sensor has a 30.4 MP resolution. You get a nearly infinite color range, all naturally rendered. And there’s a wide dynamic range. You’ll create powerful portraits with this camera.
The camera has a wide ISO range. While few portrait photographers need high ISO settings, they will appreciate the low setting of 50. This enhances image quality even further.
The autofocus is another positive for portrait fans. It’s a Dual Pixel CMOS AF system. It has face and eye detection in Live View. And you can select specific AF areas on the LCD touchscreen for more focusing controls.
The other features are great too. You get a 7 fps burst mode. There are fantastic 4K video and HD slow-motion options. And you can use the EOS 5D Mark IV as a high-resolution webcam.
8. Nikon D500
| Brand |
Brand
Nikon
|
| Sensor Format |
Sensor Format
APS-C
|
| Lens Mount |
Lens Mount
Nikon F DX
|
| Megapixels |
Megapixels
20.9 MP
|
| Autofocus Points |
Autofocus Points
153
|
| Minimum ISO (Native) |
Minimum ISO (Native)
50
|
| Maximum ISO (Native) |
Maximum ISO (Native)
51200
|
The Nikon D500 is a pro-level APS-C DSLR camera. It’s lighter and more compact than a full frame DSLR. But it still produces fantastic images and media.
The DX-Format CMOS sensor has a 20.9 MP resolution. That might not seem outstanding. But paired with the EXPEED 5 processor, you can expect fabulous portrait photos.
You get a continuous shooting speed of 10 fps. That’s quick for a DSLR. And the low-light performance is excellent. You get a high max ISO that’s expandable to 1,640,000. But you get exquisite detail and definition without having to increase your ISO.
The D500‘s AF system is fast and responsive to movement. You get Bluetooth and Wi-Fi connectivity. And you can use any of Nikon’s F-mount DX lenses. There’s a wide selection with some superb portrait options.
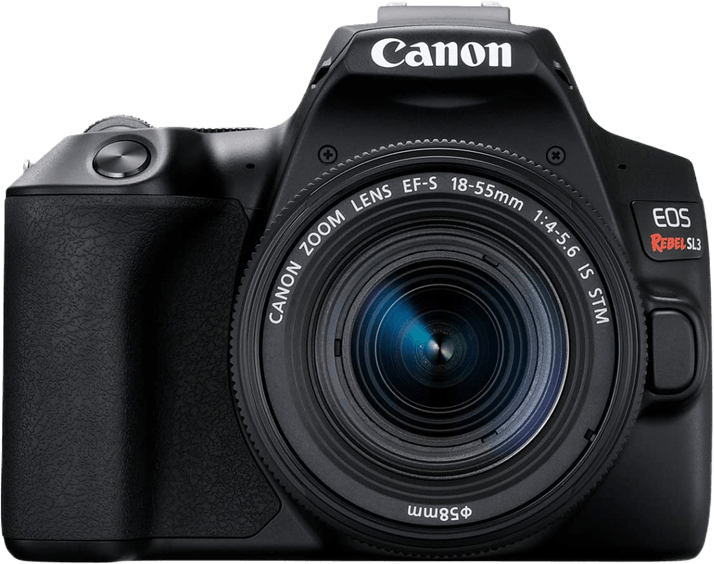
9. Canon EOS Rebel SL3
| Brand |
Brand
Canon
|
| Sensor Format |
Sensor Format
APS-C
|
| Lens Mount |
Lens Mount
Canon EF/EF-S
|
| Megapixels |
Megapixels
24 MP
|
| In-body Stabilization |
In-body Stabilization
1
|
| Autofocus Points |
Autofocus Points
9
|
| Minimum ISO (Native) |
Minimum ISO (Native)
100
|
| Maximum ISO (Native) |
Maximum ISO (Native)
25600
|
The EOS Rebel SL3 is another fantastic portrait Canon camera for beginners. It’s an affordable option for people who want to start portrait photography. The performance and results are excellent. And the features are perfectly suited to enthusiastic beginners.
The image quality is outstanding for an entry-level DSLR. The sensor has a 24.1 MP resolution. And the dynamic range and low-light performance enhance the detail in your photos.
The AF system is reliable and responsive. And the eye-detection feature makes it perfect for portraits of all kinds. It works with human and animal subjects.
The vari-angle touchscreen helps you get the shots you want. And the Wi-Fi connectivity allows you to share your portraits with other devices. The Rebel SL3 also has a Create Assist feature for more creative portrait options.
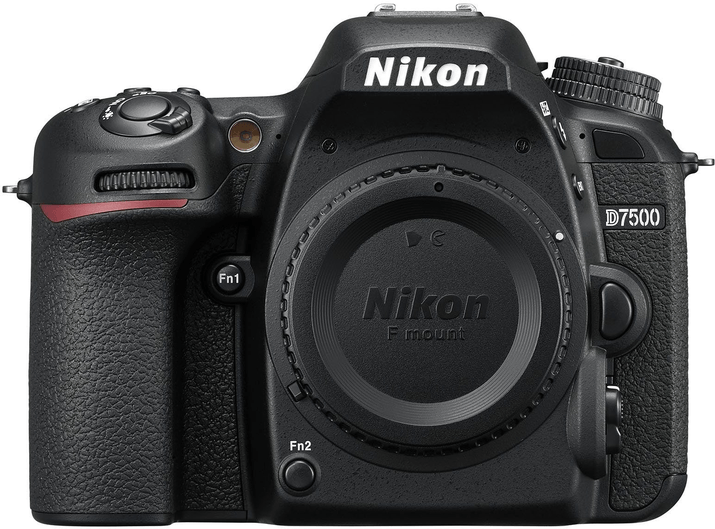
10. Nikon D7500
| Brand |
Brand
Nikon
|
| Sensor Format |
Sensor Format
APS-C
|
| Lens Mount |
Lens Mount
Nikon F DX
|
| Megapixels |
Megapixels
20.9 MP
|
| Autofocus Points |
Autofocus Points
51
|
| Minimum ISO (Native) |
Minimum ISO (Native)
100
|
| Maximum ISO (Native) |
Maximum ISO (Native)
51200
|
The Nikon D7500 is a fantastic intermediate-level DSLR for portrait photographers. It has an APS-C (DX-format) sensor. That makes it more compact than a full frame DSLR. But you still get outstanding image quality for portraits.
The sensor resolution is 20.9 MP. The colors and detail are precise and true to life. And you get excellent low-light camera performance, with clear details in darker areas.
The D7500 uses a 51-point autofocus system. It’s quick to find focus and lock onto moving subjects. It recognizes human faces, making it easier to shoot portraits. And it works well in low light.
It’s a durable camera for portraits. It’s weather sealed for outdoor portrait shoots. And the battery life is impressive, giving you up to 950 shots when fully charged.
The tilting touchscreen is a handy feature. And the 4K video options open a new area of creativity.
Best Mirrorless Camera for Portrait Photography
Many portrait photographers are now turning to mirrorless cameras. In general, they’re more compact and lightweight than DSLR cameras. And they have excellent high-tech features for added creativity.
These are our top mirrorless cameras for portrait photography.
- Excellent low-light focusing
- Lightweight and portable
- Superb low-light dynamic range
- Dual memory card slots
- Superb image quality for APS-C
- Good low-light performance
- Compact camera body
- No time limit for recording video
- Decent APS-C BSI-CMOS sensor
- A great frame rate of 15 fps
- 6.5 stops of image stabilization
- 4K video (DCI or Ultra HD) up to 60 fps
- A fully articulating rear touchscreen
- 12 Film Simulation modes
- 50 MP High Res Shot mode
- 30 fps continuous shooting speed
- Up to 6.5 stops of in-body stabilization with certain lenses
- Excellent weather sealing
- Articulating screen for angled shots
- Excellent 4K Ultra HD and DCI video
- Super high-resolution sensor
- Stunningly sharp image quality
- Excellent face and eye detection AF
- Large, high-resolution EVF
- Sharp 4K Ultra HD video
- Weather sealing to protect from elements
- Strong sensor resolution
- 4K and Full HD video options
- Time-lapse recording
- External mic port
- Webcam functionality
- A more affordable mirrorless option
- Nice to handle and use
- Relatively lightweight and not too bulky
- Solid 4K video performance
- Great image detail with little noise
- Good colors in JPEGs
- Helpful face and eye detection
- Large, bright touchscreen LCD
- Mic and headphone sockets
- High-quality, 4K Ultra HD video
- High Resolution mode for detailed images of static subjects
- Lots of custom button options and touchscreen functionality
- An LCD screen on the top plate
- Easy Wi-Fi and Bluetooth connectivity
- Durable, weather-sealed body
- Excellent 4K / 60p Ultra HD video
- Compact and lightweight body
- Smooth 4K video recording
- Vari-angle touchscreen
- Fast and reliable autofocus
- Wi-Fi and Bluetooth for easy sharing
10 Best Mirrorless Cameras for Portraits
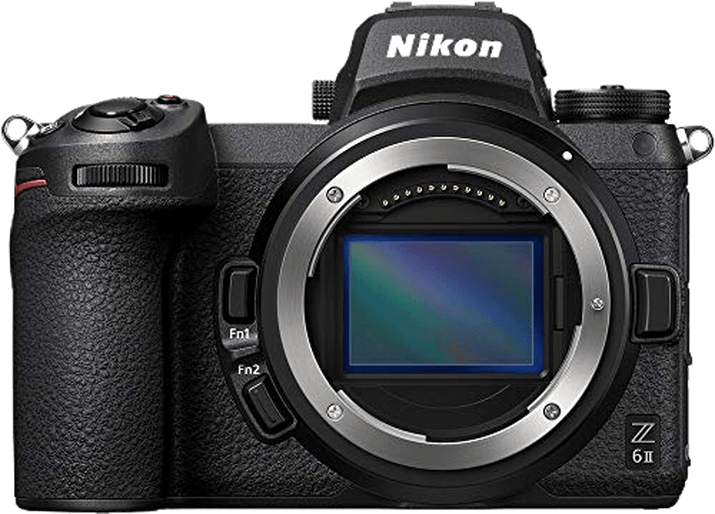
1. Nikon Z6 II
| Brand |
Brand
Nikon
|
| Sensor Format |
Sensor Format
Full Frame
|
| Lens Mount |
Lens Mount
Nikon Z
|
| Megapixels |
Megapixels
24.5 MP
|
| In-body Stabilization |
In-body Stabilization
1
|
| Autofocus Points |
Autofocus Points
273
|
| Minimum ISO (Native) |
Minimum ISO (Native)
100
|
| Maximum ISO (Native) |
Maximum ISO (Native)
51200
|
The Nikon Z6 II is Nikon’s most well-rounded full frame mirrorless camera. It delivers on image quality and performance. And it has all the features you’d expect from a mirrorless camera at this level.
The full frame sensor has a 24.5 MP resolution. And it’s backed by two EXPEED 6 image processors. They extract every bit of information from each pixel to give you stunning images. You’ll be impressed by the dynamic range.
The hybrid AF system is another standout feature. It uses 273 focus points that track moving subjects. You also have eye detection modes for sophisticated portraiture.
The Nikon Z6 II is packed with additional features. You get 4K video with a 60 fps frame rate. There’s focus shift shooting and time-lapse videos. And it’s weather sealed for photoshoots in any weather.
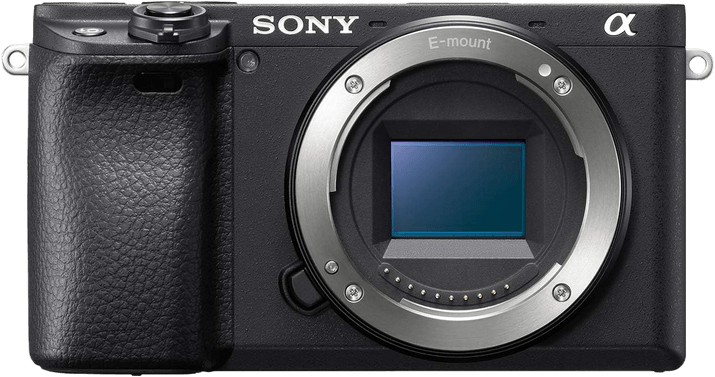
2. Sony a6400
| Brand |
Brand
Sony
|
| Sensor Format |
Sensor Format
APS-C
|
| Lens Mount |
Lens Mount
Sony E
|
| Megapixels |
Megapixels
24.2 MP
|
| Autofocus Points |
Autofocus Points
425
|
| Minimum ISO (Native) |
Minimum ISO (Native)
100
|
| Maximum ISO (Native) |
Maximum ISO (Native)
32000
|
The Sony a6400 is a fantastic all-rounder. It’s an APS-C mirrorless camera that’s packed with excellent features. And it’s an affordable mirrorless camera if you’re just getting into portrait photography.
The a6400 is equipped with a 24.2 MP sensor. It gives you excellent quality and detail for portraits. And you get crisp, natural colors.
This mirrorless has one of the best AF systems in its class. It uses 425 phase and 425 contrast detection focus points for accurate focusing.
It’s quick to find focus. And it tracks the movement of your subject. That includes accurate face and eye recognition. It’s ideal for a boisterous portrait photoshoot.
The burst mode gives you 11 fps. And you can shoot 4K movies. The LCD screen rotates 180 degrees. This is ideal for shooting self-portraits or vlogs.
The Sony a6400 is a versatile mirrorless camera. And it makes a fantastic camera for portraits.
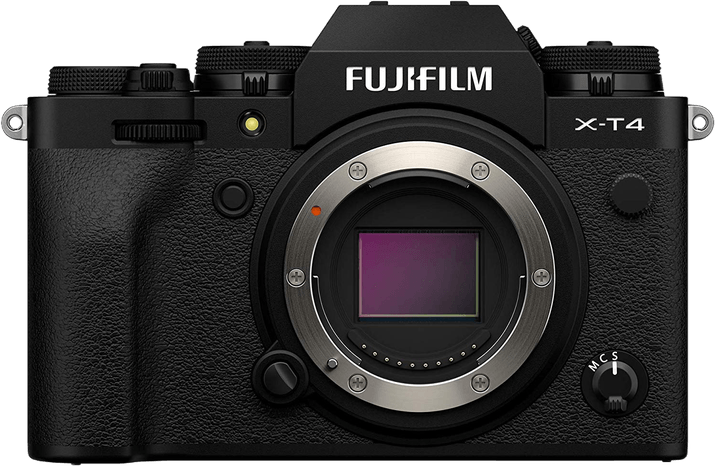
3. Fujifilm X-T4
| Brand |
Brand
Fujifilm
|
| Sensor Format |
Sensor Format
APS-C
|
| Lens Mount |
Lens Mount
Fujifilm X
|
| Megapixels |
Megapixels
26 MP
|
| In-body Stabilization |
In-body Stabilization
1
|
| Autofocus Points |
Autofocus Points
425
|
| Minimum ISO (Native) |
Minimum ISO (Native)
160
|
| Maximum ISO (Native) |
Maximum ISO (Native)
12800
|
Fujifilm is a great option if you want a mirrorless camera. And the Fujifilm X-T4 is the perfect choice if you want an APS-C mirrorless camera for portraits.
This camera has a powerful 26.1 MP sensor. The picture quality is outstanding. And you have excellent dynamic range to bring out more detail in moody portraits.
The five-axis image stabilization is another highlight for portrait photographers. It gives you more exposure control, allowing you to shoot with a slower shutter speed. And it means you can shoot handheld and still achieve sharp images.
The X-T4‘s AF system is one of Fujifilm’s finest. It has one of the fastest focusing times in the APS-C class, so you never miss a moment. And there’s a 15 fps burst mode for rapid shooting.
The built-in film simulation modes allow you to add a retro look to your portraits. They’re a great way to enhance your creativity. And you don’t need to pay to develop film.
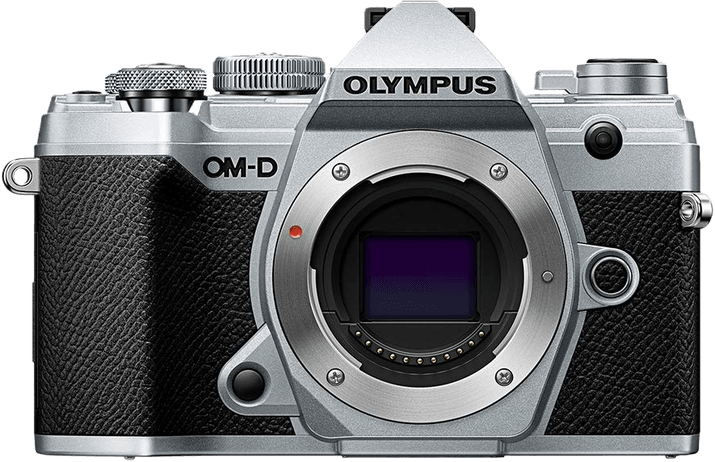
4. Olympus OM-D E-M5 Mark III
| Brand |
Brand
Olympus
|
| Sensor Format |
Sensor Format
Micro Four Thirds
|
| Lens Mount |
Lens Mount
Micro 4/3
|
| Megapixels |
Megapixels
20 MP
|
| In-body Stabilization |
In-body Stabilization
1
|
| Autofocus Points |
Autofocus Points
121
|
| Minimum ISO (Native) |
Minimum ISO (Native)
200
|
| Maximum ISO (Native) |
Maximum ISO (Native)
6400
|
Olympus’ Micro Four Thirds (MFT) cameras offer something different for portrait photographers.
The smaller sensor size makes them lighter and more compact than APS-C and full frame cameras. But the Olympus OM-D E-M5 Mark III proves there’s no compromise on performance.
The sensor has a 20 MP resolution. That might not sound like much, but that’s powerful for an MFT camera. You’ll create stunning portraits.
If 20 MP isn’t enough, you also have the 50 MP High-Res Shot mode. You need a tripod, but the image quality will knock your socks off.
Portrait photographers will also appreciate the five-axis image stabilization. This built-in system gives you sharper images. You have more options for shooting handheld and in low-light conditions. Your portraits will be crisp and clear every time.
The fast AF and video modes are additional features modern photographers love. And the OM-D E-M5 Mark III is Wi-Fi connected for easy sharing. It’s a compact mirrorless that’s bursting with features.
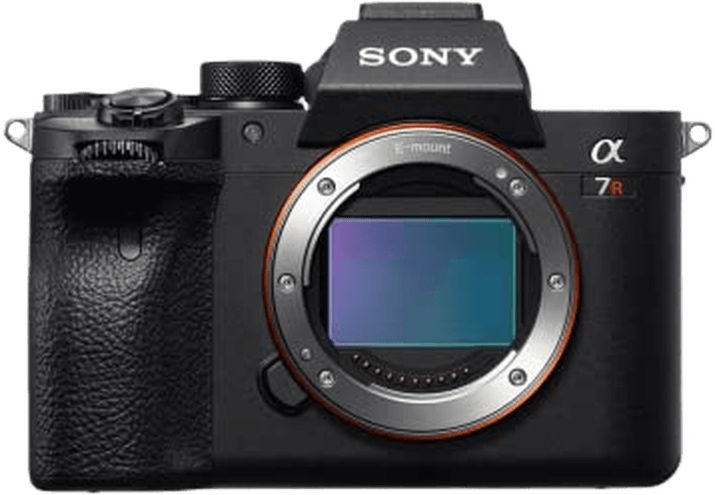
5. Sony A7R IV
| Brand |
Brand
Sony
|
| Sensor Format |
Sensor Format
Full Frame
|
| Lens Mount |
Lens Mount
Sony FE
|
| Megapixels |
Megapixels
61.2 MP
|
| In-body Stabilization |
In-body Stabilization
1
|
| Autofocus Points |
Autofocus Points
425
|
| Minimum ISO (Native) |
Minimum ISO (Native)
100
|
| Maximum ISO (Native) |
Maximum ISO (Native)
32000
|
Sony has been blazing a trail in the full frame mirrorless camera division. And the Sony A7R IV is the best example of what can be achieved. It’s a powerful camera packed with fantastic features. And it’s ideal for professional portrait photographers.
The sensor has an incredible 61 MP resolution. This gives the image quality you might expect from a medium-format camera. The detail and color are out of this world. And the dynamic range is unrivaled.
This mirrorless has a wide ISO range. That’s handy for many photographers. But portrait photographers will love the low 50 ISO setting. It gives you outstanding picture quality for professional portraits.
The autofocus system features real-time face and eye tracking. Your subject can move freely and you can still snap sharp portraits at will. It works with humans and animals.
The A7R IV is an excellent choice for videos too. The stunning 4K video recording makes it the ultimate hybrid camera. And there’s a 10 fps burst mode. That’s quick when you remember they’re 61 MP images. It isn’t cheap, but it’s the total package for photographers.
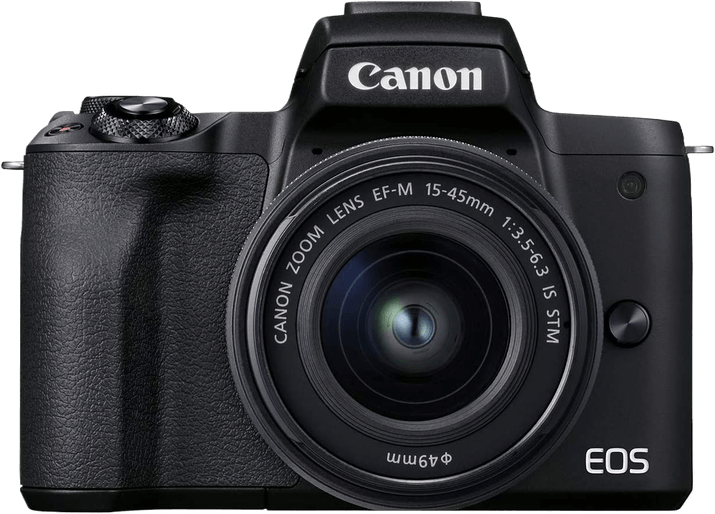
6. Canon EOS M50 Mark II
| Brand |
Brand
Canon
|
| Sensor Format |
Sensor Format
APS-C
|
| Lens Mount |
Lens Mount
Canon EF-M
|
| Megapixels |
Megapixels
24 MP
|
| Autofocus Points |
Autofocus Points
143
|
| Minimum ISO (Native) |
Minimum ISO (Native)
100
|
| Maximum ISO (Native) |
Maximum ISO (Native)
25600
|
The Canon EOS M50 Mark II is a nifty mirrorless camera for beginners. It’s an affordable option. But it’s perfect for portraits, self-portraits, and vlogging. It’s an ideal choice for anyone trying to get ahead on social media.
You can expect fantastic images from the 24.1 MP APS-C sensor. The detail and clarity will put your competition in the shade. It’s a massive improvement from smartphone photography.
The vari-angle touchscreen makes it easy to shoot self-portraits. And there’s a vertical video mode for social media vlogging. The M50 Mark II‘s face and eye recognition features in the AF system also lend themselves to portraits and selfies.
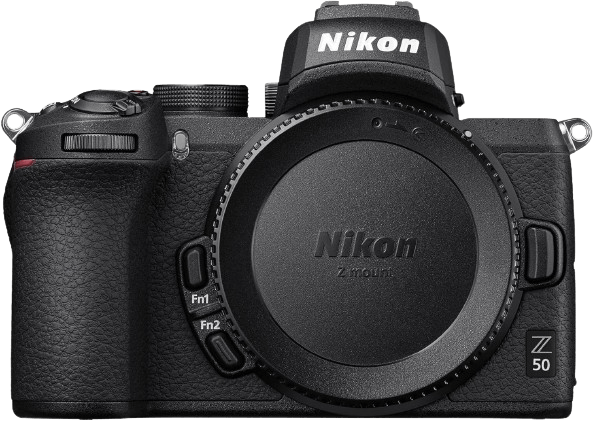
7. Nikon Z50
| Brand |
Brand
Nikon
|
| Sensor Format |
Sensor Format
APS-C
|
| Lens Mount |
Lens Mount
Nikon Z
|
| Megapixels |
Megapixels
21 MP
|
| Autofocus Points |
Autofocus Points
209
|
| Minimum ISO (Native) |
Minimum ISO (Native)
100
|
| Maximum ISO (Native) |
Maximum ISO (Native)
51200
|
The Nikon Z50 is a compact mirrorless camera. It’s full of features young portrait photographers will love. And it’ll take your portraits and self-portraits to the next level.
The 20.9 MP sensor and EXPEED 6 image processor make a fantastic team. They work together to give you images that are sure to impress. You’ll have glowing portraits that stand out from the crowd.
It’s a hybrid camera with excellent video recording options. It’s a great option for vloggers and influencers. And the rotating touchscreen makes that kind of media easy to produce.
Plus, the AF system also has eye detection and tracking. The Z50 is a multimedia machine for modern portrait artists.
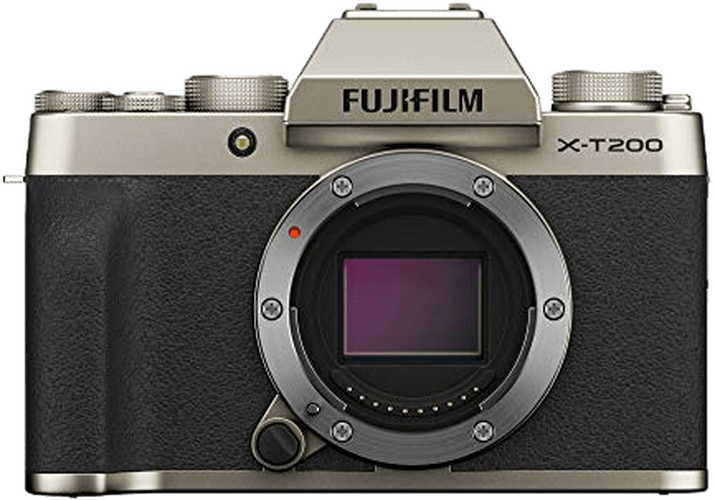
8. Fujifilm X-T200
| Brand |
Brand
Fujifilm
|
| Sensor Format |
Sensor Format
APS-C
|
| Lens Mount |
Lens Mount
Fujifilm X
|
| Megapixels |
Megapixels
24 MP
|
| In-body Stabilization |
In-body Stabilization
1
|
| Autofocus Points |
Autofocus Points
425
|
| Minimum ISO (Native) |
Minimum ISO (Native)
200
|
| Maximum ISO (Native) |
Maximum ISO (Native)
12800
|
The Fujifilm X-T200 is a fantastic portrait camera for beginners and intermediates. It’s easy to get started with. But it also has features more experienced portrait photographers will enjoy. It’s also a more affordable option than the X-T4.
The APS-C mirrorless sensor gives you 24 MP images. They look fabulous with first-rate detail and color rendition. The skin tones look excellent. You can also add more to your portraits with the film simulation modes.
The AF system has face and eye detection features, making portraits easier to master. You can shoot 4K videos. And there’s an 8 fps continuous shooting mode for fast-paced photography. Wi-Fi connectivity is another bonus feature of the X-T200.
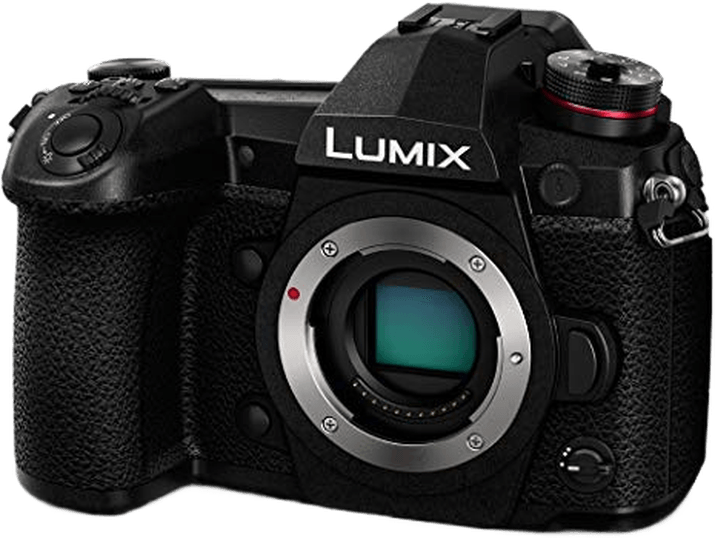
9. Panasonic Lumix G9
| Brand |
Brand
Panasonic
|
| Sensor Format |
Sensor Format
Micro Four Thirds
|
| Lens Mount |
Lens Mount
Micro 4/3
|
| Megapixels |
Megapixels
20 MP
|
| In-body Stabilization |
In-body Stabilization
1
|
| Autofocus Points |
Autofocus Points
225
|
| Minimum ISO (Native) |
Minimum ISO (Native)
200
|
| Maximum ISO (Native) |
Maximum ISO (Native)
25600
|
The Panasonic Lumix G9 is a feature-packed Micro Four Thirds camera. It’s a true hybrid camera with brilliant results for photos and videos. And it’s a fantastic option for anyone interested in portrait photography.
The MFT sensor gives you a 20.3 MP resolution. That’ll give you lovely portraits with wonderful detail and color.
But you can also use the High-Res Shot mode. This allows you to take pictures with an 80 MP resolution. You’ll need a tripod, but the results are staggering.
The image stabilization gives you more creative control over exposure settings. And it helps if you like shooting portraits by hand. You also get stunning 4K video options. And the Lumix G9 is weather sealed for outdoor portrait photoshoots.
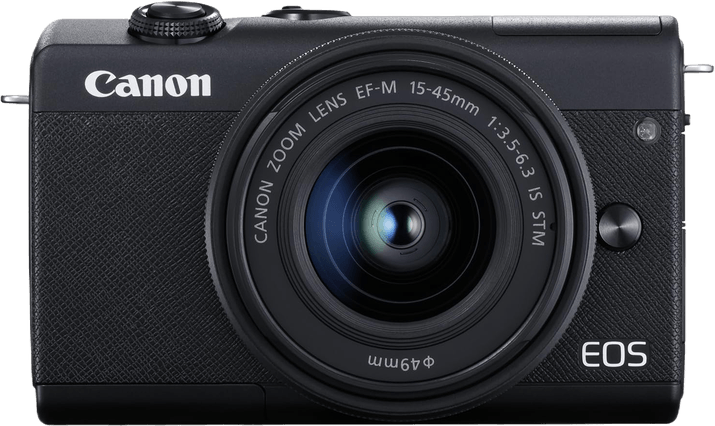
10. Canon EOS M200
| Brand |
Brand
Canon
|
| Sensor Format |
Sensor Format
APS-C
|
| Lens Mount |
Lens Mount
Canon EF-M
|
| Megapixels |
Megapixels
24 MP
|
| Autofocus Points |
Autofocus Points
143
|
| Minimum ISO (Native) |
Minimum ISO (Native)
100
|
| Maximum ISO (Native) |
Maximum ISO (Native)
25600
|
The Canon EOS M200 is perfect if you’re looking for your first camera for portraits. It’s an affordable compact mirrorless camera. It’s full of excellent features for portrait photography.
The APS-C sensor produces lovely photos. The 24.1 MP gives you better image quality than any iPhone. And you have far more creative control with the EOS M200.
The EOS M200 has sophisticated Dual Pixel CMOS autofocus. It’s quick and responsive to movement in low light. And it has eye-detection modes that help find focus when shooting portraits.
You get 4K video options. And the rotating screen allows for easy selfies and vlogs. The Wi-Fi and Bluetooth connectivity let you share your portraits quickly and easily. There’s a built-in flash for night photography. And there’s a time-lapse movie mode.
Conclusion: Best Camera for Portraits
After over a century, portrait photography remains one of the most popular types of photography. New camera technology allows us to explore the genre in new ways. And the best camera for portraits will give your portraiture a step up.
The Canon EOS 90D is our favorite camera for portraits. It’s a powerful APS-C DSLR camera. The image quality is outstanding. The eye-detection autofocus is perfect for portraits. And it’s packed with advanced multimedia features like video and wireless connectivity.
The Nikon Z6 II is our top mirrorless camera for portraits. It produces beautiful images. The autofocus is ideal for portraits. And you get image stabilization for more exposure control. It meets every demand for high-level portrait photography.