Mirrorless cameras are all the rage, and all the major brands produce excellent options. But with so much information flying around, it can be unclear which is best. It’s easy to get lost in a maze of features and specs.
But we’re here to guide you through them. If you’re a beginner, enthusiast, or professional, we’ll help you find the best mirrorless camera!
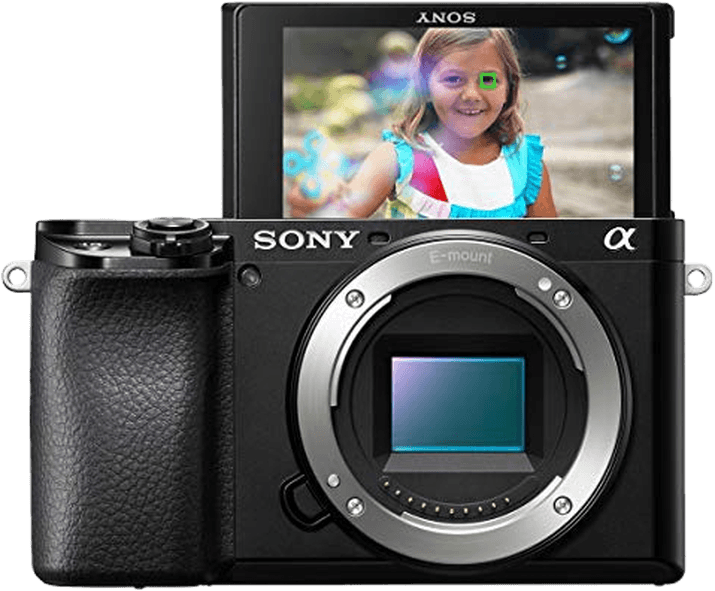
At the very top, we have the Sony a7 IV. It’s for pro photographers who want high-end image quality. It’s hard to find a better camera in this price range. It has an excellent 61.2 MP sensor, great low-light abilities, and a bundle of features—all packed into a small camera body!
What Are the Best Mirrorless Cameras?
This is our list of the best mirrorless cameras to buy. It features cameras that meet different levels and needs, so let’s dive in to find the best camera that fits you. Use the links below to navigate to the section that best fits your photo experience:
- Best mirrorless camera for beginners
- Best mirrorless camera for enthusiasts
- Best mirrorless camera for professionals
Best Mirrorless Camera for Beginners
- Great price for its features
- High-quality resolution
- Very fast 30 fps continuous shooting
- Stylish body
- Wide selection of film simulation filters
- Fast and reliable autofocus system
- Amazing ISO range that does well in low-light situations
- Amazing image stabilization for handheld shooting
- Sharp electronic viewfinder
- Great price for its abilities
- Easy to navigate for beginners
- Sharp image quality
- Superb in-body image stabilization
- Excellent 4K video
- Affordable price
- Autofocus can detect human and animal eyes for sharper focus
- Light and compact body
- Multi-angle screen helps shots at different angles
- Autofocus has customizable face detection
- Image stabilization works with lens data for sharp images
- Select your focus using the touchscreen
- Great 4K video abilities
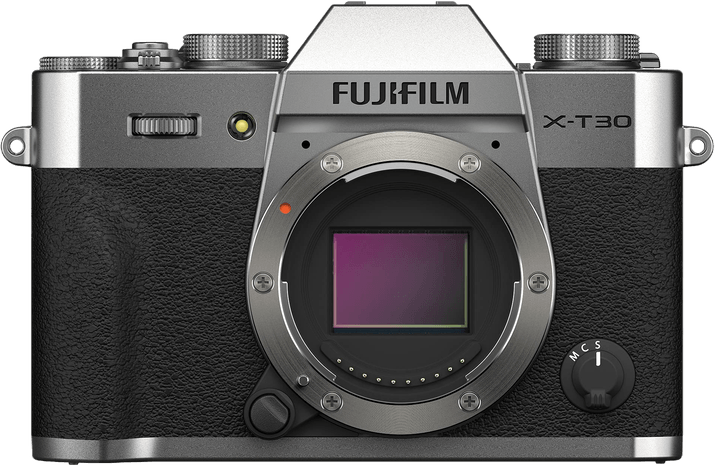
1. Fujifilm X-T30 II
| Sensor Type |
Sensor Type
CMOS
|
| Lens Mount |
Lens Mount
Fujifilm X
|
| Megapixels |
Megapixels
26 MP |
| In-body Stabilization |
In-body Stabilization
|
| Viewfinder Type |
Viewfinder Type
Electronic
|
| Autofocus Points |
Autofocus Points
425 |
| Maximum ISO (Native) |
Maximum ISO (Native)
12,800 |
| Frame Rate |
Frame Rate
30 fps |
| Video |
Video
|
| Screen Size |
Screen Size
 3" 3" |
| Best For |
Best For
Street photographers
|
The Fujifilm X-T30 II is a great place to start our list. It’s compact, robust, and has a retro body design. It is the ideal affordable mirrorless option for a beginner.
Not only does the camera look and feel good. Its performance is excellent, too. The X-T30 II has an APS-C crop sensor with 26 MP of resolution. This isn’t groundbreaking. But you get sharp images that will impress your friends and family.
The X-T30 II is a versatile all-rounder. Its 30 fps (frames per second) continuous shooting speed is great. This makes it a perfect action or sports photography camera.
The 4K video resolution is more than capable for vloggers. It’s a big improvement over smartphone recording.
The vari-angle touchscreen gives you the freedom to try different shots. No matter what the angle, you can frame the shot perfectly. It’s versatile and easy to use. And the image quality is excellent. The Fujifilm X-T30 II is the best mirrorless camera for beginners.
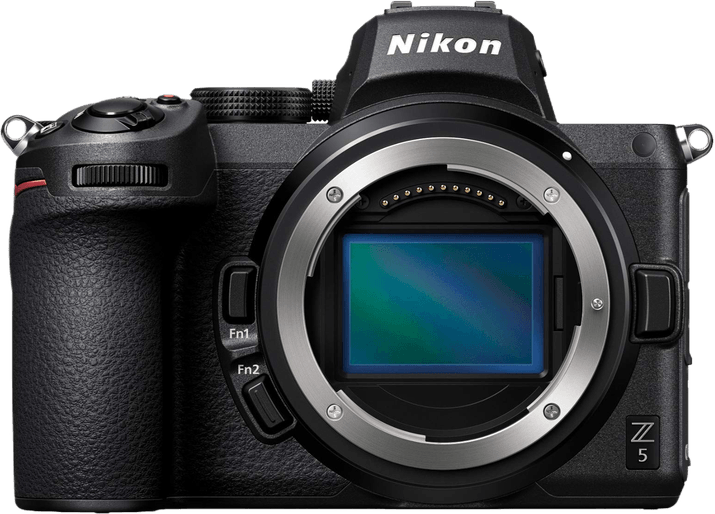
2. Nikon Z5
| Sensor Type |
Sensor Type
CMOS
|
| Lens Mount |
Lens Mount
Nikon Z
|
| Megapixels |
Megapixels
24 MP |
| In-body Stabilization |
In-body Stabilization
|
| Viewfinder Type |
Viewfinder Type
Electronic
|
| Autofocus Points |
Autofocus Points
273 |
| Maximum ISO (Native) |
Maximum ISO (Native)
51,200 |
| Frame Rate |
Frame Rate
4.5 fps |
| Video |
Video
|
| Screen Size |
Screen Size
 3.2" 3.2" |
| Best For |
Best For
Photographers who want plenty of autofocus (AF) points
|
Are you new to photography but looking for a full-frame camera? The Nikon Z5 is the best mirrorless option.
The full-frame CMOS sensor has a resolution of 24.3 MP. Compared to high-end full-frame units, this doesn’t sound like much. But for a beginner, it’s more than capable.
The 273-point autofocus (AF) system is quick and effective. It renders sharp images even when your subject is on the move. The AF is the best of its kind in this price range.
One downside is the burst mode, which has a continuous shooting speed of only 4.5 fps. But the 4K video capture is excellent when you want to capture footage on the go. It’s perfect for short videos and vlogs.
The Nikon Z5 is the best entry-level full-frame mirrorless camera on the market. It’s a high-performance camera with a compact body. It’s fantastic for taking quality stills and videos.
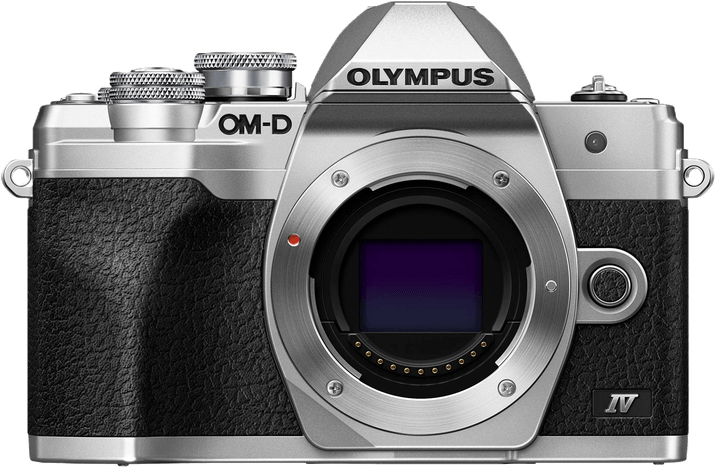
3. Olympus OM-D E-M10 Mark IV
| Sensor Type |
Sensor Type
CMOS
|
| Lens Mount |
Lens Mount
Micro 4/3
|
| Megapixels |
Megapixels
20 MP |
| In-body Stabilization |
In-body Stabilization
|
| Viewfinder Type |
Viewfinder Type
Electronic
|
| Autofocus Points |
Autofocus Points
121 |
| Maximum ISO (Native) |
Maximum ISO (Native)
6,400 |
| Frame Rate |
Frame Rate
15 fps |
| Video |
Video
|
| Screen Size |
Screen Size
3" |
| Best For |
Best For
Photographers on a budget
|
The Olympus OM-D E-M10 Mark IV may not be one of the top hitters… at least not on paper! But it’s an excellent mirrorless camera for beginners.
Micro Four Thirds (MFT) cameras are often misunderstood. Because they have a smaller sensor, their resolution is lower than that of many competitors. But this camera still packs a punch when it comes to image quality.
The autofocus performance is basic. But you won’t find a burst much quicker than 15 fps—not in this price range! And the 4K video capture is good, too. It’s also easy to move and share photos with Wi-Fi and Bluetooth.
The Olympus OM-D E-M10 Mark IV hasn’t exactly redefined photography. But it’s an excellent mirrorless camera for beginners.
4. Sony a6100
| Sensor Type |
Sensor Type
CMOS
|
| Lens Mount |
Lens Mount
Sony E
|
| Megapixels |
Megapixels
24 MP |
| In-body Stabilization |
In-body Stabilization
|
| Viewfinder Type |
Viewfinder Type
Electronic
|
| Autofocus Points |
Autofocus Points
425 |
| Maximum ISO (Native) |
Maximum ISO (Native)
32,000 |
| Frame Rate |
Frame Rate
11 fps |
| Video |
Video
|
| Screen Size |
Screen Size
3" |
| Best For |
Best For
Point-and-shoot photographers
|
The Sony a6100 marks a step up from the older a6000. Not every detail is improved, but there is enough to make this one of the best mirrorless cameras.
The tilt-angle touchscreen and viewfinder are the same as the older sibling. They still hold up, but some improvement would have been appreciated.
One major development is the 425-point autofocus system. It achieves sharpness in a nano-second. And it can track your moving subjects. This Sony camera is versatile and usable with an 11 fps continuous shooting speed.
It’s more expensive than the a6000. But the improvements make the a6100 worth the extra cost if you can stretch your budget.
5. Panasonic Lumix DMC-GX85 (GX80)
| Sensor Type |
Sensor Type
CMOS
|
| Lens Mount |
Lens Mount
Micro 4/3
|
| Megapixels |
Megapixels
16 MP |
| In-body Stabilization |
In-body Stabilization
|
| Viewfinder Type |
Viewfinder Type
Electronic
|
| Autofocus Points |
Autofocus Points
49 |
| Maximum ISO (Native) |
Maximum ISO (Native)
25,600 |
| Frame Rate |
Frame Rate
8 fps |
| Video |
Video
|
| Screen Size |
Screen Size
3" |
| Best For |
Best For
Casual photographers
|
The Panasonic Lumix DMC-GX85 (GX80 in the UK) isn’t the most recent release. But it still holds up as an excellent mirrorless option for beginners.
A Micro Four Third sensor is smaller than APS-C and full-frame sensors. So, don’t be alarmed by the 16 MP resolution. The image quality is still excellent. The MFT format gives twice the focal length of a full-frame camera.
Panasonic offers an excellent range of compact lenses for the DMC-GX85. The camera itself has a compact body, making it an excellent option for traveling.
One feature that sets it apart is the five-axis in-body image stabilization system. It’s something rarely found in an entry-level camera. And it helps maintain excellent image quality in tough conditions.
The Lumix GX85 has been around for a while and has been surpassed in some respects. But it offers great value for money. It’s hard to find a mirrorless camera at a better price!
Best Mirrorless Camera for Enthusiasts
- Superb image quality
- Image stabilization allows for handheld shooting
- 30 fps continuous shooting with crop
- Designed with comfort in mind
- 4K video abilities with amazing dynamic range
- Fast and accurate autofocus system
- Performs to a professional level in the high ISO numbers
- Durable and weather-sealed body
- Slow-motion video up to 120 fps
- Excellent 4K abilities with various features
- Amazing 50 MP resolution
- 6.5 stops of in-body image stabilization for specific lenses
- Up to 30 fps continuous shooting
- Vari-angle screen for ease of use in certain situations
- Rugged body with weather sealing
- Crop frame sensor with great image results
- Good frame rate of 15 fps
- 12 different film simulation filters
- A fully articulating rear touchscreen
- 4K video up to 60 fps
- Compact and lightweight design is perfect for travels
- In-body image stabilization
- Dual memory card slots
- Easy access to all important controls
- Smooth 4K video abilities
- Amazingly affordable full frame mirrorless camera
- Lightweight and ergonomic design
- Great added features like macro stacking and time-lapse
- Bluetooth and Wi-Fi- connectivity
- Handles 4K video well
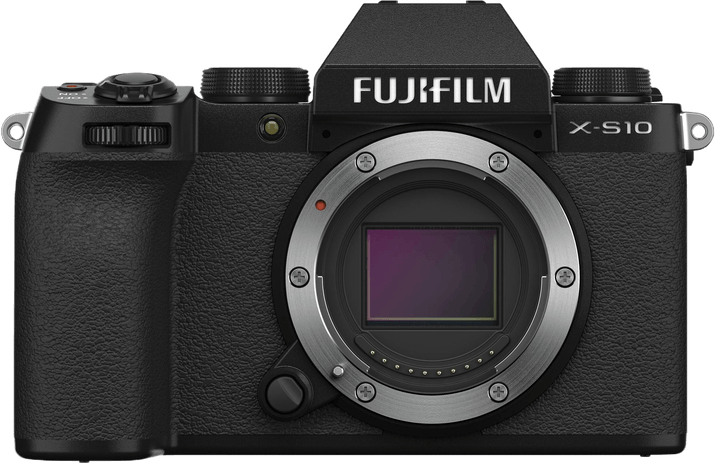
1. Fujifilm X-S10
| Sensor Type |
Sensor Type
CMOS
|
| Lens Mount |
Lens Mount
Fujifilm X
|
| Megapixels |
Megapixels
26 MP |
| In-body Stabilization |
In-body Stabilization
|
| Viewfinder Type |
Viewfinder Type
Electronic
|
| Autofocus Points |
Autofocus Points
425 |
| Maximum ISO (Native) |
Maximum ISO (Native)
12,800 |
| Frame Rate |
Frame Rate
20 fps |
| Video |
Video
|
| Screen Size |
Screen Size
3" |
| Best For |
Best For
Street photographers
|
Are you looking to upgrade from a beginner camera to something more serious? The Fujifilm X-S10 is an excellent option. The specs, features, and price make it one of the best mirrorless cameras for enthusiasts.
The 26.1 MP image resolution is solid but not mind-blowing. And the X-S10 does have features that make it stand out from the crowd.
This Fujifilm camera boasts an excellent five-axis in-body image stabilization system. It enables the shooter to go handheld. Image quality is maintained without having to rely on a tripod.
Plus, the burst mode has a continuous shooting speed of 20 fps. That’s a big jump from the beginner models.
There’s even something for photographers who miss the film photography aesthetic. With the 18 film simulation modes, you can give your images a retro look. The X-S10 offers the look of film with the convenience of digital.
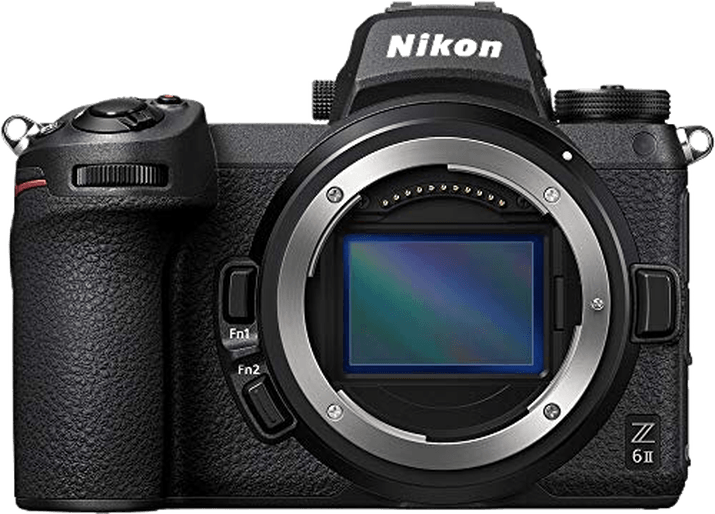
2. Nikon Z6 II
| Sensor Type |
Sensor Type
CMOS
|
| Lens Mount |
Lens Mount
Nikon Z
|
| Megapixels |
Megapixels
24.5 MP |
| In-body Stabilization |
In-body Stabilization
|
| Viewfinder Type |
Viewfinder Type
Electronic
|
| Autofocus Points |
Autofocus Points
273 |
| Maximum ISO (Native) |
Maximum ISO (Native)
51,200 |
| Frame Rate |
Frame Rate
14 fps |
| Video |
Video
|
| Screen Size |
Screen Size
3.2" |
| Best For |
Best For
Photographers who want a versatile mirrorless
|
Nikon is famous for the quality of its DSLRs. And the Z6 II full-frame mirrorless camera upholds the high Nikon standard.
The 24.5 MP sensor produces stunning images. And the in-body image stabilization system maintains quality in bumpy or low-light conditions.
This Nikon mirrorless I also boasts a 273-point phase-detection autofocus system. It’s a sophisticated, accurate AF system that helps you get the needed shots. Poor conditions and movement are less of an issue.
The Z6 II also has a 14 fps burst mode for continuous shooting, more than most DSLRs. And the 4K video resolution is excellent, too. These features and the weather sealing make it a versatile action camera.
One downside is the limited range of lenses. The list of Nikon Z-mount lenses is still considerably smaller than that of F-mount lenses. Nikon is slowly introducing new Z lens options.
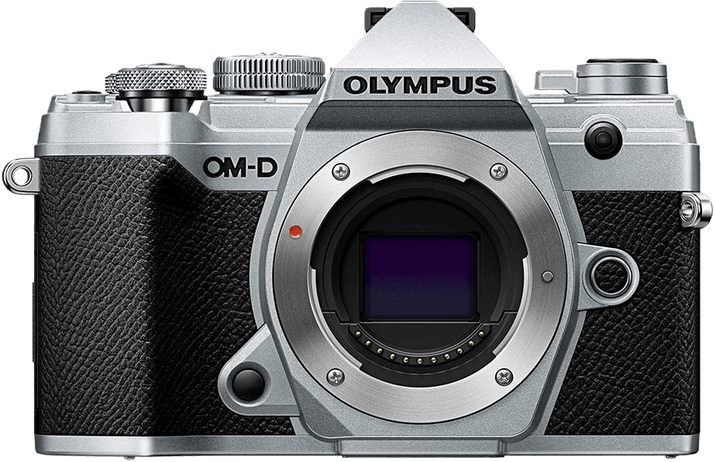
3. Olympus OM-D E-M5 Mark III
| Sensor Type |
Sensor Type
CMOS
|
| Lens Mount |
Lens Mount
Micro 4/3
|
| Megapixels |
Megapixels
20 MP |
| In-body Stabilization |
In-body Stabilization
|
| Viewfinder Type |
Viewfinder Type
Electronic
|
| Autofocus Points |
Autofocus Points
121 |
| Maximum ISO (Native) |
Maximum ISO (Native)
6,400 |
| Frame Rate |
Frame Rate
30 fps |
| Video |
Video
|
| Screen Size |
Screen Size
3" |
| Best For |
Best For
Photographers who need fast frame rates
|
The Olympus OM-D E-M5 Mark III is a crop-sensor camera making heads turn. At first glance, the specs don’t seem all that special. But some features are outstanding.
20.4 MP resolution is powerful for a Micro Four Thirds sensor. It can compete with larger APS-C sensors. And the 121-point autofocus system is fast and reliable.
The in-body five-axis in-body image stabilization also ensures sharpness and clarity. Thus, you can use this Olmpus camera confidently in all environments.
The real point of difference is the burst mode. The standard shooting speed is 10 fps if you use the mechanical shutter. But if you switch to Pro Capture mode, you get a staggering 30 fps of continuous shooting. That’s with 14-shot pre-buffering too.
The Olympus OM-D E-M5 M III is small but packed with features. Its smaller sensor size will deter some photographers. But it’s the best Micro Four Thirds mirrorless camera.
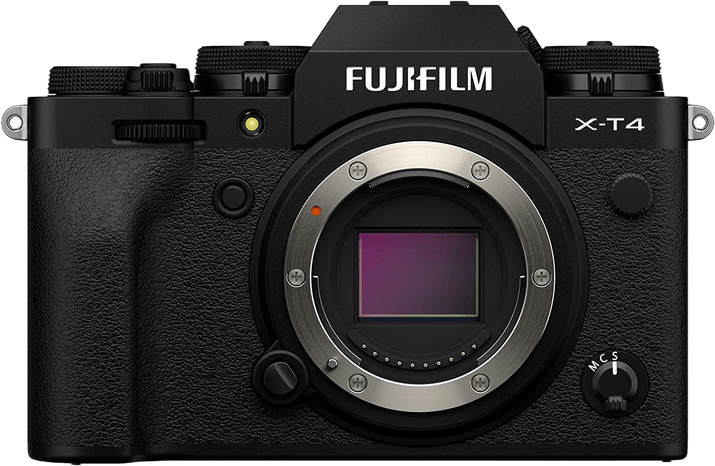
4. Fujifilm X-T4
| Sensor Type |
Sensor Type
CMOS
|
| Lens Mount |
Lens Mount
Fujifilm X
|
| Megapixels |
Megapixels
26 MP |
| In-body Stabilization |
In-body Stabilization
|
| Viewfinder Type |
Viewfinder Type
Electronic
|
| Autofocus Points |
Autofocus Points
425 |
| Maximum ISO (Native) |
Maximum ISO (Native)
12,800 |
| Frame Rate |
Frame Rate
20 fps |
| Video |
Video
|
| Screen Size |
Screen Size
3" |
| Best For |
Best For
Photographers who want a reliable workhorse
|
The Fujifilm X-T4 is an excellent all-rounder in the mirrorless division. It has the power and functionality to please the most enthusiastic photography enthusiasts.
The first improvement from the previous X-T3 model is the battery life. You can now capture 600 shots with one charge.
The burst function has also increased from 11 to 15 fps. It’s not groundbreaking. But it’s a noticeable upgrade when you need a mode for continuous shooting.
The X-T4 is packed with other great features. The autofocus and image stabilization systems are fast and reliable. And the 4K video is good enough for professional vloggers and videographers.
The Fujifilm X-T4 is an excellent mirrorless camera with a heavy price tag. While its performance is better on paper, the Fujifilm X-S10 offers better value for money.
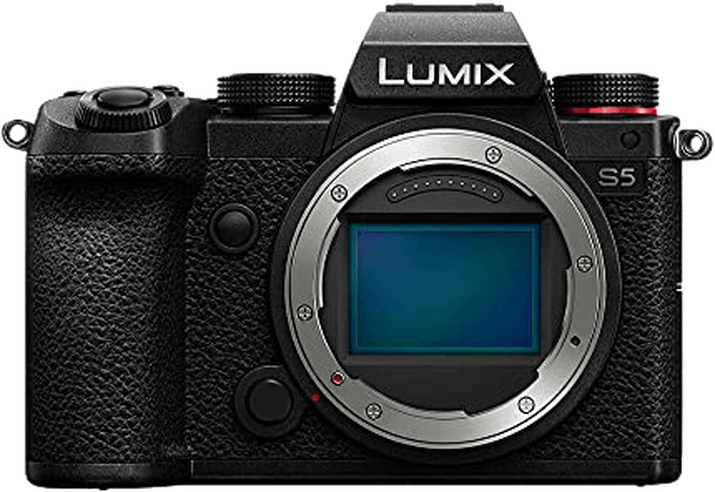
5. Panasonic Lumix S5
| Sensor Type |
Sensor Type
CMOS
|
| Lens Mount |
Lens Mount
Leica L
|
| Megapixels |
Megapixels
24.2 MP |
| In-body Stabilization |
In-body Stabilization
|
| Viewfinder Type |
Viewfinder Type
Electronic
|
| Autofocus Points |
Autofocus Points
225 |
| Maximum ISO (Native) |
Maximum ISO (Native)
51,200 |
| Frame Rate |
Frame Rate
7 fps |
| Video |
Video
|
| Screen Size |
Screen Size
3" |
| Best For |
Best For
Photographers who shoot stills and video
|
When you look at the specs for stills, you might think the Panasonic Lumix S5 looks a bit pricey. But this camera offers specialist video features, making it the best mirrorless camera for videographers.
The S5’s image resolution is still excellent for stills. And the autofocus system is solid!
The mechanical burst mode is a bit slow at 7 fps. But this Panasonic camera has a trick up its sleeve. Switching to 6K photo mode gives you 30 fps of continuous shooting. The image quality does take a hit, as this mode only has 18 MP. Yet, it’s still a high-quality image.
The Lumix S5’s video quality sets it apart. It shoots 4K 60p 10-bit 4:2:0 video, which is hard to find in the same price range.
The Panasonic Lumix S5 is expensive. So, if you only need a camera for stills, there are better options. But if you also need video, the S5 is one of the best mirrorless cameras for videographers.
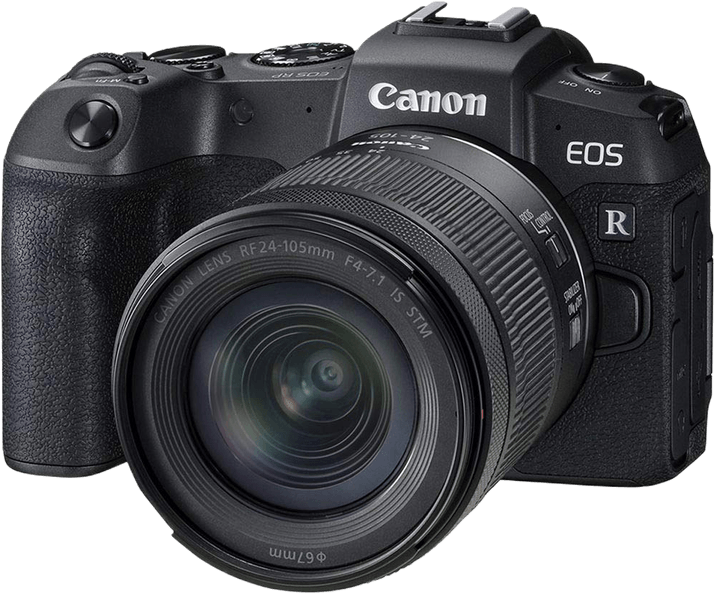
6. Canon EOS RP
| Sensor Type |
Sensor Type
CMOS
|
| Lens Mount |
Lens Mount
Canon RF
|
| Megapixels |
Megapixels
26 MP |
| In-body Stabilization |
In-body Stabilization
|
| Viewfinder Type |
Viewfinder Type
Electronic
|
| Autofocus Points |
Autofocus Points
4,779 |
| Maximum ISO (Native) |
Maximum ISO (Native)
40,000 |
| Frame Rate |
Frame Rate
5 fps |
| Video |
Video
|
| Screen Size |
Screen Size
3" |
| Best For |
Best For
Canon enthusiasts on a budget
|
The Canon EOS RP has been around for a few years now. In some respects, it has been surpassed. But if you’re a Canon user looking for a mirrorless camera, the EOS RP is still one to go for.
The full-frame image sensor gives you stunning images suitable for publication. The 26.2 MP sensor still has a higher resolution than many newer cameras.
The EOS RP’s continuous shooting speed is only 5 fps. It’s not ideal for sports or wildlife photographers. But vloggers will like the 4K video capture. The video quality isn’t the highest on the list, but still solid.
The EOS Utility Webcam Beta Software keeps this Canon in contention with others. It lets you use this Canon camera as a high-quality live-stream webcam.
The Canon EOS RP isn’t the most versatile mirrorless camera. But it still does some things better than more recent releases. It’s Canon’s best mirrorless camera in the enthusiast category. Read our full review of the EOS RP.
Best Mirrorless Camera for Professionals
- Amazing 61.2 MP high-resolution sensor
- Face- and eye-detection autofocus abilities
- Big and clear electronic viewfinder
- Durable and weather-sealed body
- 4K Ultra HD video abilities
- 45 MP sensor gives you sharp high-resolution images
- Autofocus can automatically detect body, face, eyes and even animals
- Continuous frame rate of 20 fps
- Great in-body image stabilization
- Superb 8K video abilities
- Large 50.1 MP sensor captures a great dynamic range
- Eye tracking autofocus for humans, animals and birds
- Continuous frame rate of 30 fps
- Easy to tailor the camera to your needs
- Incredible 8K / 30p Ultra HD video
- 45 MP high-resolution sensor
- Fast and reliable autofocus system
- Fast shutter speed allows you to go up to 1/8000
- Dual memory card slots
- 4K video at 60 fps
- Medium format sensor in compact camera body
- 51 MP resolution sensor
- High speed sync with Profoto Air system
- Durable with great weather-sealing abilities
- Lightweight camera body with great ergonomics
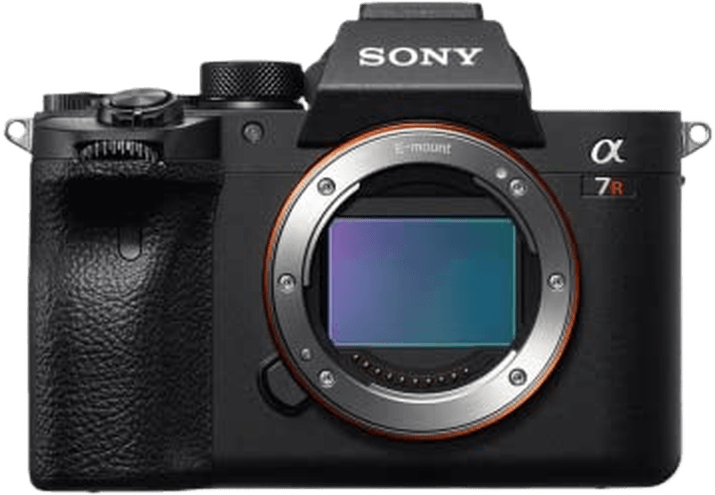
1. Sony a7R IV
| Sensor Type |
Sensor Type
CMOS
|
| Lens Mount |
Lens Mount
Sony FE
|
| Megapixels |
Megapixels
61.2 MP |
| In-body Stabilization |
In-body Stabilization
|
| Viewfinder Type |
Viewfinder Type
Electronic
|
| Autofocus Points |
Autofocus Points
425 |
| Maximum ISO (Native) |
Maximum ISO (Native)
32,000 |
| Frame Rate |
Frame Rate
10 fps |
| Video |
Video
|
| Screen Size |
Screen Size
3" |
| Best For |
Best For
Photographers who want the best photo quality
|
The Sony a7R IV is at the top of the mirrorless camera league. And in some departments, it’s unmatched.
The full-frame sensor has an image resolution of 61 MP—that’s right, 61 MP. Image quality doesn’t get much better than this. The camera provides excellent color depth and dynamic range. And it has fantastic low-light ISO capabilities.
The autofocus is also incredible. It has a 567-point phase-detection system that can detect and track eyes. It works with both humans and animals.
The a7R IV is quiet. And I mean very quiet. You can shoot at full burst speed without making a sound. It’s something some photographers may love. But it does fall short for action shots with a continuous shooting speed of only 10 fps.
The battery life isn’t great. But you can change to APS-C mode and shoot at 26 MP, which reduces battery usage. The quality of this camera means you won’t begrudge the price tag. So it’s the best-priced mirrorless camera for professionals.
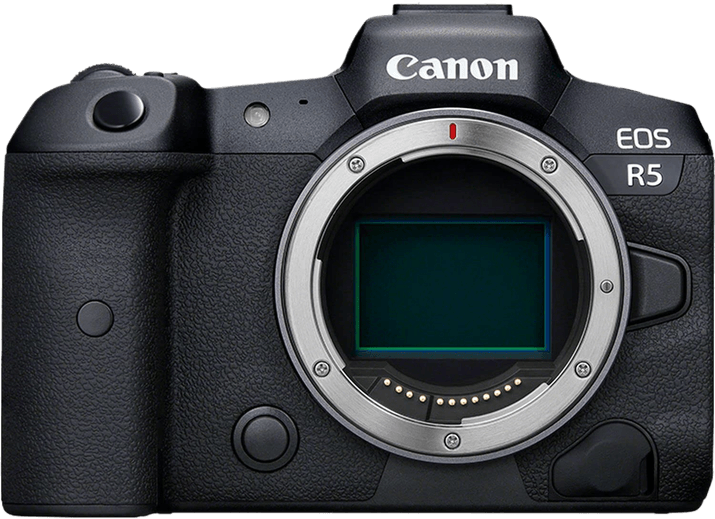
2. Canon EOS R5
| Sensor Type |
Sensor Type
CMOS
|
| Lens Mount |
Lens Mount
Canon RF
|
| Megapixels |
Megapixels
45 MP |
| In-body Stabilization |
In-body Stabilization
|
| Viewfinder Type |
Viewfinder Type
Electronic
|
| Autofocus Points |
Autofocus Points
1,053 |
| Maximum ISO (Native) |
Maximum ISO (Native)
51,200 |
| Frame Rate |
Frame Rate
20 fps |
| Video |
Video
|
| Screen Size |
Screen Size
3.2" |
| Best For |
Best For
Photographers who need a workhorse for any situation
|
The Canon EOS R5 offers something that only a few other cameras can match. It provides professional standards for still and video capture. The EOS is the ultimate all-rounder.
It’s well-built and durable. And considering its ability, it isn’t heavy. The image resolution is 45 MP, which is pretty stunning. You won’t find many DSLRs with that kind of firepower.
It also offers mechanical or electronic shutters for continuous shooting. The former gives 12 fps, while the latter has an impressive 20 fps.
The real strength of the Canon EOS R5 is the video. The video resolution is a whopping 8K, close to movie-quality motion capture. It’s not just for vlogs or catching the odd piece of footage here and there. This is professional-standard video resolution.
The Canon EOS R5 is the most versatile mirrorless camera. It meets the needs of all professional photographers today, with a bit to spare. It isn’t cheap, but the EOS R5 is worth it! Read our full review of the EOS R5.
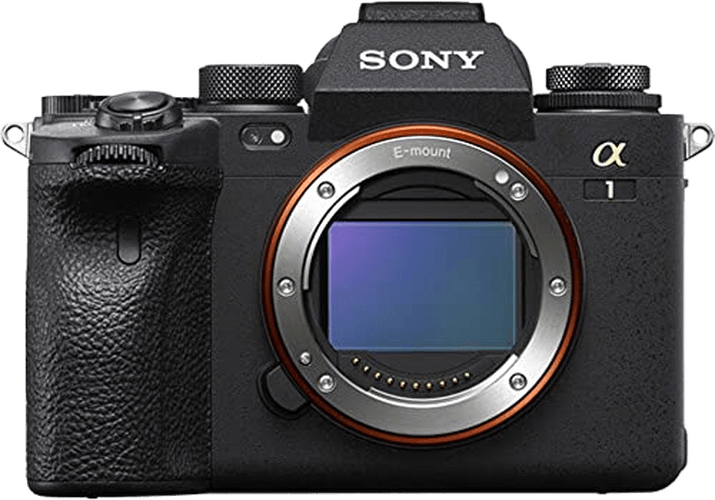
3. Sony a1
| Sensor Type |
Sensor Type
CMOS
|
| Lens Mount |
Lens Mount
Sony FE
|
| Megapixels |
Megapixels
50.1 MP |
| In-body Stabilization |
In-body Stabilization
|
| Viewfinder Type |
Viewfinder Type
Electronic
|
| Autofocus Points |
Autofocus Points
759 |
| Maximum ISO (Native) |
Maximum ISO (Native)
32,000 |
| Frame Rate |
Frame Rate
30 fps |
| Video |
Video
|
| Screen Size |
Screen Size
3" |
| Best For |
Best For
Action photographers who want amazing, advanced features
|
Many consider the Sony a1 the best mirrorless camera on the market. Its specs and performance are out of this world. But the price will bring you back down to Earth!
Image quality isn’t in question. With an image resolution of 50.1 MP, you can’t go wrong. The autofocus system is the most sophisticated out there. It has 759 points of phase detection. So, it can track at a rate of 120 calculations per second.
The camera uses an electronic shutter that is close to completely silent. For continuous shooting, the electronic shutter gives you a rapid 30 fps. That’s 30 fps at 50.1 MP, with the autofocus system working. So, it’s perfection for action shots in sports and wildlife photography.
The Sony a1 is also great for video. The 8K video resolution is suitable for any professional project. It’s way more than just a stills camera.
The a1 has set the standard for full-frame mirrorless cameras. The numbers in every department are at the top. But it sits at the top for the price, too. It is the best mirrorless camera if you can afford it!
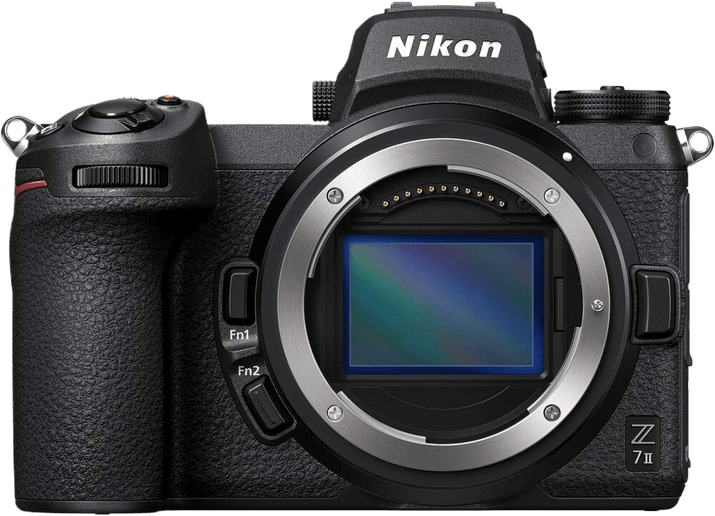
4. Nikon Z7 II
| Sensor Type |
Sensor Type
CMOS
|
| Lens Mount |
Lens Mount
Nikon Z
|
| Megapixels |
Megapixels
45.75 MP |
| In-body Stabilization |
In-body Stabilization
|
| Viewfinder Type |
Viewfinder Type
Electronic
|
| Autofocus Points |
Autofocus Points
439 |
| Maximum ISO (Native) |
Maximum ISO (Native)
25,600 |
| Frame Rate |
Frame Rate
10 fps |
| Video |
Video
|
| Screen Size |
Screen Size
3.2" |
| Best For |
Best For
Photographers who want a great-value all-rounder
|
The Z7 II is Nikon’s finest full-frame mirrorless camera. Its specs don’t quite match Sony or Canon‘s, but it’s an excellent mirrorless camera for professional photographers.
The 45.7 MP full-frame CMOS sensor produces stunning results. It’s perfect for any publication or professional project.
The autofocus is a 493-point hybrid system. It works fast to give excellent sharpness. It also includes eye detection for human and animal subjects.
The video options give you great flexibility and quality. You can shoot in 4K Ultra at 60, 30, 25, or 24p. And you can shoot in vivid slow motion at 120p in full HD.
The Z7 II is a great all-rounder for a professional. It may not match some competitors at the very top of the field. But the Nikon Z7 II is one of the best mirrorless cameras.
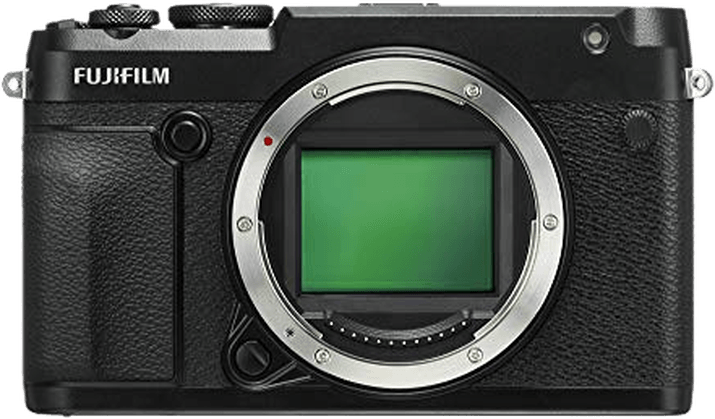
5. Fujifilm GFX 50R
| Sensor Type |
Sensor Type
CMOS
|
| Lens Mount |
Lens Mount
Fujifilm G
|
| Megapixels |
Megapixels
51 MP |
| In-body Stabilization |
In-body Stabilization
|
| Viewfinder Type |
Viewfinder Type
Electronic
|
| Autofocus Points |
Autofocus Points
425 |
| Maximum ISO (Native) |
Maximum ISO (Native)
12,800 |
| Frame Rate |
Frame Rate
3 fps |
| Video |
Video
|
| Screen Size |
Screen Size
3.2" |
| Best For |
Best For
Detailed landscape and portrait photographers
|
The Fujifilm GFX 50R is a medium-format camera, so it isn’t as versatile as other options. But if you’re looking for a medium-format camera, this is the best mirrorless camera.
The 51.4 MP sensor renders beautiful images, making it an excellent camera for landscapes and portraits. The autofocus has 425 points, which combine phase and contrast detection.
The video quality is nothing special, and the burst is only 3 fps. But that’s not what medium format cameras are about. Their purpose is to capture stunning images with incredible detail. And that is exactly what the Fujifilm GFX 50R does.
The camera uses the Fujifilm G-mount lens range. The number of lenses available doesn’t match the number for the F-mount. But Fujifilm is bringing out more lenses fairly regularly.
It’s not for everyone. But the Fujifilm GFX 50R is the best mirrorless camera in the medium-format category.
What Is a Mirrorless Camera?
DSLRs were considered the peak of digital camera technology. But now the tide is turning, and mirrorless cameras are starting to steal the headlines.
Their mirrorless design means they don’t have a mirror and shutter mechanism. (A signature feature of SLR cameras.) With fewer moving components, they can be more compact and quieter when shooting.
They are also pulling away from DSLRs in terms of quality and specs. Mirrorless machines are now breaking records for image resolution and autofocus systems.
Many major camera brands are focusing heavily on the mirrorless camera market. There are some great options, and more are coming out every year. But which mirrorless camera is the best?
Conclusion: Best Mirrorless Cameras
There are plenty of great options to choose from in our list of the best mirrorless cameras. But remember, you need to think about what you need. What level of photographer are you? What is your budget? And what kind of photography do you enjoy?
If you want the best professional mirrorless camera for a medium budget, we recommend the Sony a7R IV. It’s easy to take spectacularly sharp images with its high 61.2 MP resolution. You miss out on advanced creatures of the Sony a1. But the price point is much more affordable! If you want a better frame rate, the Canon EOS R5 is a close second.