
The f-stop Dyota camera backpack is one of the lightest we tested. f-stop has been making camera bags since 2006. They pride themselves on innovative thinking and solutions. They’re also committed to promoting increased sustainability in their products and packaging.
So it’s a shame to report that the f-stop Dyota has failed to impress us as a camera backpack. It undoubtedly has some strengths. It is very light—the 20-liter version weighs only 2.8 lbs (1.3 kg). And there are some nice touches with quality hardware.
But it is not a bag I would recommend to photographers, except in some very specific circumstances. And to be clear, we have looked at all sorts of bags in our deep dive into the world of camera backpacks.
We’re not saying the Dyota comes up short compared to just the big, heavy-duty bags. We also tested lightweight bags that impressed us. So even compared with similarly sized bags, we feel the Dyota is not something we’d recommend.
So read on and find out where the f-stop Dyota does well and where we think it falls short.

For full transparency about our review process, you can read about how we scored and ranked the bags here.
Strengths and Weaknesses of the f-stop Dyota 20L
| Weight |
Weight
1300 g
|
| Capacity |
Capacity
20 L
|
| Access Points |
Access Points
Top, side
|
| Airflow Back Support |
Airflow Back Support
Yes, without mesh
|
| Laptop Sleeve Capacity |
Laptop Sleeve Capacity
15-inch
|
| Tripod Holder |
Tripod Holder
|
| Warranty |
Warranty
20 years
|
| Waterproof Rating |
Waterproof Rating
Weather-resistant
|
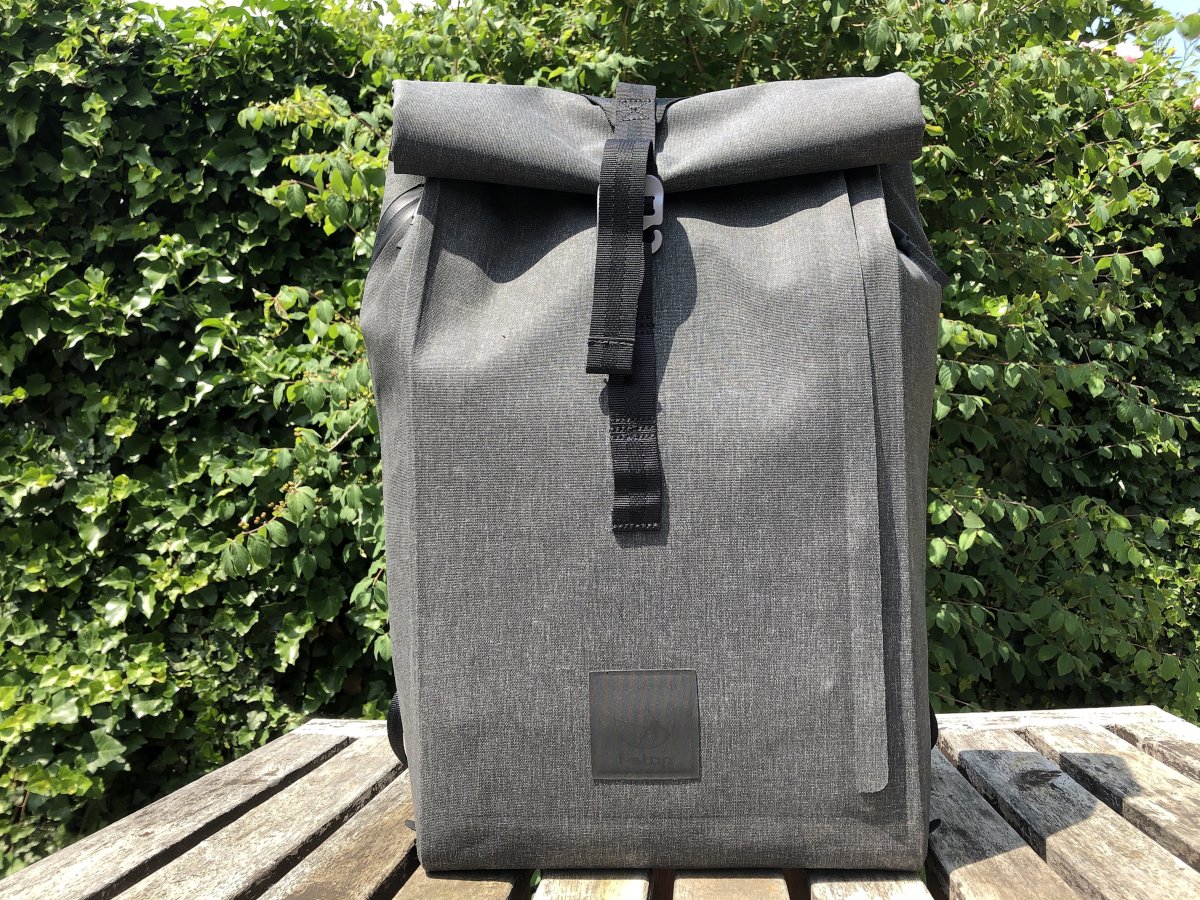
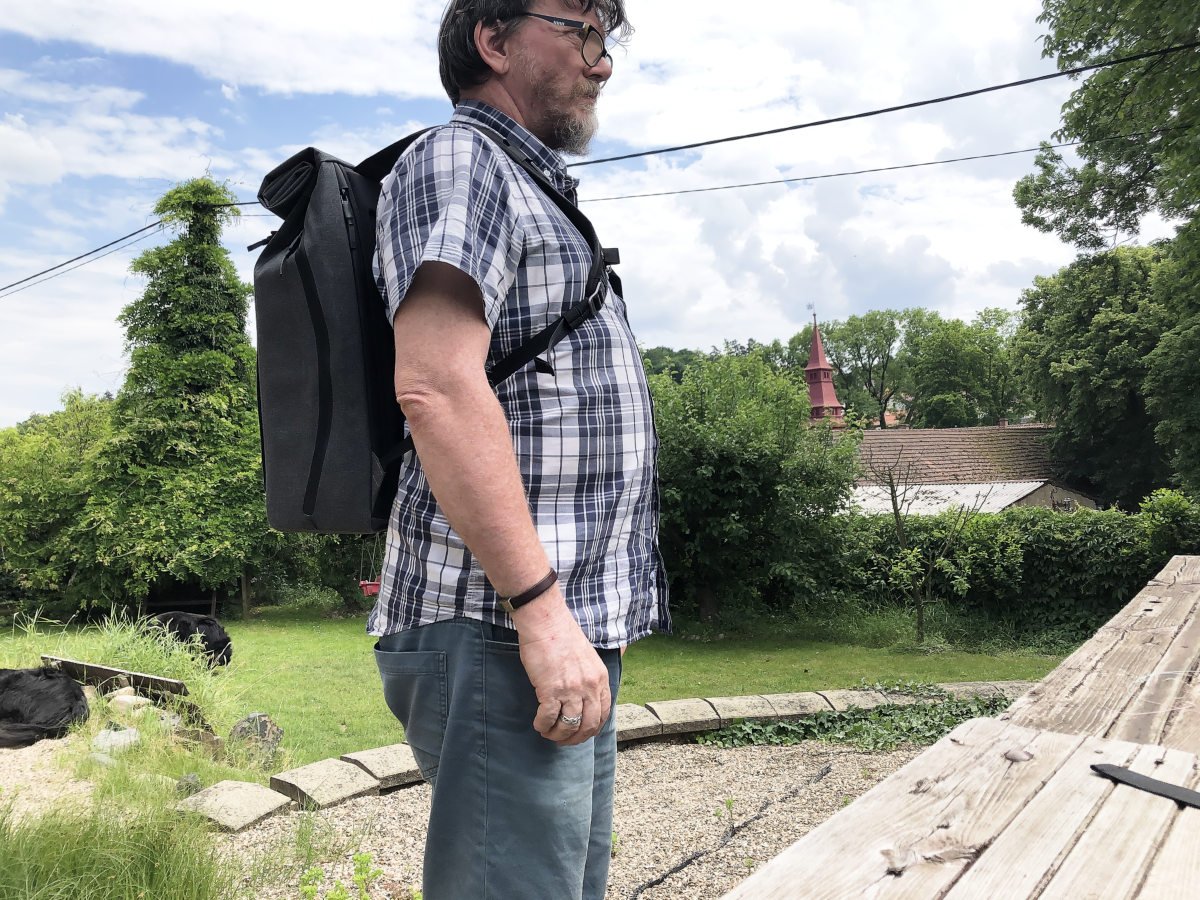
The Dyota’s style is clearly attractive to a certain sector of the market. It is a modern, stylish, roll-top design. It’s simple and unfussy. And it scores well for waterproofing and weight.
It has useful features like a height-adjustable chest strap and neat magnetic fasteners. It can also be converted to a simple day bag very quickly. And the 20-year warranty is reassuring.
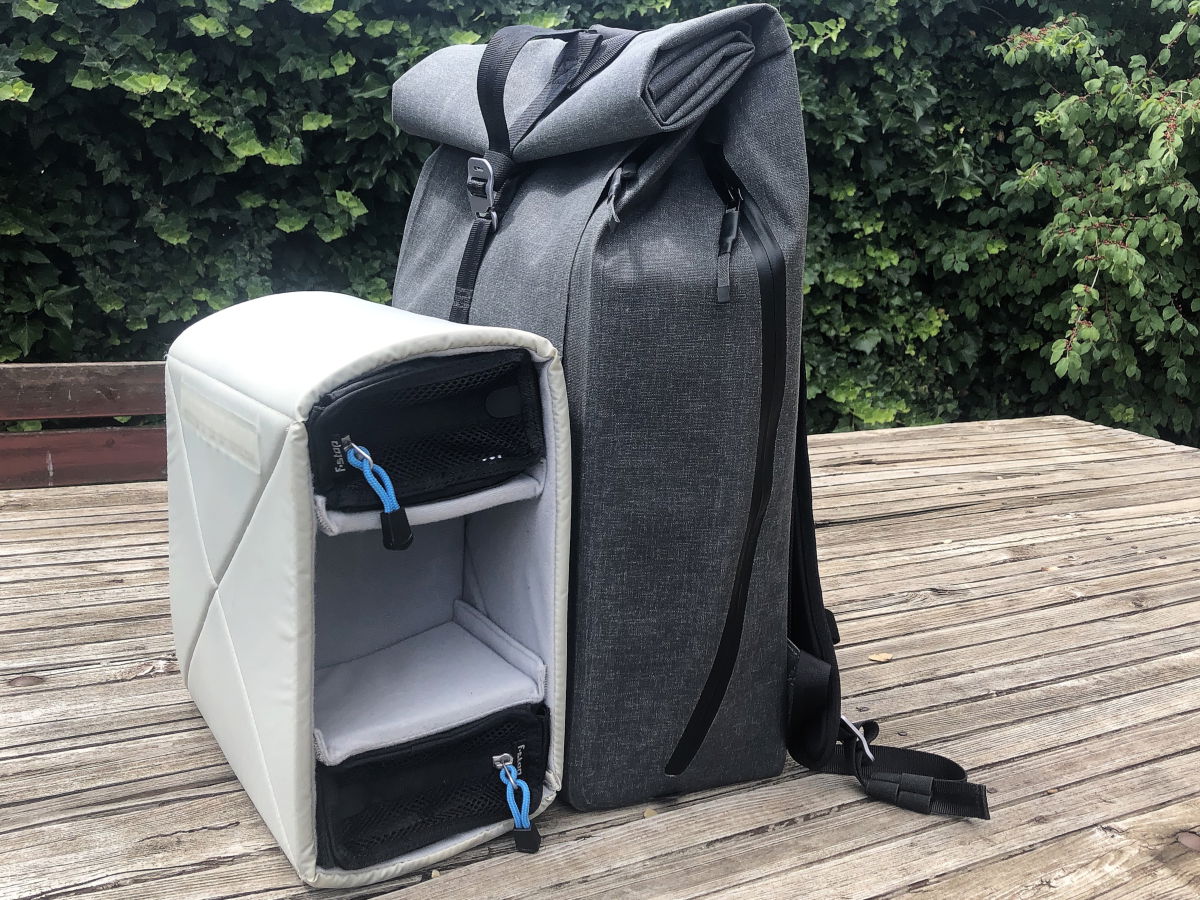
As for weaknesses, the biggest one for us as photographers is the level of protection offered by the Dyota. It comes with a foam internal sleeve with moveable dividers. But the bag itself has no padding. So anything in the sleeve is only protected on three sides.
A knock or bang to either side of the bag leaves only a millimeter of nylon between your gear and the outside threat. And there are other issues concerning accessibility and flexibility that we’ll cover later. The f-stop Dyota is an attractive but ultimately flawed product.
Design and Color Options
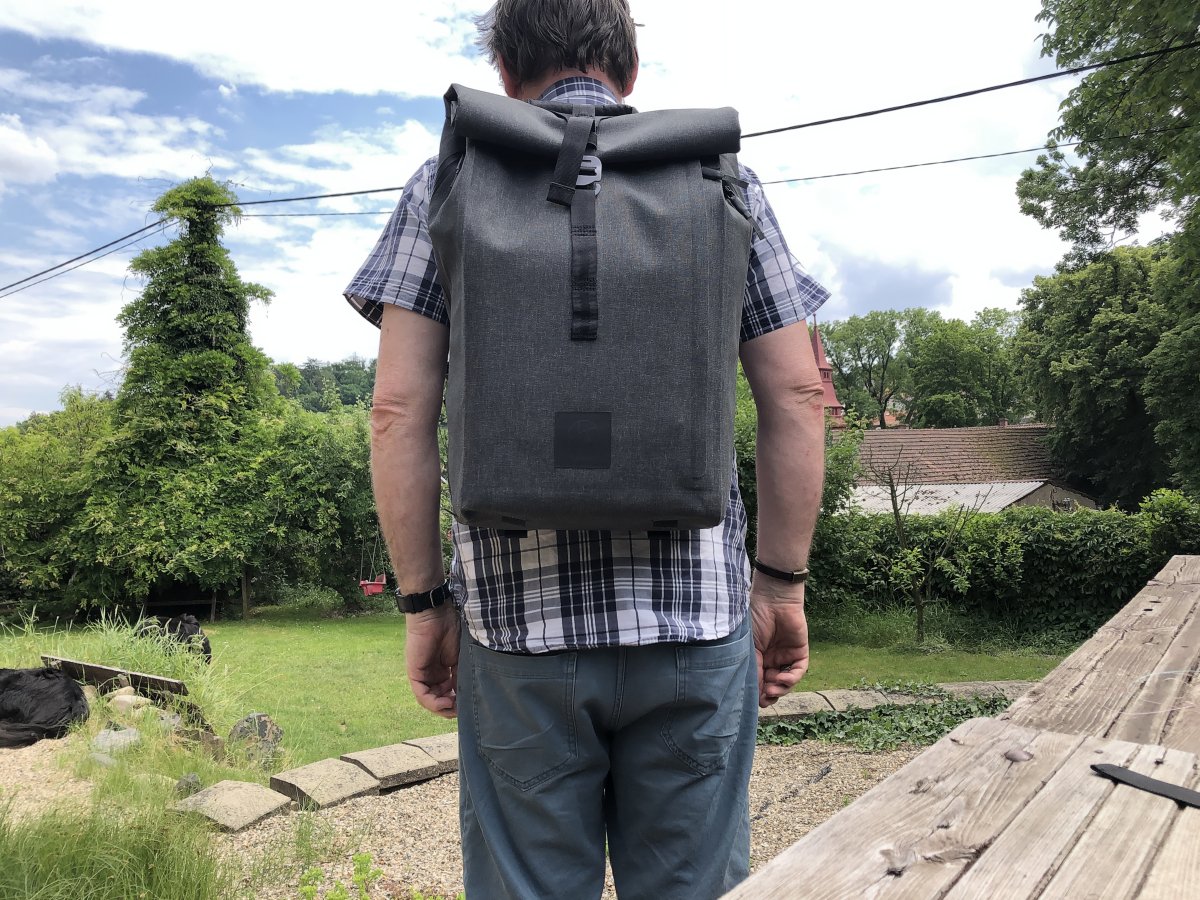
The design is modern and fresh. The material has a canvas-like appearance but is a synthetic fabric. It is available in three colors—Battleship Gray, North Sea Blue, or Rooiboos Tea (red). The roll-top looks modern and is well-executed with efficient use of magnets and buckles.
We were loaned the 20L Battleship Gray. There is also an 11L version. Pretty much everything is gray except for a patch with the f-stop logo and name. And the buckles and straps are black.
Some of the hardware is brushed metal. This is an attractive detail and adds to the overall feel of quality in materials. These details remain the same, whatever the base color of the bag.
Build Quality and Durability
The fabric seems to be well-made. And their 20-year warranty is a testament to the faith that f-stop has in this bag.
Exterior Material
The external material is water-resistant. It is welded using radio frequency (RF) welding, producing stitch-free seams. It also produces a smooth external finish.
The fabric has a stiff, slightly waxy feel to it. It’s similar to new waxed cotton for stiffness. It also makes it quite noisy when touched or moved. It’s difficult to tell how scuff-resistant it is, but it did arrive with one minor scuff.
It has the look of canvas. And with the simple black webbing straps and brushed metal fixings, it’s a very smart look. One advantage of the external material is that it gives shape and structure to the backpack. It’s a good look if you don’t like a bag that sags and crumples.
Weather Protection
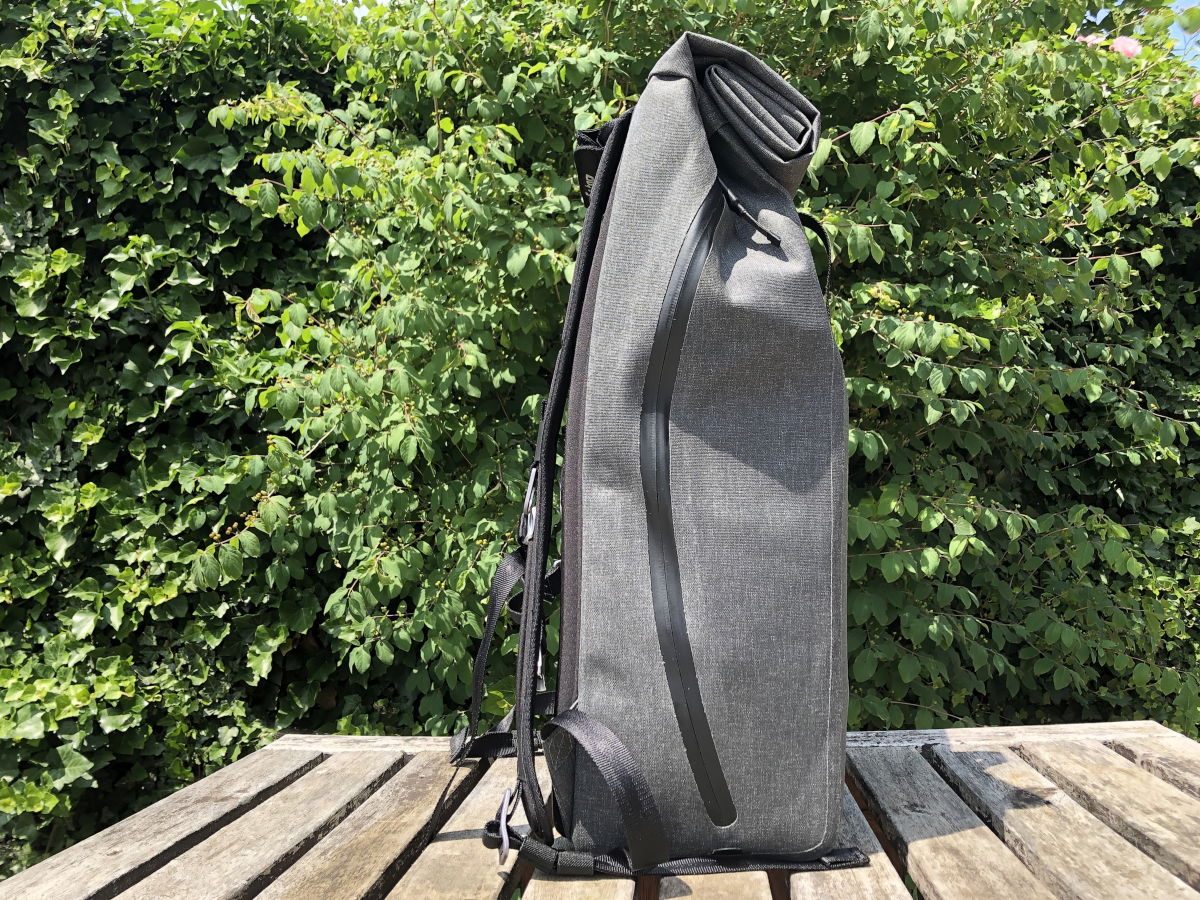
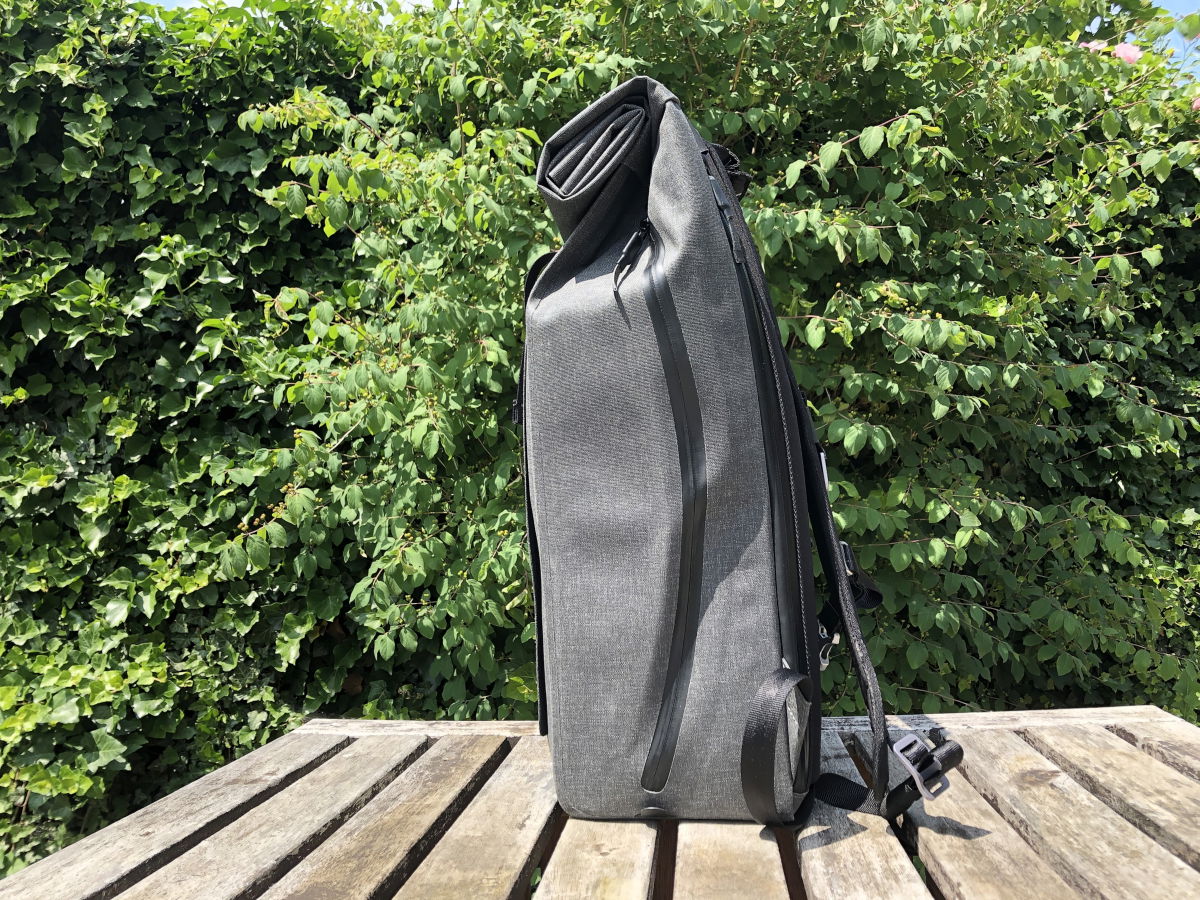
As well as the waterproof material and welded seams, the two side zippers have special waterproof shrouds. The roll-top design is a staple of drybags used by watersport enthusiasts. It’s a pretty foolproof way of keeping your kit dry. It also allows you to expand the carrying capacity (at the expense of some protection).
There are no feet to keep the bag off the wet ground. Perhaps this isn’t an issue, as the fabric is waterproof. But otherwise, it’s fair to say that weatherproofing is one of the Dyota’s strengths.
Interior Material
The interior of most of the bag itself is just the inside of the external fabric. It is again slightly waxy to the touch. But it isn’t a textured surface, so it is smooth to the touch.
The exceptions are the rear panel, which is a nylon-covered padded material. And there is a zippered nylon pouch at the top of the main body.
Straps and Back Support
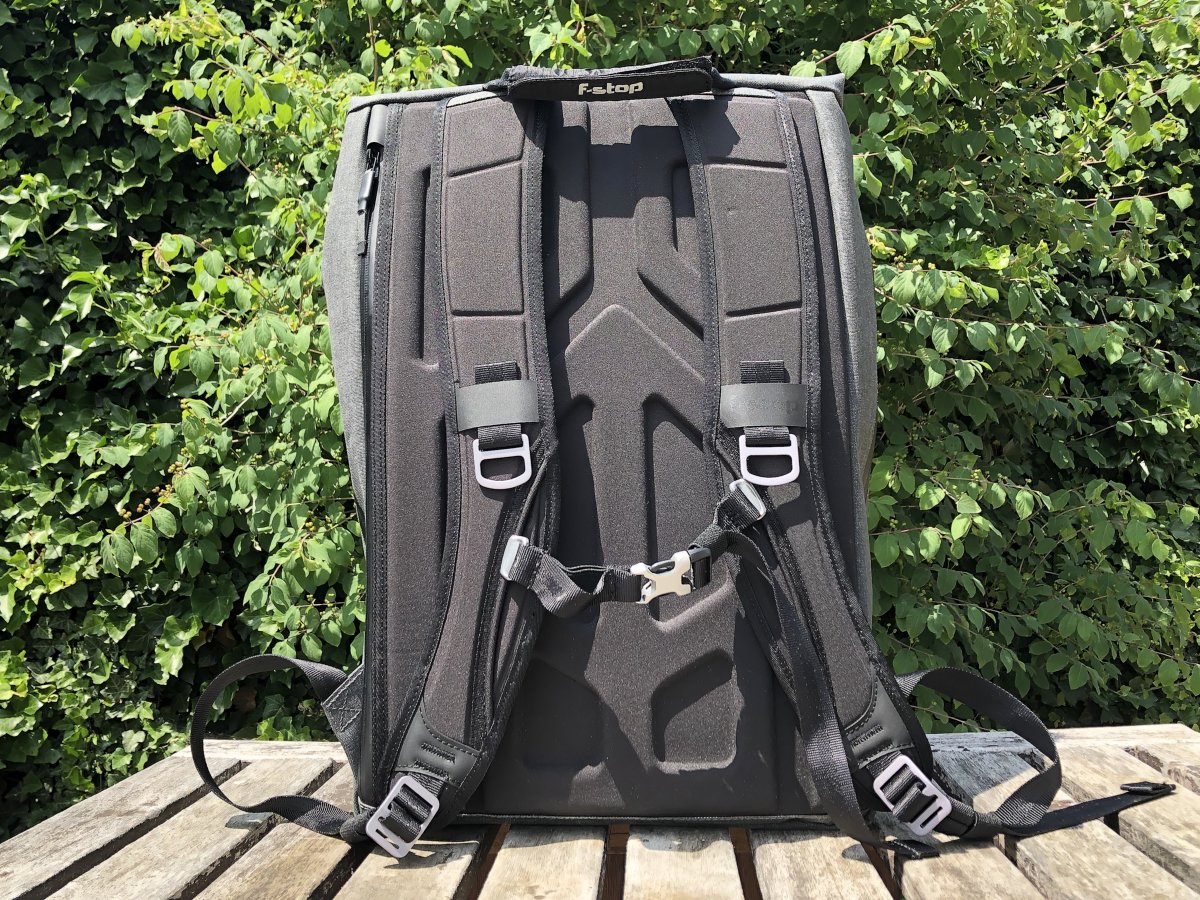
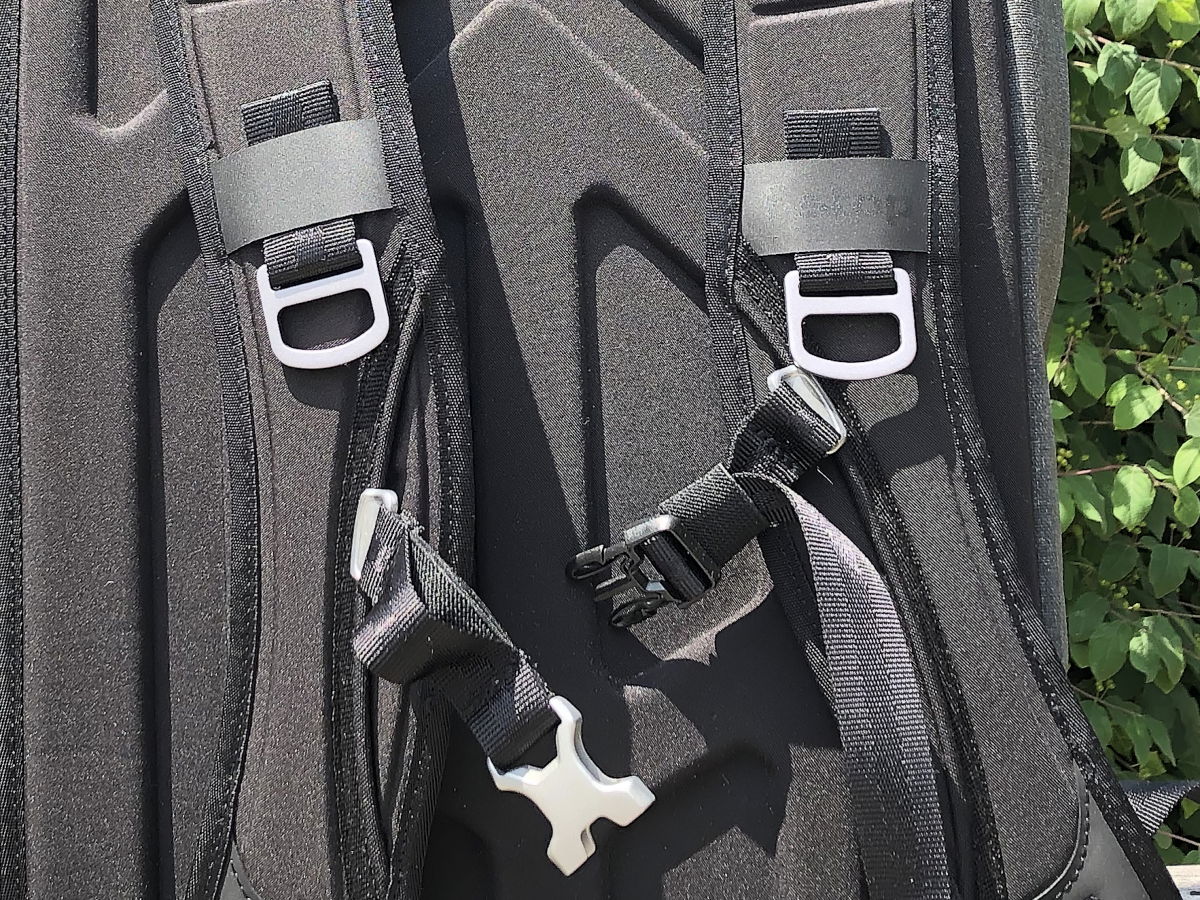
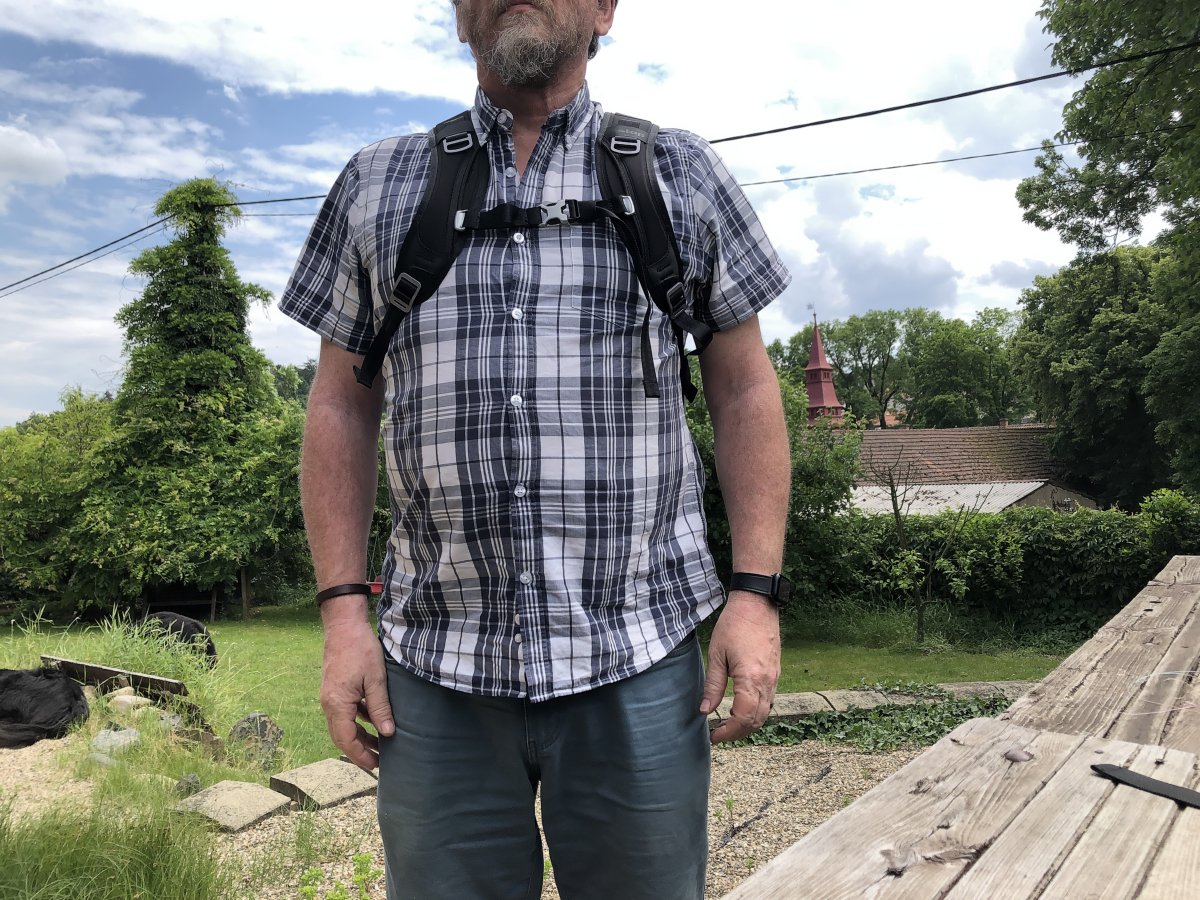
The two shoulder pads seem well-made and the padding is sectioned to allow flexibility. It isn’t very thick, but it seems to be made of high-density EVA foam. They can be adjusted for length, but not height.
There is a single chest strap. You can adjust the height by sliding the metal Duraflex wing clip fitting along the vertical piping of the shoulder strap. This allows precise adjustments along the 7-inch (17.8 cm) rail.
The back panel of the camera backpack has similar EVA padding with channels and cutouts for added breathability. The fabric is a smooth synthetic fabric, not mesh.
Seams and Stitching
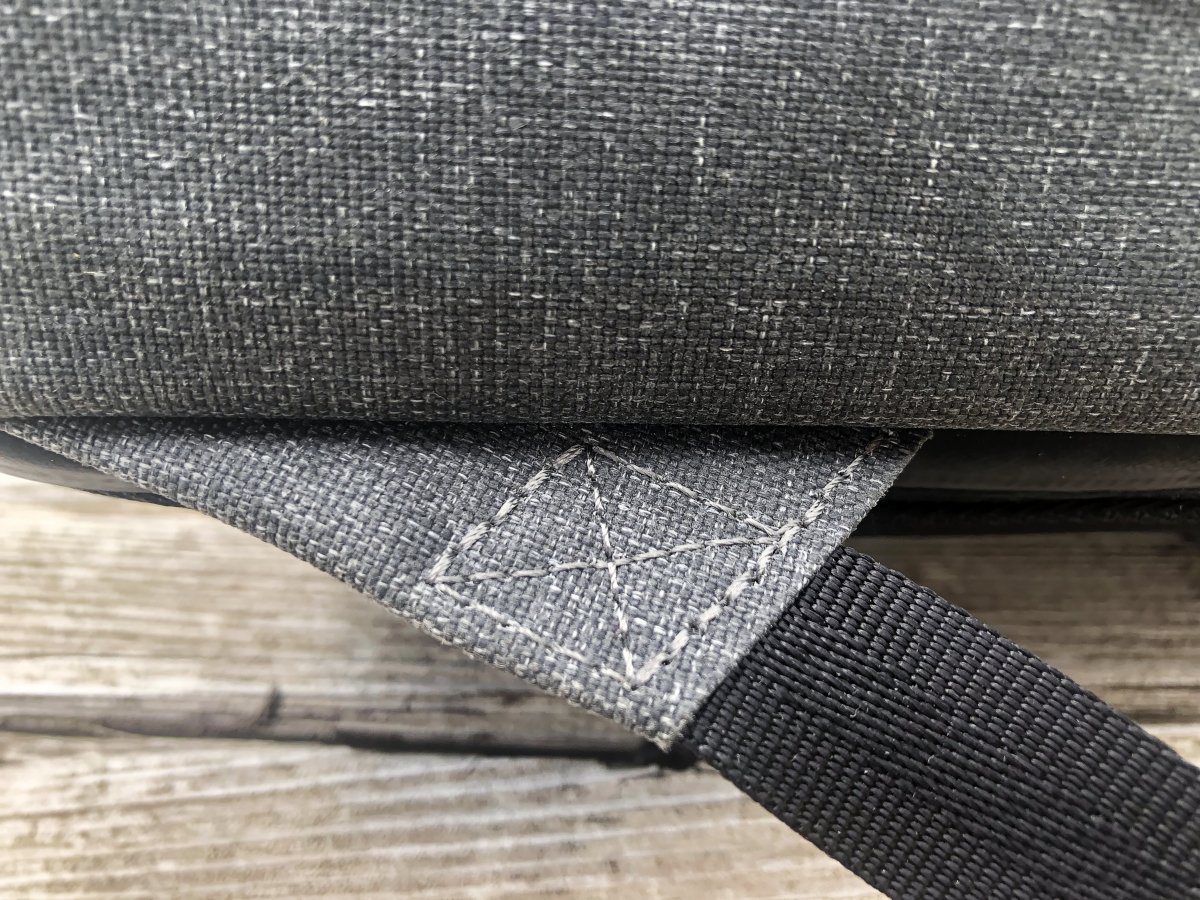
All the main seams are RF welded for improved weather sealing. Where there is stitching, it is high quality. This is mainly where webbing, buckles, and handles are attached to the bag. For example, the webbing strap that secures the roll-top is secured with a Y-section at the top of the bag. It is clear that this will prove more than adequate in terms of strength.
Internal Padding
Here we come to one of the f-stop Dyota’s problem areas.
The internal padding centers on the removable internal camera unit. This is a fabric-covered four-sided foam sleeve. It is clearly marked so you insert it the right way. This is because it contains two rows of magnets. These keep the unit attached to the bag’s exterior. The foam seems to be fairly dense and the sleeve’s external surface is covered in nylon. So far, so good.
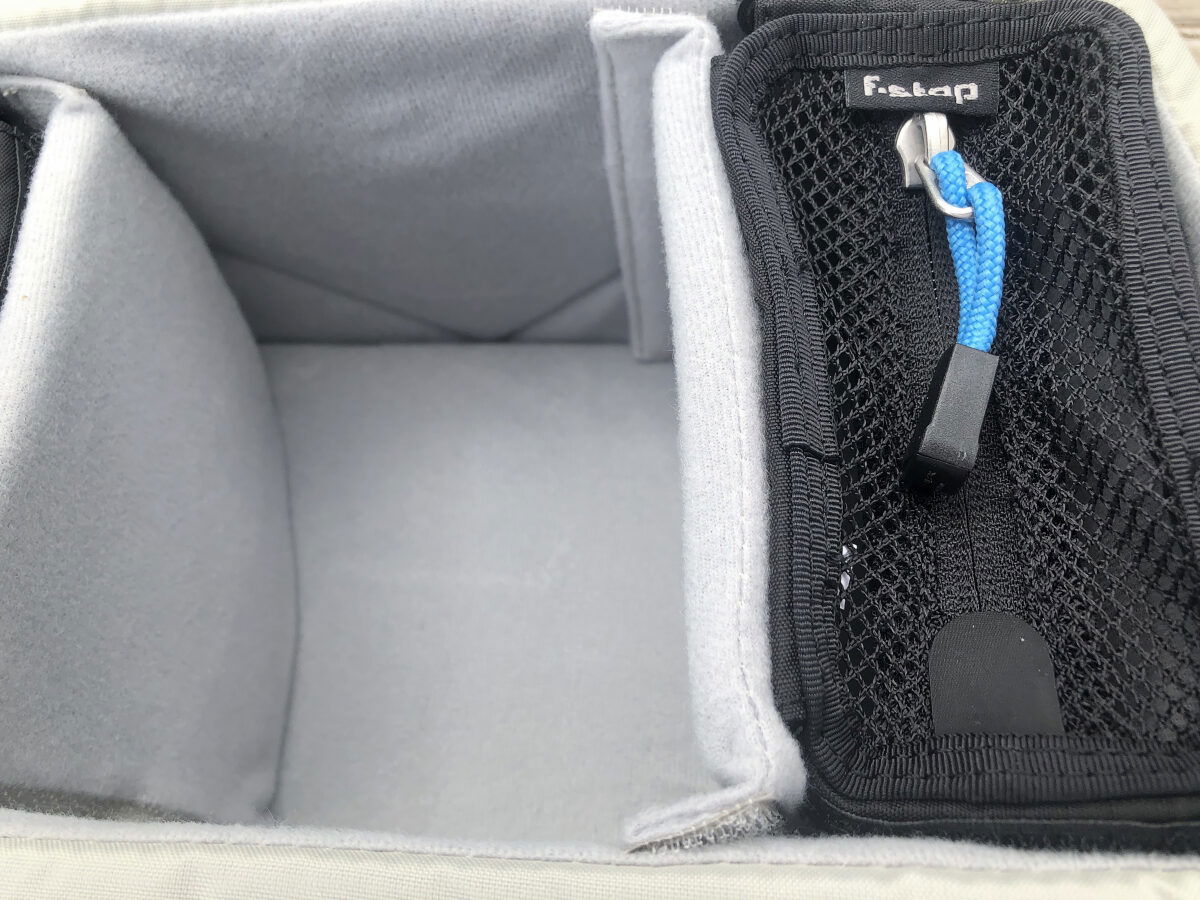
The sleeve is lined in soft brushed fabric. This both protects your gear and allows you to fit the dividers using Velcro. This fabric isn’t stitched across the surface like many bags are. This means that any repositioning of a divider pulls at the whole surface of the fabric. Not only do I worry about the impact on the fabric, but it also makes positioning the dividers frustratingly awkward.
There is no internal padding on the front or sides of the bag. This is a worrying oversight. There are no sides on the internal camera unit. So any blows to the side of the bag could easily damage your equipment.
Zippers and Fastenings
There’s no doubting the quality of the f-stop Dyota’s fittings. Duraflex buckles are used throughout. Many are brushed gunmetal gray metal, but some are plastic. And all of them are neatly and securely stitched.
Zippers are KCC metal zippers. For the most part, you can’t see the brand name as the external ones have a tag. This is made of the external fabric with a heat-shrunk tube attached to it and covering the metal zipper pull. This doesn’t offer the best visibility for the pull, but it does offer a good grip. And the shrink tube seems secure and prevents rattling.
Functionality and Ease of Use
This is an area where we struggle to rate the Dyota highly. There are a few things we want in a camera backpack. We are looking for the ability to carry our gear, keep it safe, and be easily accessible.
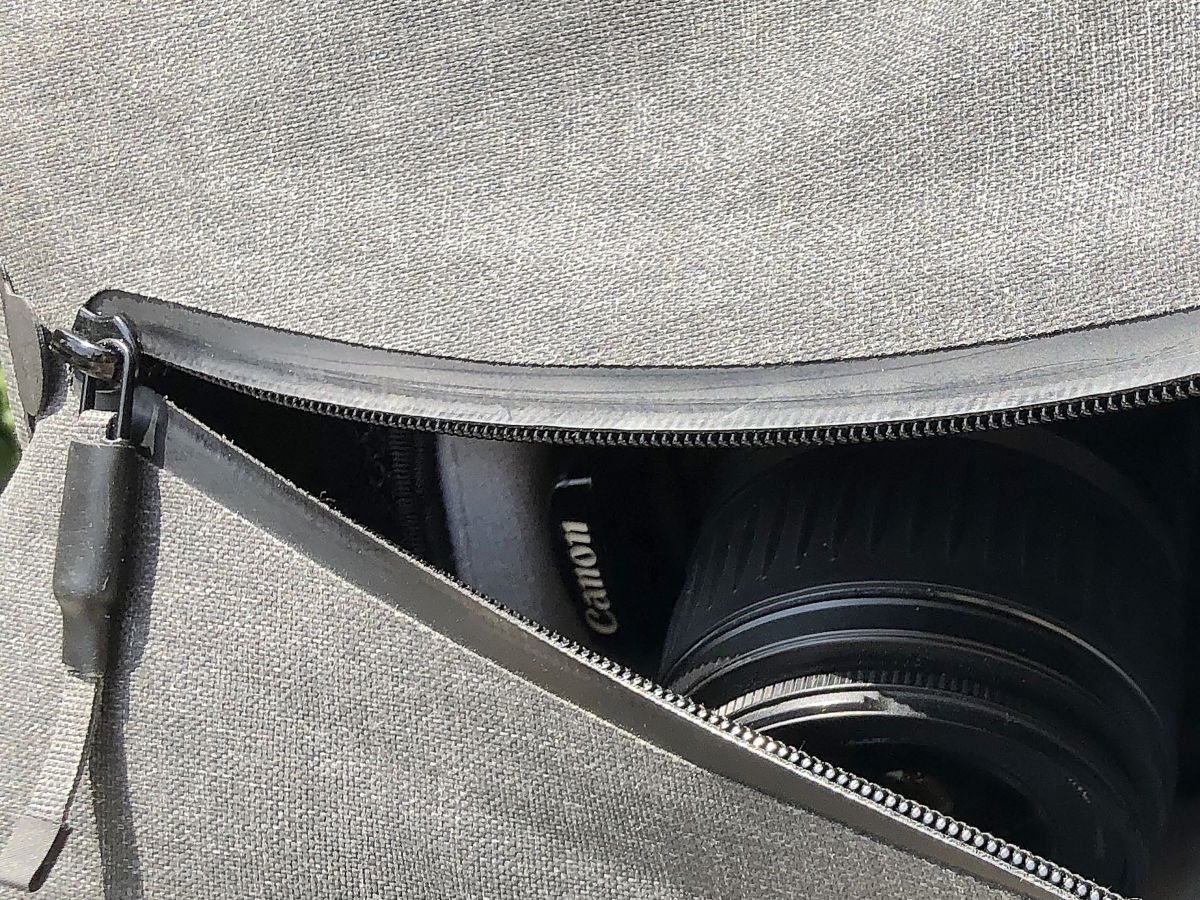
On the first criterion, the Dyota is sufficient if you have a modest setup. An APS-C DSLR or mirrorless camera will be the largest device you would want to use this for. Even then, the two curved side zips present problems.
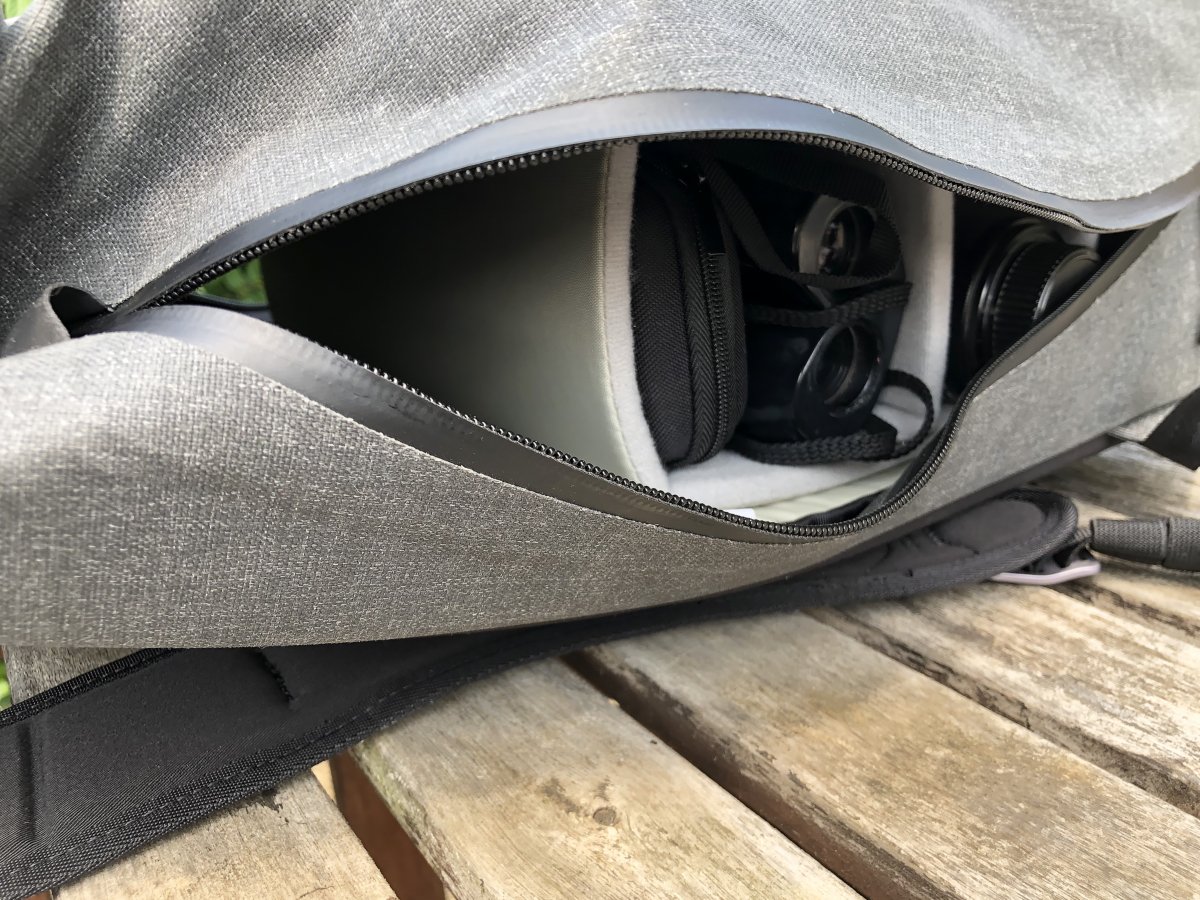
Firstly, they do not offer easy access to your gear. Because of the stiffness of the material, they tend to stay closed, even when unzipped. And even when you unzip them, the opening is not all that wide. There is no flap, for example, that opens to allow access to your gear. So you are always reaching in and having to hold the opening, well, open.
But the problems do not end there.
There is a central divider in the camera unit that runs from top to bottom. It’s removable, but without it, you can’t subdivide the sleeve. This means that you might find yourself opening one side zip to access a lens, closing that zip, then opening the other side zip to grab your flash. This is as ridiculous in practice as it sounds in theory.
You could conceivably place the central divider as a “lid” on one side of the camera unit. Everything would then be accessible from one side. But then, why the second zip? It’s a little confusing.
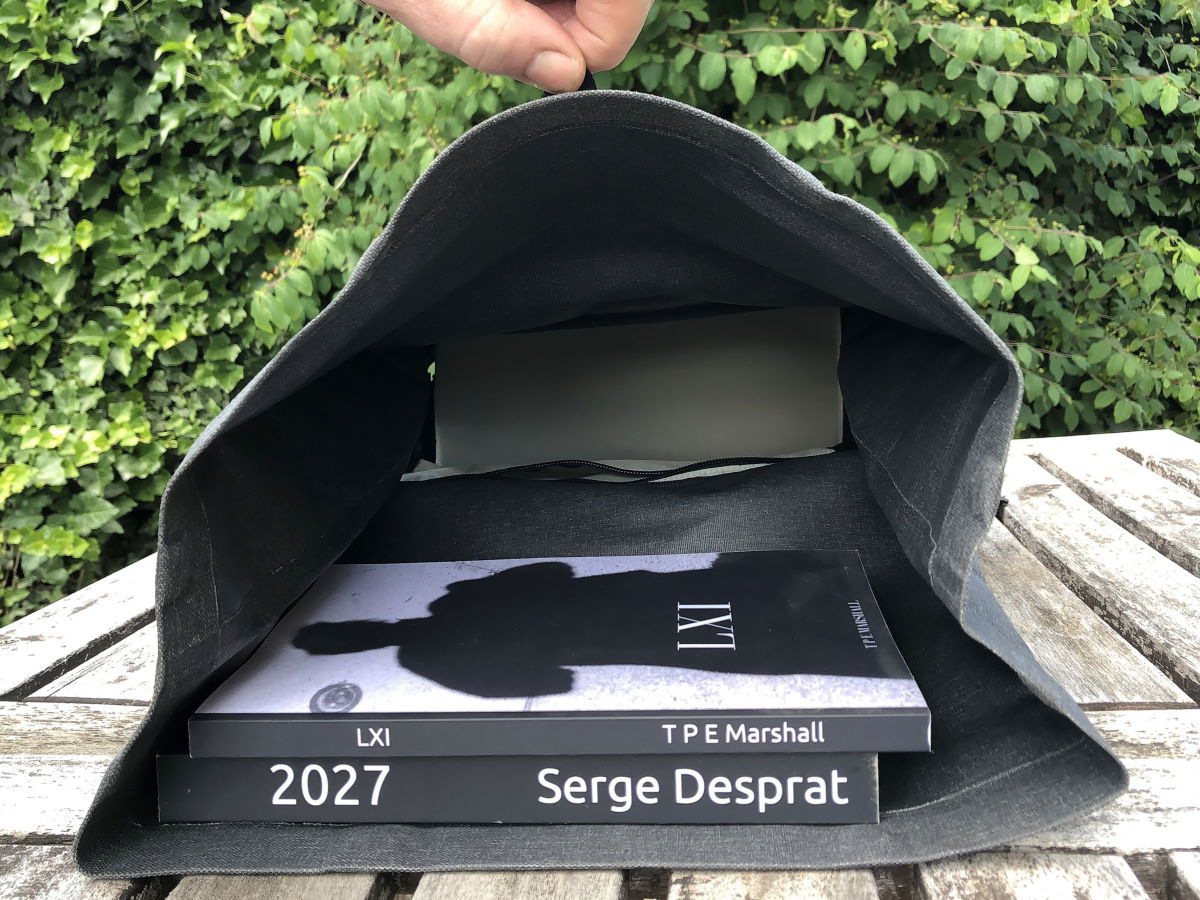
The largest opening is via the roll top. But this provides no access to the camera unit. And if you chose to keep your gear in the top section, it would have no protection. And the access is a long way down. The length from the bottom of the top section to the opening is the same length as from my fingertips to my elbow.
This leaves you with a camera backpack that seems to work against easy access to your equipment. And it doesn’t give the impression that your gear is nestled safely in protective padding.
Size and Weight
The f-stop Dyota is light and reasonably compact. But it’s not the lightest backpack we tested. And it only shaves a mere 3.5 to 7 oz (100 to 200 g) off some others that offer a much better level of padding and accessibility. That’s less than the weight of the water in your 16 oz (450 ml) water bottle.
As a backpack for a day out, it might be worth using without the camera insert. Or if you want to use your camera, and have an extra lens just in case, then maybe it would be worth considering.
Capacity
There’s no way I could consider trying to use the Dyota for my Canon EOS 5D Mark III. Fair enough, it’s not designed for that.
But I have another compact backpack here (the Guragear Kiboko City Commuter). Theoretically, it’s 2 liters smaller than the Dyota, but I can fit my 5D and two lenses in it with room to spare. Not to mention that the padding is better and I can quickly access my camera from a side entry flap.
Organization and Customization
The Dyota does not score well here, either. Customization is very limited. f-stop gives you a generous number of dividers and two zippered mesh “lids” for the divisions. But I can barely fit three fingers in the access slot. So I am unsure what they’re supposed to be used for.
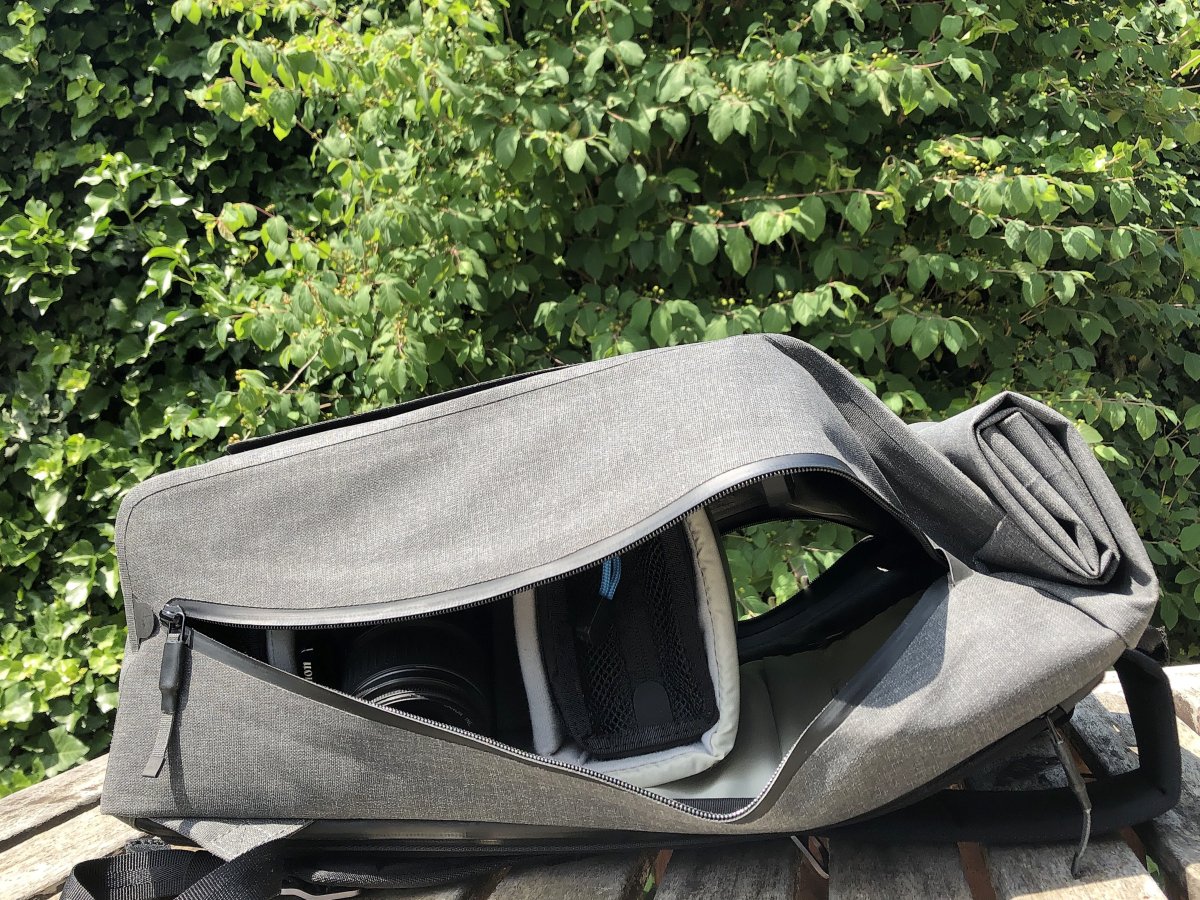
Other than that, the arrangement of the internal camera unit means it isn’t easy to organize the space. And remember that anything in that compartment won’t have any protection between it and the side of the backpack. The camera unit can be removed, providing you with a very lightweight and waterproof backpack.
Access Points
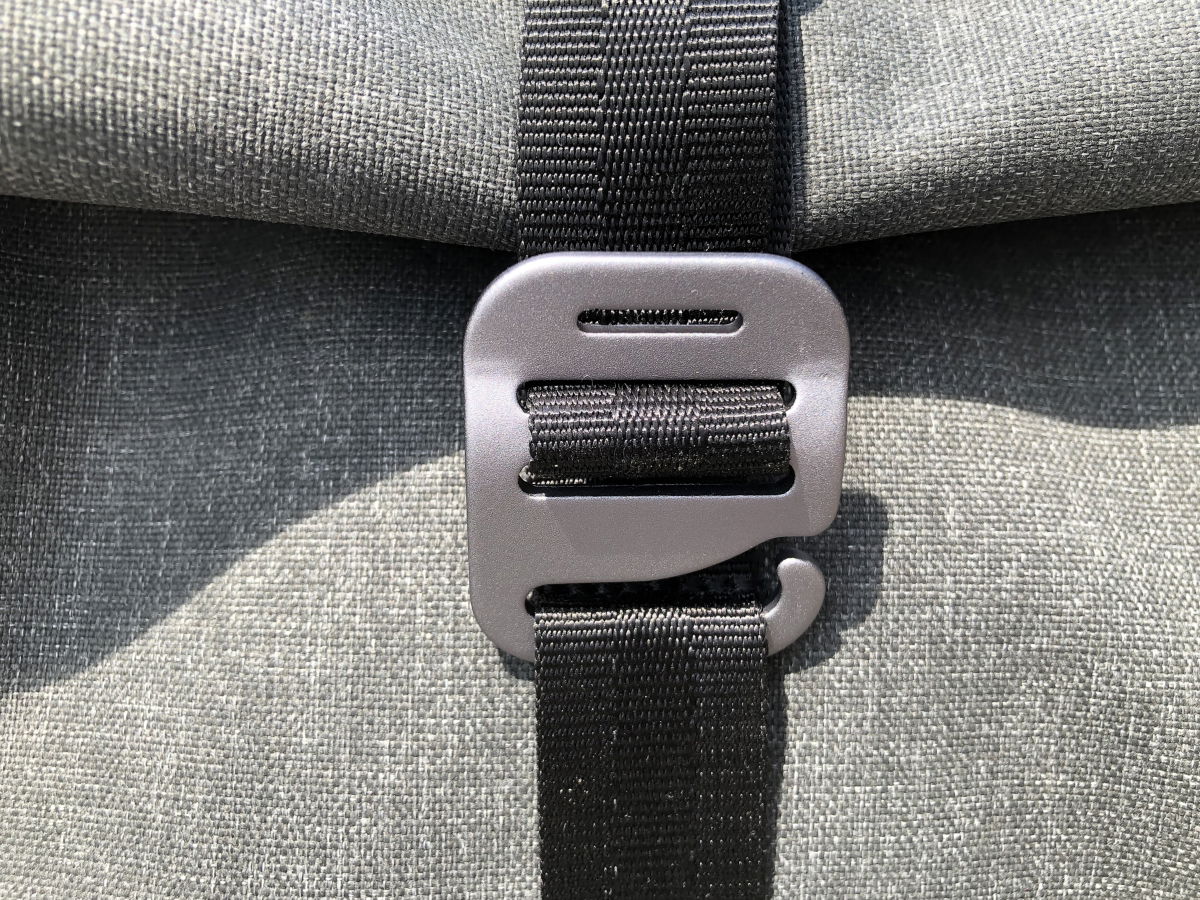
Because of the stiffness of the material, the two side zipper openings habitually return to a mostly closed position. This is very far from ideal. The only other access point is the roll-top. The roll-top opening uses magnets to snap closed. Once rolled, it’s secured with a webbing strap. Again, these are good-quality fittings. They feature strong stitching and a Duraflex aluminum adjustable hook. There is a securely sewn webbing ladder strap that allows the hook to be fastened at four different heights.
The laptop compartment is closed with a full-length zipper. It’s unobtrusive and protected from the weather by a rubber-gusseted zip. One worry with a side-access laptop compartment is if you forget to close the zip, it’s fairly easy for your precious computer to slide out. This is much less likely with a top opening or an internal section.
Security
There are no dedicated security features. The external material is tough, but it could easily be slashed. The camera unit would offer some additional protection, but not much.
Additional Features
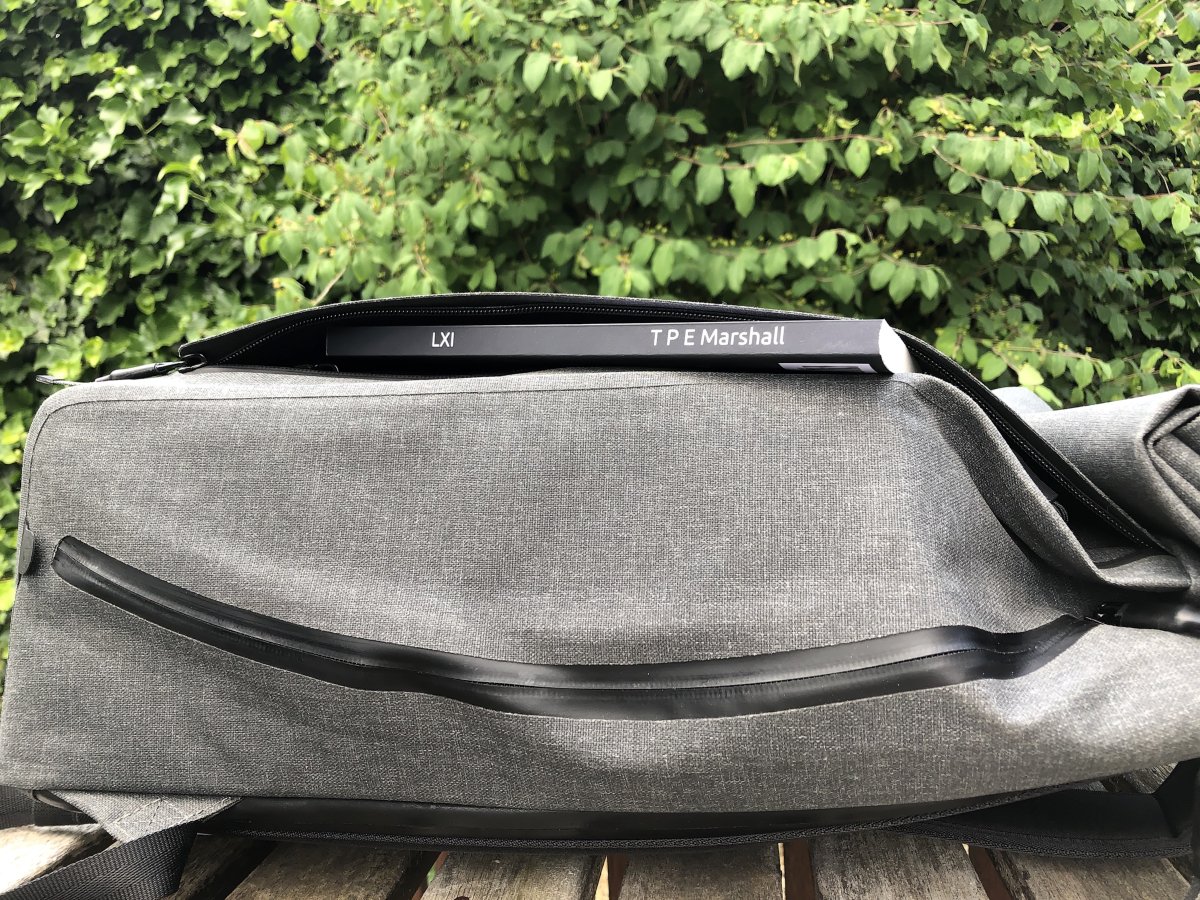
The laptop section sits between the back and the main body. It is lined with nylon fabric, not a brushed soft fabric. It has two slip-in pockets big enough for a passport. And it will accommodate a 16-inch laptop.
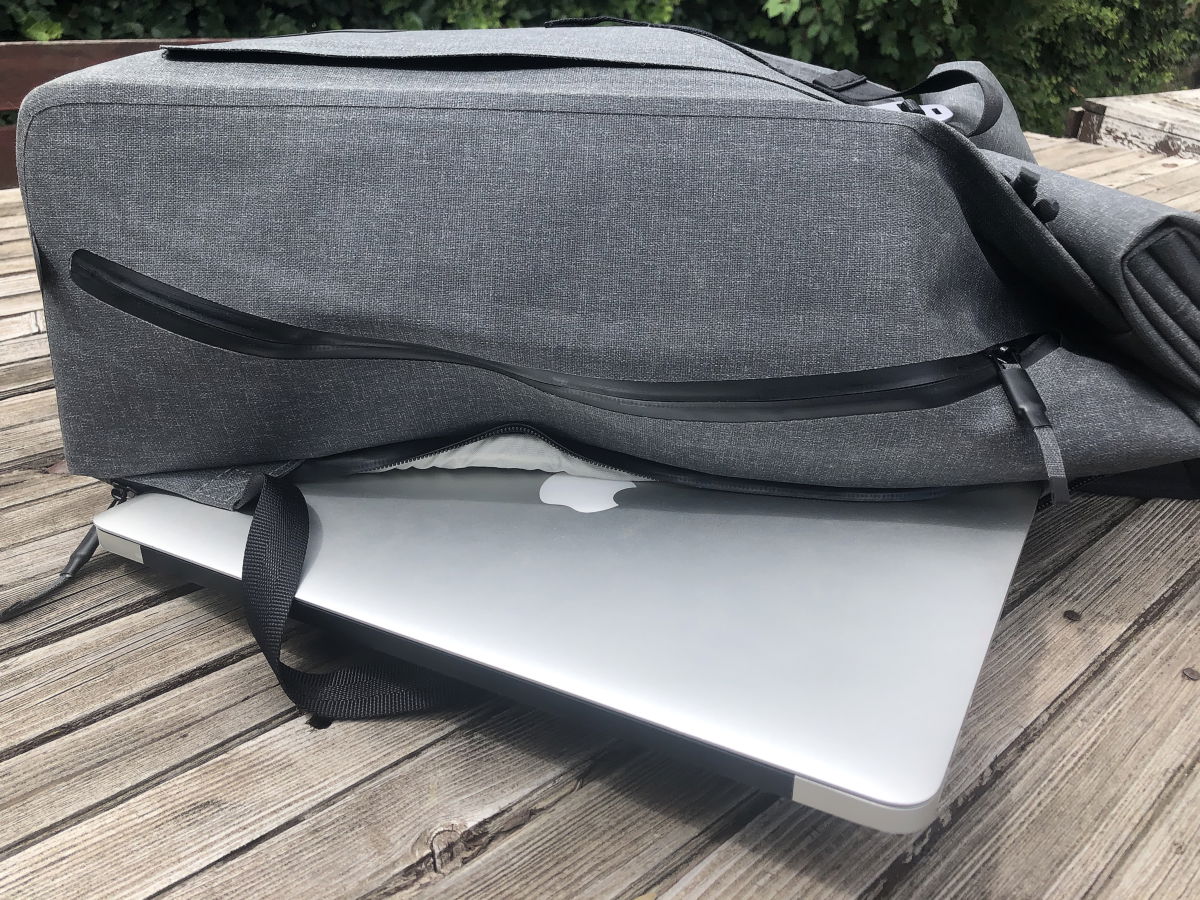
The back padding is very thin, and the air channels improve airflow and breathability. It’s a potential weak point where a sharp corner or edge could impact your laptop when the bag isn’t being worn. I’m also slightly anxious about the lack of padding at the bottom of the laptop compartment. This leaves your laptop with very little between it and the ground.
The roll-top provides expandable storage. (If I had to guess, I’d say it adds about 5 liters of storage.) If you fill it to capacity, of course, you leave almost no waterproof protection at the top of the bag. That’s because you need to leave enough material to fold a few times to create a waterproof seal.
There are four small webbing loops on the base of the bag to use f-stop’s “Gatekeeper Straps.” These are adjustable webbing straps with quick-release buckles. They attach with Duraflex spring-lock carabiners, and the straps can be used for a tripod or any other accessory. Remember that a big tripod will make your load as wide as the tripod is long.
Compatibility and Versatility
This is another disappointment from the f-stop Dyota. It has limited capacity for carrying gear safely and little versatility.
Compatibility for Cameras and Lenses
A mirrorless camera plus a spare lens and maybe an external shotgun mic would be about the limit. And perhaps that is the target demographic—content creators with such a system and perhaps a GoPro.
This would leave some room for personal items like a jacket or snacks. And of course, each bag has its target user. And if you’re looking for light, stylish, and compact, then this is aimed at you.
What it doesn’t overcome, though, are the basic shortcomings in access and functionality. The side openings will often mean you have to open both sides to access your gear. And there still won’t be any padding to protect it from a side impact.
Carrying Versatility
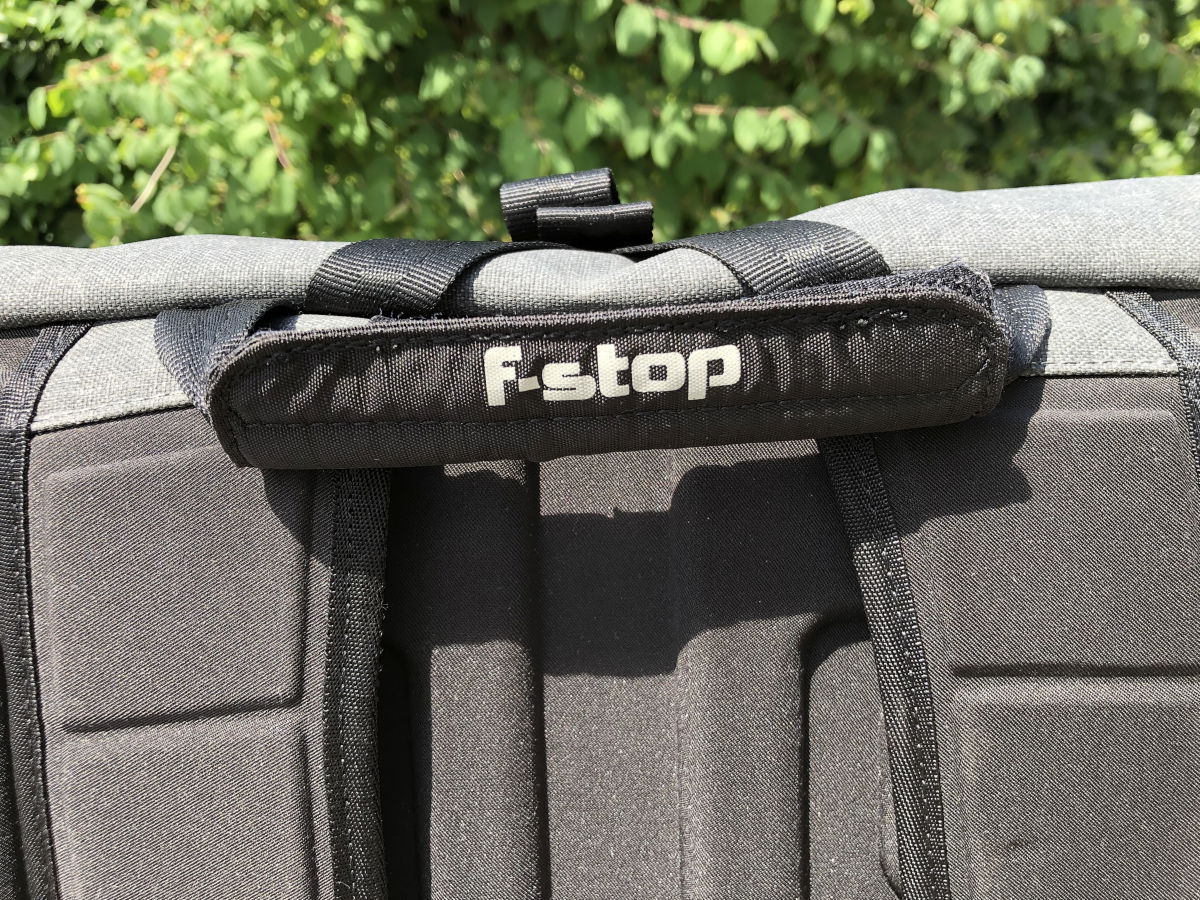
This is a backpack and nothing else. You can use the chest strap or not. Other than that, you wear it with one or both shoulder straps. There is a top carrying handle.
Sustainability
f-stop is committed to promoting the sustainability of its products. One example is the use of recycled packaging. All f-stop products since 2020 have been packaged in recycled materials. And they come in reusable bags.
They also make the point that they have stopped automatically including Gatekeeper Straps with every bag. This is based on not wanting to supply them needlessly. They say that bag prices were reduced to take this into account.
Price and Value
The f-stop Dyota is not cheap. And its many shortcomings make us agree it offers poor value for money.
The quality of the construction and the components is high. There is a 20-year warranty, which speaks volumes about f-stop’s confidence in its product. And they have a 45-day no-questions-asked return policy. So if you don’t like the bag, you can return it.
These are all admirable points, but we feel they don’t do enough to outweigh the negatives.
Alternatives to the f-stop Dyota 20L
The bad news for f-stop is that there are plenty of high-quality roll-top camera backpacks available for the same or less money.
Thule Covert
The Thule Covert is a good-looking roll-top bag. And it offers excellent protection, easy side access, and takes a lot of gear. It’s one of the best roll-top bags we’ve tested.
It’s both rugged and versatile. Thule’s reputation is built on quality and reliability, and the Covert lives up to these standards. You’ll find high-quality components to go with the thick, water-repellent nylon fabric.
The Covert’s camera pouch can be accessed through the top or the sides. And like the Dyota, you can remove it and just use the bag as a backpack.
We’re disappointed that it carries only a two-year warranty. But in every other respect, we think this is a great camera backpack.
Wandrd Prvke
Another roll-top we love is the Prvke. It can go head-to-head with the f-stop for weatherproofing. But it is miles ahead in terms of versatility, access, and capacity. And like the f-stop, you can convert it to a simple day bag very easily.
It has bags (sorry) of versatility for carrying your gear, with different sizes of camera cubes available. They are made with excellent-quality padding and a good selection of dividers.
It also has a very nifty system for making side access possible, even though the camera cube can be used as a standalone bag. It’s really impressive. In fact, I chose it to take on holiday with me this year, and I liked it even more after using it for two weeks.
Nomatic McKinnon
If you’re looking for a sleek style and you’re not worried about a roll top, then take a look at the Nomatic McKinnon. We think it’s a fine-looking bag. It uses top-quality materials and is very versatile. And the padding and protection are excellent.
Like the Dyota, it has rubber-shielded zippers, and the outer material is waterproof. It’s incredibly versatile inside, with different cubes available. And there is an internal “ladder” system that doubles the top compartment’s size with a simple pull of a tab.
The padding provides reassuring levels of protection, and the bag is comfortable to wear. We think it’s a fantastic choice.
Use our discount code EXPERT15 at checkout for an extra 15% off!
Final Verdict of the f-stop Dyota 20L
| Measurement |
Measurement
Score
|
| Design and Aesthetics |
Design and Aesthetics
|
| Build Quality and Durability |
Build Quality and Durability
|
| Functionality and Ease of Use |
Functionality and Ease of Use
|
| Weather Resistance |
Weather Resistance
|
| Compatibility and Versatility |
Compatibility and Versatility
|
| Value for Money |
Value for Money
|
| Total Score |
Total Score
|
The f-stop Dyota looks stylish. It is made of quality components, with thought given to the construction and quality. It is waterproof and very light. It can be used to carry some camera gear and other essentials for day trips. Or it can simply be used as a simple backpack.
But it simply doesn’t meet the mark as a camera backpack. The padding is fatally missing along two sides of the bag. The camera unit is awkward to customize and limited in practicality. And the access is simply impractical.
It lacks flexibility and adaptability in use. If you want to see what our top picks for lightweight camera backpacks are, then take a look at our roundup of the best lightweight camera backpacks. You’re sure to find one that suits your needs.