ImagenAI promises to be your artificially intelligent personalized photo editing assistant. It learns your editing style and preferences for each photo. Then it makes editing decisions based on this.
Imagen is hosting a Black Friday sale this week, and you can get this AI software for 30% off as part of the Imagen Black Friday offer.
It does this in a fraction of the time it would take to outsource the work to a picture editor. So it’s aimed at high-volume photographers. ImagenAI could save you days of editing, as they claim a 4x productivity boost.
But can AI photo enhancement replicate the subtle nuance of human creativity? And can it produce engaging, deliverable, professionally edited photos? Read this review to see what we think and whether ImagenAI is the right fit for you.

How Does ImagenAI Photo Editing Work?
The ImagenAI smart assistant is a stand-alone app. With it, you can decide which images you want to edit from Adobe Lightroom Classic (required software).
The AI software then applies your editing profile. And it emails you when the edits are ready to download. Plus, you also get several pre-determined editing styles you can use (RAW and JPEG).
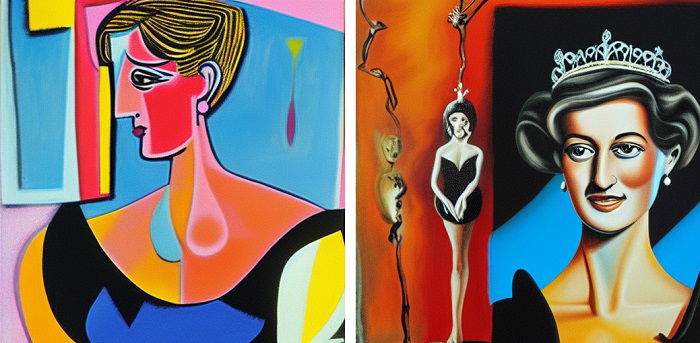
These Talent AI Profiles are from professional photographers whose editing styles have unique looks. They are built-in and can be used straight away. (Their emphasis is on portraits and wedding photos.)
Pictured below is the main ImagenAI interface window. You can teach the software, send photos for editing, download your completed edits, or fine-tune your editing profile.
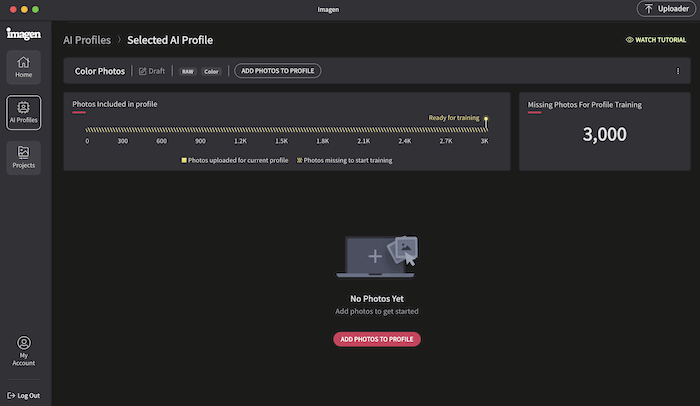
To teach the software your creative editing style, you must feed it 3,000 edited photos, at the very least. They must all have a similar look. And they recommend different lighting and environments.
You are also asked for the type of photos in a project. Choices are wedding, portrait, or family and newborn. There is also sport, event, real estate, landscape and nature, boudoir, or “other.”
Unfortunately, Lightroom Classic cannot be open when you do this. So this can be a challenge for those who shoot across different genres.
Your photos’ compressed versions are stored securely on Imagen servers. And AI analyzes and learns your style. After a few days, you get an email saying ImagenAI is ready to edit on your behalf.

Who Is the Software For?
ImagenAI is a time-saving tool for those who take a large number of photos but don’t want to spend long hours editing at a computer after a shoot.
It’s also best for those with distinct editing styles across many photos. Although intelligent, it will not cull your images.
With a pay-per-edit model, you still need to work through your shots and rate them. But you can then use the Image Filters section to send only your best photos for editing.
Even though it is a stand-alone desktop app, ImagenAI is only compatible with Adobe Lightroom Classic. So users must have a Lightroom subscription to use it.

What Is the Cost of ImagenAI?
The cost per edit with ImagenAI changes whether you choose a pay-per-use or a high-volume package option.
There is a minimum $7.00 monthly payment for maintaining each custom user profile. If your edit costs are less than that, the difference goes towards edits the following month.
If you have one color and one black-and-white profile, you need to edit a couple of hundred photos to use up the $14.00 you will be charged.
Creator pay-per-use is $0.05 per photo. There is an added $0.01 for add-ons to crop and straighten. (There is also a subject mask in a beta version.)
You can also upgrade to a package if you edit more than 18,000, 36,000, or 72,000 photos annually. These let you plan a more set monthly fee.
Then you can continue with the pay-per-use or ($0.05 per photo). Or you can commit to higher editing volumes and get a 6 to 15% discount on each photo.
You can even decide when to use the packages within 12 months. And you will get the discount even when the package finishes. There is also a tailored package aimed at companies with high volumes.
How Is AI Editing Different from Lightroom Presets?
Lightroom presets copy altered parameters from a previous edit and applies them to many photos. This makes for a great starting point. But you may need to refine the edit to suit each photo.
AI editing works in almost the opposite way. ImagenAI will change the edit parameters for each image based on the photo’s characteristics and lighting.
And when you have your final edits back, you can tweak the results and add the changes to your AI profile. This way, the software learns with you as your style and taste develop.
What Parameters Can ImagenAI Control?
- White Balance: Temperature, tint
- Tone: Exposure, contrast, highlights, shadows, whites, blacks
- Presence: Clarity, vibrance, saturation, texture, dehaze
- Colors: Hue, saturation, luminance (HSL)
- Advanced Options: Straighten, crop, subject mask (beta)
Does AI Photo Enhancement Work?
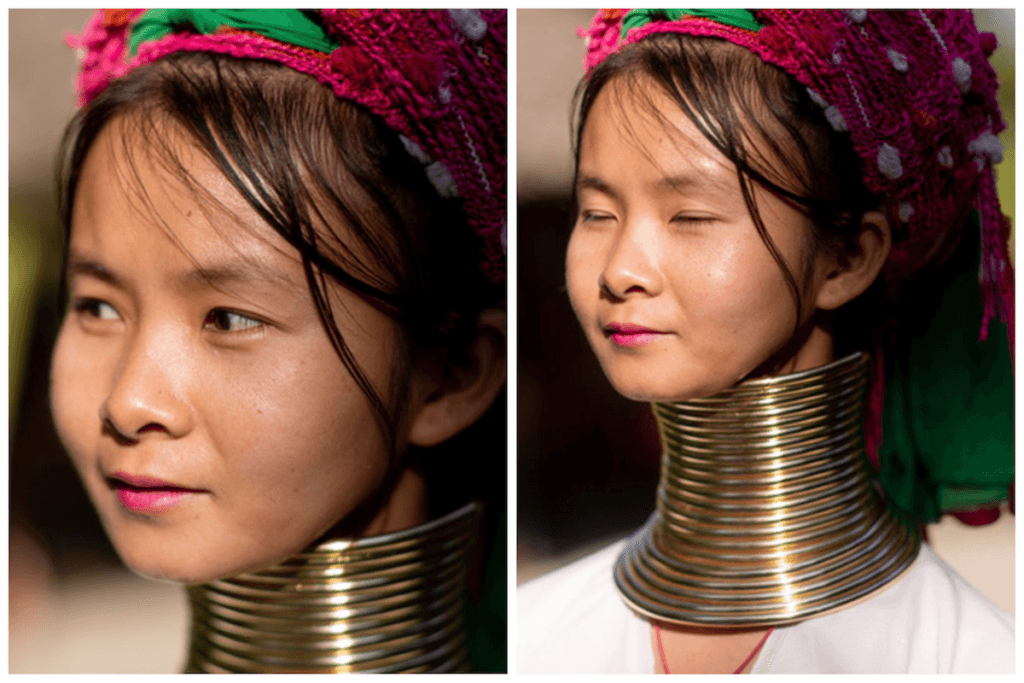
The short answer is yes. Here are some thumbnail examples from a wedding. We tried three different Talent AI Profiles. And each one yielded different yet consistent results.


Watch this tutorial to learn how to adjust ImagenAI to your unique editing style.
Are There Alternatives to ImagenAI?
Neurapix is the closest AI software competitor to ImagenAI. It is newer integration for Lightroom Classic in the form of a dedicated plugin.
It learns your photo style by uploading fewer images (500). So this could save you some time on the initial setup.
Neurapix also features straightening and three SmartPresets you can add to your images. You can also continue to edit photos to fine-tune them.
And its SmartPresets automatically update, continuing to learn about your style based on the photos you upload. Their three SmartPresets are bold, with deeper colors and higher contrast.

Neurapix is cheaper than ImagenAI. They charge $0.03 per photo up to 1,000 and $0.02 beyond that.
And Neurapix also has monthly and yearly flat rates for unlimited editing. The monthly flat rate is $79.95 a month. And the yearly rate drops to $49.95 a month.
But because it is newer, it has less of a track record than ImagenAI. Luckily, you can try both out for free to compare the two yourself.
With both, only a short time is needed to fine-tune photos after initial uploads. Other AI programs are visual editors or software that apply specific processes or effects.
Verdict for ImagenAI
I recommend ImagenAI to any photographer needing to batch-process files. To get edited photos in your style with such a short turnaround is incredible.
For those who have outsourced before, this option is cheaper and quicker. The AI learns your editing style (with some up-front work on your part of uploading photos).
You can also use some nice pre-made profiles by professional photographers. These are tailored for portraits and weddings. But it would be good to see other photography genres added in the future.
You can try this personalized photo editing assistant without risk because you get 1,000 free AI credits. And for ExpertPhotography’s readers, ImagenAI offers 1,500 free AI edits!
Score
| Measurement |
Measurement
Score
|
| Main Features |
Main Features
|
| Ease of Use |
Ease of Use
|
| Design |
Design
|
| Compatibility |
Compatibility
|
| Annoying Little Things |
Annoying Little Things
|
| Personal Verdict |
Personal Verdict
|
| Value for Money |
Value for Money
|
| Total Score |
Total Score
|