Finally, a Blueprint for Creative & Unique Portraits Using Everyday Objects and Simple Editing Steps
(With The Camera You Already Own)
Sara Garcia Garcia
Anya explains her process step by step in a super clear way. What I love the most is that I found it easy to apply every tip I learned from her to my own work.
Sara Garcia Garcia
99% positive reviews
14 photography projects (across 464 pages)
14 Enchanted Challenge Cards (Cheat Sheets)
3 FREE bonuses
Online & at your own pace
Downloadable onto any device
Language: English
Level: Beginner
If there was a fun and easy way to create unique portrait photos that stand out from the crowd… would you be interested?
Photos that are so magical and fantastic that they make people gasp “Wow! How’d you take that?”
You don’t need expensive camera equipment or fancy props. You don’t even need to spend long hours editing.
All you need is a selection of simple, yet creative portrait photography projects.
Projects that show you how to use ordinary items as props… and a variety of editing tools to bring your imagination to life.
Because the truth is, you can create jaw-dropping portraits in an afternoon.
Here, I’m going to prove it to you.
Take a look at this…
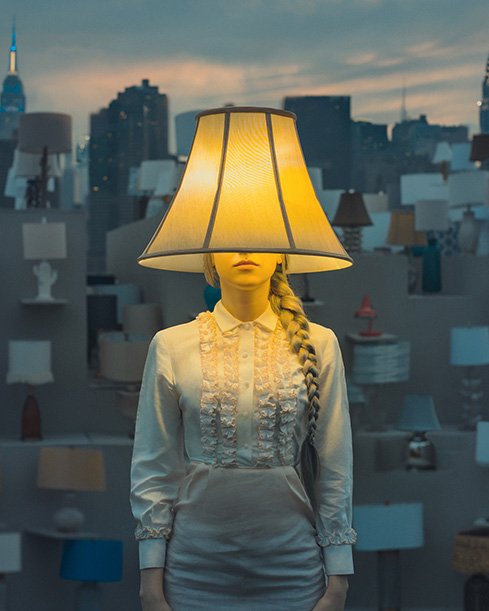
This photo was taken within 10 minutes at home (including setting up the scene and shooting). Then the image was tweaked in Lightroom and Photoshop in about 15 minutes.
Of course, it’s easy when you know exactly how to compose your portraits and edit them to perfection.
That’s why you need a guide. Someone who will walk you through the art of creating mesmerizing portrait photography.
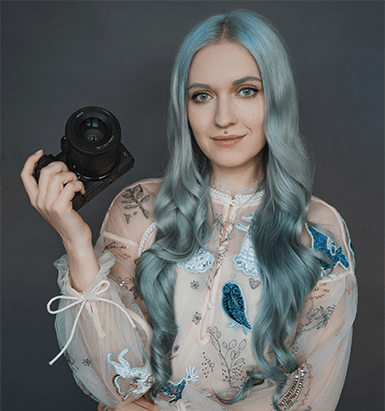
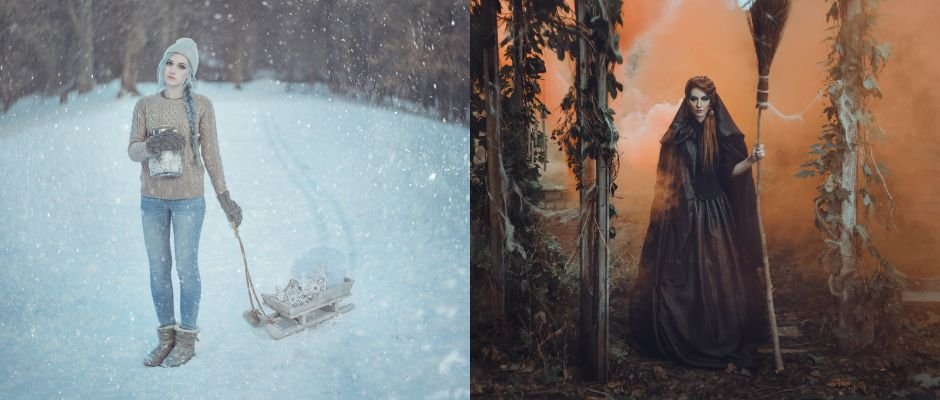
Meet Anya Anti, the Tim Burton of Creative Portrait Photography
@anya-anti
35.6K Followers
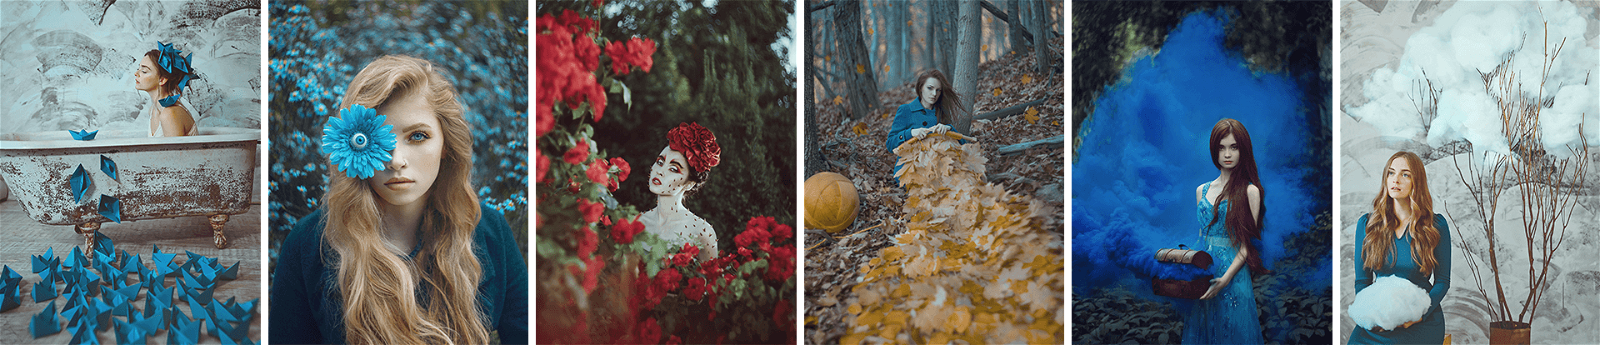
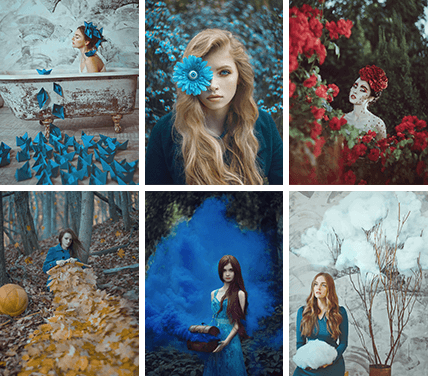
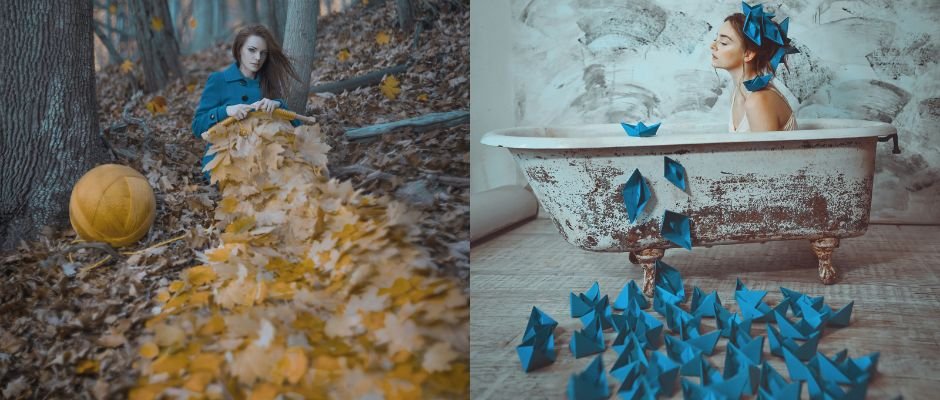
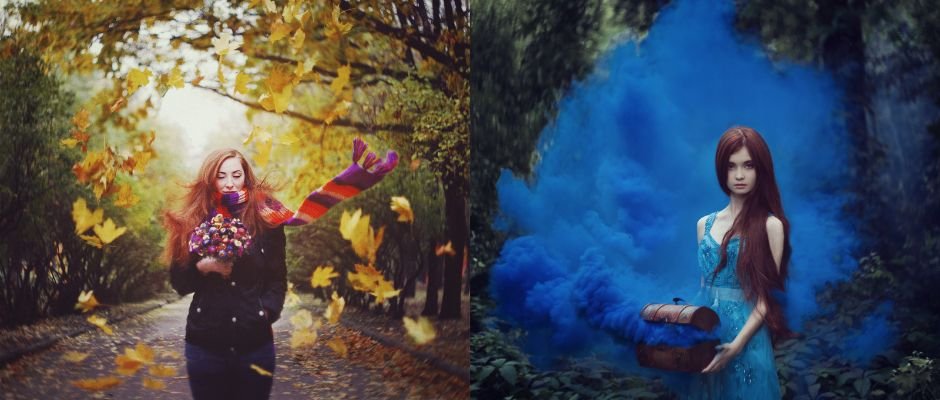
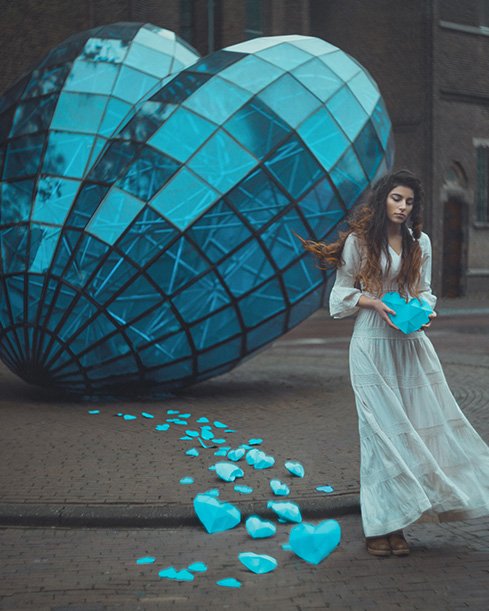
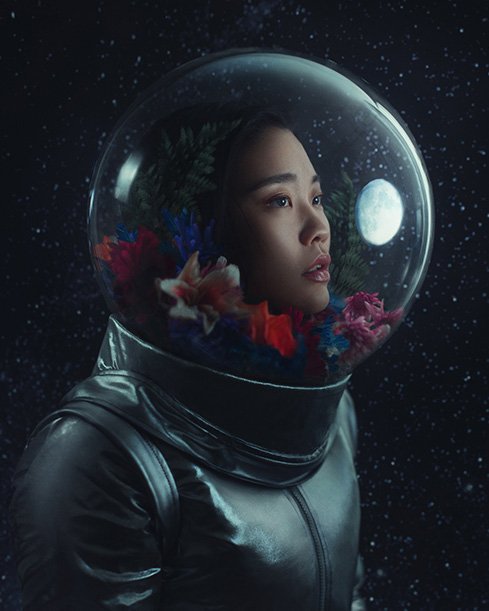
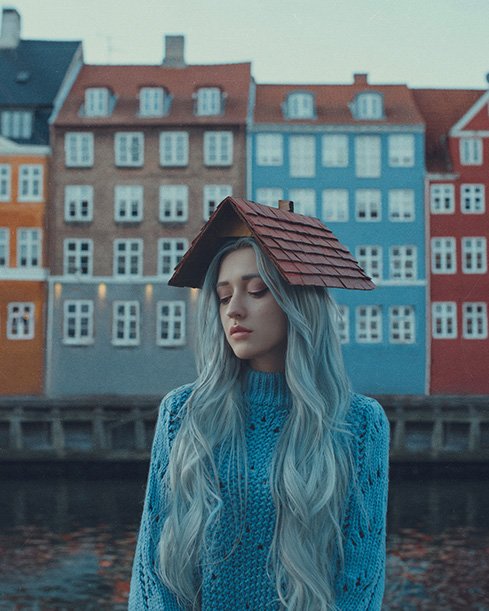
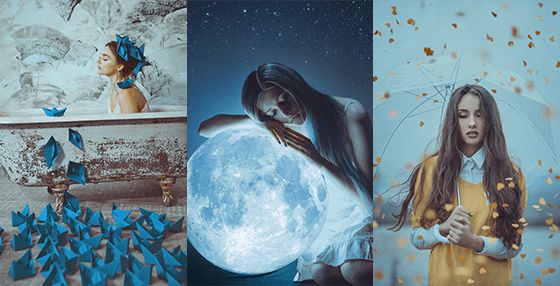
Anya shoots floral astronauts in outer space… unicorn ladies wandering through forests… adventurous princesses stealing the moon…
Her style relies on unique compositions and easy editing steps. They allow her to translate fantastic stories into reality.
With simple equipment in her local area or at home.
I tried it myself, and I managed to take some of the most surreal and fun portraits of my life.
It’s no wonder that she is internationally published from Paris to New York and in magazines such as Adobe, Nikon, Faerie Magazine, and more.
She’s pioneered a unique style of portrait photography that won her 25+ awards in 10 years. And inspires her 76,000+ followers online.
So it only made sense to join forces and create this…
Introducing: “Creative Portrait Concepts”
(For illustration purposes only; this is a downloadable ebook)
This 464-page eBook will show you how to create 14 imaginative portrait photos… that could belong to a storybook.
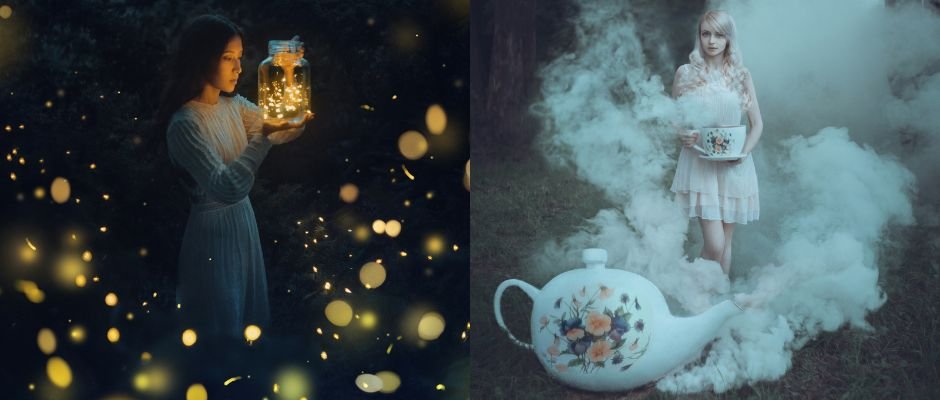
This includes levitation, changing colors, cloning, using smoke, adding elements, and more…
While using gear you already own.
All you need is our ebook and printable “Enchanted Challenge Cards” (more on those below).
The only limit is your imagination, and with 14 of Anya’s best ideas to choose from… you’ll never be short of inspiration.
With “Creative Portrait Concepts”, you’ll soon discover:
Detailed instructions to capture stunning portrait photos in any season or weather
An unlimited source of creative inspiration to capture dreamlike images
How to choose location, props, and costumes to tell stories with your shots
Fun ways to take photos with the gear you already own and props you can find at your home
How to use levitation to create eye-catching images
The best way to edit your photographs step-by-step for spectacular results
This ebook comes in 2 parts with 7 projects each: ‘Magical Gardens’ and ‘Weather and Elements’.
Each project averages 24 pages in length with detailed illustrations to walk you through every step.
You don’t have to read the book all at once, or even in order.
Pick the image you want to create, read through the tutorial, print off the “Enchanted Challenge Cards”… and start shooting!
Here’s what Anya has to say about her exciting new product:
14 Printable “Enchanted Challenge Cards” for Creative Portrait Photography
We wanted to make the process of capturing these photos as easy as possible.
So Anya worked with our design team to create case studies and cheat sheets for each image.
The process is simple:
Read through the detailed instructions in the eBook
Choose a scene and scout the location
Collect the props and call a friend to pose for you
Follow the simple tips laid out on the sheet during the photoshoot
Follow Anya’s quick editing tips to finish your own magical story
The “Enchanted Challenge Cards” detail how to create each image. This includes styling, posing the model, editing steps, and more.
Whether you’re a magician or an almighty sorcerer… these photography “Enchanted Challenge Cards” make the process easy.
Forget About Expensive Equipment and Long Hours of Post-Processing
You might think that taking images like Anya’s requires lots of equipment and editing.
But that’s not true.
You only need the most basic camera or smartphone and 15 minutes.
And you don’t need to invest in any props as you’ll use everyday items you’ll find around your home.
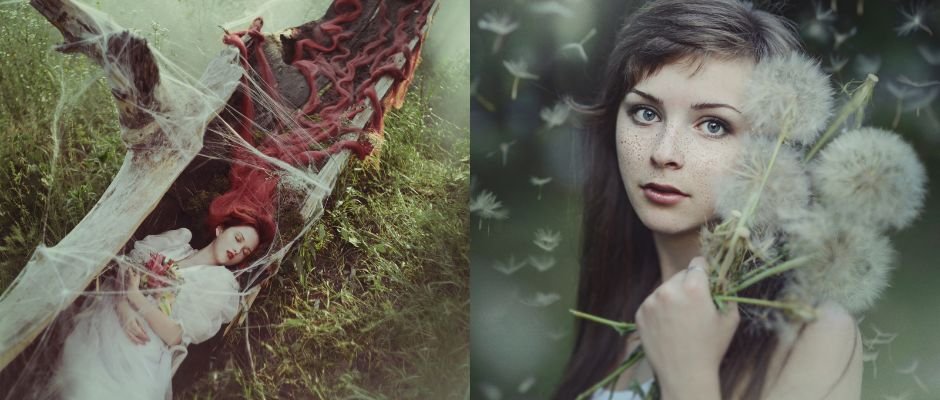
Anya focuses on meaningful compositions and simple editing steps. And the end result includes enchanted scenes like these:
No matter the time, place, or weather… you can always find a way to tell fantastic stories with your images.
If you can follow simple instructions, creating great results is as easy as clicking a button.
Follow Anya’s 3 Steps to Plan, Photograph, and Process
Step 1 – Plan
If you’ve ever struggled coming up with unique ideas, don’t worry. Anya’s got you covered.
She shares her exact method for coming up with interesting photo ideas.
And she provides prompts to make your ideation faster and more enjoyable.
She will show you:
Where she gets her inspiration from (and how you can find yours)
How to find cool locations in your local area
The best way to find and use props for more creative images
You can copy her exact ideas. Or you can use them as inspiration for your own imaginative portraits.
Step 2 – Photograph
Once you have a creative idea and a camera in your hand… it’s time to start shooting.
You need to use your composition and select your camera settings.
This will have a huge impact on the look and feel of your photo.
Anya will show you how, with:
Unique composition ideas that go far beyond the ‘Rule of Thirds’
Tips on how to pose models (even if they have no experience)
Camera settings that capture the mood of your photo
This is everything you need to take mesmerizing portraits that will go viral.
Step 3 – Process
Anya uses Photoshop and Lightroom to create scenes that would otherwise be impossible.
They’re small but powerful adjustments that can be made in 15 minutes or less.
In this last step, Anya will show you:
Easy ways to completely change the color and tone of your images
How to layer your edits for images with more depth and interest
A variety of cool editing tools that will transform your photographs in seconds
This is everything you need to create mind-blowing portrait photos like Anya’s in an afternoon.
Easy Editing Techniques for the Most Creative Portrait Photos of Your Life
Picture this.
You have a new way to take impressive photos. You don’t have to invest in expensive equipment or long hours of editing anymore.
Ideation isn’t a problem, because you have dozens of “Enchanted Challenge Cards” to take inspiration from.
You find a location that suits your concept and gather some props.
There’s no need to worry about styling your scene. You already know exactly how you’re going to pose your model.
Time flies by as you arrange your scene and experiment with props.
Within minutes, you have captured your own unique portrait filled with potential.
And after some easy edits, your photos are fantastic… surreal… and dreamlike…
They’ll definitely make people say: WOW!
The portraits are so exciting to shoot and edit, you can’t wait until your next photoshoot!
All you need is some props and a basic camera to produce stunning results like these…
With over 140,000 students, photographers love our training. But don’t just take our word for it, check out what some of them have to say about our and Anya’s training…
anya_anti
anya_anti
anya_anti
anya_anti
anya_anti
"...easy to understand, friendly, and highly helpful material..."
Laila Vindsland
I really enjoy the great explanations, your enthusiasm, and that you show that it is possible to make great photos without the most expensive equipment.
Argun Ozdemir
I am absolutely content and very happy with your simplified easy to understand, friendly, and highly helpful material… you are the best among many tutorials I have inquired.
Sara Garcia Garcia
Anya explains her process step by step in a super clear way. What I love the most is that I found it easy to apply every tip I learned from her to my own work.
Annette Gabriel
Clear and easy-to-understand written content with plenty of photos and examples to back it up. Well-written, easy-to-read e-books covering basic photography knowledge as well as more advanced techniques, hints, and suggestions.
14 Jaw-Dropping Portrait Photos (Value $397)
1. Magical Gardens - 7 Projects
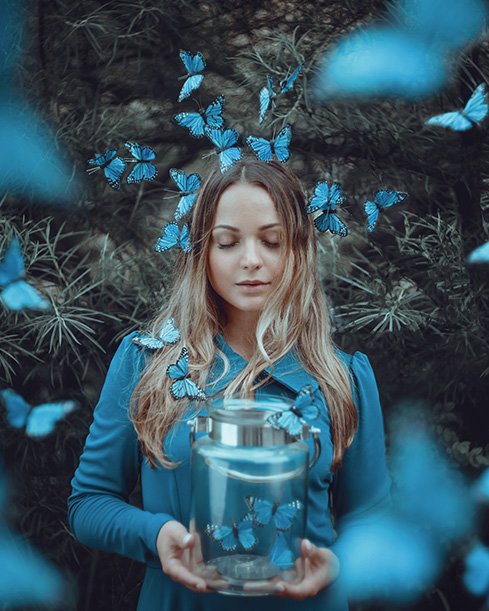
Nothing resembles the beauty of a woman more than flowers.
They are not only highly accessible props but… they change throughout the year resulting in more seasonal photos.
While Anya’s images don’t require long hours of editing, she does process them.
This is an essential step to creating surreal and dreamy portrait photos.
The colors become more vibrant… inanimate objects start to levitate… and magic fills the photo…
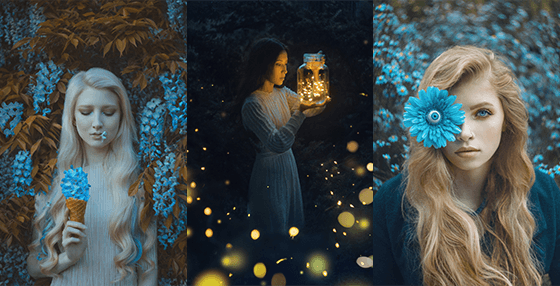
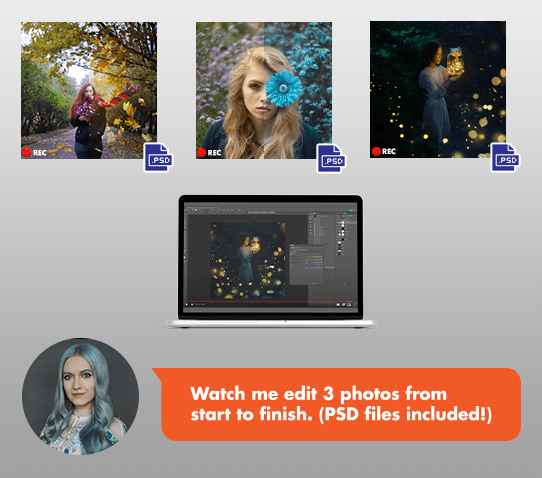
Anya was kind enough to film three bonus videos that show how she processed her most popular images:
Fall Swirl, Eye See You, and Fireflies
Each video is about 20 minutes each. And she also included the PSD files so you can try these methods for yourself.
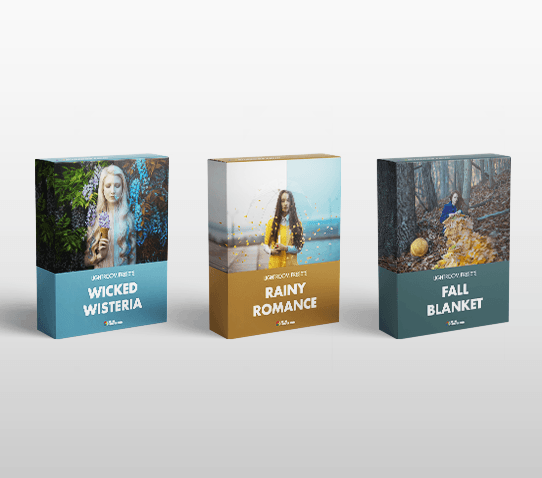
Bonus #2: Anya's Private Presets (Value $49)
Photographers rarely share their Lightroom presets for free with anyone.
But Anya was kind enough to include her private presets for free.
They are called ‘Rainy Romance’, ‘Fall Blanket’, and ‘Wicked Wisteria’.
These allow her to transform her images with a click of a button.
They are yours for free when you purchase ‘Creative Portrait Concepts’.
100%
90 Days Guarantee
I stand behind every product we offer. And having planned and commissioned this ebook, I’m happy to put the ExpertPhotography name on it.
So I’m putting my money where my mouth is with these two guarantees:
Guarantee #1: If you don’t think “Creative Portrait Concepts” is the best $39 you’ve spent on your creative photography… send me an email. I’ll provide you with a full refund.
Guarantee #2: If you DO what’s recommended, and your results aren’t great, I’ll refund double your money. All I ask is that you give it an honest effort. How’s that for fair?
And these guarantees are good for 90 days after purchase!
Here’s The Amazing Deal We’ve Put Together
We’ve created an ebook on creative portrait photography that works for any photography enthusiast.
And to make the method as easy as possible, the eBook contains projects that can be achieved with any camera or equipment you own.
And although the value far exceeds $399.00, we’re offering this for a very limited introductory price.
Creative Portrait Concepts
Create Magical Portraits with Simple Editing Steps
When we release a new product, we always discount the price for the first 500 people. But it’s 500 people only.
For that reason, time is very much “Of the Essence”… I can’t stress the time-sensitiveness of this offer enough.
Not only will the 500 eBooks go quickly, but at that point, the $754.00 discount will expire. And I’m taking the bonuses away too.
Why? The reduced price is to celebrate the launch of the new eBook. The value of the eBook is far higher. It doesn’t make long-term sense to sell it for such a low price.
This is The Forefront of Creative Portrait Photography… Don’t Miss Out!
Anya wrote this ebook under my brief:
“Show us how to create unique portrait photos with tips that any photography enthusiast could follow.”
If you follow her advice, you can avoid time-consuming experimentation. And create mind-blowing portrait photos using a variety of new tools.
So it’s decision time: You can either continue taking photos like you always did… Or you can take Anya’s advice and rapidly improve the photos of creative portrait photography.
This simple $39 ebook is the only thing standing between you and the stunning photos you see throughout this page.
Anya’s methods have worked for other people like you, and it’s 200% guaranteed so you have nothing to lose.
It’s a no-brainer.
Yours Truly,
Josh Dunlop
Founder, Expert Photography
P.S. – You’re getting everything you need to get started with creative portrait photography. AND you’re getting the 3 Bonus “Smoke and Dust” Projects, the 3 Editing Walkthrough Videos with PSD Files, AND the Presets for FREE. But remember – 500 is the magic number.
Questions?
Who is ExpertPhotography?
ExpertPhotography was founded in 2011 by Joshua Dunlop.
Since then ExpertPhotography has grown into the world’s largest photography education website with a variety of online courses, ebooks, cheat sheets, presets, and more.
Everything we do here is to make the process of learning photography easier, so you can experience the same joy we do.
We’ve taught photography to 140,000+ very happy and satisfied students over the past 11 years.
Photography has changed our lives, and we hope we can help it to change yours too.
How long is the ebook?
464 pages. But you don’t need to read it all at once, or even in order. Simply pick an image that interests you, and read the “Enchanted Challenge Cards” to get started.
How long does it take to create each image?
Setting up, capturing, and editing the images take up 2-3 hours only, depending on how much you’d like to experiment with the concepts Anya will show you in the ebook.
What additional gear do I need?
All you need is your camera (or a phone with a good camera). Anya shoots mainly with a Nikon D600 and Nikon Z7 with 50mm and 85mm lenses. But an entry-level DSLR and kit lens would work too. You also need a tripod.
How much experience with photography do I need to have to get started?
It’s helpful to understand how exposure works, but aside from that, everything you need to know is covered in the ebook.
How much post-processing do I need to do?
Anya does rely on Photoshop and Lightroom to transform the look and feel of her images, but she walks you through exactly what you need to do to achieve the same results.
Will you send me a physical copy of this ebook to my address?
No, this is a downloadable file only. That means we can keep it up to date and offer immediate delivery.
What's your refund policy?
You can get a full refund within 90 days of your purchase – no questions asked.