Master Powerful Composition And Capture Stunning Photos Everyday
(With Our eBook & Illustrated Cheat Sheets)
M Sylvain Munsch Sarl Vibrance
I’m surprised by the quality, simplicity, and clarity you put in all this presentation about photography, and all the subjects covered. Amazing way to learn or improve photography skills.
(For illustration purposes only; this is a downloadable ebook)
We know how frustrating it can be to study a book… only to discover you can’t remember half of what you read when it comes time to shoot.
That’s why “Intuitive Composition” comes in two parts:
A 330-page, richly illustrated ebook
50 cheat sheets on the most important topics
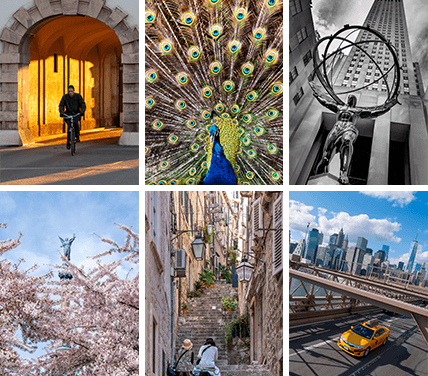
In the ebook, Stuart uses stunning images to walk you through 134 composition rules.
These range from the basic rules of subject placement to colour theory and design.
Then the cheat sheets serve as quick reminders when you’re out shooting.
You can print and slip them into your camera bag (or load them onto your phone), for a full-sized guide on-the-go.
Whether you’re trying to practice a new composition rule, or need a quick brush up on an old one
These cheat sheets will help you master 50 aspects of composition with only a few minutes of study.
7 Big Benefits of Our Composition Cheat Sheets
We worked hard to make photography composition as simple and easy to understand as possible… Here’s how we did it:
✓ The cheat sheets cover a broad range of composition rules across 50 different sheets
✓ Our beautiful designs make complex concepts easy to understand with illustrations
✓ You can print them at home, and fit them easily into your bag
✓ The digital format allows you to load them onto your phone and tablet, so you always have them when you need them
✓ They cover everything you need to know, from the basics to principles of design
✓ They work both as learning tools and as quick refreshers in the field
✓ Each topic is organised so you can easily find what you’re looking for (see below)
Our Illustrations Make Composition Fast and Easy to Learn
A well-designed cheat sheet can make even the most complicated concepts easy to grasp.
And they serve as handy reminders when you’re shooting in the field.
Our team have worked hard to make even the most complex concepts straightforward.
Simple layouts, beautiful images, and helpful illustrations
Just a quick glance… and you’ll know everything you need.
Develop Your Intuition to Spot Stunning Composition
When you understand composition, you no longer think about it… composing your pictures comes naturally to you.
Picture this.
You scan through our ebook and cheat sheets to familiarise yourself with a few rules of composition…
And the next time you go out with your camera, you start to spot them everywhere you go:
Juxtaposition at the bus stop… patterns in buildings… leading lines on the walk home…
You’re not looking for them, but you can’t help but see them.
With the cheat sheets on your phone, you can refresh your memory… and capture stunning images in everyday situations.
The world starts to become a more beautiful place.
Because understanding composition means you can spot scenes that most photographers miss.
Stuart Price
Stuart Price
Stuart Price
Stuart Price
Stuart Price
Stuart Price
Stuart Price
Stuart Price
Stuart Price
Stuart Price
Carolyn Walton
As they say, “a picture speaks a thousand words“. What I loved most was the drawings on the cards which explained exactly what you were talking about which made it super easy to understand.
Argun Ozdemir
I am absolutely content and very happy with your simplified easy to understand, friendly and highly helpful material….you are the best among many tutorials I have inquired.
M Sylvain Munsch Sarl Vibrance
I’m surprised by the quality, simplicity, and clarity you put in all this presentation about photography, and all the subjects covered. Amazing way to learn or improve photography skills.
Glenys Cope
The ebook is very easy to use. I love the pictures showing how to use different facets of photography and it’s not too complicated.
Here's What “Intuitive Composition” Covers
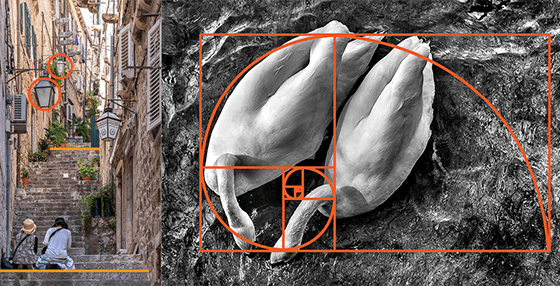
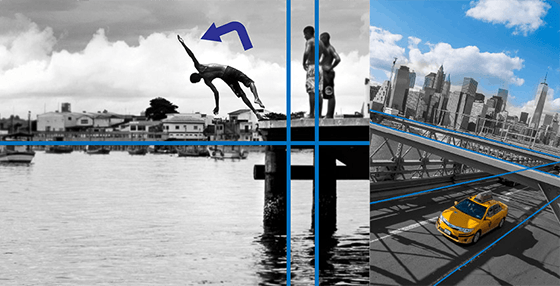
1. Basic Rules + 6 Cheat Sheets
From the rule of thirds to the golden ratio… all composition starts with the basic rules of subject placement.
If you can get this right, you’ll add more depth and interest to your photos. And then you can add more advanced composition rules on top.
Stuart covers 12 rules in detail, including how to use grids and the rule of odds.
2. Framing + 4 Cheat Sheets
Whatever doesn’t add to an image, takes away from it.
If you want your photography to stand out, you have to make decisions about what makes an image look great.
And framing allows you to add context to your photos… while removing anything that may distract from it.
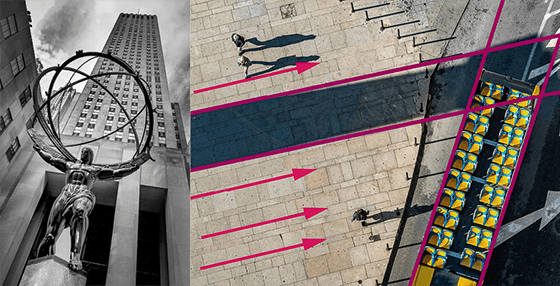
3. Perspective + 6 Cheat Sheets
Shooting from eye level is the most common way to take photos, but you shouldn’t stop there.
Low angle, high angle, birds-eye-view…
A fresh perspective can transform an ordinary scene into an abstract work of art… while including more context about what you’re shooting.
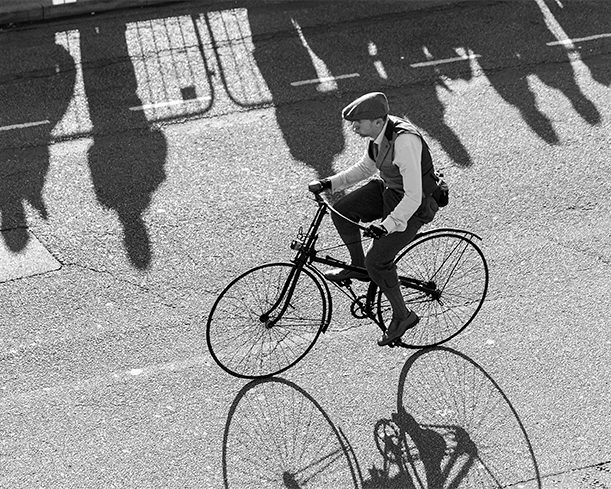
4. Leading the Eye + 14 Cheat Sheets
If you want to tell stories with your photos, you have to lead your viewers’ eyes to the most important part of the frame.
This can range from using triangles and curves to dynamic tension.
As leading the eyes is one of the most important things to master, this topic has the most cheat sheets.
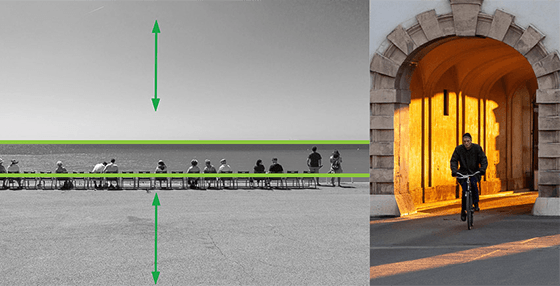
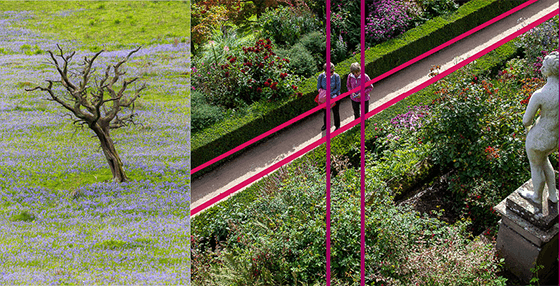
5. Balance + 9 Cheat Sheets
From pleasing and harmonious to uncomfortable and unresolved… there is a sense of balance in every photo we capture.
We have to be intentional about the feelings we want to evoke and balance is one of the best tools for that.
It gives us total control over the impact our images have. And simple tips like symmetry and juxtaposition can make all the difference.
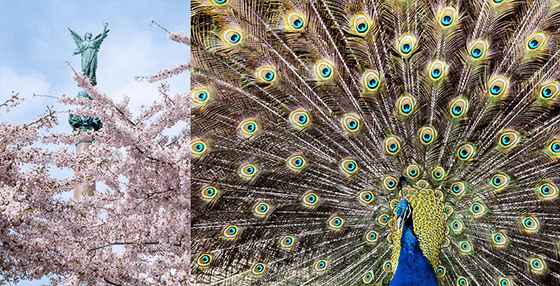
6. Light and Colour + 5 Cheat Sheets
From silhouettes and shadows to light direction and the colour wheel… Light and colour play a huge role in your composition.
If you get the light right, you can turn ordinary scenes into stunning works of art.
Images with strong light and colour can evoke powerful feelings in a viewer – regardless of the contents of the scene.
7. Principles of Design + 5 Cheat Sheets
These are some of the most advanced rules of composition. And they will allow you to take more interesting images.
Looking for patterns… rhythm… harmony… and movement in your scenes will come naturally when you know what to look for.
And you’ll start to see beautiful moments in your everyday life.
What else is included?
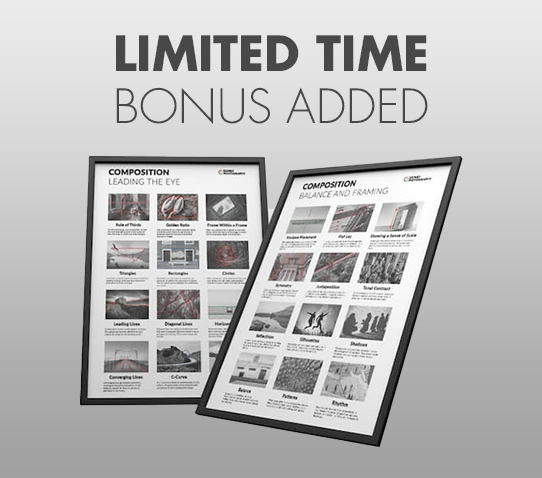
New Bonus: Composition Posters (Value $49)
When you’re getting started with composition, there’s a LOT to remember.
But even the most complicated topics can be simplified with our cheat sheets. And now we want to take it one step further…
That’s why we created downloadable wall posters featuring the most important rules of composition.
From the rule of thirds to patterns… you’ll easily be able to remember the most important concepts!
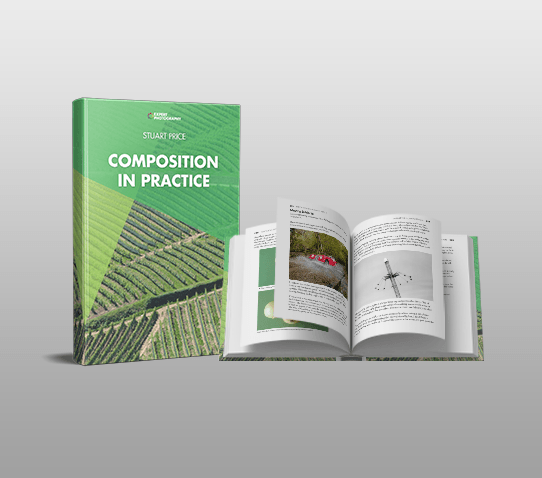
Bonus #1: Composition in Practice (Value $99)
We’ve worked hard to make this ebook as practical as possible… that’s why we created the cheat sheets.
But we wanted to go a step further by adding an extra chapter covering the composition rules in practice.
From portraits and landscapes to architecture and still life… there’s something for everyone in these bonus chapters.
100%
90 Days Guarantee
I stand behind every product we offer. And having planned and commissioned this ebook, I’m happy to put the ExpertPhotography name on it.
So I’m putting my money where my mouth is with these two guarantees:
Guarantee #1: If you don’t think “Intuitive Composition” is the best $39 you’ve spent on your composition mastery… send me an email. I’ll provide you with a full refund.
Guarantee #2: If you DO what’s recommended, and your results aren’t great, I’ll refund double your money. All I ask is that you give it an honest effort. How’s that for fair?
And these guarantees are good for 90 days after purchase!
Here’s The Amazing Deal We’ve Put Together
Stuart and our team have made sure “Intuitive Composition” provides huge value to every photographer.
If we only charged you $1 for every hour of time that went into them, the whole collection would cost more than $1,000.
But you’re not going to pay anything close to that.
Intuitive Composition
Master Powerful Composition
The entire ebook contains:Value
Introduction to Composition in Photography (3 Chapters)
$99.00
Composition Rules (8 Chapters)
$299.00
Photography Principles (4 Chapters)
$199.00
50 Cheat Sheets
$149.00
Total Value:
$746.00
Plus... you're also getting these powerful bonuses:
Composition Posters
$49.00
Composition in Practice(Bonus Chapter)
Portraits, Landscapes, Still Life, Architecture, and more…
$99.00
Total Value:
$148.00
A combined value of $894.00
But you won’t be paying $894.00 today. You won’t even be paying $199.00. Or even half of that.
It’s Yours Today For Just $39🔥
But hurry! Only the first 500 copies are discounted!
Save an amazing $855.00 before the countdown ends.
Get Instant Access to:
“Intuitive Composition”
Yes, I want it! I want access to this ebook right now!
As you can tell, this is a staggeringly low price. But as I said, there is a catch.
When you get your copy, can you email me your feedback on it? A single sentence would be helpful.
And that’s it. Pretty easy “catch”, right?
I just want to get as much feedback as possible before I open this composition toolkit to the public in a couple of weeks’ time.
For that reason, we are only offering this deal to the first 500 customers to get the feedback we need.
You could go out and try to master composition on your own.
But can you imagine how much easier it is when you follow an expertly made ebook and cheat sheets?
This simple $39 product is the only thing standing between you and the stunning photos you want to capture.
Stuart’s methods have worked for other people like you, and it’s 200% guaranteed so you have nothing to lose.
It’s a no brainer.
Yours Truly,
Josh Dunlop
Founder, Expert Photography
P.S. – You’re getting everything you need to get started with child photography. AND you’re getting Composition Posters and Composition in Practice for FREE. But remember – 500 is the magic number.
Questions?
Who is ExpertPhotography?
ExpertPhotography was founded in 2011 by Joshua Dunlop.
Since then ExpertPhotography has grown into the world’s largest photography education website with a variety of online courses, ebooks, cheat sheets, presets, and more.
Everything we do here is to make the process of learning photography easier, so you can experience the same joy we do.
We’ve taught photography to 140,000+ very happy and satisfied students over the past 11 years.
Photography has changed our lives, and we hope we can help it to change yours too.
Is this a digital or physical product?
This is a digital product designed to be printed at home, or loaded onto your smartphone, so you never leave home without them.
What file format are the cheat sheets in?
These cheat sheets and the ebook come in a PDF file format for easy printing and reading.
Is there a limit to how many times I can download them?
No! You will have lifetime access and can download the files as many times as you want.
Will this work for my camera?
Yes! The great thing about mastering composition is that you can take stunning photos, regardless of the camera you use.
Are these cheat sheets right for my level in photography?
Intuitive Compositions works best for photographers who sometimes struggle to memorise every small detail about how composition works. And would like to have the help they need on hand, while they’re out shooting.
They also make a great gift for photography enthusiasts 😉
Will you send me a physical copy of this ebook to my address?
No, this is a downloadable file only. That means we can keep it up to date and offer immediate delivery.
What is the recommended size for printing?
The cheat sheets were designed to be printed in A4 size.
What's your refund policy?
You can get a full refund within 90 days of your purchase – no questions asked.