
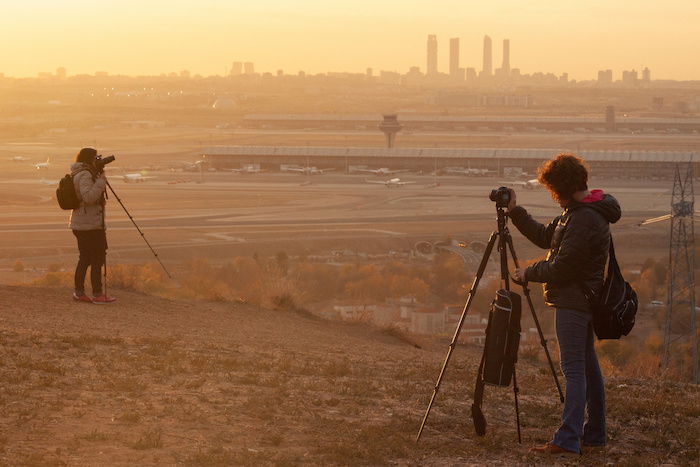
Are you feeling a little uninspired? A 365 photo challenge is one of the best photography ideas to start the year.
And we’ve put together this 365-day calendar so you can start a photo challenge to start your year off right. You can download all 12 calendar months to save all 12 calendar months (featured below) as a reference!
What Is a 365 Photo Challenge Calendar?
A 365 photo challenge is a project where you capture an image every day for a year. But instead of coming up with topics, our calendar and daily prompts tell you what to look for and shoot.
There are many benefits to this project idea. They help to develop your skills by forcing you to look at scenes and objects you might otherwise ignore. This advances your “eye” for exposure, composition, and perspective.
As you are given ideas each day, it forces you to rely on your creativity. It gets you to shoot every day and drags you out of your comfort zone.
You’ll also have to learn about post-processing and how to share images on online media platforms. And by participating in this challenge, you’ll become part of a larger photography community.
A lot of people around the world join in on this. They share their images and look at others’ photos. So this initiates a lot of conversation between photographers.
You can use the #365photochallenge hashtag to make your images accessible to other photographers.
How to Use Our 365 Photo Challenge Calendar
It is very simple to get started. Look at our monthly calendars below, or download them from our list.
You will see a word or a prompt—this is your only clue for what to capture. You may only see a word like “fork,” which leaves how you shoot your image open for interpretation.
It could be a side shot to show the fork abstractly. It could be a simple above shot showing the fork’s lines and curves. Or it could be an image showing only the fork’s shadow.
These prompts are open for interpretation, as everyone will come up with something different. And don’t just take one image. Take a few shots and see what they look like after. Then keep the best one for sharing or printing at a later stage.
This is a fantastic way to work on your photography style. You’ll find many different types of photography on our list. And you can use anything from your smartphone to a digital camera. You can even try film photography.
Using a film camera can be a great way of bringing a twist to this project. You can try shooting only one frame per day. This makes it more exciting. And you can save time because you won’t take hundreds of photos of one topic.
Due to this challenge, you’ll have a lot of images of different subjects. This means that you can extend your artistic portfolio.
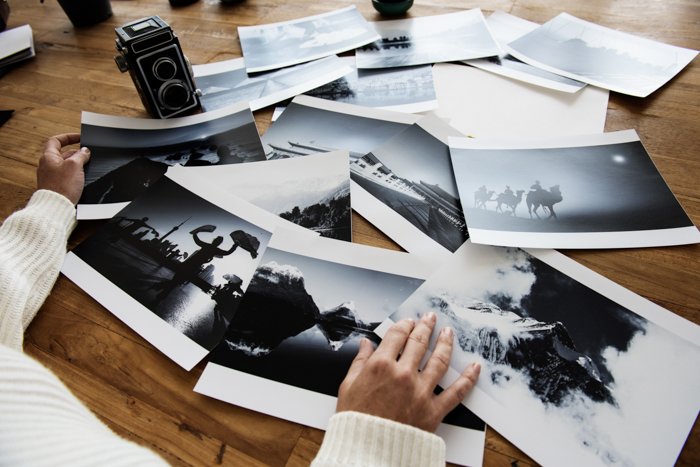
The best thing about these projects is that they will create a body of work. See it through to the end, and you’ll have a range of images you can print as a book. Or you can create a following on your social media!
A photo book can even be one of the best photography gifts for friends and family at the end of the year. So start today!
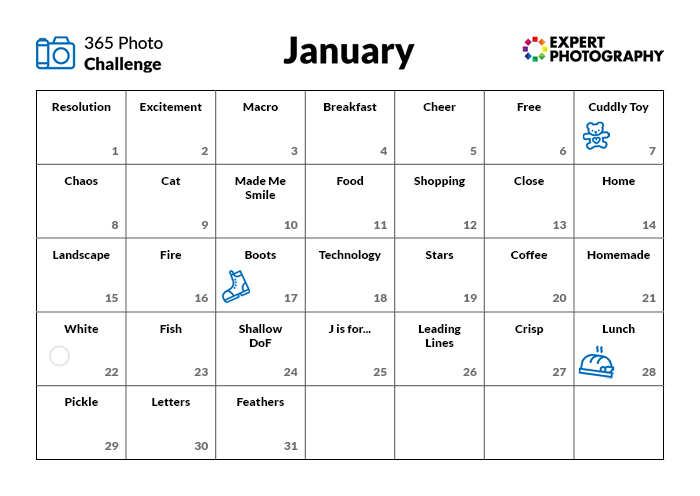
January Photo Challenge
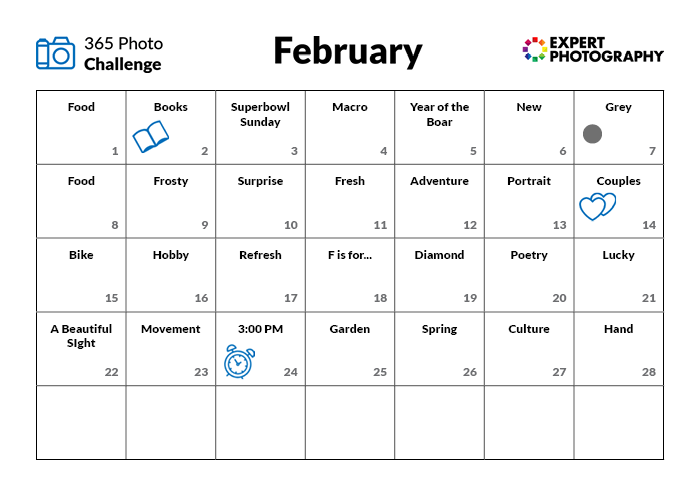
February Photo Challenge
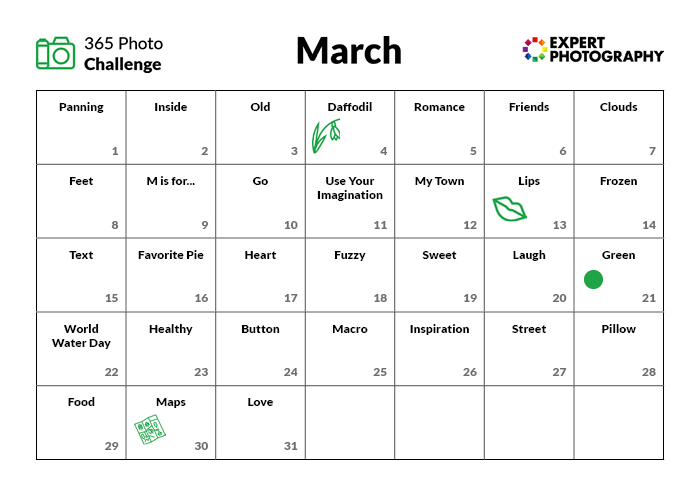
March Photo Challenge
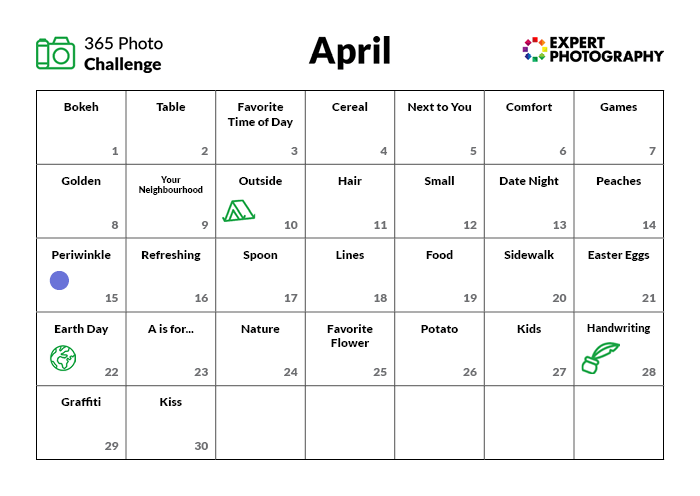
April Photo Challenge
May Photo Challenge

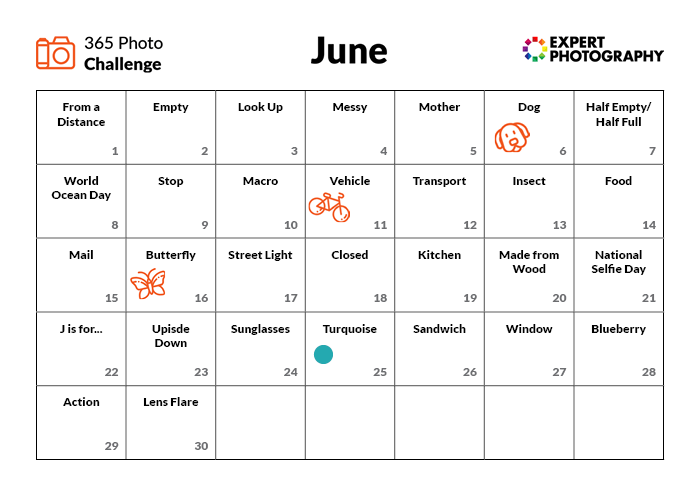
June Photo Challenge
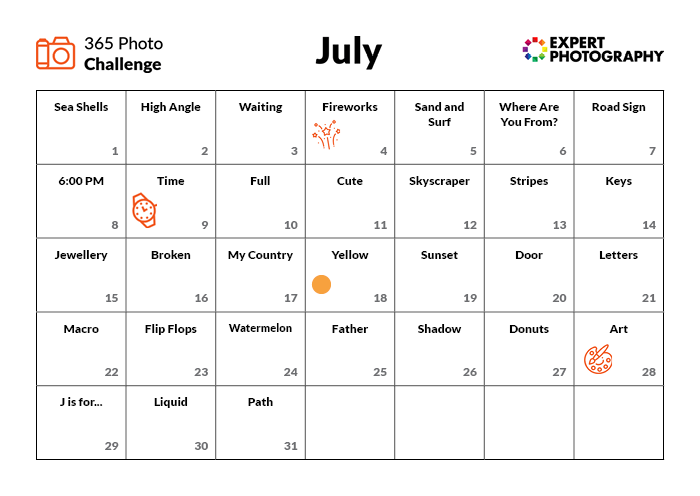
July Photo Challenge
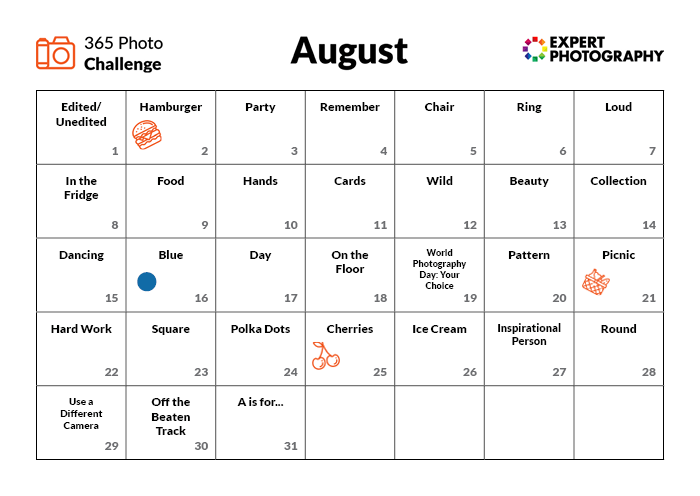
August Photo Challenge
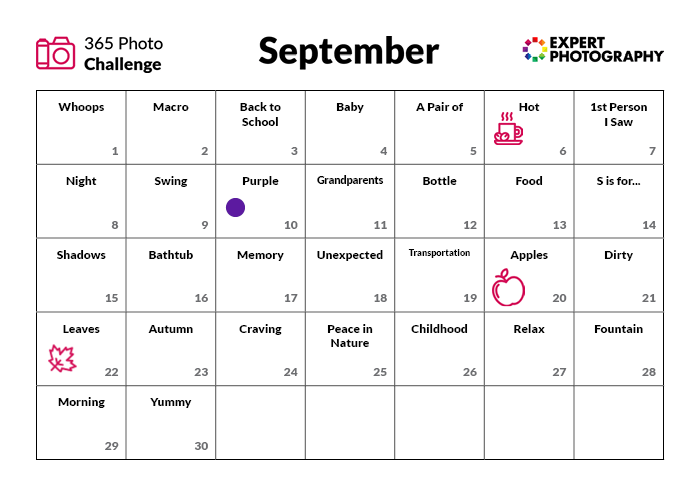
September Photo Challenge
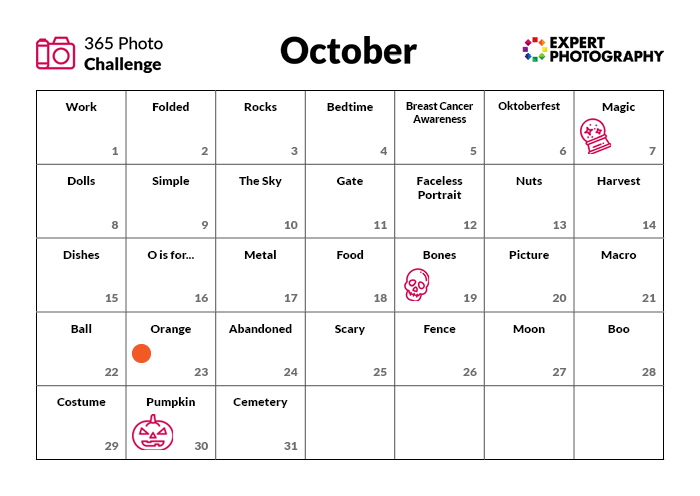
October Photo Challenge
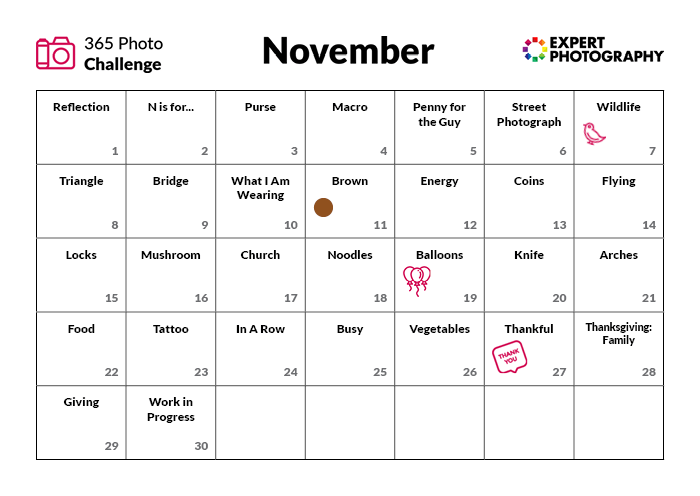
November Photo Challenge
December Photo Challenge

Conclusion
You can learn a lot through this challenge. You can learn new technical details and get familiar with different genres of photography.
Besides this, you can learn a lot about yourself. Which genre do you prefer? What is the hardest task for you? How persistent are you, etc.? Believe us… at the end of the year, you will be really proud of yourself!
