Vertical lines in photography are sometimes overlooked. But that doesn’t mean you should pay them no attention. They make for great leading lines and intersecting points for horizontal lines.
Read on to learn how to make the best of vertical lines in your shots!
What to Know About Vertical Lines in Photography
Vertical lines aren’t as important as horizontal lines, and that’s for one main reason—the way our eyes view an image.
Our eyes scan a photo from left to right, picking up horizontal lines first. But vertical lines are still important. They’re excellent at complimenting horizontal lines, stopping nature as they intersect. This is a great technique for adding tension to a photo.
Vertical lines have a very important place in how we perceive a photo in both photography and art. This perception encompasses a wide range of things, depending on what the photo is of.
A photo of a vertical tree may give the perception of growth or an uplifting sense of something spiritual, as shown in the photo below. A building would give a sense of dominance, power, performance, and stability, such as in the photo below the trees.
It’s all about what’s in the photo and how this interacts with whatever else is in the frame. 

Vertical Lines in Photography with Portraits
The easiest way to present a photo with a strong sense of vertical lines is to shoot in portrait orientation.
The vertical edges being closer together than in landscape accentuate the vertical form. It encourages the viewer to see the lines present within the photo. Keeping vertical lines close to the edges of the composition encourages the viewer to compare the lines in the photo with the vertical frame.
Create Depth with Vertical Lines
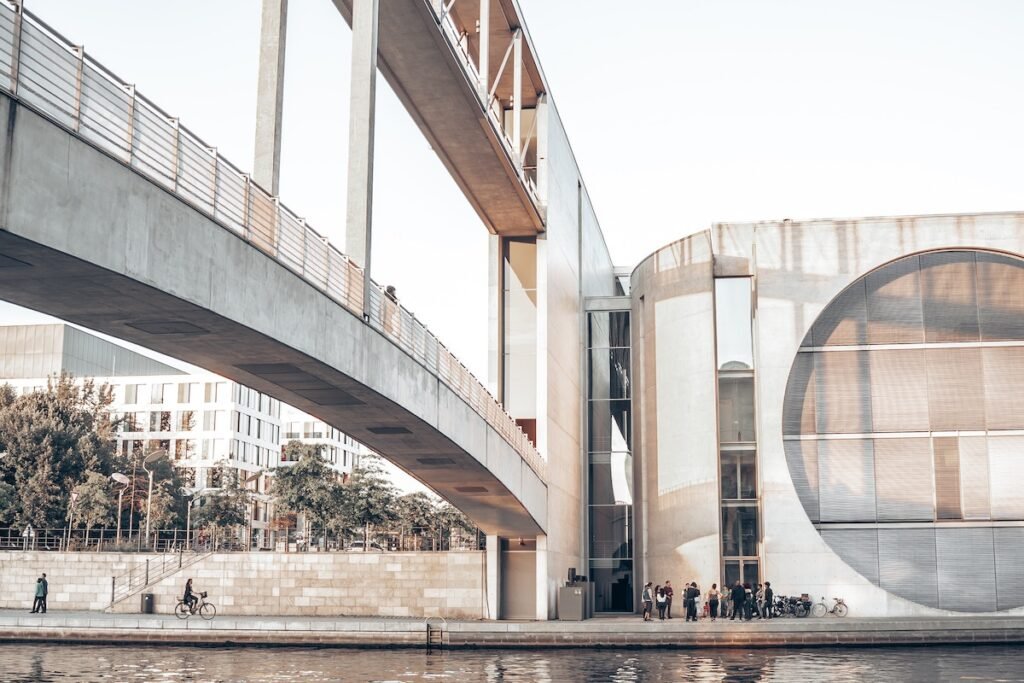
It’s easy to create a sense of depth in a photo with vertical lines. You just have to take two or more objects that we know to be the same (or roughly so) height and place one further away than the other.
Using this technique makes the vertical line appear smaller, providing a sense of depth. The trees and bridge in the photos below demonstrate this.

Use the Correct Perspective
Perspective has a very obvious effect on photos. Using different focal lengths can have a huge effect on how we see lines in a photo.
Up close, the effects are obvious. Like in the photo of the trees along the sidewalk above, the further away the lines get, the closer together they appear to be.
If you’re much further away and using longer focal lengths, the objects appear closer together and, therefore, straighter by comparison.
My tutorial on focal length explains this in depth. But here’s a photo to show you how focal length affects our perception of depth in a photo.
Change Your Positioning
A vertical line can appear to cut a frame in half when placed in the center of the photo, as shown in the image below. This can be a useful technique. But the majority of the time, it’s not how I want my photo to look, as it adds tension and takes away interest.
If you place the subject of a photo slightly to one side, the photo becomes more interesting. Use the slider in the image below to see how the composition changes when you change your position.


Using Vertical Lines in Landscape Orientation
Below is a great example of vertical lines within a landscape orientation composition. They change the feeling from vertical lines continuing vertically out of the frame to vertical lines continuing on a horizontal plane out of the frame.
Because you can’t see where the lines stop repeating, you get a sense of infinity. It feels like the photo couldn’t contain the lines. But they also create a sense of stability from the intersecting horizontal line.
When there are multiple vertical lines in a frame, it’s best to shoot in landscape orientation to contain them. This gives a sense of depth and repetition in the photo.
Had this photo been shot in portrait, it would have lost its sense of repetition and drawn the eye up and down the photo rather than left to right.
Conclusion—Vertical Lines in Photography
Vertical lines in photography can be used for many reasons. They can be leading lines, dividing lines, and even change the perspective of the shot. But misusing vertical lines can create unwanted tension or unease. So it’s always a good idea to use them intentionally.