
A camera for concert photography lets you capture magical moments. It allows you to take photos of your favorite bands and artists as they strut their stuff on stage. Whether you’re a fan in the audience or a photographer in the press pit, having a concert photography camera makes all the difference. So we have cameras for beginners, pros, and everyone in between.
The Sony a7 III is at the top of our list. It’s perfectly suited for concert photography. The image quality is outstanding. You also get a superfast autofocus (AF) system and stunning 4K videos.
The Best Camera for Concert Photography in 2023
With your next gig coming up, you don’t have time to look at every camera in every catalog. That’s why we’ve compiled a list so you can find the best camera for concert photography.
Our list includes cameras for all concert audience members. We have fun fan options that keep things simple. And we have cameras for intermediate and professional music photographers.
You can take a quick look at the list below. Then we’ll look at each camera in detail in the section below.
- Quick and accurate 693-point AF
- Wide ISO range with a low 50 setting
- Outstanding dynamic range and low-light performance
- Records stunning 4K video and has live stream capabilities

- Quality sensor produces detailed and vibrant images even at high ISOs
- Dual Pixel AF with eye detection
- User-friendly touch-to-focus screen
- 900-shot battery life
- Cinema-quality (DCI) 4K video

- Great value for money
- Smaller, compact DSLR body
- Easy to handle and hold
- Long battery life
- Lightweight and portable
- Image stabilization to prevent camera shake
- Dual memory card slots
- Great 4K video capabilities
- Excellent 32.5 MP APS-C sensor
- Dual Pixel AF with eye detection
- Decent frame rate of 10 fps
- Good, 1,300-shot battery life
- Live View and 4K/30p Ultra HD video
- A fixed Leica lens with 30x zoom range
- Subject tracking AF system with face and eye detection
- 4K Photo mode with 30 fps burst
- Built-in optical image stabilizer for camera shake
- Excellent 4K video
- Excellent low-light performance
- 10 fps RAW burst with 200-image limit
- Weather-sealed body
- Long-lasting battery life
- 4K video with ports for external sound recording
- A high dynamic range
- Fast continuous shooting speeds
- Stylish design
- Pocket-sized body
- Flip-up rear LCD touchscreen
- Live-streaming compatible
- User-friendly entry-level camera
- Fantastic image quality
- Excellent low-light performance
- Helpful guide mode for beginners
- Fantastic battery life
- Affordable
- High-quality images
- Fast 30 fps with 1.25x crop
- Small and light
- Stylish retro, black-and-silver look
- Affordable
- Very beginner-friendly
- Excellent image quality
- Built-in image stabilization for video and low light
- Endless list of compatible lenses
- Excellent 4K video features
- Fantastic image quality
- Impressive 45-point AF system
- Built well and nice to handle
- Handy built-in Wi-Fi and GPS
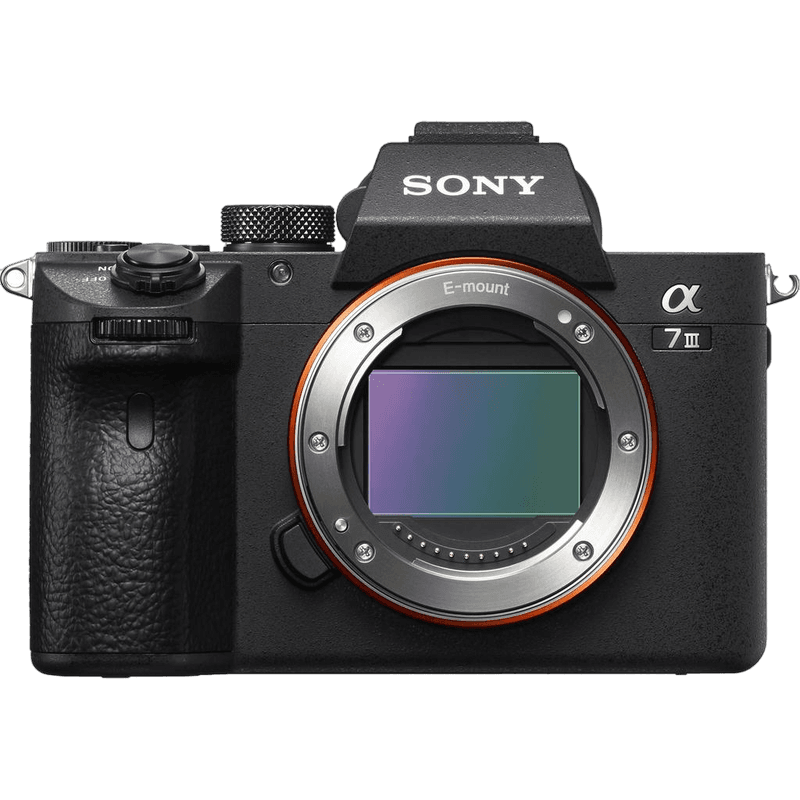
1. Sony a7 III
| Brand |
Brand
Sony
|
| Sensor Format |
Sensor Format
Full Frame
|
| Lens Mount |
Lens Mount
Sony FE
|
| Megapixels |
Megapixels
24.2 MP
|
| In-body Stabilization |
In-body Stabilization
1
|
| Autofocus Points |
Autofocus Points
693
|
| Minimum ISO (Native) |
Minimum ISO (Native)
100
|
| Maximum ISO (Native) |
Maximum ISO (Native)
51200
|
| Video |
Video
1
|
The Sony a7 III is ideal for getting beautiful action shots at concerts. It is a full frame mirrorless camera with more than enough features to help you. It more than meets the demands of concert photography.
The main feature that can help you is its 693-point phase detect AF system that covers 93% of the frame. This extensive range is there, for one thing, to allow you better and easier control. The 425 contrast detection points work well in low-light conditions. They can even function in light as low as -3 EV.
You can specifically select your favorite band member to focus on. And the Sony a7 has some other exceptional features. It can film 4K video and shoot 10 fps (frames per second) in burst mode. Burst mode is great when photographing concerts. It helps ensure you won’t miss that iconic moment.
The a7 is at the top of this list because its extensive features are packed into a small, ergonomic camera body. A camera’s shape and feel go a long way when shooting in difficult circumstances. And it’s small enough to go unnoticed when you go to concerts for the perfect shot.
2. Canon EOS 5D Mark IV
| Brand |
Brand
Canon
|
| Sensor Format |
Sensor Format
Full Frame
|
| Lens Mount |
Lens Mount
Canon EF
|
| Megapixels |
Megapixels
30.4 MP
|
| Autofocus Points |
Autofocus Points
61
|
| Minimum ISO (Native) |
Minimum ISO (Native)
100
|
| Maximum ISO (Native) |
Maximum ISO (Native)
32000
|
| Video |
Video
1
|
Since it first came out, the Canon 5D range has set the professional standard for DSLRs. With incredible image quality and advanced features, the Canon EOS 5D Mark IV is close to the top of the list.
It has improved weather sealing. That makes it perfect for an outdoor festival or open-air arena. But its biggest selling points are the image quality and tonal range you get from its excellent full frame sensor.
You have a 61-point AF system. It works well in low light and tracks subjects as they move. You also get fantastic video features. This means you can produce high-resolution concert videos.
The ISO range is another huge benefit of the 5D Mark IV. Canon does a great job of handling noise in low-light situations. Other great details are the Wi-Fi connectivity and built-in GPS. GPS keeps track of where you take each photo. That’s a handy feature if you’re on tour.
3. Nikon D7500
| Brand |
Brand
Nikon
|
| Sensor Format |
Sensor Format
APS-C
|
| Lens Mount |
Lens Mount
Nikon F DX
|
| Megapixels |
Megapixels
20.9 MP
|
| Autofocus Points |
Autofocus Points
51
|
| Minimum ISO (Native) |
Minimum ISO (Native)
100
|
| Maximum ISO (Native) |
Maximum ISO (Native)
51200
|
| Video |
Video
1
|
The Nikon D7500 is a perfect intermediate-level camera for concert photography. It has an APS-C sensor, so it does not give you as much tonal range as a full frame camera. But it has some great features that could put it above many full frame DSLRs.
One of these features is its excellent autofocus system. The system has a facial recognition component. It’s a helpful feature if you’re trying to snap a specific member of a band. It uses 51 focus points across the frame. It’s fast, responsive, and works well in concert lighting.
Like most great DSLRs nowadays, you need good video capabilities. This is especially true when your favorite song comes on. The Nikon D7500 provides great 4K capabilities and electric image stabilization (EIS). You also get a burst speed of 8 fps.
You may find that the Nikon D7500 struggles in low-light conditions. But this only happens toward the end of its ISO range. And it is definitely evident in its extended ISO range.
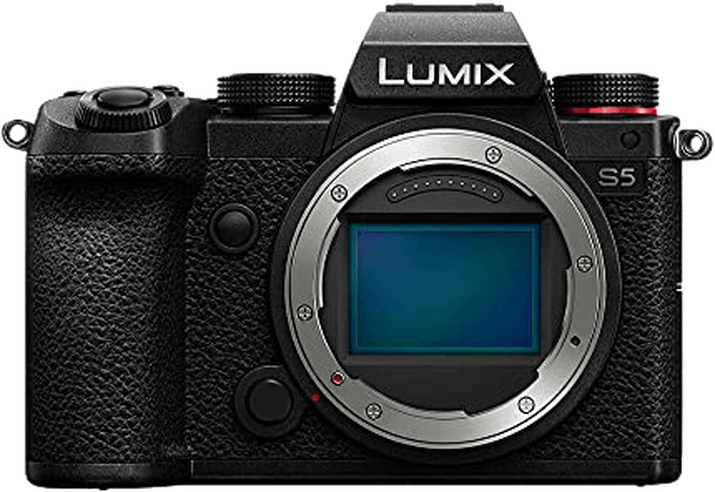
4. Panasonic Lumix S5
| Brand |
Brand
Panasonic
|
| Sensor Format |
Sensor Format
Full Frame
|
| Lens Mount |
Lens Mount
Leica L
|
| Megapixels |
Megapixels
24.2 MP
|
| In-body Stabilization |
In-body Stabilization
1
|
| Autofocus Points |
Autofocus Points
225
|
| Minimum ISO (Native) |
Minimum ISO (Native)
100
|
| Maximum ISO (Native) |
Maximum ISO (Native)
51200
|
| Video |
Video
1
|
The Panasonic Lumix S5 is a brilliant hybrid camera for concert photography. It produces excellent images. And the video results are just as impressive. It’s also more compact than a full frame DSLR. But despite its size, it’s bursting with fantastic features.
I like the idea of its AI focus detection. This new feature allows you to set the camera to look for specific details to focus on. It works for faces, eyes, bodies, and animals. But if that’s not what you want, you still have 225 AF points.
Panasonic also provides dual-image stabilization and a flip screen. These two features work in harmony for concert photography. Imagine you’re far back in the crowd and have the tallest people in front of you. Simply tilt your LCD screen and lift your camera as high as possible before taking your shot. The Panasonic Lumix S5‘s image stabilization should account for any camera shake.
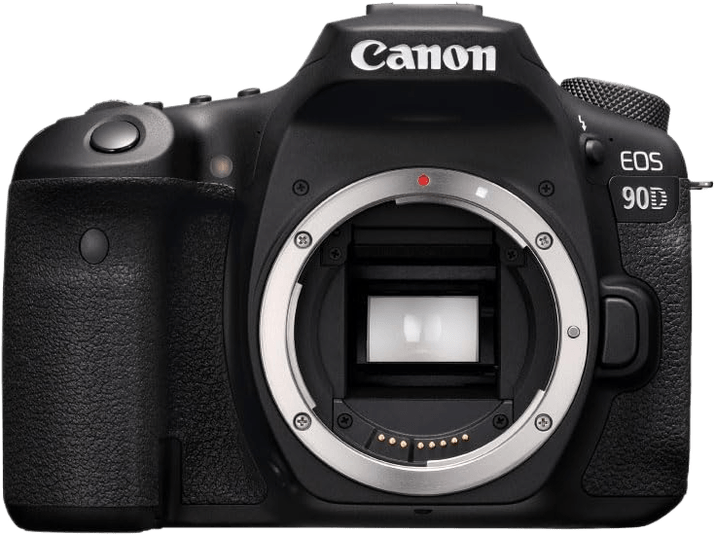
5. Canon EOS 90D
| Brand |
Brand
Canon
|
| Sensor Format |
Sensor Format
APS-C
|
| Lens Mount |
Lens Mount
Canon EF/EF-S
|
| Megapixels |
Megapixels
33 MP
|
| Autofocus Points |
Autofocus Points
45
|
| Minimum ISO (Native) |
Minimum ISO (Native)
100
|
| Maximum ISO (Native) |
Maximum ISO (Native)
25600
|
| Video |
Video
1
|
The Canon 90D is a powerful APS-C DSLR camera. It’s one of the best cameras for sports and wildlife photography. And the same specs and features work pretty well for concert photography.
The way the camera handles focus tracking is what gives it its edge. This allows you to keep your eyes on your subject the whole time. The powerful 32.5 MP sensor is a great feature. It produces some of the highest-quality images of any APS-C DSLR. It beats many full frame cameras, too.
The 90D can shoot up to 10 fps in burst mode. And it has a flip screen for unconventional shooting angles. It is a modern DSLR, so you also get Wi-Fi and Bluetooth capabilities.
It is one of the best concert photography cameras but can struggle a little bit with noise. But it is only evident when pushing the ISO range quite far. The Canon EOS 90D performs really well in the unique lighting conditions of a pop concert.
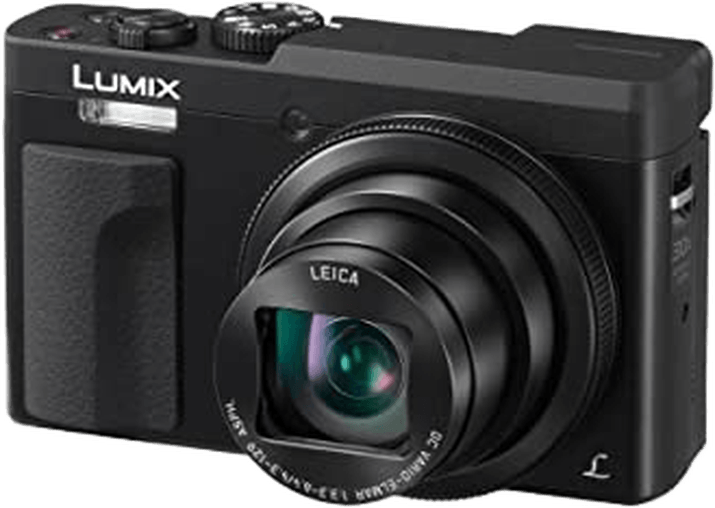
6. Panasonic Lumix DC-ZS70
| Brand |
Brand
Panasonic
|
| Sensor Format |
Sensor Format
1/2.3”
|
| Lens Mount |
Lens Mount
Fixed
|
| Megapixels |
Megapixels
20 MP
|
| In-body Stabilization |
In-body Stabilization
1
|
| Autofocus Points |
Autofocus Points
49
|
| Minimum ISO (Native) |
Minimum ISO (Native)
80
|
| Maximum ISO (Native) |
Maximum ISO (Native)
3200
|
| Video |
Video
1
|
The Panasonic Lumix DC ZS70 is a great entry-level camera for concert photography. It’s a point-and-shoot camera body that easily fits in your pocket.
You don’t need a camera bag for this one. That leaves you free to dance and mosh to your heart’s content. But you can still snap a photo when you want.
With 20.3 MP, you have enough power for some high-resolution shots. And the Lumix ZS70 seems like a fully automatic camera. But you can still control all the settings like a manual camera.
The zoom lens is another bonus for going to a concert. It’s a Leica lens, so there’s no doubt about the quality. And it gives you a 30x zoom. You can shoot detailed shots of the stage even if you’re in the back row.
You can also shoot videos. And they’re recorded in lovely 4K quality. That knocks most smartphone footage out of the water. And with the Lumix ZS70‘s zoom range, it’ll look like you were in the front row.
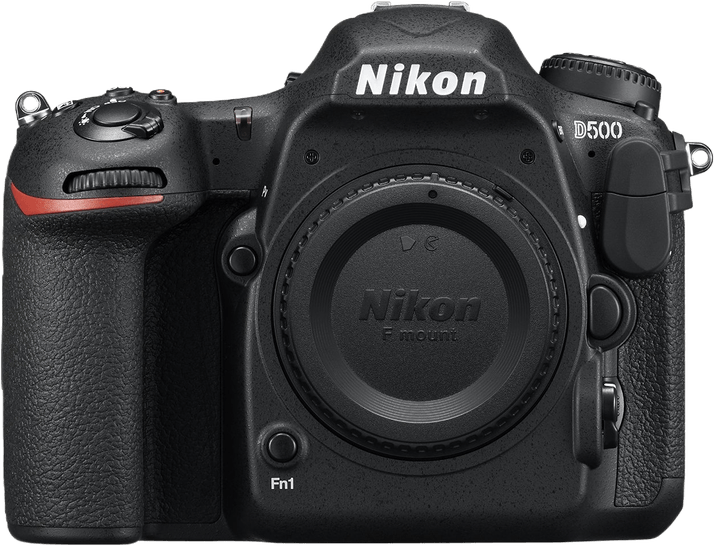
7. Nikon D500
| Brand |
Brand
Nikon
|
| Sensor Format |
Sensor Format
APS-C
|
| Lens Mount |
Lens Mount
Nikon F DX
|
| Megapixels |
Megapixels
20.9 MP
|
| Autofocus Points |
Autofocus Points
153
|
| Minimum ISO (Native) |
Minimum ISO (Native)
50
|
| Maximum ISO (Native) |
Maximum ISO (Native)
51200
|
| Video |
Video
1
|
The Nikon D500 has been around since 2016. But despite its age, it continues to be one of the best cameras for concert photography. It is an APS-C DSLR with high-end capabilities.
The autofocus system is one of the top selling points of the D500. It has 153 AF points to choose from. It’s quick to find focus and track moving subjects. And concert photographers will love how it operates with precision in near darkness.
The D500 has all the must-have features for concert photography. It can shoot stunning 4K concert videos. And it has excellent weather sealing for outdoor gigs and festivals. It isn’t the cheapest camera on the list. But it’s a worthy investment for a serious concert photographer.
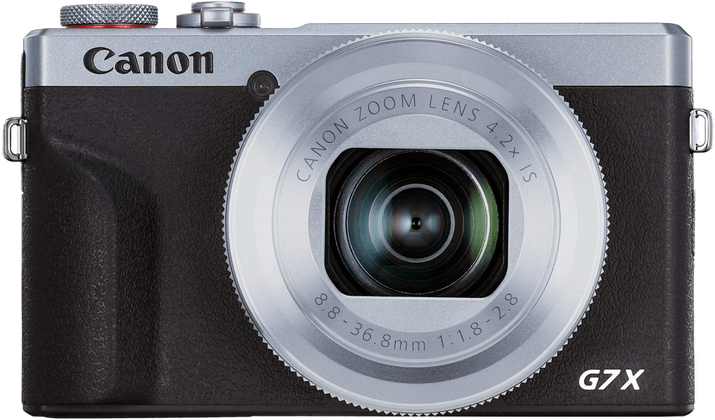
8. Canon Powershot G7 X Mark III
| Brand |
Brand
Canon
|
| Sensor Format |
Sensor Format
1"
|
| Lens Mount |
Lens Mount
Fixed
|
| Megapixels |
Megapixels
20 MP
|
| In-body Stabilization |
In-body Stabilization
1
|
| Autofocus Points |
Autofocus Points
31
|
| Minimum ISO (Native) |
Minimum ISO (Native)
125
|
| Maximum ISO (Native) |
Maximum ISO (Native)
12800
|
| Video |
Video
1
|
The Canon PowerShot G7 X Mark III is a fantastic compact camera for concerts and music events. It gives you excellent photos and videos and is packed full of advanced photography features. And all that comes in a pocket-sized package.
The 1-inch CMOS sensor gives you a 20.1 MP image resolution. That’s a big step up from a smartphone camera. You’ll immediately notice the higher standard in your pictures.
The camera has a fixed lens. That means there’s no extra cost of buying lenses. And it gives you a decent 4.2x zoom range, which gets you closer to the musicians. And it has built-in optical image stabilization. That keeps your images sharp, reducing signs of camera shake.
You can shoot 4K videos. And the LCD screen rotates, making it easier to take tricky shots. It also makes selfies and vlogs easier to shoot.
There’s a port for an external mic. That gives you professional sound recording options. And there’s USB charging so you can stay topped up when you’re on the go. That makes the Canon G7 X Mark III a good choice for music festivals.
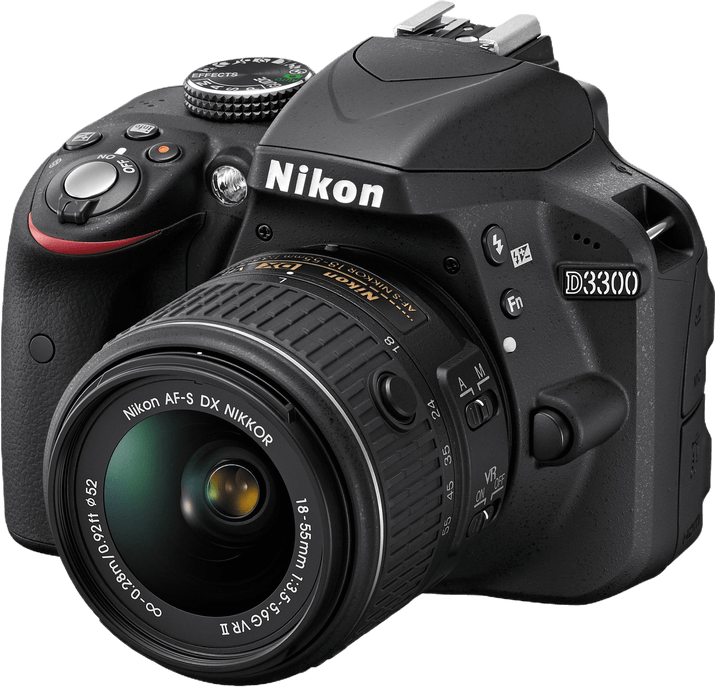
9. Nikon D3300
| Brand |
Brand
Nikon
|
| Sensor Format |
Sensor Format
APS-C
|
| Lens Mount |
Lens Mount
Nikon F DX
|
| Megapixels |
Megapixels
24.2 MP
|
| Autofocus Points |
Autofocus Points
11
|
| Minimum ISO (Native) |
Minimum ISO (Native)
100
|
| Maximum ISO (Native) |
Maximum ISO (Native)
12800
|
| Video |
Video
1
|
The Nikon D3300 is one of the best entry-level DSLR cameras on the market. It’s compact for a DSLR and has a powerful sensor. And the solid AF and low-light performance make it a good choice for concert photography.
The D3300 has a straightforward interface. It’s easy to remember where the essential buttons are in low-light situations. You can find the function you need in no time, so you don’t miss any magic moments.
The 24.2 MP resolution is strong. And detail and colors in low light are excellent for a DSLR at this price. You can push the ISO a few stops without fear of digital noise.
The Nikon D3300 has a bunch of special effects presets. Effects are a fun way to add something extra to your concert photography.
The camera also has a 5 fps burst setting. That’s not super quick, but it’ll help you when the on-stage action is at its hottest.
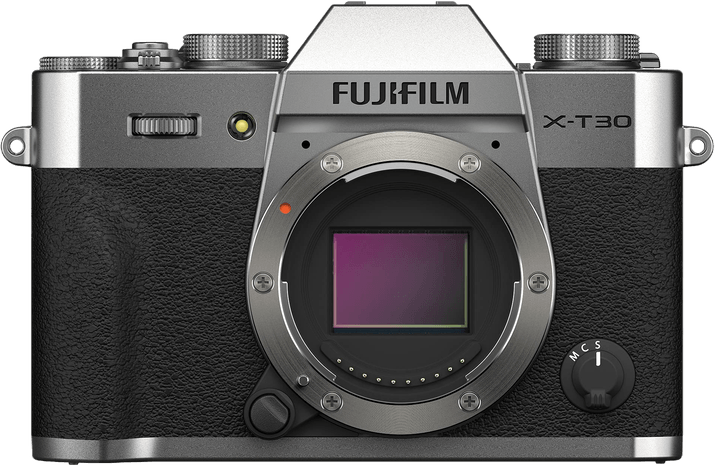
10. Fujifilm X-T30 II
| Brand |
Brand
Fujifilm
|
| Sensor Format |
Sensor Format
APS-C
|
| Lens Mount |
Lens Mount
Fujifilm X
|
| Megapixels |
Megapixels
26 MP
|
| Autofocus Points |
Autofocus Points
425
|
| Minimum ISO (Native) |
Minimum ISO (Native)
160
|
| Maximum ISO (Native) |
Maximum ISO (Native)
12800
|
| Video |
Video
1
|
Intermediate photographers should check out the Fujifilm X-T30 II. It’s a fantastic mirrorless camera. And the features make it a good option if you love concerts and music events.
It has an APS-C sensor with a 26.1 MP resolution. You can expect exceptional-quality images. And the strong dynamic range means you get details from the light and dark areas of the stage. You also get noise-free images when using higher ISO levels.
The AF system is perfectly suited to concerts. It’s fast and responsive in low light. And it continues to track your subject even in inconsistent light. And you get the same responsive AF when shooting video.
The video quality is 4K. And you have Full HD slow-motion video modes for more creative video options. You also get a rapid continuous shooting speed for action stills.
The Fujifilm X-T30 II has 18 film simulation modes. They give your concert photography a retro look your peers will envy. Your photos will look like they’ve come out of a 1977 edition of Rolling Stone.
11. Olympus OM-D E-M10 Mark IV
| Brand |
Brand
Olympus
|
| Sensor Format |
Sensor Format
Micro Four Thirds
|
| Lens Mount |
Lens Mount
Micro 4/3
|
| Megapixels |
Megapixels
20 MP
|
| In-body Stabilization |
In-body Stabilization
1
|
| Autofocus Points |
Autofocus Points
121
|
| Minimum ISO (Native) |
Minimum ISO (Native)
200
|
| Maximum ISO (Native) |
Maximum ISO (Native)
6400
|
| Video |
Video
1
|
The Olympus OM-D E-M10 Mark IV is a Micro Four Thirds (MFT) camera. And MFT cameras have a smaller sensor than APS-C and full frame cameras. But there’s no compromise on quality. They deliver on stills and video and they’re packed with features.
The MFT sensor gives you a 20 MP resolution. And you can record 4K videos. There’s a 5-axis image stabilization system that helps in low light. It allows you to shoot with slower shutter speeds without the risk of camera shake.
You won’t miss any key moments with the 121-point AF system and 15 fps burst function. It also has a flip screen to help you shoot from those hard-to-reach angles. The camera is so lightweight and compact that it fits in a small bag. You won’t need a specialist camera bag.
The OM-D E-M10 Mark IV has a selection of filters and artistic shooting modes. They give more creative options to help your concert photos stand out. And they’re all built-in, so you can add them in-camera. No post-processing is needed.
12. Canon EOS 6D Mark II
| Brand |
Brand
Canon
|
| Sensor Format |
Sensor Format
Full Frame
|
| Lens Mount |
Lens Mount
Canon EF
|
| Megapixels |
Megapixels
26.2 MP
|
| Autofocus Points |
Autofocus Points
45
|
| Minimum ISO (Native) |
Minimum ISO (Native)
100
|
| Maximum ISO (Native) |
Maximum ISO (Native)
40000
|
| Video |
Video
1
|
The Canon EOS 6D Mark II is a fantastic option for your first full frame camera. It’s compact for a full frame DSLR. And it has a well-defined selection of buttons for its interface. It might be a bit advanced for absolute beginners. But it’s ideal for concert photographers looking for an upgrade.
Canon handles digital noise in dark environments remarkably. So this camera is built for concert photography. Its vari-angle LCD screen also helps, allowing you to see your image from above your head.
The 26.2 MP resolution gives you great image quality. You’ll see the difference compared to beginner cameras. The ISO range also gives you good options for low-light photography.
The Canon EOS 6D Mark II has full Wi-Fi, Bluetooth, and GPS capabilities. This makes it quick and easy to sort through your photographs. On top of this, you can also record Full HD videos.
Conclusion: Best Camera for Concert Photography
Concert photography has a unique set of demands. It isn’t easy to get shots that truly represent the performance and atmosphere of a live show. But finding the best camera for concert photography changes everything. You get images with all the power and energy of the concert you attended.
We’ve included cameras for all skill levels and budgets. There are entry-level DSLRs and point-and-shoot cameras for enthusiastic fans. And there are mirrorless cameras for those who take concert photography more seriously.
The Sony A7 III is the best camera for concert photography. It’s a professional-grade camera. And it delivers outstanding images even in the tough conditions of a concert. The dynamic range and low-light performance are brilliant. Plus, you have a sophisticated AF system for tracking the stars on stage.