
As a photographer, finding a good photo editing software is vital.
The software that you use determines your workflow. If photography is your business, your workflow can impact your profit margins.
While Adobe leads the way with Lightroom and Photoshop, there are some good alternatives.
RawTherapee is not only an alternative to Lightroom or Photoshop, but it’s also free! Can it replace the leading software, though? Let’s explore with our RawTherapee review.
What Is RawTherapee?
RawTherapee is a free, open-source editing software that rivals Lightroom. It allows you to work with your RAW files in a non-destructive way.
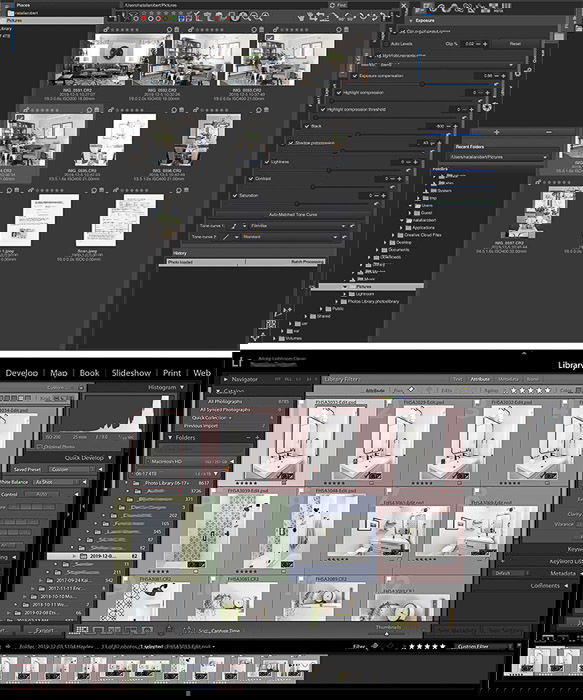
You can apply color corrections, photo edits, and retouching. The RawTherapee interface mimics Lightroom in many ways but goes much more in-depth with color correction.
How Does RawTherapee Compare to Lightroom?
The first difference is that the RawTherapee interface is not as user-friendly.
Lightroom shows the separate tabs and buttons for primary functions. RawTherapee lacks the same clarity.
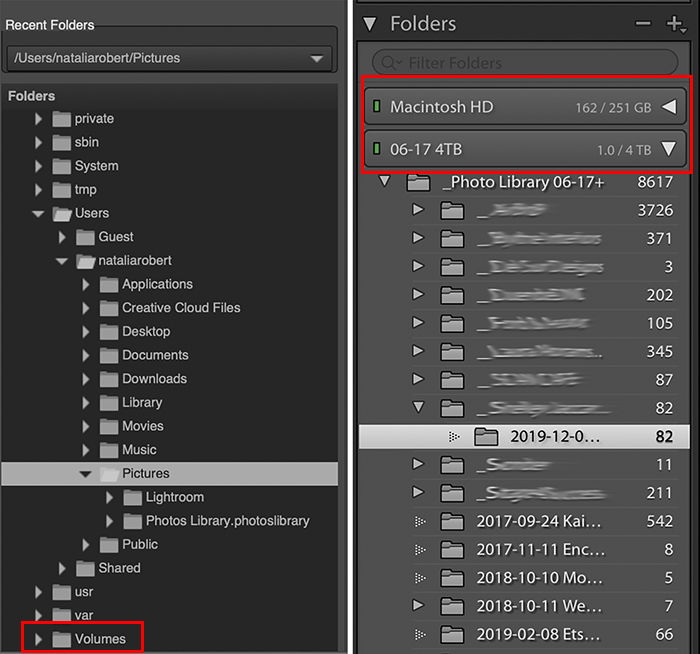
The folder organization in RawTherapee is also not as intuitive as in Lightroom. This can make RawTherapee a bit confusing to get started.
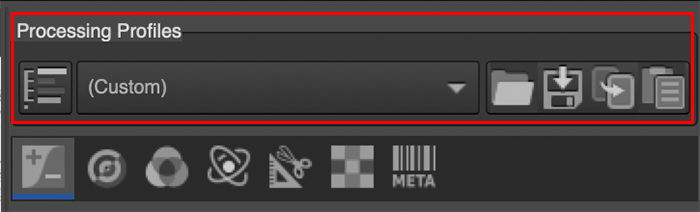
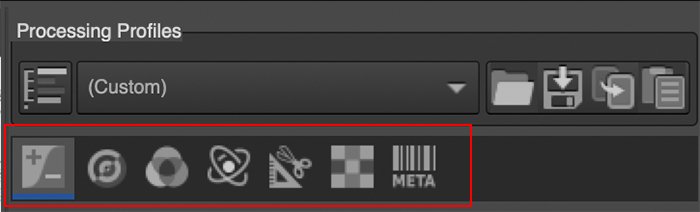
You aren’t able to use Lightroom preset files, but RawTherapee does offer its own version of presets.
Processing Profiles are a way to save your settings to be later applied to other photos.
You can load or save processing profiles within the Editor tab, at the very top of the right column. Processing profile files are saved as .pp3 file types.
Basic RawTherapee Interface Walk-Through
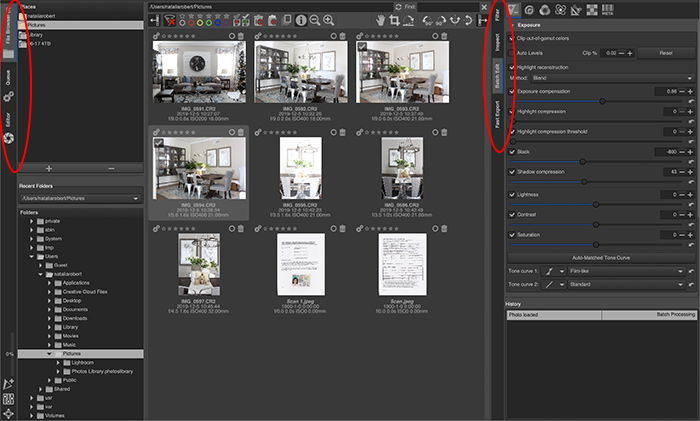
File Browser
The File Browser tab is where you navigate your folder to select the photos. You can save folders into the Places section if it’s a folder that you often access for photos.
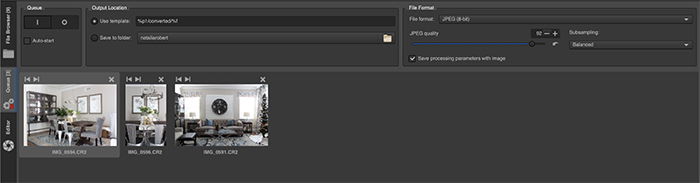
Queue Tab
The RawTherapee Queue tab is where the photos waiting to be exported are held. Once you click to export, the images get sent here and are held in this tab.
You then go to the tab to finalize the exporting details and complete the exporting process.
Editor Tab
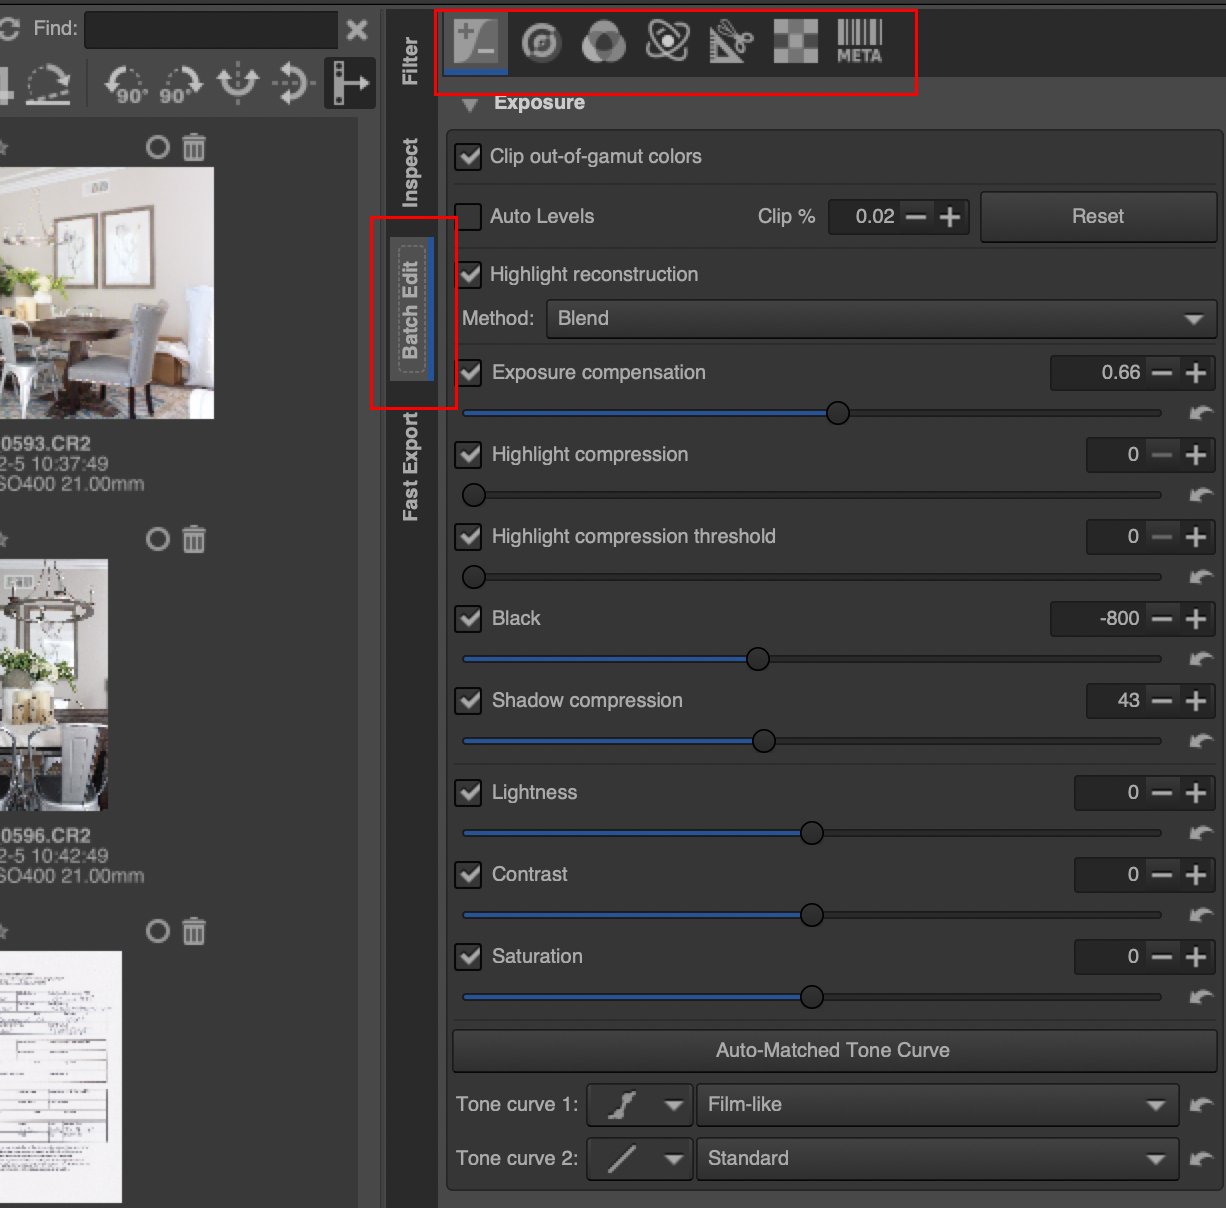
There are seven options within the RawTherapee editor tab:
- Exposure – Adjust settings for exposure compensation, tone mapping, highlights, shadows and more.
- Detail – The detail section offers adjustments on settings such as sharpening, noise reduction, and edges.
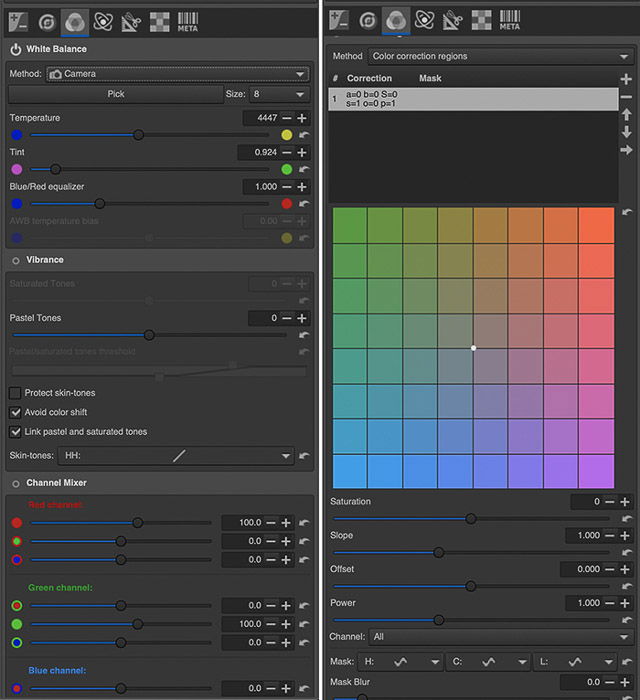
- Color – White balance, the channel mixer, color toning, color management, and film simulation.
- Advanced – Tone mapping, algorithms, and wavelet levels
- Transform – Crop, resize, lens correction, resolution
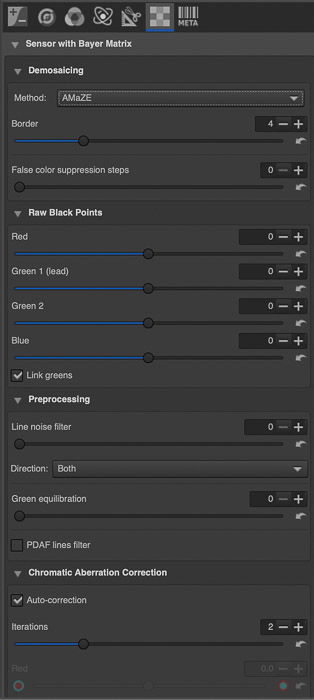
- RAW – Demosaicing, chromatic aberration corrections, hot or dead pixel filters
- Metadata – EXIF data for the file
Benefits of RawTherapee
The main benefit of RawTherapee is that it is free software. There’s no registration or sign-up of any kind, and the download is quite simple.
The fact that RawTherapee is free is an excellent draw for photographers who are testing photo editing software.
While RawTherapee has almost the same photo editing power as Lightroom, it excels in color correction. The adjustments you can make are to a deeper level. There are endless color correction possibilities.
Beyond color correction, RawTherapee also provides in-depth options to RAW file corrections.
This includes things such as pre-processing, pattern noise and chromatic aberration correction.
Batch editing is simple to do within the File Browser tab. This is a great time-saving benefit for quick editing needs.
This batch editing section doesn’t include the full scope of options that are within the Editor tab. But it’s ideal for quick jobs that need minimal adjustments.
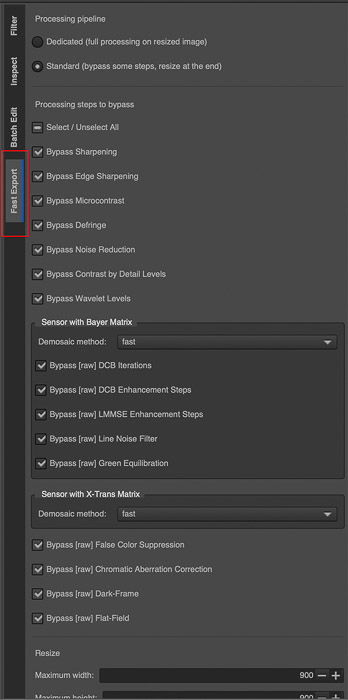
RawTherapee also offers a great variety of settings in the Export tab.
Within the File Browser tab, there’s an Export tab on the right column. This tab is where you export the image file, but it lets you select specific types of edits to exclude from the export.
While this isn’t something that you will need, it’s an excellent feature to have if you want to show options for a photo.
RawTherapee Drawbacks
The main drawback to RawTherapee is that the interface is not very user-friendly. The learning curve is greater than most current major editing software options.
In addition to the confusing interface, the information and support for RawTherapee are lacking. When troubleshooting, there are not many resources.
The download does include a manual for the software, but the manual is not the easiest to manoeuvre. Your best bet is to go to online forums for responses to your exact issue.
Beyond the lack of user-friendly features, there are a few more drawbacks to consider.
RawTherapee is overall slower to respond than Lightroom or Photoshop. When making adjustments with the sliders, the results are not instant. While this isn’t a big issue when editing photos for fun, it can become a real issue when editing for business.
One significant feature that is lacking in RawTherapee is organizational capabilities.
Within Lightroom, you can move photos, organize folders, and apply or search for keywords. RawTherapee doesn’t have these capabilities yet and would benefit from adding them.
Finally, the process of exporting is not as streamlined as it could be, making the process a bit confusing at first. Naming options are also a bit limited, and having the exporting so broken up does make the process choppy.

RawTherapee Review Conclusion
RawTherapee is a fantastic option when looking for free photo editing software alternatives.
The possibilities it offers are far-reaching, but it is not yet a comparable Lightroom alternative.
The user interface and workflow still need work. RawTherapee lacks the organizational aspect of Lightroom and the retouching abilities of Photoshop.
Finally, the lag during editing presents a problem when creating a smooth workflow.
If your budget allows, Lightroom and Photoshop are still the top choices to consider for your photo editing needs.
