
The best flash drive for iPhone should have enough space for your needs. Plus, it should be certified, and you may want it to be password-protected. But don’t worry, we’ve got you covered. We rounded up the top flash drives to back up photos and more from your iPhone!
We’ve got something for everyone. Our top pick is this iDiskk photo stick. It connects to almost any iPhone, has 256 GB of storage, and makes file transfer a breeze. But keep reading to find out which flash drive best suits your needs.
What Is the Best Flash Drive for iPhone?
The best flash drive for iPhone should offer ample storage capacity and reliable data transfer speeds. It should also be compatible with the latest iPhones and Apple operating systems (iOS).
We list options with features like encryption and easy file management to suit your needs. After summarizing our top picks, we’ll review our recommendations more thoroughly.
- Specifically made for iPhone (MFI certified)
- Also comes with 128, 512 GB, or 1 TB storage capacity
- Easy to back up photos, videos and contacts
- Plug and play, no Wi-Fi setup required
- Compact and lightweight
- Automatic cloud backup for photos and videos
- Also comes with 64 or 256 GB storage
- Quickly transfers files between iPhone and computer
- Password protected for added security
- Slim and portable design
- Water-resistant, shockproof, high-temp resistant
- Fast read-and-write speeds for quick data transfers
- One-click data transfers with iPhone
- Connect via USB, Lightning, and Type C
- Encryption options for better data security
- Also comes cheaper with 64 GB capacity
- Fast transfer speeds
- Works as USB to Lightning connector
- Allows charging while transferring files
- Compact and portable
- MFI certified with 18-month warranty
- Also comes with 256 or 512 GB memory
- High-speed data transfer
- Plug and play on both iPhone and iPad
- Ultra-compact, slim design
- Simple one-click first-time backup
- Also comes in 16, 32, and 256 GB
- Smart backup automatically continues from last one
- Supports multiple platforms
- Portable and easy to use
6 Best iPhone Flash Drives in Detail
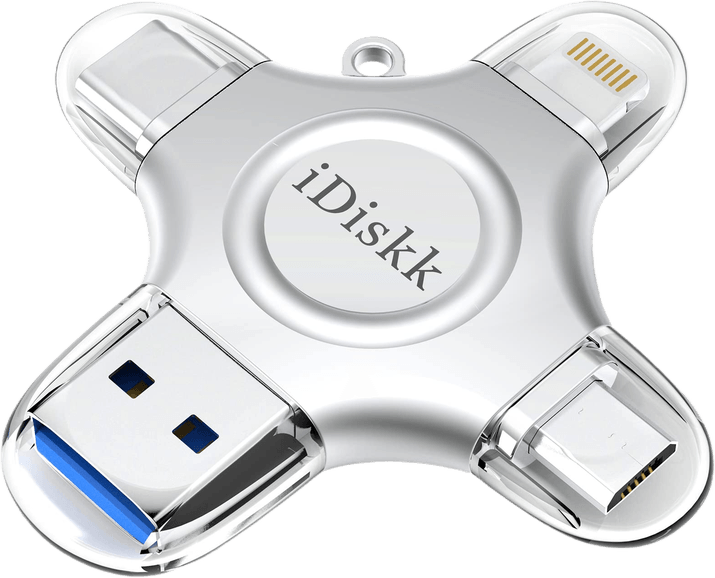
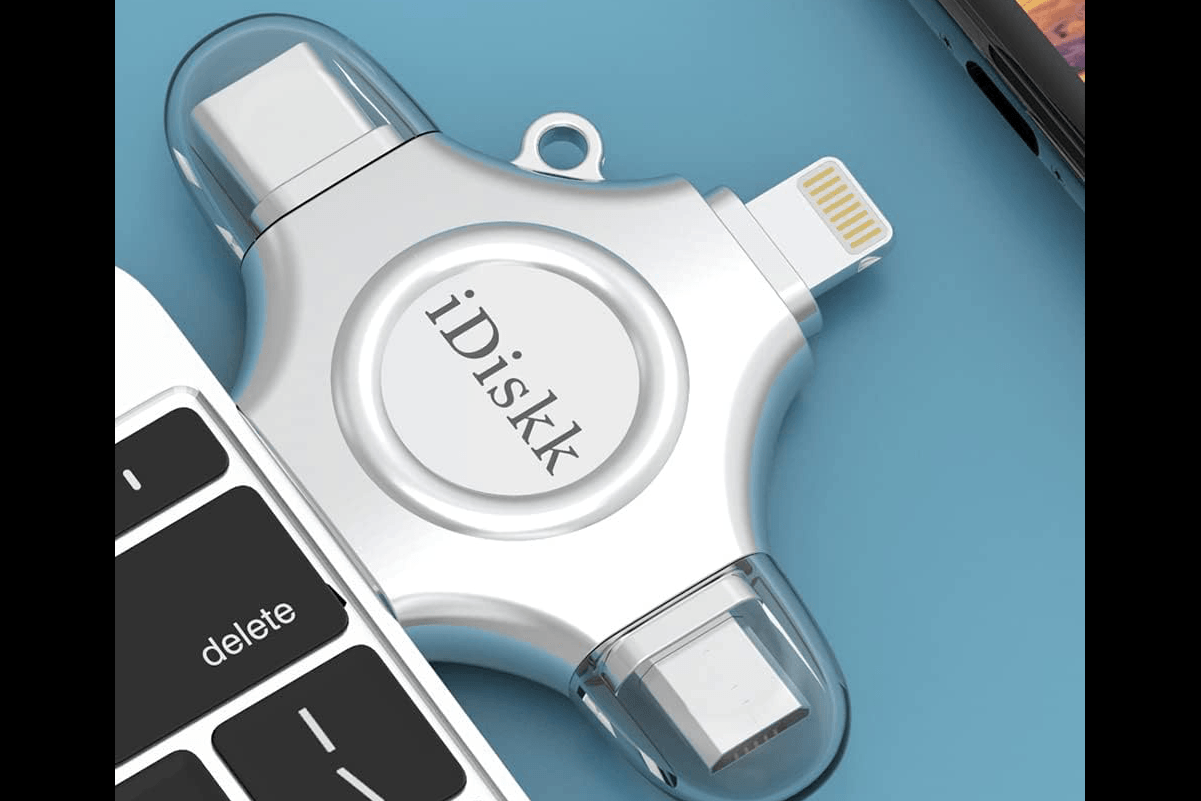
1. iDiskk Photo Stick 256 GB
| Brand |
Brand
iDiskk
|
| Capacity |
Capacity
128, 256, 512 GB or 1 TB
|
| Connections |
Connections
USB, Lightning, micro USB, USB-C
|
| Key Features |
Key Features
MFI certified, easy plug and play
|
| Best For |
Best For
Using across a range of old and new devices
|
For us, the iDiskk photo stick is the ultimate Lightning flash drive for iPhone. And it’s compatible with Android phones as well.
The iDiskk has four ports. Of course, it includes the iPhone USB Lightning port. But it also features a micro USB for older Android smartphones and cameras and USB-C for newer devices. Finally, it has a USB 3.0 port to plug into your computer.
The iDiskk is most helpful if you want to transfer files from an iOS device to an Android or vice versa. Typically, moving data can be frustrating. You need to connect two devices either using a cable or via Wi-Fi.
With the iDiskk, you don’t need the other phone to move all your photos and videos. Just plug in the iDiskk, and you’re ready to transfer! There are many iPhone flash units out there with questionable quality. But the iDiskk is MFI certified.
MFI stands for “Made For iPhone, iPod, and iPad.” That means Apple approved this flash drive for use on their devices. So you can be certain that using it will be safe for your files and smartphone.
There is a cheaper 128 GB version. And there are 512 GB and 1 TB iDiskk options if you need more space.
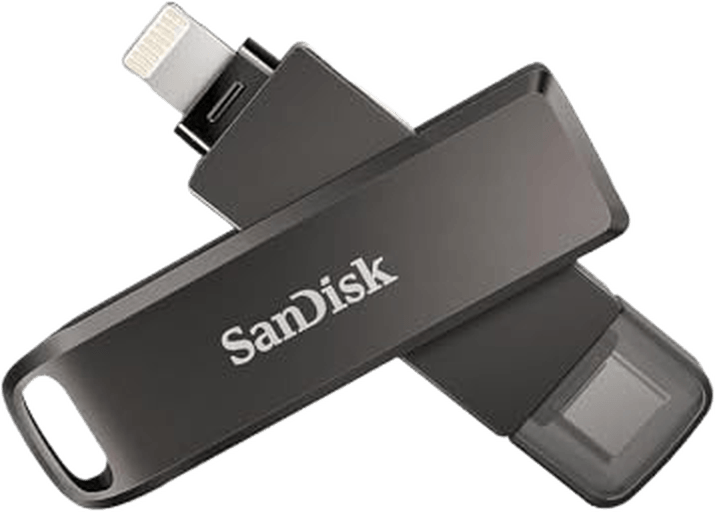
2. SanDisk iXpand 128 GB
| Brand |
Brand
SanDisk
|
| Capacity |
Capacity
64, 128, or 256 GB
|
| Connections |
Connections
Lightning, USB-C
|
| Key Features |
Key Features
Automatic cloud backup and password protection
|
| Best For |
Best For
Recording directly from iPhone to flash drive
|
SanDisk has been around longer than most brands selling flash drives. iPhone users know it for its quality products. If you want a reliable flash drive for your iPhone, the SanDisk iXpand is your best choice.
This iPhone flash drive has 64, 128, or 256 GB storage. The 64 GB option is enough to store all the files from a single iPhone. But if you have a lot of files to transfer, you can always get 128 or 256 GB.
You can use the iXpand as an iPhone external storage if you’re a smartphone filmmaker. It lets you record video straight to the flash drive. So you don’t have to worry about filling up your memory while shooting footage.
Of course, it comes with a USB-C connector if you need to transfer those files quickly to your computer. It also features password protection to ensure nobody else can access your files.
This SanDisk iPhone USB drive has automatic backup. It sends your files to the Cloud via the iXpand Drive app.
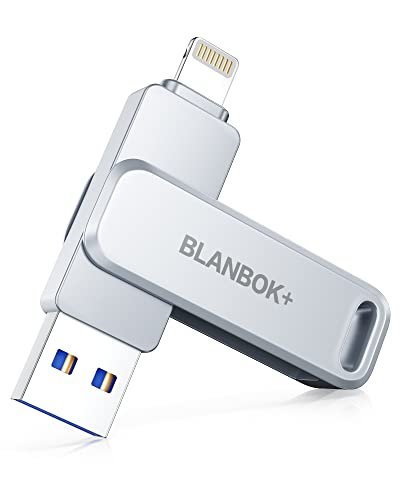
3. BLANBOK USB Flash Drive
| Capacity |
Capacity
128, 256, or 512 GB
|
| Connections |
Connections
USB, Lightning, Type C
|
| Key Features |
Key Features
One-click iPhone data backup, encryption options, high-temperature resistance, shockproof, waterproof
|
| Best For |
Best For
A durable, reliable way to back up an iPhone
|
The BLANBOK USB Flash Drive is a durable gadget and a lifesaver. Despite its convenient size, it’s both shockproof and waterproof. It also has high-temperature resistance. That gives you peace of mind that your data will remain intact.
It’s a multi-port flash drive, letting you link up via USB, lightning, and Type C connections. This makes transferring data between different Apple devices, like your iPhone, MacBook, and iPad, easier.
With three storage sizes available, you can choose the right drive for your needs. Casual users can start with the 128 GB option, which still has plenty of storage space. But if you need more, the 256 and 512 GB options are also available.
As an MFi-certified product, it runs smoothly when paired with Apple devices. It even gives you one-click data backup options when linked to one of the latest iPhones. Plus, you can securely encrypt files on this pen drive for iPhone.
Data transfers are quick and painless, with a read speed of 80 MBps and a write speed of 40 MBps. You won’t be wasting time waiting for large transfers to complete.
The BLANBOK MFi-Certified USB Flash Drive is a bargain. The higher GB options are more expensive, but all models are reasonably priced. It’s the best flash drive if you want reliability and durability.
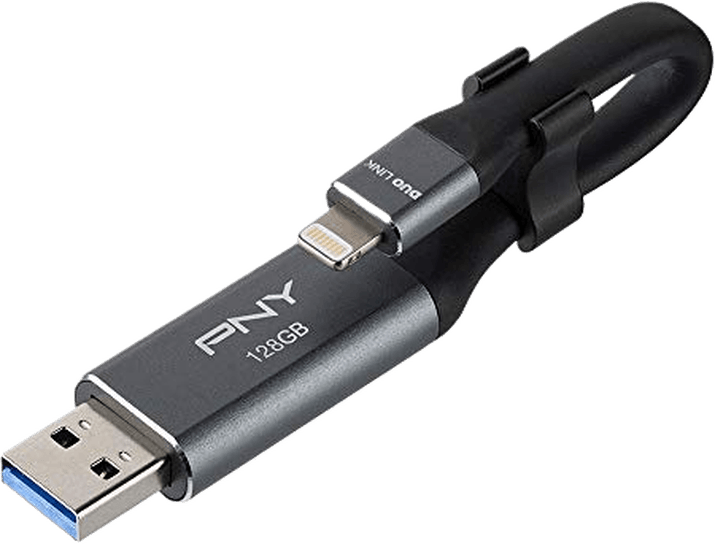
4. PNY DUO LINK 128 GB
| Brand |
Brand
PNY
|
| Capacity |
Capacity
64 or 128 GB
|
| Connections |
Connections
USB, Lightning
|
| Key Features |
Key Features
Works as a Lightning to USB connection
|
| Best For |
Best For
Backing up files when there's no internet available
|
Like Sandisk, PNY is another excellent brand. It has produced high-quality storage devices for decades. They have everything from solid-state drives to, you guessed it, several iPhone flash drive options.
The DUO LINK is the best iPhone flash drive that PNY offers. It can store 64 or 128 GB of files. The storage space options are a bit lower than the Sandisk iXpand. But for smartphone photos and videos, 64 GB is more than enough, in our opinion.
What makes the DUO LINK different? It’s more than a flash drive for iPhone. It also doubles as a connecting cable to your computer.
Unlike flash drives with solid bodies, this device has a short, flexible cable. This lets you transfer files quickly and doubles as a charger for your iPhone or iPad Mini. It features a USB plug that makes it compatible with most computers.
The PNY DUO LINK comes with the PNY DUO LINK 4 app that features automatic backup. It lets you access your files at any time without connecting to Wi-Fi. That’s convenient, especially if you’re in a location with no internet connection.
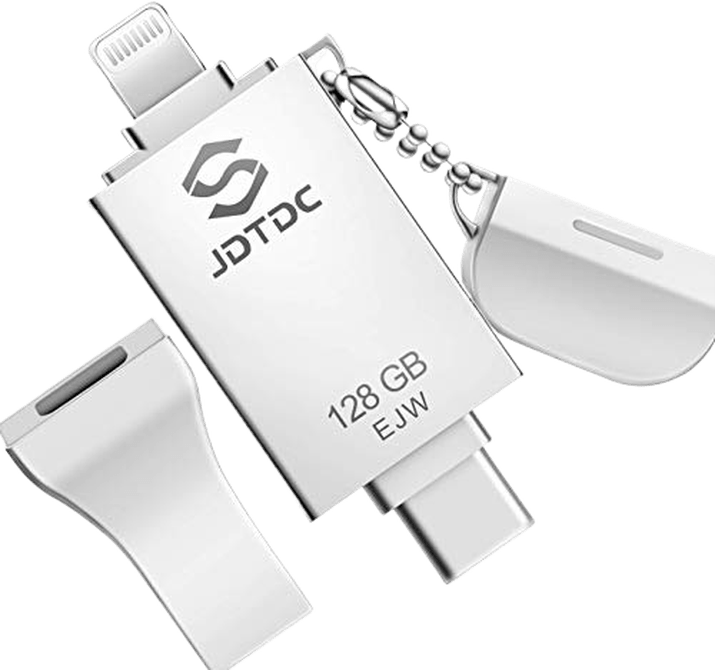
5. JSL JDTDC 128 GB
| Brand |
Brand
JSL JDTDC
|
| Capacity |
Capacity
128, 256, or 512 GB
|
| Connections |
Connections
USB, Lightning, USB-C
|
| Key Features |
Key Features
MFI certified, plug and play
|
| Best For |
Best For
Keeping your files password-protected
|
If you want a flash drive for iPhone with a lot of storage space, you need to look at the JSL JDTDC photo stick. It comes in 128, 256, and 512 GB options. That’s a lot of storage if you have lots of files to transfer.
This flash drive has an app that lets you back up all your data with password protection. You can use it to transfer your photos and videos to the Cloud. So you won’t lose your files even if you lose your flash drive!
As it says in its product name, it’s MFI-certified. That means Apple has inspected and approved all the hardware in this hard drive. So you can be confident that it’s fully compatible with iOS devices.
The JDTDC photo stick has a USB 3.0 connector. It lets you seamlessly transfer files from your phone to your computer. It’s quick and safe. And it comes with a hinged cover to ensure the USB connector stays clean when unused.
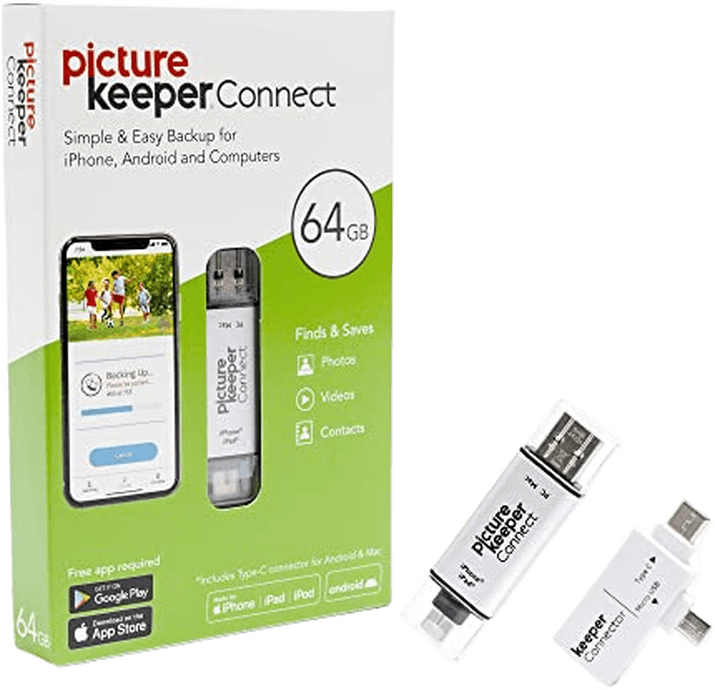
6. Picture Keeper Connect 64 GB
| Brand |
Brand
Picture Keeper
|
| Capacity |
Capacity
16, 32, 64, or 256 GB
|
| Connections |
Connections
USB, Lightning, USB-C, Micro USB
|
| Key Features |
Key Features
Simple backup process via the free app
|
| Best For |
Best For
Backing up files from a variety of sources
|
This is one of the most popular and well-reviewed flash drives for a good reason. People like using it because of its simple design and ease of use. The Picture Keeper Connect flash drive looks like any other. That’s what makes it appealing.
Its clear lids protect the USB. And Lightning ports let people quickly see which end of the stick they need. This nifty gadget has a built-in Lightning connector for your iPhone or iPad. But it also has a USB-C and micro USB attachment if you need to transfer data to an Android device.
The Picture Keeper Connect has several options, including 16, 64, and 256 GB. But the most popular is the 32 GB. It may seem inadequate compared to the 1 TB versions on this list. But it’s enough to store up to 16,000 pictures. And that’s more images than an average person takes on an iPhone!
5 iPhone Flash Drive Features
What should you look for in an iPhone flash drive? Here are five things to consider.
1. MFI Certification
MFI stands for “Made for iPhone, iPod, and iPad.” Apple products tend to have more proprietary features than Android devices. For instance, they use a Lightning cable. They don’t use universal USB-C, so third-party products are likelier to fail with Apple devices.
The MFI certification ensures third-party products follow Apple’s strict criteria. This is done so that they don’t fail when people use them. Check if your flash drive for your iPhone says it’s MFI-certified. That way, you can be confident that it’s compatible with your Apple devices.
2. Ample Storage
Before buying a flash drive for your iPhone, find out how much memory your phone has. It helps you narrow down the flash drives you need to consider.
If your phone can store lots of files, it’s best to get a flash drive that can hold just as much data, if not more. Remember that not all iPhones have the same storage space.
The iPhone 15 and iPhone 15 Plus have 128, 256, or 512 GB storage space. The iPhone 15 Pro or Pro Max also has a 1 TB version. Meanwhile, you may only have 64 GB if you have an iPhone SE.
Research the storage space of your specific device. Ensure your flash drive has enough memory to handle all your photos and videos.
3. Cloud Storage
Redundancy is crucial when it comes to storing your files securely. You need to back up all your photos and videos. That way, you don’t have to worry when accidentally deleting an image on your device.
Apart from storing your files physically in your flash drive, you can also upload them to the Cloud for redundancy. Thankfully, some brands like PNY and Sandisk offer Cloud storage services. They sync with your iPhone and flash drive.
But be aware that not all flash drives offer Cloud storage. To use this feature, buy a brand with this service.
4. USB and Lightning vs USB-C Connectors
Look for flash drives that have a fast USB connector. By “fast,” we mean it should be capable of transferring files quickly without losing all your data. Currently, the fastest USB connector is USB 3.0.
USB 2.0’s transfer rate is about 480 Mbps, while USB 3.0 is 4,800 Mbps. It’s the perfect option, especially if you need to transfer large files to your computer.
Also, your flash drive needs a lighting port instead of a USB-C connector to connect to your iPhone. Remember that USB-C devices are Android and incompatible with portable Apple devices.
5. Password Protection
Nobody wants other people to steal their data. That’s why it’s essential to have a storage device with password protection. This ensures no one can easily access your files.
But not all flash drives have password protection. Do your research and determine if the device you want has this feature.
Flash Drive for iPhone Recommendations
The iDiskk may be our favorite, but that isn’t the only option. We all know it depends on your needs and preferences. That’s why we’re listing a few alternatives below for you!
Budget Pick
If you don’t want to spend much money on a flash drive, then the SanDisk 128 GB iXpand Flash Drive is an excellent option. It may look fancy, but the price is more than reasonable. And if 128 GB is more storage than you need, you can go for the 64 GB iXpand, which is even cheaper.
Most Storage
iDiskk has a whopping 1 TB of storage, which is more than most users need. But if you have a lot of files to transfer or video backups, this is the one we recommend.
Best for Pros
Sandisk is a highly reputable company when it comes to data storage devices. So it only makes sense to recommend the Sandisk iXpand. It has a robust construction and reliable electronics that will not fail you.
Conclusion: Best Flash or Pen Drive for iPhone
The best flash drive for iPhone is the iDiskk 256 GB photo stick. This flash drive is great for backing up photos, videos, and other files quickly and efficiently.
It is also reliable and durable. This makes it the perfect choice as a reliable and secure way to back up your data. With its large storage capacity, it is sure to meet the needs of any user!