
In this Photoshop project tutorial, we’re going to learn how to cut out an image in Photoshop. This is a common task that you’ll likely need to do at some point, whether you’re working on a photo-editing project or creating a graphic for your website. So let’s get started! In this Photoshop tutorial, we’re going to learn how to cut out an image in Photoshop. This is a common task that you’ll likely need to do at some point, whether you’re working on a photo-editing project or creating a graphic for your website. So let’s get started! to create special effects or to hide things in the background. In this article, you will learn seven different ways to make smoke for photography.
Creating a Fence Cut-Out Image in Photoshop: A Photoshop Project
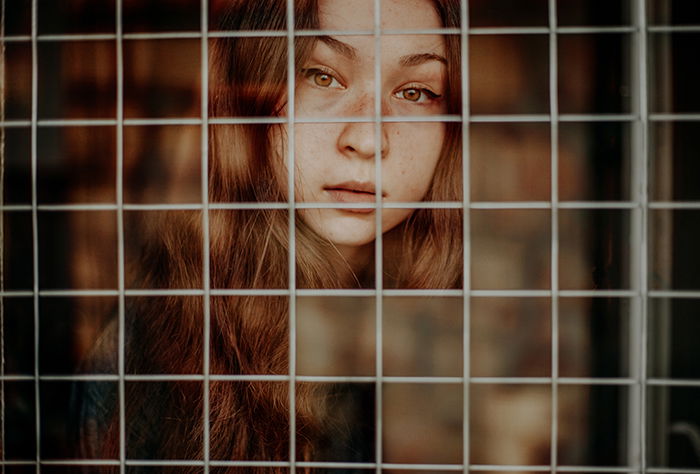
As intimidating as a result may look, it’s not that difficult to create. The trick is all about proper camera angles and using Photoshop to create a composite.
When you learn this technique, you’ll get better at planning your shots, editing, and looking at everyday objects from a more imaginative perspective.
And don’t feel overwhelmed even if you don’t use Photoshop that much. The process is quite easy to execute even for a beginner. We’ll guide you through the entire editing process to create this effect.
What You Will Need to Follow This Tutorial
- An editing program like Photoshop. Make sure that your app lets you use brushes, layer masks, and blending modes;
- A sturdy tripod;
- A remote;
- A fence;
- A placeholder. (This is necessary for self-portrait photography only. You can use it to figure out what exactly to focus on before you stand in front of the camera. Alternatively, you can ask someone to be behind the fence while you manually adjust the focus.)
The Photo-Taking Process
1. Find a Safe Location
Taking these photos will require some time and patience, so make sure you find a peaceful location. If you accidentally move your tripod, you could end up ruining your composition.
Another thing to keep in mind is safety. Make sure the fence you’ll be photographing isn’t dangerous in any way. Don’t compromise your model’s security for the sake of an edgy photo.
If you’re going to take self-portraits, I highly recommend going out with a friend. Doing so will make you feel safer and give you a chance to get your focus right before you shoot.
2. Set Up Your Tripod
Set up your tripod on a stable surface. Look at your spirit level (the tiny bubble on your tripod) and make sure it’s in the middle. You can also turn on your camera’s horizon level to confirm that the frame looks straight.
If you’re shooting on a fairly windy day outdoors, add weights to your tripod. You can find a hook on the middle column where you can hang a sandbag. But your backpack works just as well.
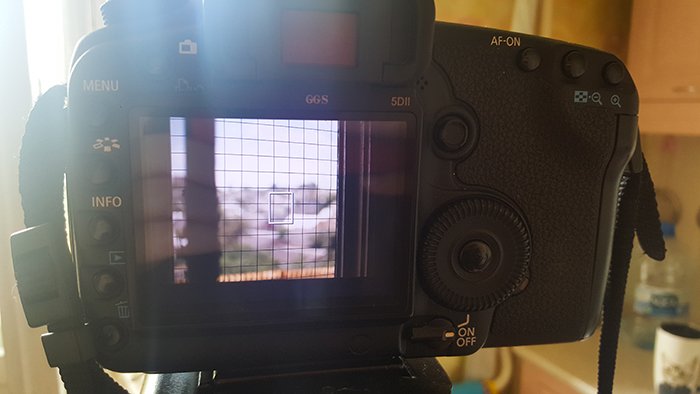
3. Lock Your Focus
Now that your camera is ready to have your model pose behind the fence. But before you take pictures, make sure you switch your focus to Manual.
Autofocus might automatically choose the fence as your subject. To take perfectly sharp portraits, stick to manual focus.
Once you’re happy with the focus, lock it and take as many photos as you can.
You also need to make sure that your model doesn’t move away from their position. Otherwise, they may end up looking blurry. To be safe, have them stay precisely where you locked your focus.
How about if you’re using an object as a stand-in for your self-portrait? You need to place that object where you want to pose and focus your lens on it.
Also, don’t use an aperture that’s too wide such as f/1.2. f/2 or f/2.8 will give you enough depth of field to get a sharp focus. But at the same time, these values also produce pleasing background blur.
Once you achieve focus, remove the object and stand in its place. But you need to make sure you’re in the exact position where you placed your stand-in. Otherwise, you may end up out of focus.
Since you’ll be doing this on your own, expect to have a few failed attempts. However, remember that the results will be worth it.
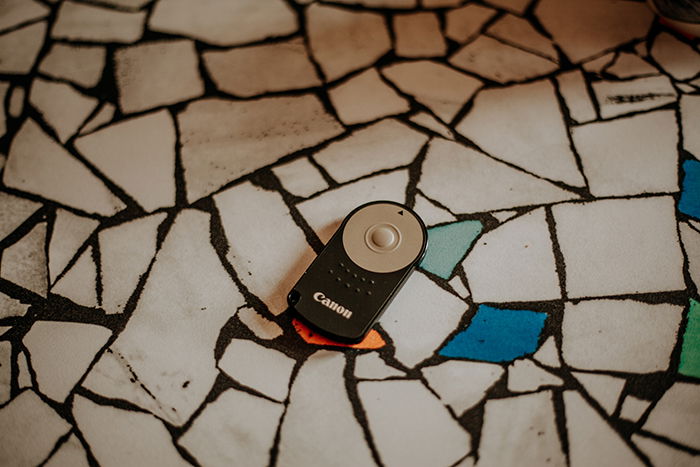
4. Use a Remote
Any slight movements can accidentally move the camera and throw off your framing. Once you’re happy with your composition and focus, don’t touch the camera. Instead, use a remote.
Remotes are also handy for self-portrait photographers who don’t have any assistants during a shoot.
If you want to include your hands while taking self-portraits, consider adding a self-timer.
Simply set your self-timer to 10 seconds and press your remote when you’re ready. Once you trigger the camera, it will start counting down and take a photo.
5. Take Photos of the Fence
When you’re happy with your model shots, take a few photos of the fence on its own. Remember not to change the angle and the position of the camera while you’re doing this. The framing has to be the same, or you’ll find it challenging to create a composite in Photoshop later.
Once you finish taking photos of the fence, import your images into Photoshop. The editing process is truly where the magic happens.
The Editing Process – How Do You Cut Out a Section in Photoshop?
So what is the easiest way to cut something out in Photoshop?
The secret to creating a composite is using layer masks in Photoshop. Although they sound technical, the concept behind them is easy to grasp.
1. Open your two photos in Photoshop. Make sure they’re in the same document and that there are two layers. To do this, go to File > Scripts > Load Files into Stack. Make sure you click Attempt to Align Images.
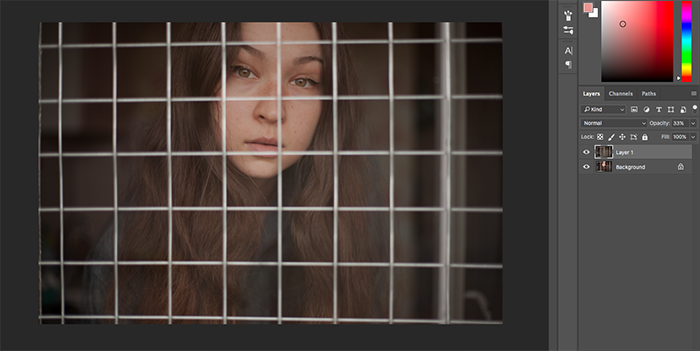
Click on the fence image and make sure it’s the top layer. Doing so will help you finish your composite much quicker.
2. Click on the top layer and set the opacity to around 30%. Doing this lets you see both photos and point out any flaws you need to fix. If the images still aren’t aligned, press CTRL T and move the first image around until you don’t see any double photos.
Now, how do you make a natural composite in Photoshop?
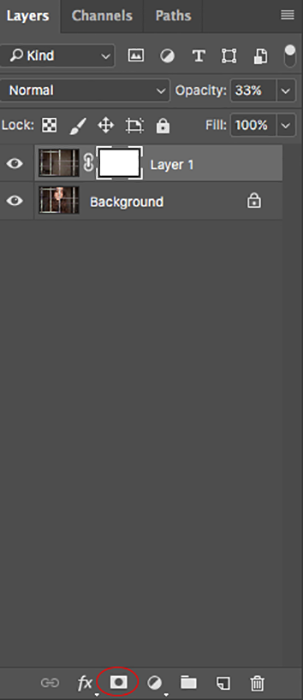
3. At the bottom of the Layers box, there’s a rectangular symbol with a circle in the middle. C that will help you cut out any part of your image. Click on it.
Once you see a white square next to your image, that means that you have successfully attached the layer mask. You can use it to show sections of the photo that’s below it.
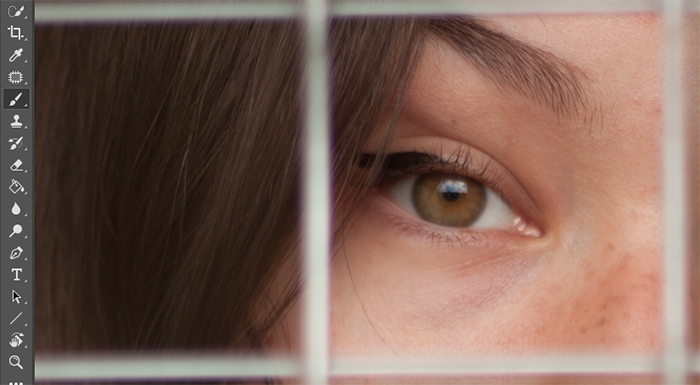
4. Click on the Brush Tool (opacity 100%) and select black as your color. Now click the layer mask again and go to the image to paint over the parts you want to remove. Make sure you carefully paint inside of the squares. If you make a mistake, select white for your Brush Tool and repaint the areas, you messed up.
Remember that painting your layer mask with black reveals the image below. Meanwhile, using white hides it.
If you don’t seem to show or remove a section in your layer mask, then that means you chose the wrong color.
6. Once you finish the main composition, clean up any edges. To quickly spot mistakes, click twice on the small eye icon on the left of your second layer.
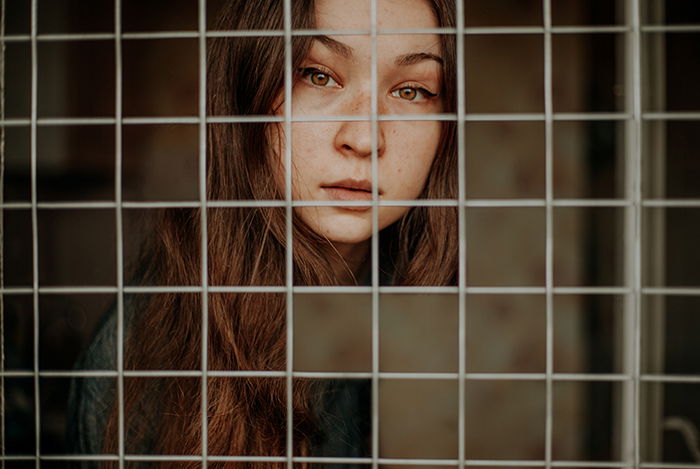
7. The last step is to do color correction, and you finally have a beautiful composite!
Creative Cut-Out Photography Ideas to Try
The method above isn’t the only way you can create cut out and composite photographs. Many other ideas can enhance your results and give your creative mind a boost of inspiration. Consider this next idea, an exciting Photoshop project that will improve your editing skills.
The Double Exposure Effect
During the same photoshoot for the tutorial above, I took photos of various objects that stood out to me. One of these was an abstract-looking window reflection. On their own, the images don’t always look that appealing.
Don’t let their looks fool you, though. In reality, they have the power to transform simple portraits completely.
The benefit of taking your own “stock” photos is that they’ll beautifully complement your favourite images. Unlike online stock photos, you can easily match the tones and shapes in your main shots.
Doing so can help you create very natural but striking compositions. Here’s one of the many things you can do with your resources:
1. Open your main image and stock photo. Make sure the files are in the same document.
2. Slightly lower the opacity of your stock photo.
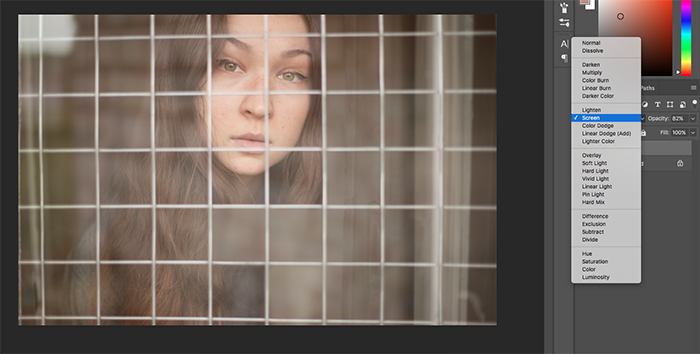
3. Change the blending mode to Screen.
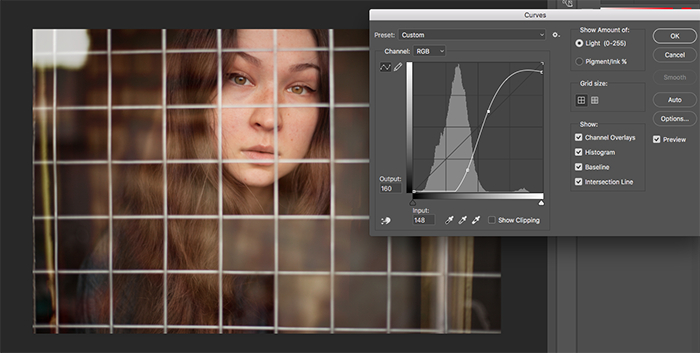
4. Edit the stock photo’s contrast in Curves. To do this, press Ctrl + M or Command + M on your keyboard.
5. Resize, transform, and warp your stock photo until you’re happy with the results. Let your creativity roam free during this process.
As you can see, the results are very eye-catching. You can use this technique when working with portraits of any kind.
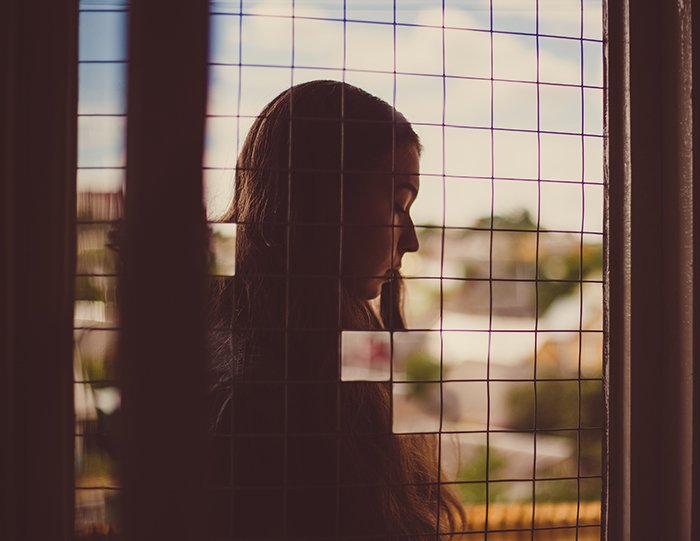
Silhouettes and Angles
When it comes to the cut-out effect, you don’t have to take simple portraits. Play around with angles, perspectives, and lighting. Experiment with closeups, wide-angle shots, and panoramas.
But keep in mind that whatever angle you choose, stick to that once you take your two composite shots. Remember that the framing needs to match or compositing will be impossible.
These challenges won’t make the editing process any more challenging, especially since you’ll be working with similar shapes.
You can also create a creative but straightforward cut-out effect with the help of silhouettes. To do this, photograph your model in front of a light source. As you can see in the photo above, the sun should be brighter than the light on your model’s face. The contrast in this image creates a dramatic look.
Different Foregrounds
For this tutorial, I used a regular fence. There’s an abundance of other foregrounds you can use. As long as something has patterned holes, you can use it as a foreground. Here are a few things you can use instead of a regular fence:
- A sieve (the editing process might be a bit tedious because of all the holes, but the results will be worth it);
- A fence with vertical poles;
- A chain-link fence (the diamond-shaped patterns will look stunning in your portraits);
- A ladder.
In most cases, just about any type of pattern will work. So feel free to experiment on anything you see that might be perfect for this effect. The more unique your backdrop, the better your image is going to look.
Conclusion
Cut-out photography is an exciting challenge that will strengthen both your photography and editing skills, regardless of how experienced you are in either area.
This technique is ideal for artists who want to work on new projects, get out of their comfort zones, and teach themselves something new about editing programs. The skills you gain after this experience will make you a better photographer in general.
Even though I’m not an expert at photo manipulation, I’m proud to have a cut-out image in my portfolio.
No matter what genre you’re coming from, make sure you expose yourself to new ideas, techniques, and concepts. They’ll change the way you look at the world, yourself, and other people’s work.
Cut-out photography is one of the topics we cover in our creative photography course, Wow Factor Photography. If you’d like to learn more, check out the course here.
