Product photography is one of the most popular photographic genres in commerce. A good product shot can be the difference between a well-selling product and one that no one wants to buy.
In this complete guide, we will discuss all the points you need to consider in product photography. These range from beginner setups in your own house to full-blown studio shoots. By the end of this article, you will have loads of ideas for starting your own product photography business!
What is Product Photography?
Product photography is a photographic genre that highlights a single product or array of products. This means that all attention is directed toward the product, with no other distracting features unless they enhance the product.
There are numerous ways to shoot product photography, but it usually consists of nice, even lighting, with the product taking up around 70% of the frame. You can use objects that highlight or emphasize the product or even human intervention to display the product in use.
This genre doesn’t need high-end equipment for great results. In this section, we will outline how to get started in product photography using cheap materials—you can even use your smartphone!
Getting Started in Product Photography
You don’t need expensive gear for great product photos. Your current camera or smartphone is good enough to get started. For a backdrop you can use white card stock. It is a versatile tool that provides a clean background and can be used as a DIY infinity curve or bounce card.
Glass offers a creative, reflective surface that works with any colored background. A lazy Susan turntable is perfect for 360 product shots. You could also drape a white shower curtain over a table for an instant lightbox, or use it to diffuse window light.
Natural light is free and produces distinct effects at different times of day. Outdoor settings can also work well for product photoshoots. Reflectors made from cardboard or tin foil are helpful for bouncing light and eliminating harsh shadows. You could also use fishing wire for lifting small objects.
If you’d like to learn more about diy product photography, we have a detailed guide that covers everything you need to know.

Understanding Product Photography
Let’s now dive into the specifics of shooting products. The main aim of this photographic genre is to entice people to buy the product. This means you must consider the color, shape, and what the product is for.
This genre can seem simple enough, but more often, the simplest shoots are the hardest to execute perfectly. Everything must be considered, from light to composition to the exact angle of the product. You will even need to notice every glare or reflection in the frame.
In this section, we will outline the most important features of a product photoshoot. If you consider all these points, you will understand the key points of this photographic genre.
Camera Settings and Exposure
Let’s now take a look at some important camera settings for product photography. You should shoot in RAW format to get the highest quality images with the most flexibility for editing. Use manual mode to dial in the best aperture, shutter speed, and ISO for your shot.
A small aperture like f/16 or f/22 will keep your product in focus. Keep your ISO low to avoid grainy photos, and use a tripod with a low shutter speed to bring in more light. Set your white balance to “Daylight” when using studio lights, or use a grey card in natural light.
Use automatic focus to lock in on your subject and get sharp images. Finally, retouch your photos in post-processing to make them look their best. To learn more about product photography camera settings, check out this in-depth guide.
Shot List and Checklist
To take your product photos to the next level, use a shot list. It will help you capture all the angles and details you need to show off your products. Start by deciding on a theme that fits your brand, like a simple white background or a creative flat lay.
Make a list of all the gear you’ll need, like a camera, lenses, lights, and backgrounds. Schedule enough time for the shoot, about 10-15 minutes per product. Then, create a shot list of all the products and any special requirements, such as showing the inside or back of an item.
Set up your gear and test the lighting to make sure it’s soft and consistent. As you work through your shot list, check each image for focus and exposure. Edit the photos for consistency, then export and upload them to your online store. By using a product photography shot list, you’ll be able to capture professional-looking images that showcase your products in the best light.
Considering the Background
Finding the right photo background can be tricky. It should have the right color and texture, be lightweight, and affordable. Wooden boards are a popular choice for food photography, giving photos a warm, cozy feeling.
Paper and vinyl backdrops in solid colors are great for minimalist compositions or color blocking. Ceramic floor tiles that resemble stone and marble are a durable, inexpensive alternative to the real thing.
Plywood and hardboard are versatile options that can be painted or textured to create unique backgrounds. Natural elements like sand, seashells, moss, and artificial grass add interesting textures to product and still life shots. Even your own lighting equipment, like a diffuser or softbox, can serve as a fantastic photo background.
With a little creativity, you can craft beautiful, professional-looking backdrops on a budget. If you’d like to explore more ideas for photo background alternatives, there are many techniques to try in this article.
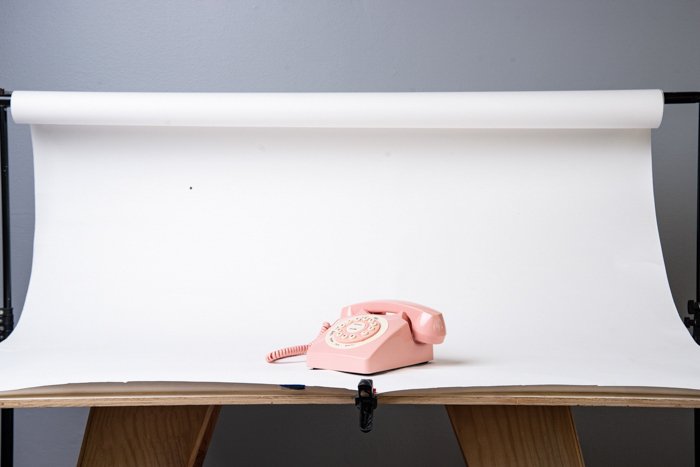
DIY Infinity Curve Wall
An infinity curve is a seamless background that eliminates lines and corners, creating a clean photo background that draws the viewer’s eyes to the main subject. To make an infinity curve for product photography, use seamless paper as your background.
For small products, tape a poster board to the wall and let it rest on a table. Medium-sized products require a 4 ft seamless paper background and a background stand. Attach the paper to the stand and position it about 4 ft apart.
Large products need an 8 ft seamless paper. Set it up like the 4 ft version, but let it drape down to the floor. Lay at least 4 ft of paper on the floor for enough space to position your product. Use sandbags to weigh down the corners and prevent curling. When using an infinity curve, be careful not to place products too close to the background to avoid ripping the paper.
Best Gear for Product Photography
The best product photography equipment doesn’t have to be expensive. You can start with a camera like the Canon EOS RP, an entry-level full frame mirrorless camera with excellent resolution, fast autofocus, and a compact body. It works well with EF lenses using an adapter.
A tripod is also important for product photography. It improves image quality and keeps your camera angle consistent. The Vanguard Alta Pro 263AB 100 is a good option with an adjustable center column for overhead shots.
Speedlites are a great lighting option on a budget. They’re brighter than LED lights and more affordable than studio strobes. The Godox TT600 HSS is a high-performance flash with built-in wireless receiver and multiple flash modes. Reflectors like the Neewer 24×36″ 5-in-1 are also useful for removing shadows and reducing contrast.
Look at our dedicated article for a wider selection of product photography equipment.
Cameras
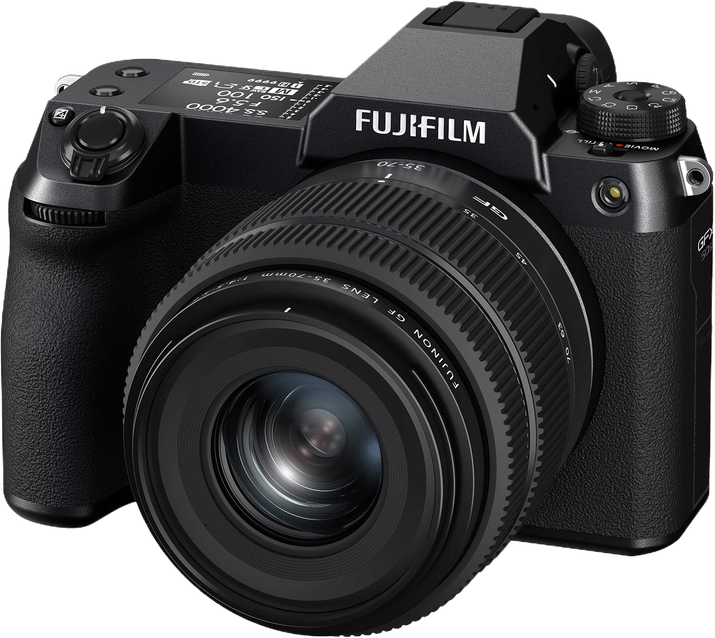
Let’s now look at some great cameras for product photography. The Fujifilm GFX 50S II is a top choice, with a medium format sensor that captures exceptional detail and dynamic range. It also has in-body image stabilization and a tilting screen, all in a compact body.
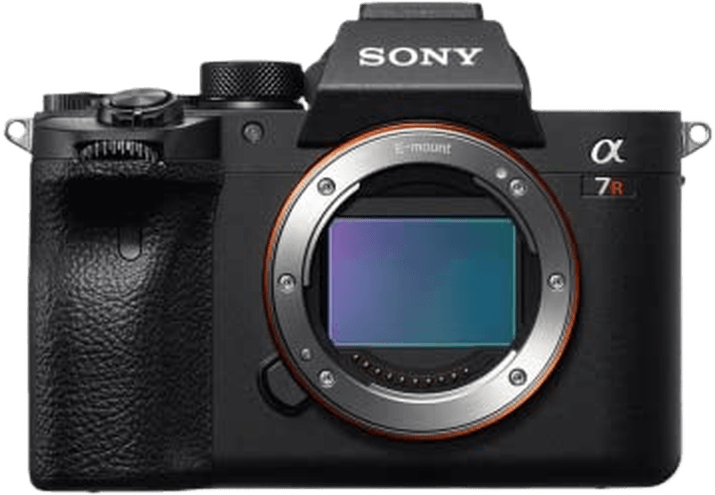
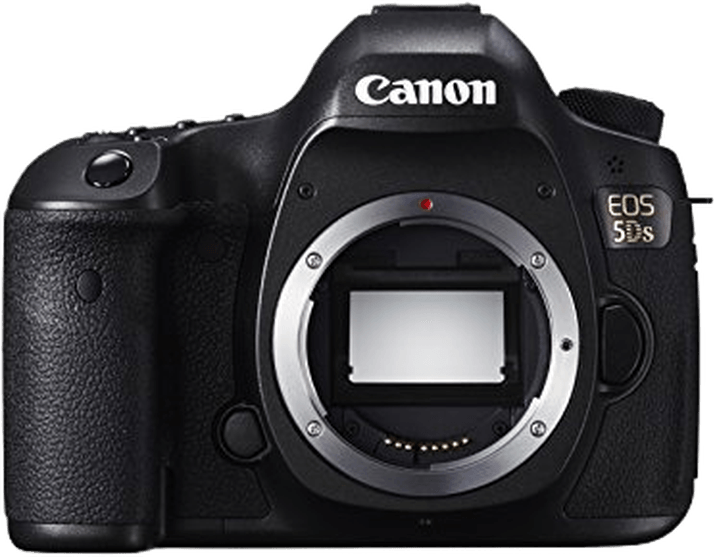
Other great options include the high-resolution Sony a7R IV and the Canon EOS 5DS. The Nikon D850 offers fantastic image quality, autofocus performance, and 4K video. For those on a budget, the Canon EOS 90D is a capable APS-C camera with a 32.5 MP sensor and 4K video.
Product photography requires great image quality. The best cameras for product photography should have manual controls, interchangeable lenses, high resolution, and good dynamic range. With the right camera, you can capture stunning product images that grab attention and drive sales.
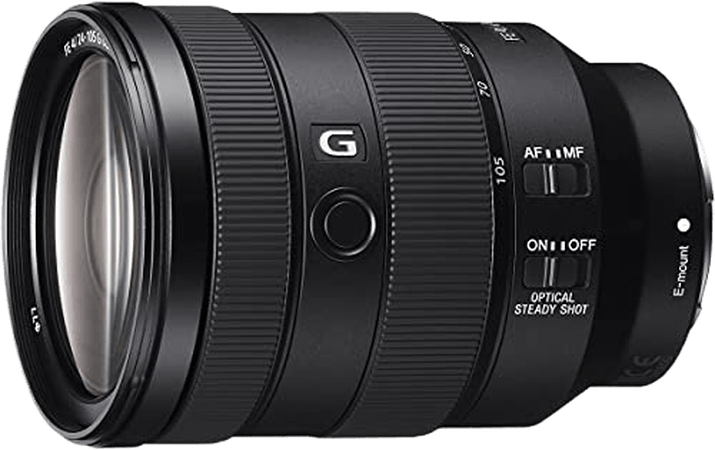
Lenses
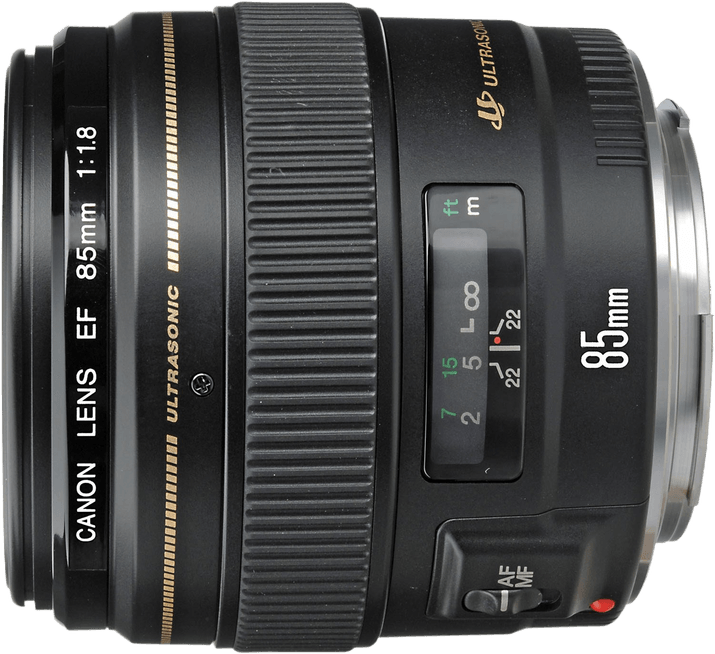
The best lens for product photography depends on your camera and shooting style. Prime lenses are often sharper than zooms and don’t have moving parts that cause diffraction. The Canon EF 85mm f/1.8 is a great prime lens that produces sharp images with beautiful bokeh.
If you prefer a zoom lens, the Sigma 24-105mm f/4 Art is a good option for Sony, Canon, Nikon, and Sigma cameras. It has a constant f/4 aperture and image stabilization to keep photos sharp in low light.
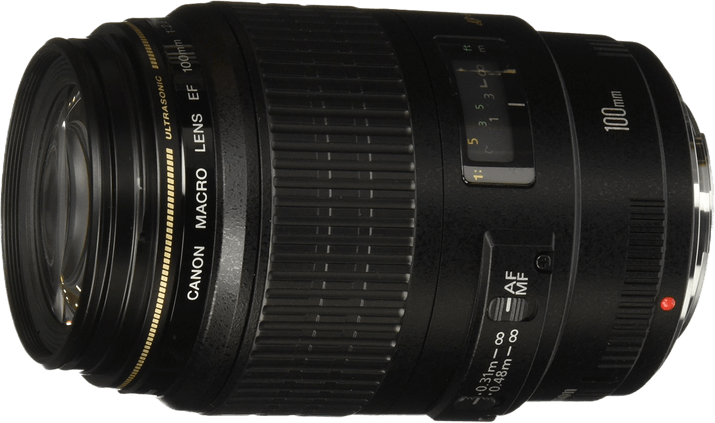
Macro lenses are also useful for product photography. They can capture life-size images with lots of detail. The Canon EF 100mm f/2.8L and Sony FE 90mm f/2.8 G are both excellent macro lenses with fast autofocus and pleasing bokeh.
Be sure to read our full article to learn more about the lens for product photography.

Lenses for Canon
When choosing the best Canon lenses for product photography, sharpness and detail are key. The Canon EF 100mm f/2.8L Macro IS USM is a top pick for its exceptional edge-to-edge sharpness. This lens captures intricate details, making it perfect for close-up product shots.
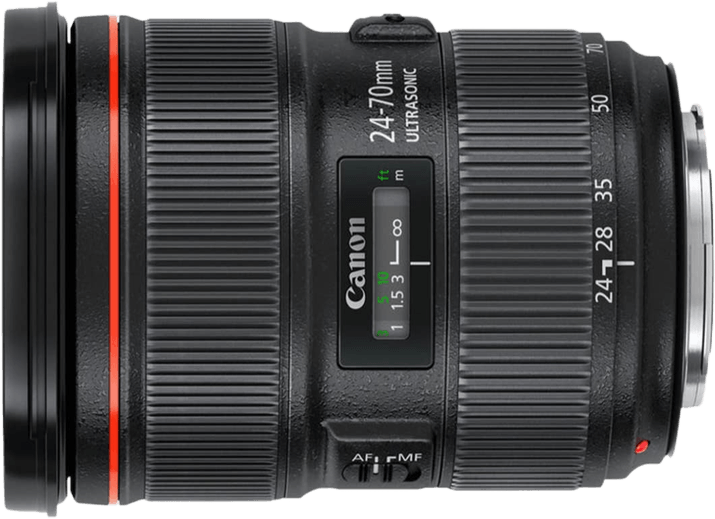
The Canon EF 24-70mm f/2.8L II USM is another great option, offering versatility with its zoom range. It maintains sharpness across the frame and has minimal distortion, ensuring products look true to their shape.
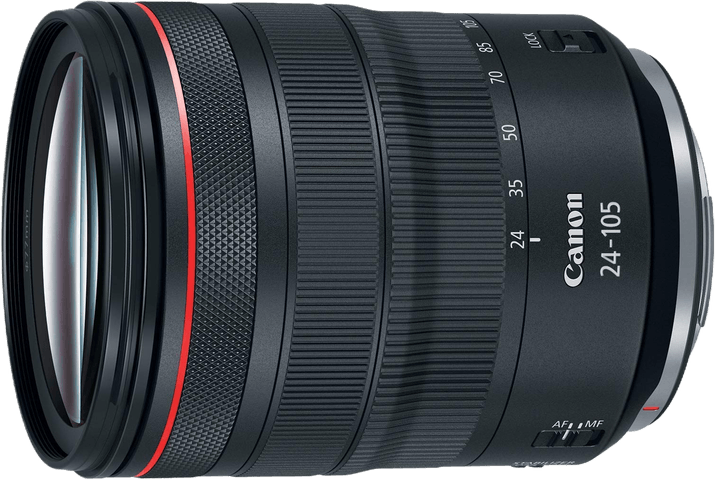
For an all-in-one solution, the Canon RF 24-105mm f/4L IS USM is a reliable choice. Its broad focal range can capture everything from wide-angle shots to close-ups, and the constant f/4 aperture allows for consistent exposure control. To learn more about the best canon lenses for product photography, there are many helpful resources available online.
Lenses for Nikon
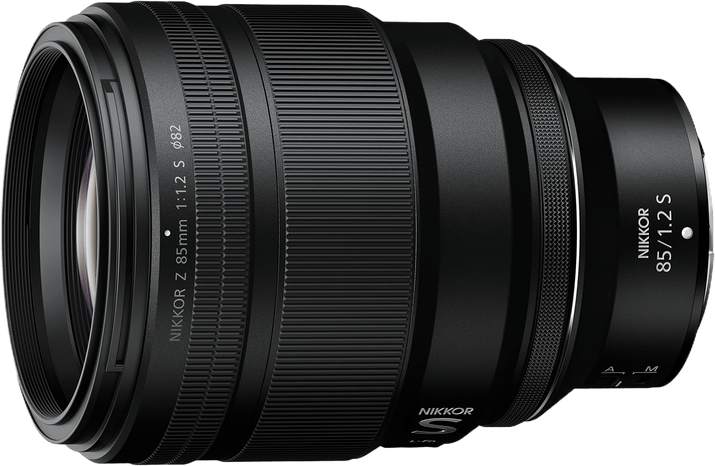
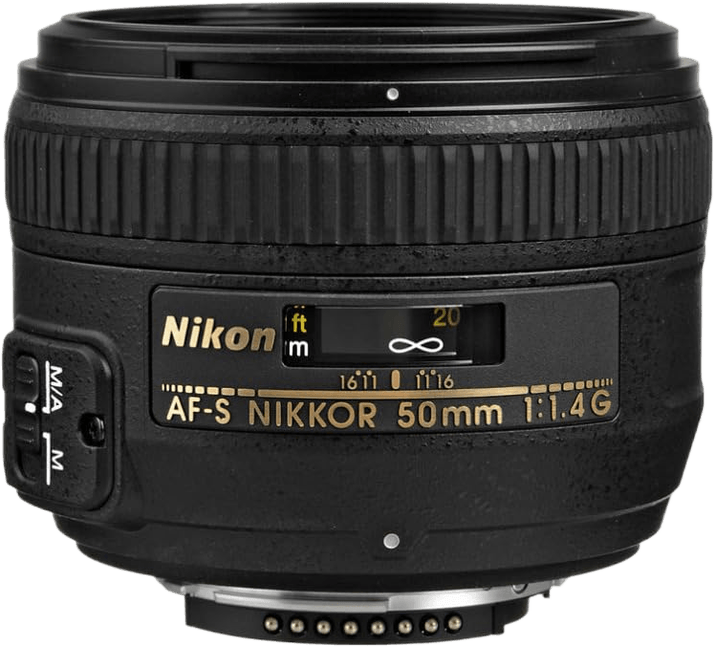
The best Nikon lenses for product photography capture sharp, detailed images. The Nikon Z 85mm f/1.2 S and Nikon AF-S 50mm f/1.4G are top picks for their exceptional sharpness and fast apertures.
The Z 85mm f/1.2 S offers edge-to-edge clarity and a natural perspective. Its f/1.2 aperture allows for precise depth of field control and beautiful background bokeh. The AF-S 50mm f/1.4G is noted for its classic rendering and versatility.
Other great options include the Sigma 56mm f/1.4 for its compact design and the Nikon Z MC 105mm f/2.8 VR S for macro photography. The Nikon Z 135mm f/1.8 S Plena excels at minimizing distortion, while the Nikon Z 70-180mm f/2.8 provides a versatile zoom range.
To learn more about the best nikon lenses for product photography, check out our in-depth guide.
Lenses for Sony
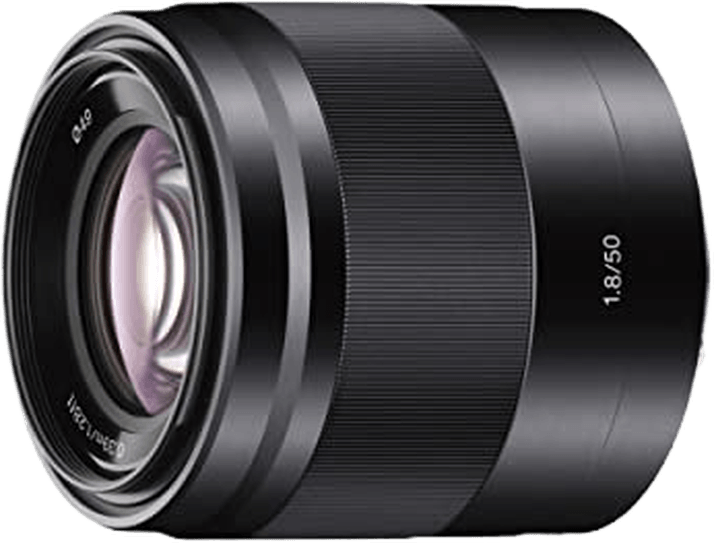
The Sony E 50mm f/1.8 OSS is sharp with minimal distortion, making it great for capturing product details. Its fast f/1.8 aperture allows for a shallow depth of field to make products stand out. This affordable lens is lightweight and easy to handle.
For more flexibility, the Sony FE 24-105mm f/4 G OSS covers a wide focal range. Its constant f/4 aperture provides exposure control, while the G Series optics ensure sharpness. The Sigma 24-70mm f/2.8 DG DN is another versatile zoom with a fast f/2.8 aperture that’s perfect for low light.
When you need to get up close, the Sony FE 50mm f/2.8 Macro and Sony FE 90mm f/2.8 Macro G OSS lenses offer 1:1 magnification for stunning detail. Both are sharp, lightweight, and weather-sealed.
Sony lenses for product photography give you the tools to capture products in their best light.

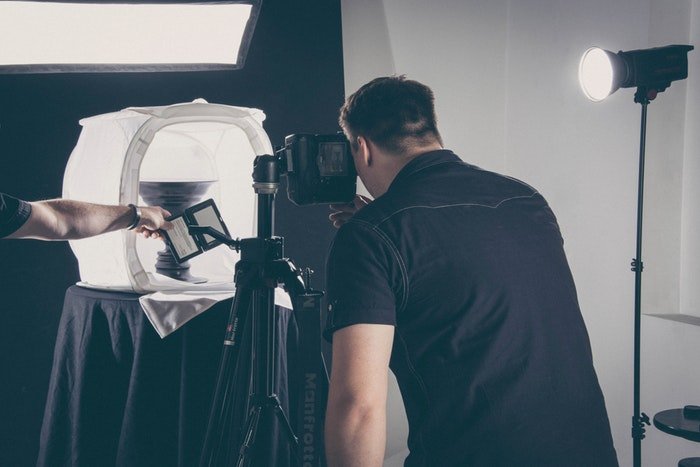
Lighting Your Product Photography Shoot
Proper lighting is key to creating stunning product photos. A simple setup with studio lights can make your products stand out. Ring lights are a popular choice for bright, even lighting.
For reflective products, use two lights at an angle to avoid unwanted reflections. Three lights provide full coverage and emphasize form. Experiment with different arrangements to find what works best for your products.
No studio lights? Natural light from a window can also produce soft, even lighting for product photography. Product photography lighting takes some trial and error, but with practice, you can create professional-looking images that showcase your products in the best light.
Use Natural Light
Natural light product photography is a simple and affordable way to capture high-quality images. By using sunlight scattered through a diffuser, you can evenly illuminate your product and create soft shadows. This wrap-around light effect mimics the look of a big softbox in a studio setup.
To achieve a wider focus range and keep sharpness throughout the product, set your aperture to f/16. Position your product to show its multidimensional aspects, with the camera slightly above and capturing both frontal and side views. A color chart can be a helpful reference for editing later on.
Natural light product photography is a great starting point for those new to photography, as it requires minimal gear and helps in learning the basics of light.
DIY Lightbox
Creating a DIY light box is a simple way to improve your product photography. You can make one using a cardboard box, baking parchment or wax paper, aluminum foil, and a white sheet of paper. Cut holes in the sides of the box and cover them with wax paper to diffuse the light.
For a more advanced setup, use an acrylic sheet or white cardboard to create a collapsible light box with an LED light strip. This allows you to shoot anytime, even at night.
Another option is to use a translucent white storage box and two speedlights. Place a white sheet of paper inside as the background and arrange your product. Sync the speedlights with your camera and you’re ready to capture professional-looking images.
Read our dedicated article to learn more about creating your own diy light box.
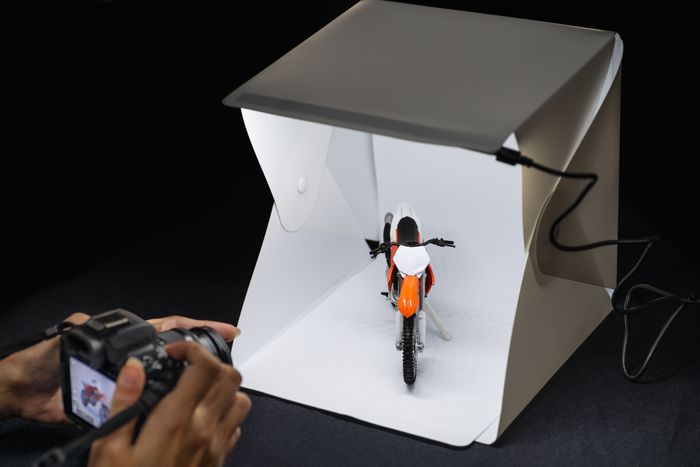
Light Tent
A light tent is a mini studio for product photography. It provides a clean, controlled environment to capture professional-looking shots of your products.
Light tents come in various sizes to accommodate different product types. Some include built-in lighting for convenience, while others allow you to use your own lights for more control. Foldable designs are great for easy transport.
When using a light tent, iron out any wrinkles in the fabric and set it up on a table with your camera on a tripod. Experiment with different angles and backgrounds to showcase your product in the best light. With the right techniques and a few handy accessories, a light tent can help you achieve stunning product photos.
You will have to buy a light tent, or you could construct one yourself. Here are some more useful ways to use a light tent.
Composing Product Shots
Let’s now take a look at composition. Place your product front and center to make it the focus. This draws the viewer’s eyes straight to the product with no distractions.
Use camera angles that highlight the product’s best features. A 45-degree downward angle makes the product seem realistic and obtainable, as if the viewer already owns it.
Apply negative space to draw attention to the product and give the photo room to breathe. This also leaves space to add text later if needed for advertisements.
To learn more about product photography composition, check out our in-depth guide that covers additional techniques like the rule of odds, rule of thirds, differential focus, dynamic diagonals, and top-down perspectives.
Product Photography Ideas
Product photography is everywhere, from websites to magazines and advertisements. Images are important for supporting a company’s brand and making sales. There are many types of product photography, each with a different approach to showcase the product.
Simple studio shots on white backgrounds are common for online retailers. White backgrounds allow the product to be clearly seen and can be used to create a “floating” effect. Showing products in use, called “in-context” or lifestyle shots, helps shoppers visualize how the product works for them.
Studio setups provide more control and consistency for photographing multiple products. Non-traditional product images convey ideas rather than specific products. Large products may require special setups and lighting techniques. The key is choosing the right strategy to best showcase each product. To learn more about the types of product photography, check out this detailed guide.
360 Degrees
360 product photography involves taking a series of photos of a product from all angles. This creates a 360-degree view that lets customers rotate and examine the item on a website.
To do this, place the product on a turntable and rotate it in increments, taking a photo each time. You’ll need a camera, tripod, remote control, lighting equipment, and a turntable. A DIY option is to use a Lazy Susan with a fabric measuring tape and white platform on top.
Set up your lighting and camera, then rotate the turntable and snap photos at each increment. Edit the images and upload them to a 360 viewer program to create the final interactive 360 photo. 360 product photography is a great way to showcase products online.
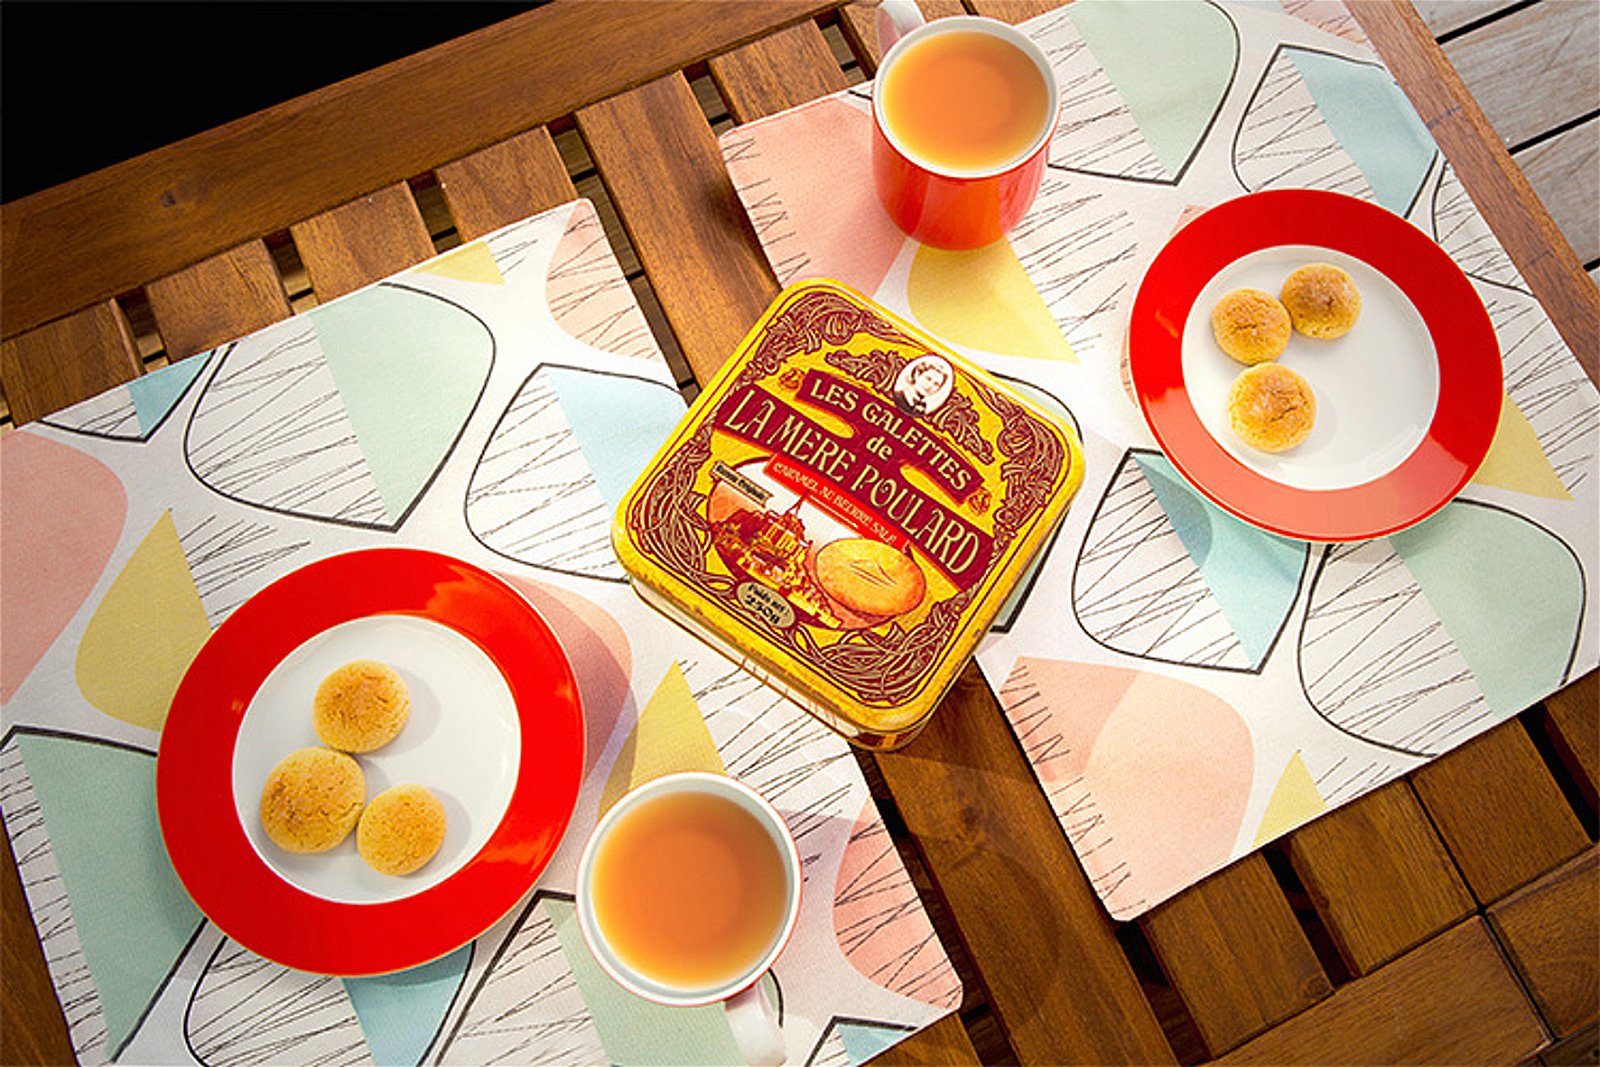
Flat Lay
Flat lay photography is a popular style for showcasing products. To create the perfect flat lay shot, point your camera straight down at a 90-degree angle. Use a tripod with a horizontal mount to ensure accuracy.
Choosing the right background is key. A flat, plain surface works best to avoid distractions. Proper lighting sets the mood, whether you use hard light for an edgy look or soft light for a painterly feel.
Styling your flat lay is important. You can use the knolling technique to create neat patterns or embrace a messy look with a prominent hero product. Composition is crucial, so place your hero product in the center or use the rule of thirds for balance.
With these tips, you’ll be able to capture stunning flat lay product photos that tell a story. To dive deeper into flat lay product photography, check out our comprehensive guide.
On A Budget
You can shoot professional product photos on a budget with a simple setup. Use a white background, like a sheet or foam board, and make sure it’s matte to avoid unwanted reflections. Clamp the background in place to create a seamless look.
A point-and-shoot camera works well for product photography. Use a tripod to keep the camera steady and maintain consistent angles across multiple products. Artificial lighting, like softboxes or a DIY light box, provides even illumination.
Find the best angles to showcase your product’s key features. Limit yourself to three to five angles, such as straight-on, 45-degrees, and overhead. Use a narrow focal length to reduce perspective distortion and capture flattering angles. In post-production, correct the white balance to ensure whites appear pure white. With these techniques, you can create cheap product photography that look professional.
Ideas For Subjects
This section is for you if you want to practice your product photography but don’t know where to start. The best way to begin is by looking around the house for a product that interests you. You can then build your own product shoot from there.
Below, we outline the best way to shoot different products. Each section introduces a product and outlines the key elements to look out for during your photoshoot. You can then apply these ideas to similar products.
Artwork
Photographing artwork can be challenging without the right techniques. Use a digital SLR or mirrorless camera for the best results. Even a high-end smartphone can work if you don’t need large file sizes.
To get the highest quality, use the lowest ISO setting and a narrow aperture like f/11 or f/16. This will minimize image noise and keep the details sharp. Use the custom white balance setting and a color checker for accurate colors.
The standard lighting setup uses two identical lights at 45-degree angles. This provides even, shadowless light. Avoid mixing light sources and use a sturdy tripod to keep the camera still. Include a grey card in one photo as a reference for editing. If you want to learn more about photographing artwork, there are great resources available with additional tips and techniques.
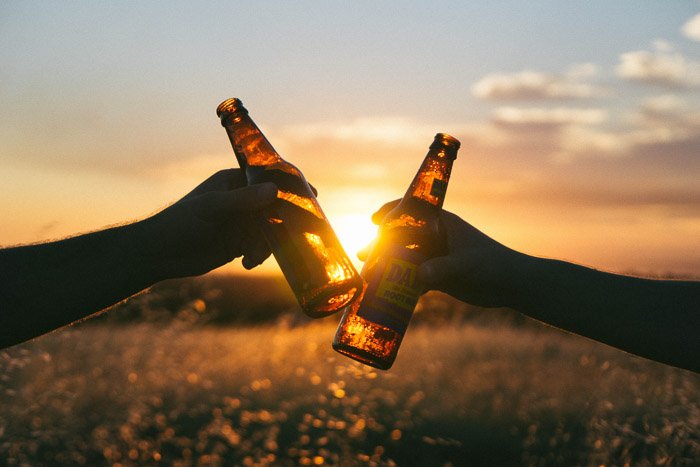
Beer
Beer photography is becoming increasingly popular for advertising and promotional gigs. With microbreweries popping up everywhere and bars needing to showcase their stock, learning how to photograph beer is a great addition to your food or product photography portfolio.
When photographing beer, use a standard lens free of distortion to keep the product true to life. A 50mm lens with a wide aperture (f/2.8 or lower) is a popular choice for capturing sharp images with a shallow depth of field.
Lighting plays a crucial role in beer photography. Natural or available light works well for capturing the warm, organic vibe often associated with beer drinking. If using artificial light in a studio setting, opt for continuous light sources like a ring light or softbox to easily eliminate reflections.
By mastering the techniques for photographing cans, bottles, and glasses, and using the location to highlight your product, you can create beer photography that stands out and tells a compelling story.
Clothing
Conceptualizing your clothing photography shoot beforehand is important. First, ask yourself why you need to take photos of the outfit. Knowing the purpose allows you to narrow down your requirements, such as using a white background for e-commerce or props for lifestyle shots.
The backdrop you use depends on where you plan to use the images. For e-commerce, a white background is the standard as it creates uniformity and makes the outfits stand out. You can use a DIY backdrop like a wall or blanket, or buy a seamless paper backdrop. For lifestyle photos, use backdrops that match the clothing style and don’t overpower the outfit.
Lighting doesn’t have to be a challenge when shooting clothing. Shoot beside a wide window during the day for diffused, even lighting. At night, use a small work light with a white curtain hung in front to diffuse the harsh beam. Position the light about 45 degrees from the outfit. If you plan to shoot a lot of clothing photography, consider investing in a small softbox for clothing photography.

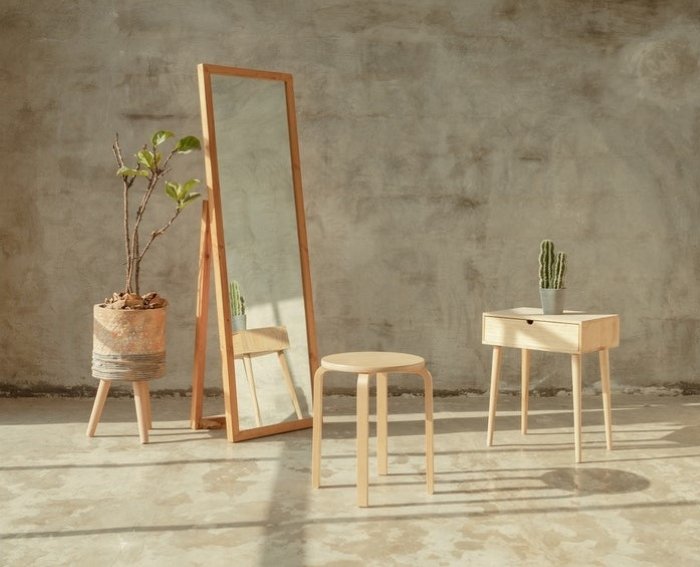
Furniture
Furniture photography is important for e-commerce businesses. Clean and polish your furniture before taking photos. Remove any tags or distractions.
Use natural light if possible, shoot near a window or in a bright open room. You may need to use a reflector or bounce card to direct the light. If there’s not enough natural light, use a portable flash.
Find the most flattering angle for the furniture. Avoid shooting it straight on, as this can make it look clunky. Use a tripod to keep the camera steady and the images sharp. A prime lens works well, but a zoom lens like a 24-70mm is good if you need to move around.
Check out our in-depth guide to learn more about furniture photography.
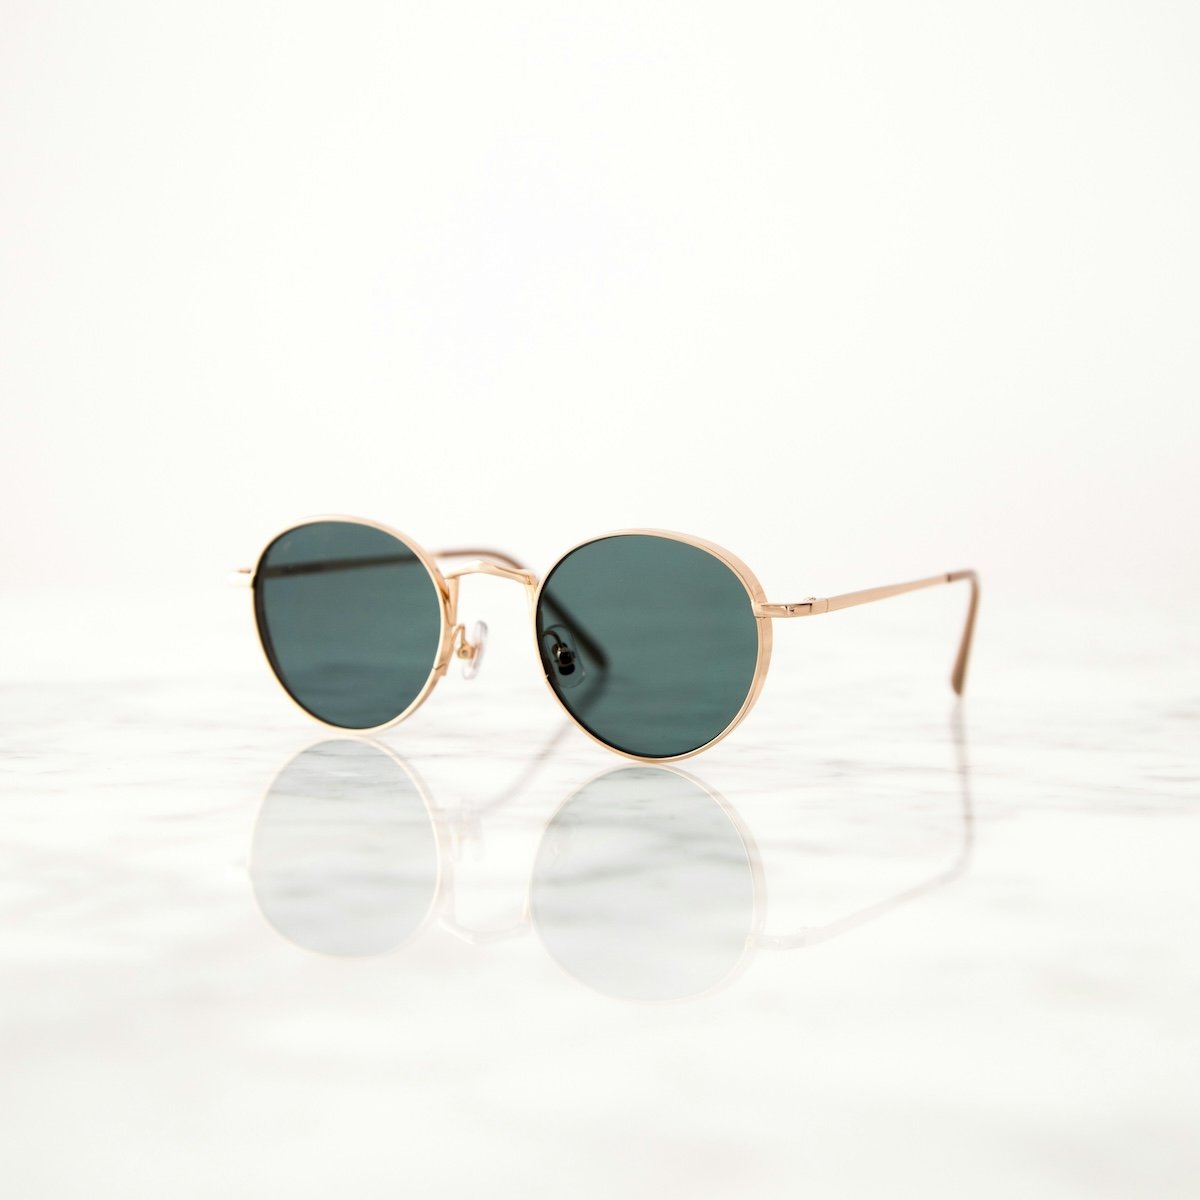
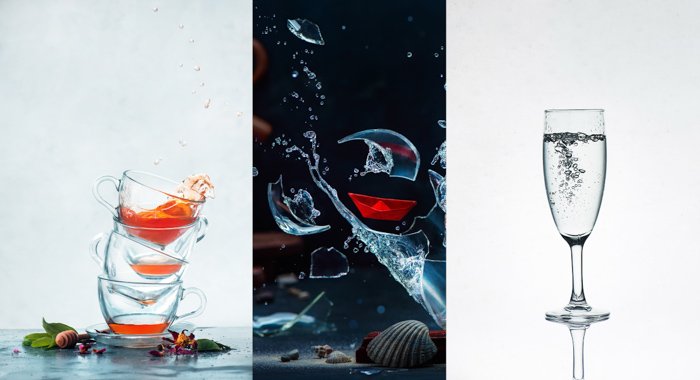
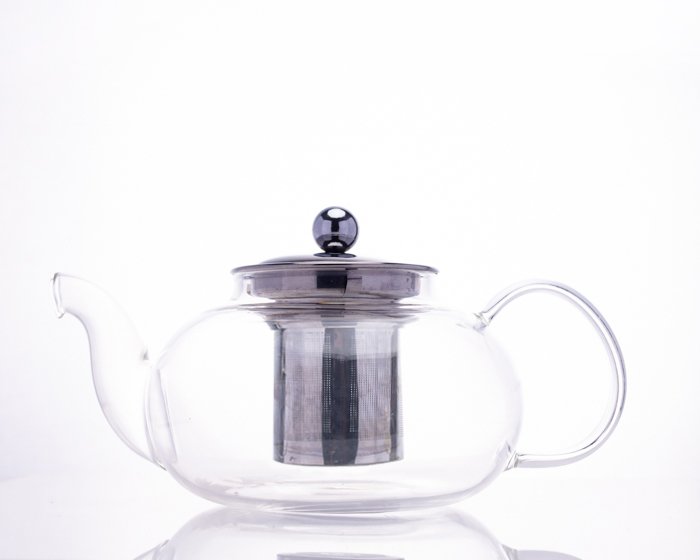
Glass
Glassware is one of the most challenging subjects to photograph. Reflections and transparency make it tricky to capture the perfect shot. But with these 8 creative tips, you can take your glass photography to the next level.
Using backlight is key to combating unwanted reflections. It also makes liquids shine beautifully. You can create backlight with simple techniques like using white paper or a softbox.
For a dramatic look, try photographing glass on a black background. Use two light sources to add depth and reveal texture. A long focal length can also make shooting easier by minimizing reflections and compressing the background.
Want to add some excitement to your glass photos? Try capturing action shots of pouring water or bubbles. Just be careful not to break any fragile props in the process! Glass photography takes practice and creativity, but the results are worth it.
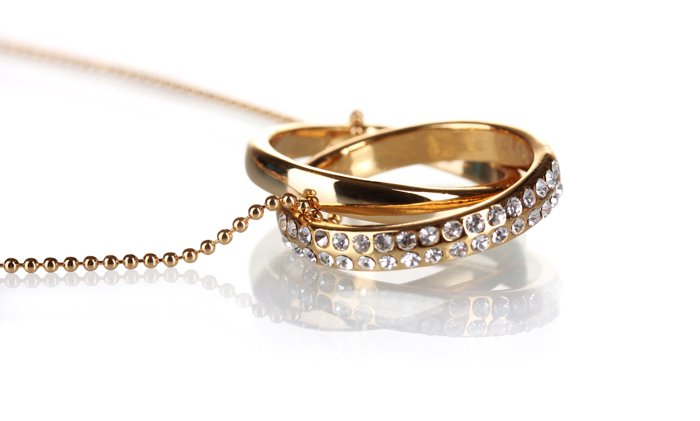
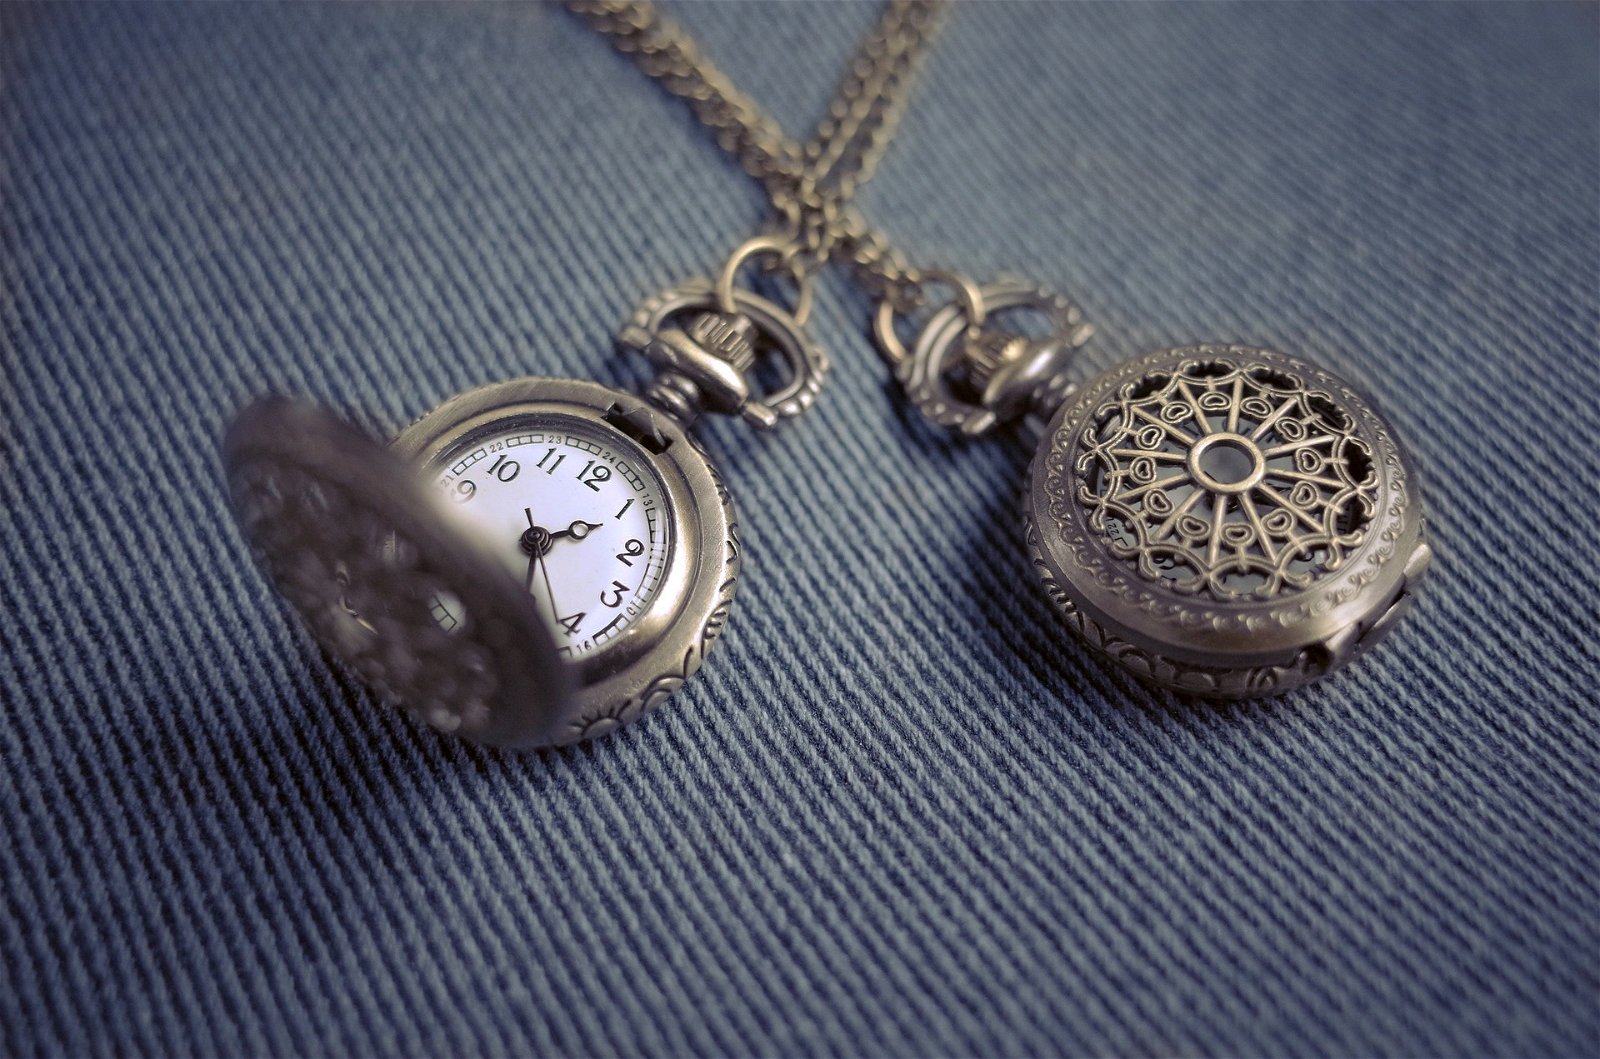
Jewelry
Jewelry photography can be challenging due to reflective surfaces and small details. Use a tripod to keep your camera steady and choose a standard lens to avoid distortion. A ring light or softbox will provide even, accurate lighting.
Keep your setup simple with a white background and avoid busy compositions. Pay attention to reflections and move lights as needed. Accurate white balance is crucial for true-to-life colors.
Use a deeper depth of field for overall shots and shallow DOF for detail images. Clean the jewelry before shooting and spend time in post-processing for the sharpest results. Proper composition and eliminating hard shadows will give your jewelry photos a polished, professional look.
If you’d like to dive deeper into jewelry photography, we have a comprehensive guide available.
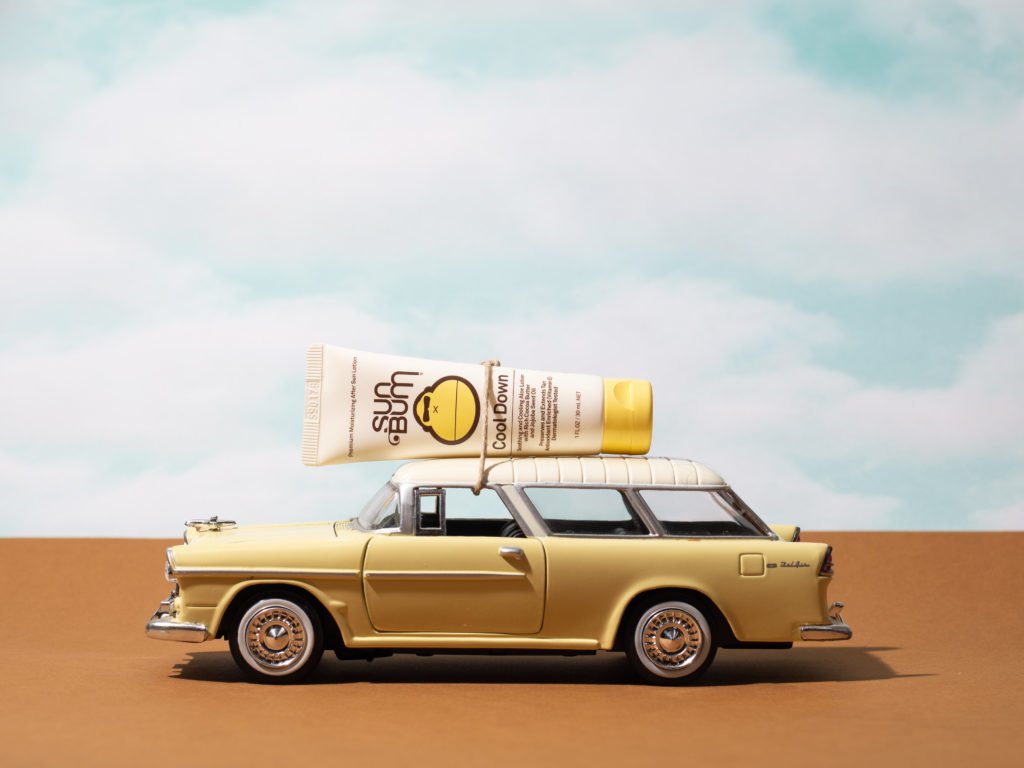
Lifestyle
Lifestyle product photography shows products in real-life scenarios. The goal is to create convincing imagery that makes consumers feel like they’re living through your photos.
Always think about what the product does and who it’s for. If you’re shooting sunscreen, show it by the pool or at the beach. You can place the bottle in sand, on a colorful towel, or sticking out of a beach bag.
Choose real locations when possible to avoid spending money on fake backgrounds. Use the right props, but don’t overwhelm the photo. The product should always be the focus. Lifestyle product photography lets people imagine how they can use an item, so invite them to do just that with your images.
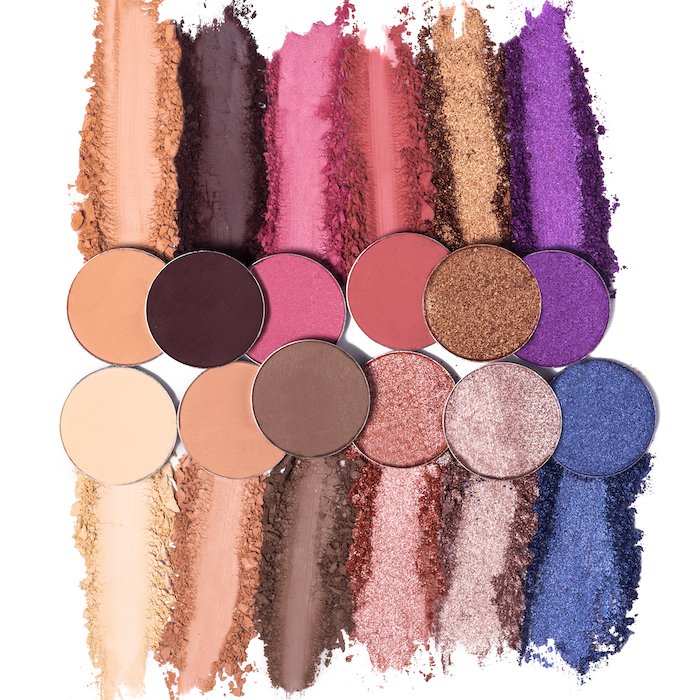
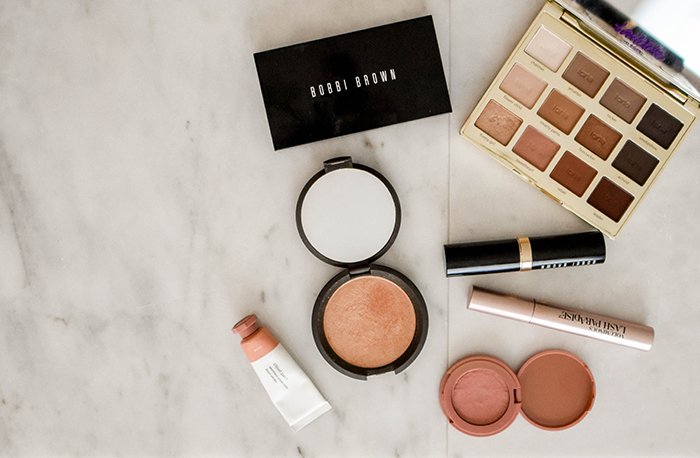
Makeup
Let’s look at some great makeup photography tips for beginners. You should use natural light to make colors stand out. Shoot in an open space with soft light hitting your model’s face to create a glowing effect and make their eyes sparkle.
Choose bold makeup colors like bright red lipstick. Cameras tend to desaturate colors slightly, so more intense shades will look better in photos.
Avoid using too much foundation so skin still looks natural. Make sure freckles and birthmarks are visible.
You can also use fake eyelashes to accentuate the eyes. Wispy lashes can emphasize certain parts of the eye without looking too heavy.
Bring out freckles and skin textures to make portraits look authentic. You can draw over freckles with an eyebrow pencil or use the High Pass filter in Photoshop to sharpen them.
Make sure the model’s outfit complements the makeup and doesn’t clash or stand out too much. Click here to learn more about makeup photography.
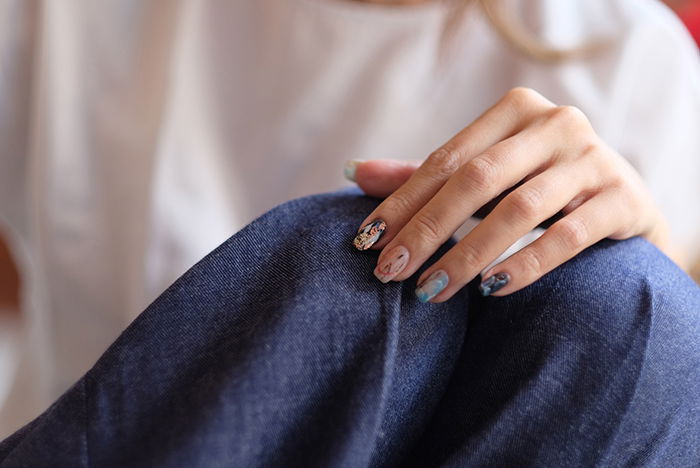
Nails
Nail photography is an important part of lifestyle and beauty photography. Taking stunning pictures of nails can be difficult without the right settings and equipment.
Use natural light to give nails a beautiful glow. Shoot indoors next to a large window or outdoors in an open space. Make sure the light is even to avoid unflattering shadows on your hands.
Hold props to make your hand poses look natural. Use anything related to lifestyle or beauty, like a bottle of perfume or your other hand. Avoid props that are more eye-catching than the nails themselves. To learn more about nail photography, we have a detailed guide that covers everything you need to know.
Cars
We will now look at some ideas for shooting professional car photography. First, find a unique perspective to make your photos stand out. Avoid mainstream shots and look for exciting locations or unusual angles. Capture the car from above or use a drone for a bigger frame.
Including a person can add life to your car photos. Choose a model that matches the car’s personality and target audience. Focus on the interior too, especially the steering wheel and dashboard.
Good composition is key. Use leading lines, the rule of thirds, or the golden ratio to create balance. The best lighting is during the golden hour – the first and last hours of sunlight each day. Car colors and paint impact the best time of day to shoot. Matte finishes do better in various lighting situations.
Capture driving shots to show movement and experiment with different angles for interesting results. Highlight the car’s unique details and personality, like headlights or interior features. Be mindful of reflections – they can add visual interest or be distracting.
Ready to take your car photography skills to the next level? Keep practicing these tips to create stunning, professional-looking images that showcase the beauty and personality of any vehicle.

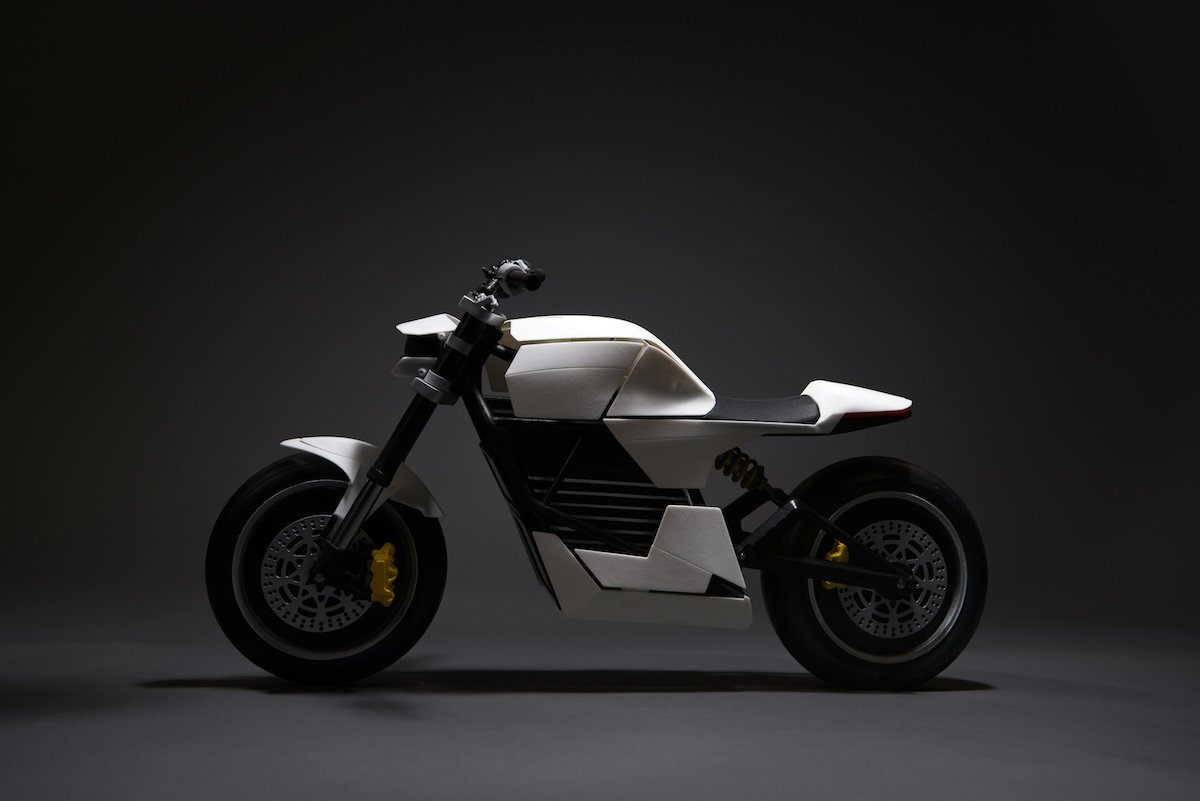
Motorcycles
Motorcycle photography is an exciting way to capture the beauty and power of these machines. To get the best shots, you need a fast camera with reliable focus and a decent number of megapixels. DSLRs and mirrorless cameras are popular choices.
The lens you use is also important. Look for lenses with a wide aperture, like f/2.8 or lower, to let in more light and create a shallow depth of field. Fixed lenses are often sharper than zoom lenses.
When shooting outdoors, try to avoid harsh midday sun. Sunrise and sunset provide better lighting. If you must shoot in bright sun, use a reflector, find shade, or use an ND filter. With the right equipment and techniques, you can create stunning motorcycle photography that captures the unique personality of each bike.
Photographic Techniques
There are a few photographic techniques and elements you should consider when photographing in this genre. Cameras are not as forgiving as our eyes, so we will see objects and surfaces differently from how the camera sees them. One big issue is focusing, and sharp focusing is crucial to product photography.
You must also consider reflective surfaces. The light source can be a complete giveaway that you are shooting at home or in a studio. The viewer will be distracted from the product if it is easily recognizable. This is made much harder with mirror surfaces.
Read the sections below to learn how to use simple techniques to combat these issues.
Focus Peaking
Focus peaking is a camera feature that helps with manual focusing. It shows a colored overlay on the sharp areas of the image in real-time.
The camera analyses the live image feed and looks for areas with high contrast, especially micro-contrast. It then covers those areas with a colored layer. Most cameras let you choose the overlay color and adjust the sensitivity.
Focus peaking makes manual focusing much quicker than using live view magnification. However, it can still be challenging with shallow depth of field. If you’d like to learn more about focus peaking, there are great resources available here that dive deeper into the topic.

Reflective Surfaces
Photographing reflective surfaces like glass and metal can be challenging. The key is to use bounce cards to control the light and prevent glare.
Place the light source beside or behind the subject, then use white or silver bounce cards to direct the light onto the reflective areas. Adjust the cards’ positions until you eliminate dark spots and achieve the desired look.
When photographing cosmetic products with shiny caps and translucent tubes, position the key light above and the backlight behind the product. Use bounce cards on each side to reflect light onto the cap, creating clean white lines. An acrylic panel under the product can help achieve a pure white background.
Reflective surface photography takes practice, but mastering this skill will make photographing any reflective object easy.
Phone Photography
You can take professional product photos using just your smartphone. Set your phone on a tripod to keep it stable and prevent blurry shots. Use a white backdrop like construction paper or a blanket for a clean look.
Adjust your camera settings for the best results. Keep the ISO at 100 to avoid image noise, and choose the right aspect ratio for your website. Use autofocus by tapping on the product to ensure sharpness.
Shoot near windows to take advantage of soft, natural light that mimics a studio setup. If it’s too dim, use table lamps with bendable necks to direct the light where you need it. After shooting, use editing apps like Adobe Lightroom, VSCO, or Snapseed to color correct, adjust exposure, and remove blemishes.
Click here to learn more about smartphone product photography.
Editing
Once you have finished your shoot, you will want to edit your photos on your computer. Just like the product photography genre, it seems simple but is extremely complex at the professional level. Experts will create masks for every single piece of the product to fine-tune each section.
Here, we will describe simple ways to enhance your images in digital editing programs. If you don’t have Lightroom but use another editing software, read this article to find the suggested adjustments. You should then be able to apply these adjustments in your preferred software.
If you have Photoshop, follow the relevant guide for a more detailed look at editing product photography.
Editing In Lightroom
Lightroom is a powerful editing software for improving your product photos. It offers many features to enhance and color correct your images.
One great thing about Lightroom is the ability to “sync” your edits. You can copy the settings from one image to a whole series of photos. This saves a lot of time when editing.
Lightroom has tools for cropping, white balance, exposure, contrast, and more. The spot removal tool helps create clean product images. You can also use the HSL panel to balance colors and the sharpening panel to add definition.
Read our extended Lightroom guide too learn more about product photography editing.
Editing In Photoshop
Editing product photos in Photoshop is an important step to make them look their best. The basic process involves cleaning up the image, adjusting colors, and improving contrast.
Start by using the Clone Stamp tool to remove any dust, scratches, or spots on the product. Then, use Color Balance to make sure the colors in the photo match the actual product. If needed, use a layer mask to apply the color changes only to specific areas.
Finally, add some life to the image with the Levels adjustment. This will brighten the photo and add contrast to make it more attractive. By following these steps, you can edit product photos to create accurate and appealing images that will help sell your products.
Start Your Own Business
Starting a product photography business is a great way to make money from your photography skills. You can often do this type of photography at home with minimal space and gear. To get started, invest in a couple of monolights or speedlites, reflectors, diffusers, and backdrops.
Having good Photoshop skills is important for delivering high-quality images to clients. You’ll also need a simple website to showcase your work and attract potential buyers. Research companies that sell products you’d like to photograph and reach out to introduce yourself.
Social media platforms like Instagram are powerful tools for getting your work seen by potential clients. Engage with brands by following them, commenting on their posts, and even featuring their products in your own photos. Licensing your images through stock agencies or selling them directly on your own site are additional ways to make money from your product photography.
If you’d like to learn more about product photography business, there are many helpful resources available here.