Macro photography guides us into a world invisible to the naked eye. And even within the macro niche, there are tons of different little worlds photographers explore!
Macro photos make us see the beauty in the details by making small subjects look larger. Here are 30 of the most influential artists working in the macro niche to inspire you. Believe us, it’s worth following them!
- Learn to take stunning photos without stepping outside.
- Discover affordable ways to convert any lens for macro shots.
- Explore unique techniques for lighting and composing your subjects.
30 Most Influential Macro Photographers
Let’s look at the work of 30 of our current favorite macro photographers!
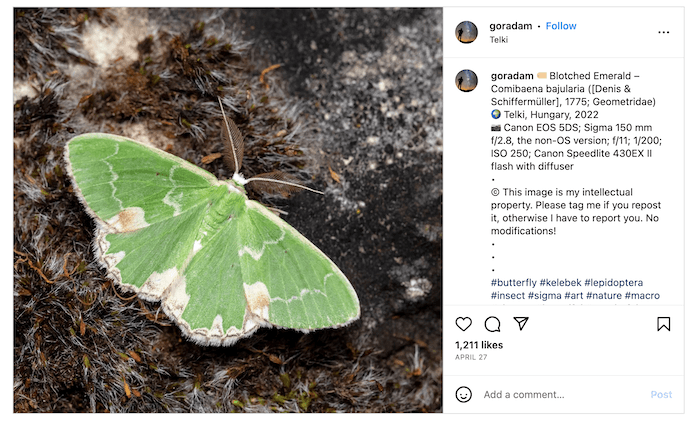
1. Adam Gor
Adam is a Hungarian biologist who has been taking photos since 2000. And he took it to a professional level bit by bit.
He mostly photographs butterflies and moths. His images are perfectly composed. And he always manages to catch his subjects in their most beautiful moment.
These photos also make the viewer wonder how patient Adam is.
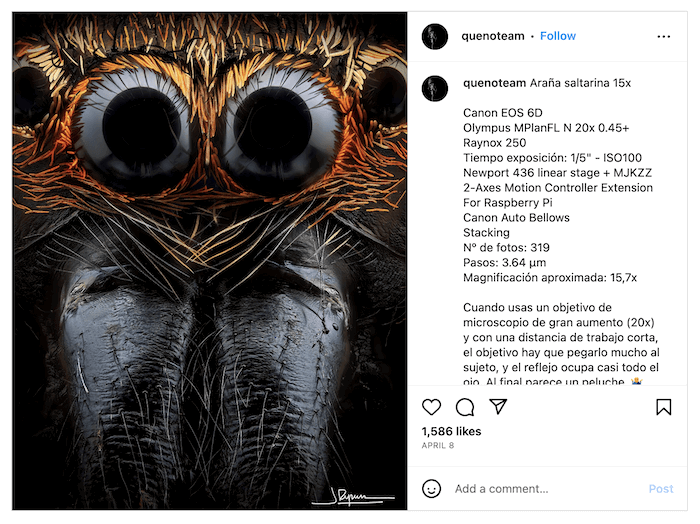
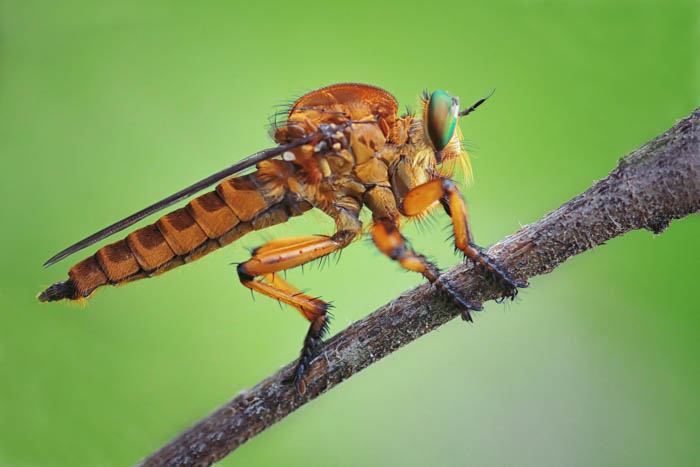
2. Javier Rupérez
Javier is a Spanish photographer who specializes in extreme macro photography. This subgenre focuses on details that are almost invisible to the naked eye.
His macro shots perfectly capture the surprising and scary beauty of insects. Javier really makes us rethink what we know about the world around us.
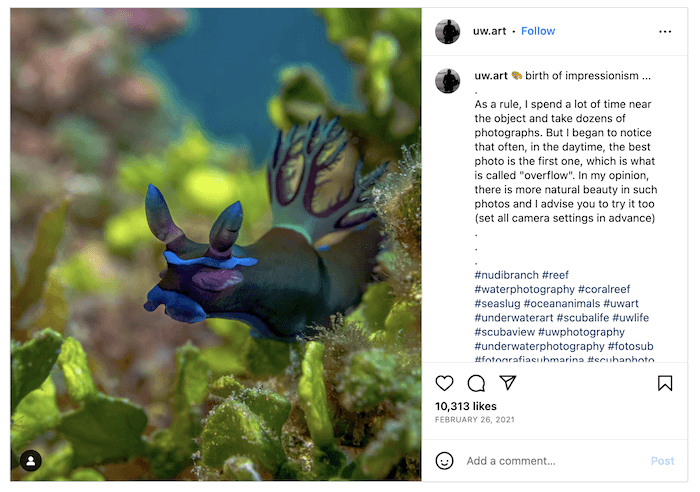
3. Andrey Savin
Andrey is an underwater photographer, videographer, and certified diver. So it’s safe to say he spends a lot of time with an underwater camera. His unique skill set lets him take outstanding macro photos you don’t get to see very often.
He also travels a lot. Audrey has guided tours and workshops where you can go with him to take images as vibrant and diverse images as his.
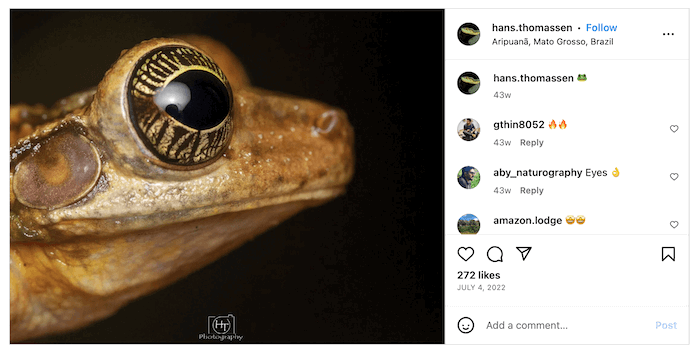
4. Hans Thomassen
Hans Thomassen is a Brazilian biologist, researcher, photographer, and entrepreneur. He aims to raise awareness about nature and fights for a sustainable world.
You can meet a lot of different creatures in his images. Some of his favorite subjects to photograph are insects, spiders, amphibians, and reptiles.
He also educates his followers by writing informative captions.
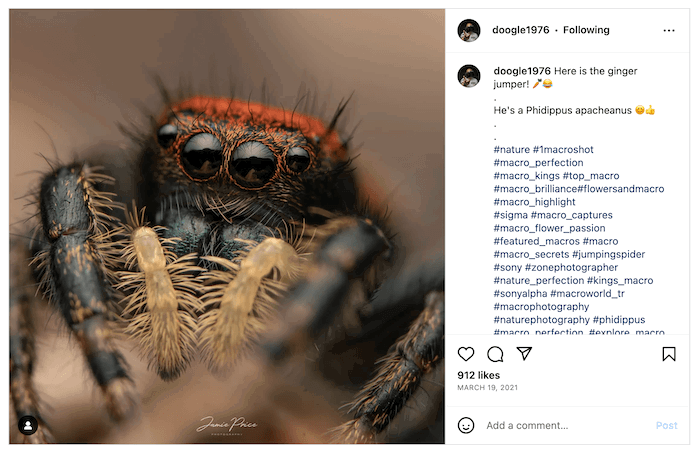
5. Jamie Price
Jamie Price specializes in macro, portrait, pet portrait, and product photography. He is based in Leicestershire and takes lots of photos in his own home.
He can make the scariest spiders look so astonishing that the viewer forgets to be afraid. But he doesn’t just capture living creatures. You can also find small objects, fruits, flowers, or seeds among his macro images.
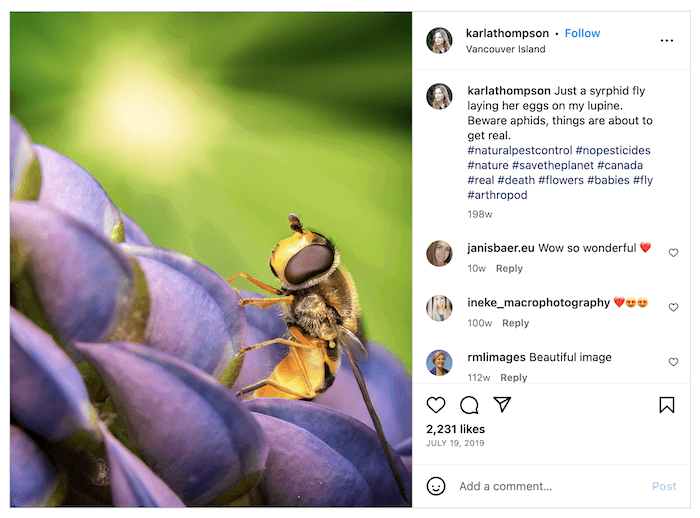
6. Karla Thompson
Karla Thompson is an arthropod conservationist photographer with a passion for nature. She stands for ethical photography and hopes to build a bridge between nature and humans.
Her images are vivid and beautiful. And her lively captions effectively bring her photographed creatures closer to us. From bees to spiders, she captures everything she encounters.
7. Alan Shapiro
Alan is an award-winning photographer and advertising chief creative officer. Photography started as a hobby for him, but it quickly became his passion.
He is into many genres of photography. And lucky for us, macro photography is one of them. His macro photography mostly consists of amazing photos of flowers that have a painting-like feel.

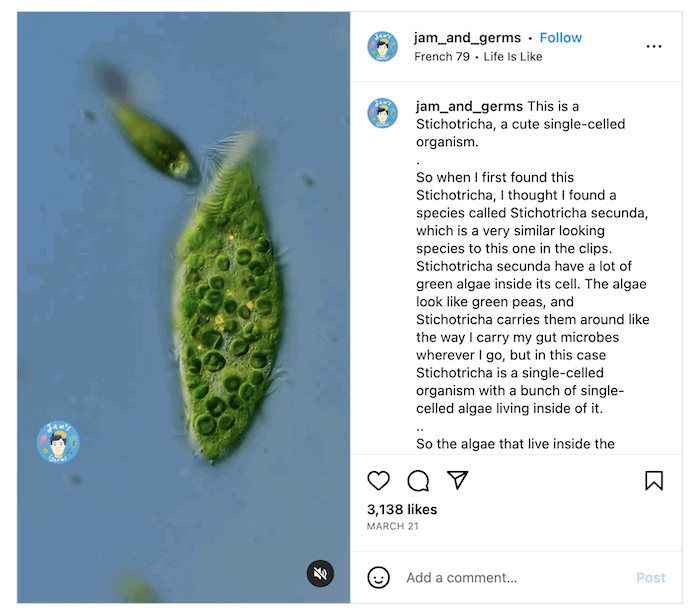
8. James Weiss
James introduces himself as “a funny guy who got lost in life and found his passion in pond scum!” This basically sums up his shooting style and subject matter.
He photographs and takes videos of microscopic organisms like amoebas. And he writes fun and easy-to-understand blog posts about them.
Thanks to his microscope and deep knowledge, he guides us into a world we otherwise tend to forget about.
9. Christian Brockes
Christian is a master of extreme macro photography. The German photographer uses his work to raise awareness of environmental problems.
He documents spiders and insects that are sometimes unfamiliar to us and opens our eyes to the wonders of nature.
He aims to use photography as a way of fighting against habitat loss, climate change, and the usage of pesticides and herbicides.

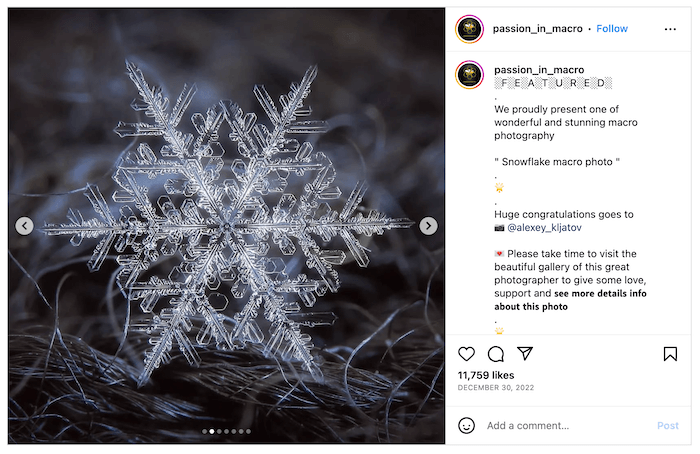
10. Alexey Kljatov
Alexey’s passion is taking macro photos of snowflakes. He finds their infinite diversity amazing and worth capturing.
His photos have been published in NASA, CNN, The Wall Street Journal, and others have published his photos. And it’s no wonder he became famous. His images are incredible!
They are beautiful, sharp, and simply mesmerizing.
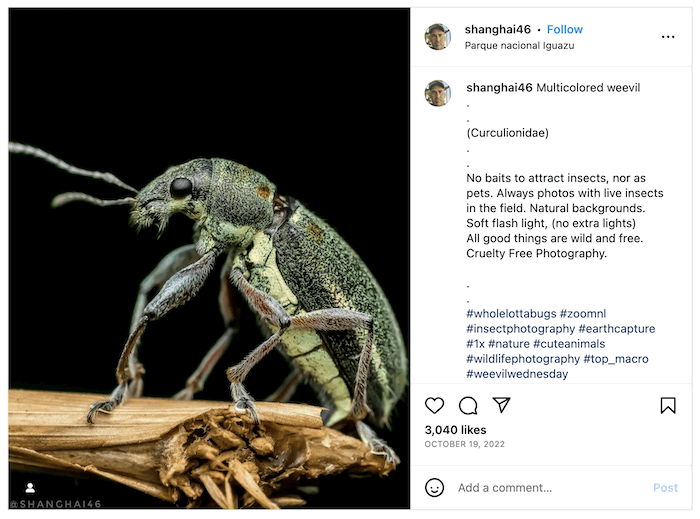
11. Diego Mendez
Diego Mendez is a macro photographer from Argentina. He is passionate about the world of insects and spiders.
He only posts cruelty-free photographs and doesn’t use any bait to attract insects. Also, he solely takes photos of animals in the field. His motto is, “All good things are wild and free.”
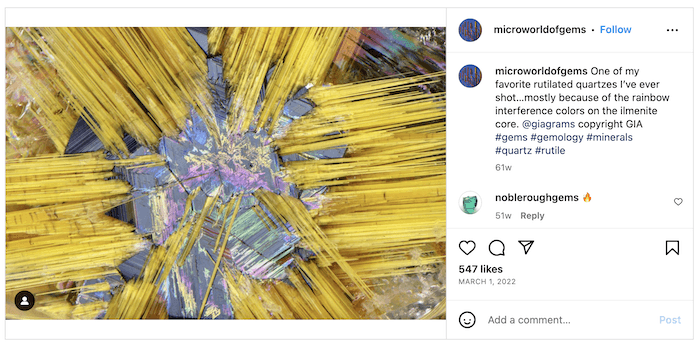
12. Nathan Renfro
Nathan is a gemologist and geologist who takes stunning images with his Zeiss microscope. His subjects are gems, rocks, and minerals.
At first, his gallery looks like he has a graphic designer or art background, as he captures things we never see with our naked eye.
The surfaces of these formations are geometric. And due to his photography techniques, they appear colorful and unlike anything else!
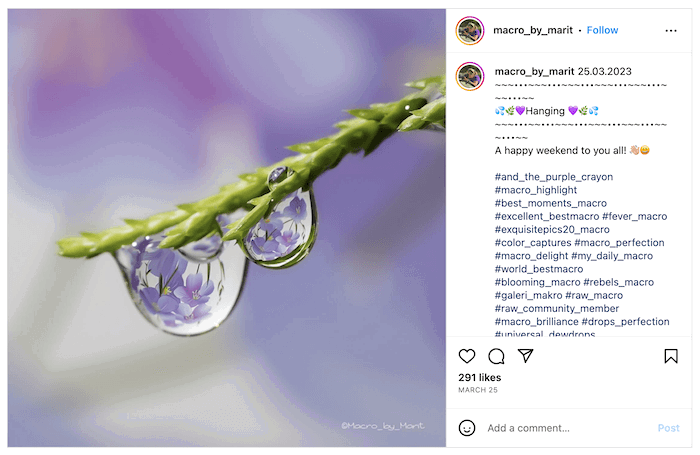
13. Marit Hovden
Marit’s main subjects are waterdrops, which she captures in stunning macro photos. She even has a dedicated feature account (@drops_creative) for droplet photos. And you can use the #drops_creative hashtag to get featured.
Her images are magical. The waterdrops look like tiny pearls. And she plays with reflecting the background in them.
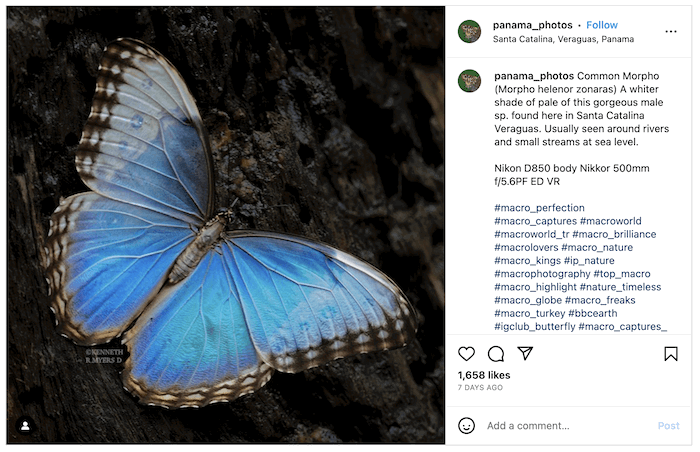
14. Kenneth R Myers
Kenneth was born and raised in Panama. He captures the beautiful wildlife there, raising awareness of the importance of conservation and protecting nature.
His images are mostly of birds and tiny insects. And they are almost like drawings or paintings. They are incredibly vivid and colorful and guide viewers into a lesser-known world.
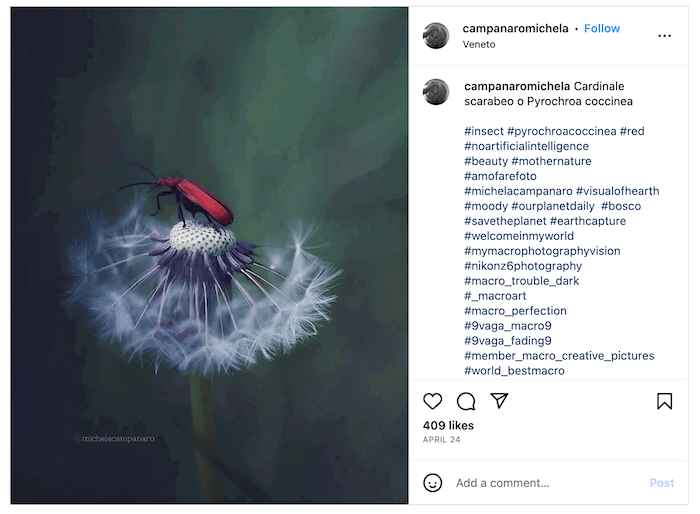
15. Michela Campanaro
Michela is an Italian photographer whose photos are raw and emotional. You’ll notice that most of her photos look dark and unedited. But this effect is done intentionally to enhance her tiny models.
Michela also owns a feature account with over 21,000 followers on Instagram. You can submit your work using the hashtag #thehub_macro to be featured on it.
16. Oscar Rojas
Oscar is a macro photographer based in Florida. He has amazingly sharp close-ups of insects, spiders, and sometimes caterpillars.
He also captures their behaviors, like when spiders eat other tiny things. He sometimes explains what we’re looking at in his captions.
Plus, he adds the exposure settings and technical details of his photography process. It’s incredibly useful for photographers who want to gain inspiration from his style.

17. Monica
Monica has painting-like macro images. She shoots flowers with nicely blurred backgrounds. She plays with the colors during post-processing to add depth and atmosphere to the photos.
Her photos look soft and give a calm feeling. This makes them ideal for decorating any home.
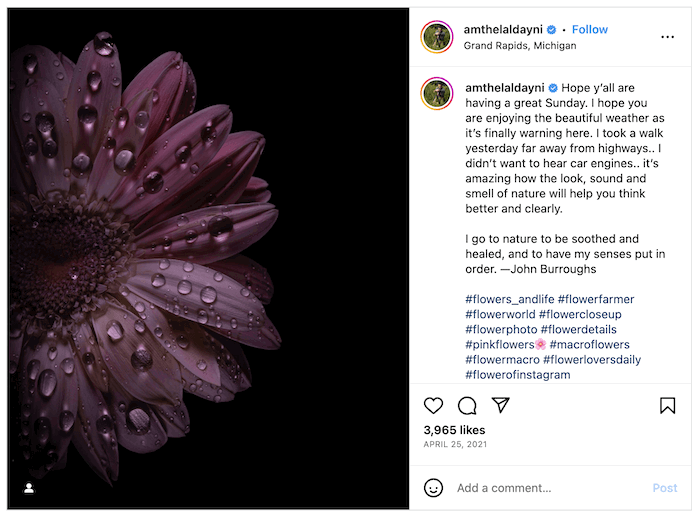
18. Amthel Al-Dayni
Amthel is a photographer with a strong passion for macro photography. He doesn’t consider himself a professional, but his images say otherwise.
His work contains stunning and colorful photos of insects, spiders, flowers, fungi, waterdrops, and soap bubbles.
He gets really creative with his waterdrop photos. They sometimes reflect different subjects from the background.
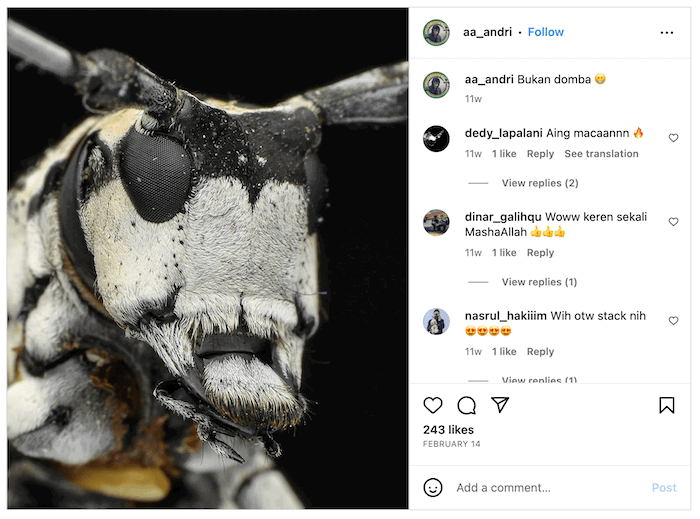
19. Andriansyah Andriansyah
Andriansyah is an Indonesian macro photographer with an interest in tiny animals. He takes stunning and surprising images of insects, flowers, spiders, or snails. And sometimes reptiles or amphibians.
He professionally freezes movement and shows the interactions of the living things around him. Besides animals, you can find objects like jewelry in his portfolio.
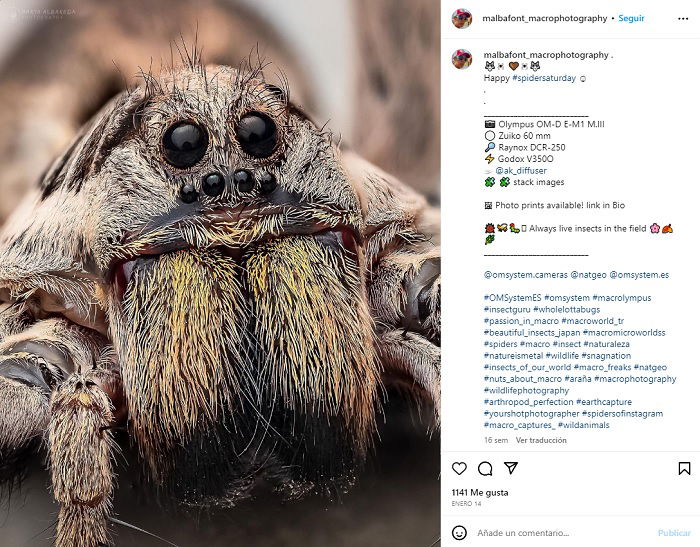
20. Marta Albareda
Marta is a prolific macro photographer from Barcelona, Spain. She has a passion for insect macro photography. And her skill behind the camera allows you to see a bug’s life in exceptional detail.
She uses Olympus (OM System) cameras. And she’s mastered the art of the extreme close-up, bringing new dimensions to insect photography.
Some might find bugs disturbing or frightening, but she turns them into objects of wonder and awe.
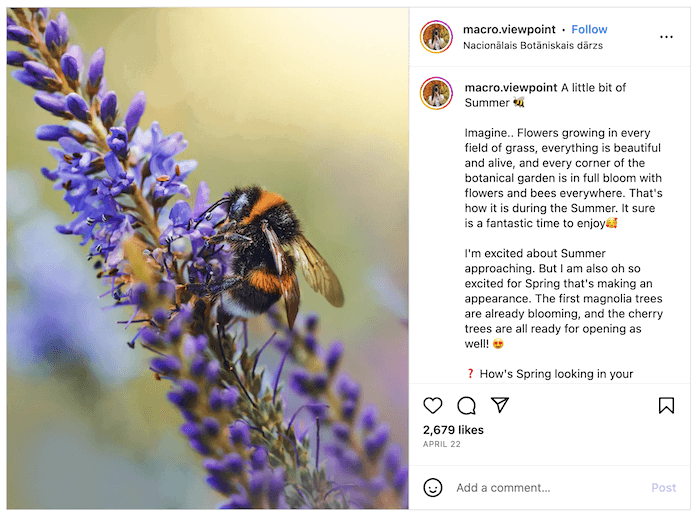
21. Kristine
Kristine is a nature and macro photographer from Latvia. She has a blog that touches on different topics and offers tips and tutorials on making images like hers.
She has a unique style with a combination of strong and pale colors. She captures flowers, leaves, fungi, insects, or frozen bubbles. And all of them are done to a professional level that will leave you wanting more.
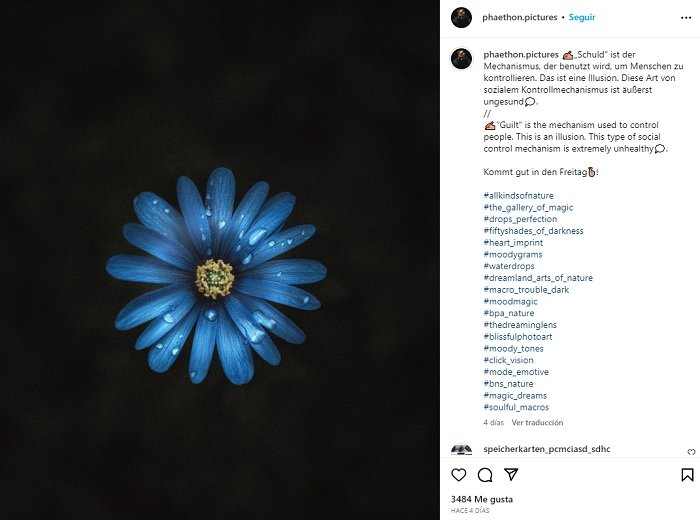
22. Phaethon Pictures
Phaethon Pictures is a macro photographer working in Coburg, Germany. They are prolific with a camera, pumping out stunning macro images on a regular basis.
They use a noticeable amount of post-production. But that’s one of the reasons they have such a distinct style. These images are minimalist and dramatic yet have a dreamlike quality.
The main subject is flora—mainly flowers and leaves in isolation. They’ve mastered the art of bokeh to intensify the central subject. And colors are contrasted with darkness, adding a sense of mystery to the images.
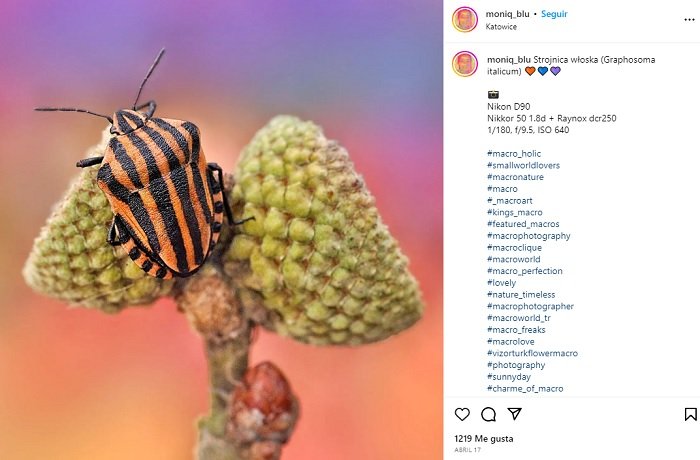
23. Monika Blucha
If you like bright colors, you’ll love Monika’s macro photography. Her favorite subjects are insects and flowers, often shot together. Her love for them both rings clear in her images.
Each shot is beautiful. But as a collection, her bright and colorful images bring joy to the soul. Her images are happy and playful. And the bright color palette gives her portfolio a storybook quality.
The insects become characters, making us more invested in the images. Bugs can be scary or disgusting, but she transforms creepy crawlies into curious critters.
She also documents the camera and lens she uses and her exact settings for each shot. That’s fantastic information if you’re learning the art of macro photography.
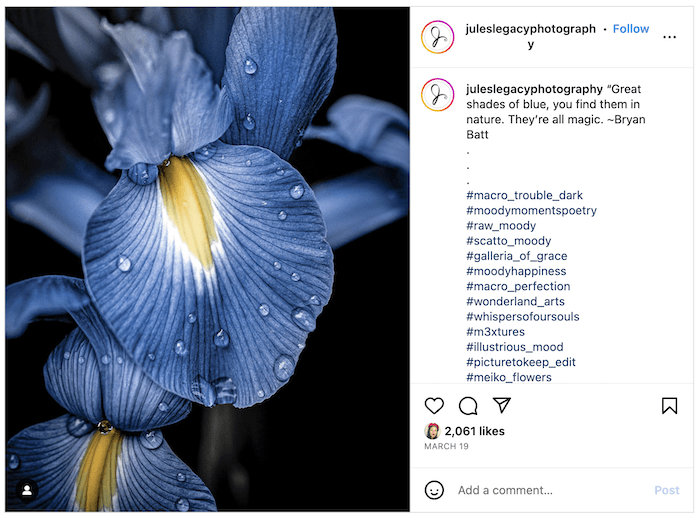
24. Julie
Julie is based in Michigan and Montana. Her stunning macro images are mostly about plants, their leaves, and flowers in all seasons. She captures the frozen winter world by using magical pale colors. And she captures the lively springs with stronger ones.
Her images show how sensitive she is to the soft and delicate beauty of the world.
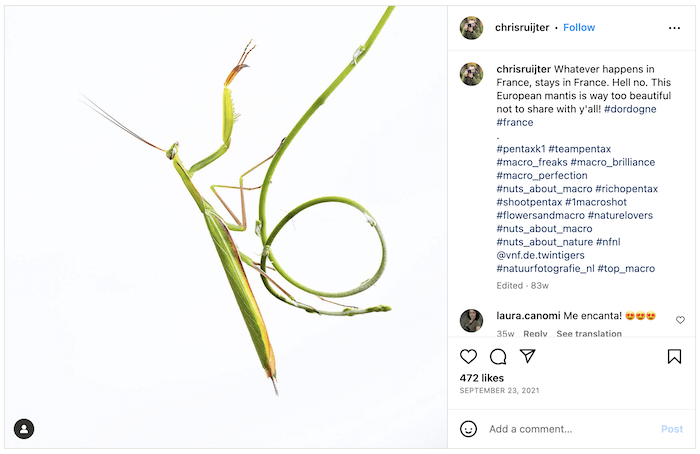
25. Chris Ruijter
Chris is a nature photographer from the Netherlands who is passionate about macro photography. He is a Ricoh-Pentax ambassador. He uses his gear to capture sharp and gorgeous images of dragonflies, fungi, spiders, and other insects and plants.
He documents nature around him with great sensitivity. And he pays attention to the details that so many of us might otherwise never see.
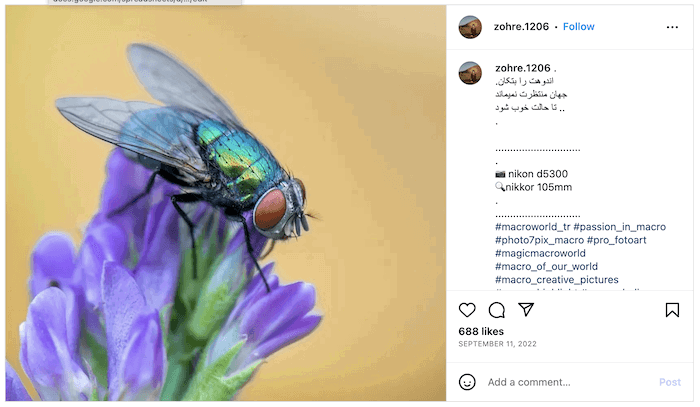
26. Zohre
Zohre is a smartphone camera photographer. She is a great example of what camera phones can do in our daily lives.
Using a Samsung A750 with a macro lens, Zohre takes gorgeous close-ups of insects and flowers. Her images prove you don’t always need a professional camera to take stunning macro pictures.
She now also uses a Nikon D5300 camera with a 105mm lens.
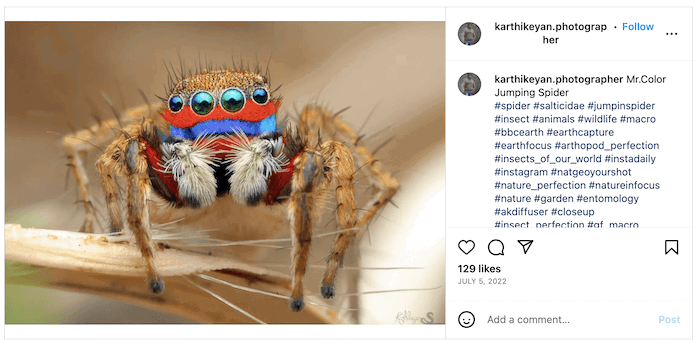
27. Karthikeyan Shanmugasundaram
Karthikeyan’s work is mostly about animals and insects in motion. This has earned him recognition in the macro photography community.
His images are so sharp and colorful that the viewer feels they will start moving at any second. It’s not an easy task to capture tiny flying creatures. But he manages to do it in a way that brings us into his tiny world.
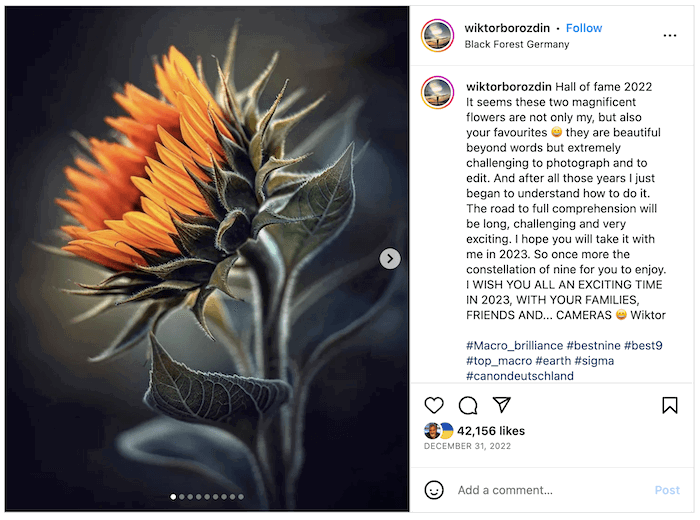
28. Wiktor Borozdin
Wiktor is from Freiburg, Germany. He loves to take pictures in the forest. And he has many beautiful photos of sunflowers and poppy flowers.
He hopes that people will respect nature more if they see the little details of the world. His images look like paintings. And he cleverly uses color to enhance shapes and texture.
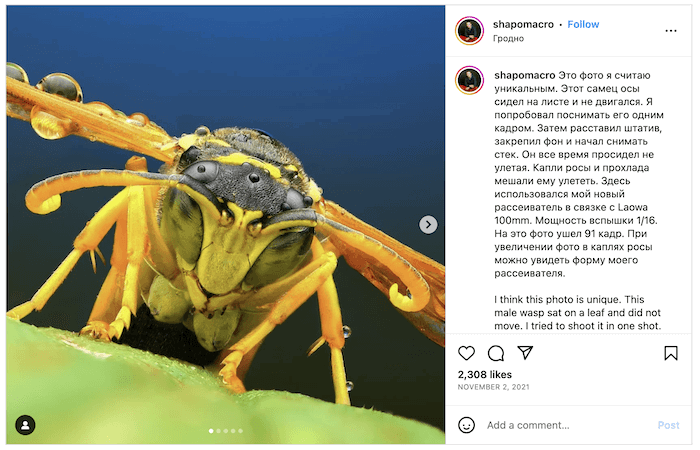
29. Андрей Шаповалов
Андрей Шаповалов is a macro photography enthusiast. He lives in Grodno, Belarus, where he shoots in a home photo studio.
In his gallery, you will find wonderful photos of insects and spiders. His extreme macro photos seem like they were taken of creatures from another planet. He uses focus stacking to ensure his whole subject is in sharp focus.
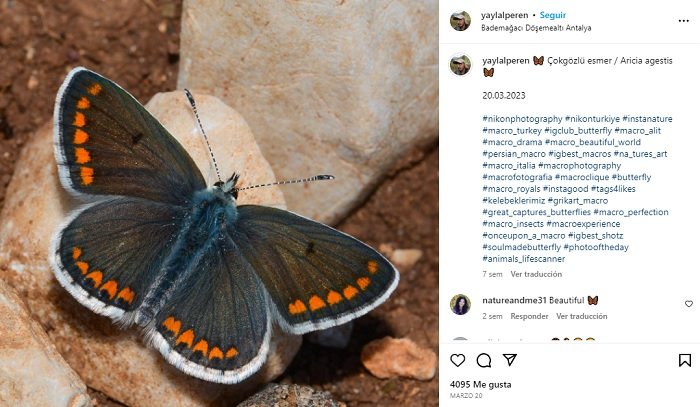
30. Alperen Yayla
Alperen is an insect expert who specializes in taking pictures of butterflies. But he isn’t just a photographer. He is also a qualified lepidopterist (butterfly and moth collector). He has a passion for winged insects, and that passion comes through in his macro photography.
Since he studies butterflies professionally, his photo style is scientific. But his images are also full of beauty and intrigue. Butterflies are always a joy to look at. But Yayla’s skill with the camera enhances their natural beauty.
What Is Macro Photography?
Macro photography is about taking close-ups of small subjects and making them look much bigger than life-size.
Macro subjects can be any living creatures, from flowers to insects or details of larger objects. Macro shots can also be about phenomena like snowflakes, waterdrops, or objects like jewelry.
Tiny animals in such a large magnification can look like they are from another planet. This is what takes our breath away.
It can require special equipment, like macro lenses or microscopes. But some photographers use their smartphones for macro photography.
Conclusion: 30 Most Influential Macro Photographers to Follow
Macro photography is a genre that guides us into totally different worlds. And it introduces us to the tiniest creatures and objects around us.
Getting inspiration from another photographer’s work is always a good idea. And this list has enough artists to inspire your own creative style of macro photography!
- Learn to take stunning photos without stepping outside.
- Discover affordable ways to convert any lens for macro shots.
- Explore unique techniques for lighting and composing your subjects.