Capturing stunning macro photography backgrounds is of utmost importance.
You see, a good background will take your macro photos to the next level, while a bad background will cause them to fall flat.
1. Macro Photography Backgrounds: Finding the Simplest for Beautiful Shots
Step one of creating amazing macro photography backgrounds:
Make sure that the background is simple.
Because the simplest photography backdrops emphasize the main subject. They make it stand out.
And in macro photography, you want your main subject to stand out.
What counts as a simple background?
First, the simplest backgrounds have no distracting elements. There are no stray branches, no unwanted leaves, and absolutely no human-made objects, such as garden trellises.
Now, it’s not hard to eliminate these items from your backgrounds. The key is to take a moment after you’ve composed your shot–and think about whether everything that exists in the frame should be there.
If you notice any unwanted elements, you should either remove them from the frame or change your composition to exclude them.

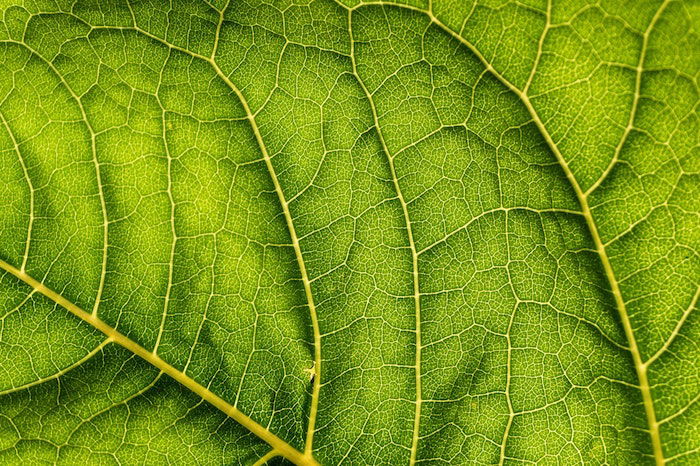
Second, simple photography backdrops are as uniform as possible. There are no unwanted splashes of color. There are no rapid transitions from green to brown and back again.
If possible, you should make your background into a single wash of color, like this:
Notice how the color stays solid the entire time. This is essential–because colors can take away from your photo, same as stray branches or distracting leaves.
That’s what you want to create.
Finding uniform backgrounds like this doesn’t have to be hard. It just involves a bit of deliberate composing before you set up for a shot. Once I’ve found the main subject, I look all around the scene.
The goal is to find spots of consistent color behind my subject, such as a deep green tree or a patch of a golden wheat. I then try to position my subject directly in front of these background areas.
But as you can see, I haven’t just made a background that’s uniform in color. I’ve created a background that features a nice blur. This further enhances the background simplicity.
After all, the fewer details you can see, the less the background distracts–and the more it emphasizes the main subject.
But how do you create this beautiful background blur?
2. Use a Wide Aperture and Large Subject-Background Distance for the Best Backdrop Blur
In macro photography, background blur is beautiful.
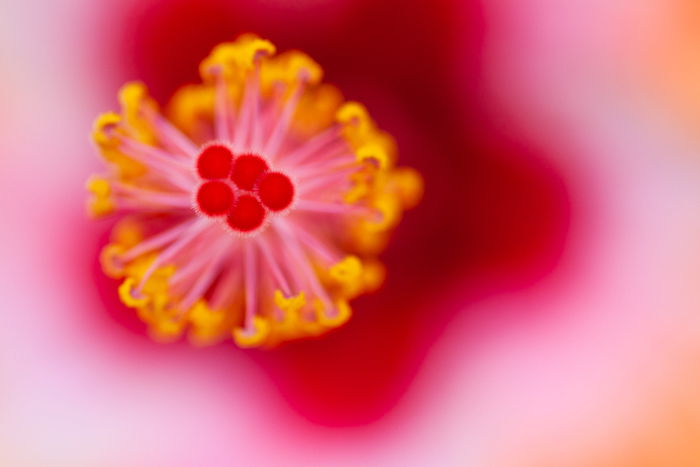
Because background blur emphasizes the subject. And, if you’re careful, you can even manage to enhance the subject with your blur. Do so by creating stunning background effects, such as the bokeh in this photo below.
To get that background, I used something I like to call the Broken Backlighting Technique, which I explain in detail below. But it all starts with a nice blurred background!
So how do you capture stunning background blur?
Here’s how it works.
First, you should use the widest aperture that your lens offers. You see, your aperture is a hole in the lens, which opens wider and closes down depending on your camera settings.
The wider the aperture, the narrower the area that is actually in focus.
This photo has a narrower aperture, and so it appears sharp throughout:
Whereas this photo has a wider aperture, and so it only has a small sliver in focus.

Now, the aperture is represented by f-numbers, like this: f/4, f/8, f/11, etc. And the smaller the f-number, the wider the aperture.
For the best backgrounds, I recommend shooting with an aperture between f/2.8 and f/5.6. This will give you a stunning photography backdrop with stellar background blur.
Note that the higher your aperture, the more you’re going to have in focus–and the more distracting the background will become.
However, creating a beautiful blur isn’t just about using a wide aperture. Your technique matters, too.
In particular, you can enhance the background blur by increasing the distance between your main subject and the background. That is, the farther your subject is from the background, the better the blur will look.
Here’s a little trick. You can increase the subject to background distance just by getting low to the ground and shooting outward.
That way, the background of your subject won’t be the ground behind it, but will be the features off in the distance!
That’s how you’ll achieve the perfect backdrop blur.
Include Repeating Elements Behind Your Subject to Add Depth and Interest
Even though the simplest backgrounds tend to work best, sometimes you just can’t simplify your backgrounds any further. You have too many background elements to work with.
Do you just give up?
Absolutely not!
Instead, you use the background elements to create a pattern–one that adds depth and interest to the scene.

Here’s what you do. Note the shape of your main subject. Consider any lines or other geometric features.
Then look around the scene. Do you see any other elements that are similar in size and shape to your main subject?
If so, try to position them just behind and off to the side–so that they almost appear to echo the focal point of the scene.
However, you want to make sure the ‘echoed’ element is slightly out of focus. If it’s too sharp, it will assert itself in the scene and distract from the actual subject.
And if it’s too soft, it will disappear too easily from the scene, and just won’t have the same effect.
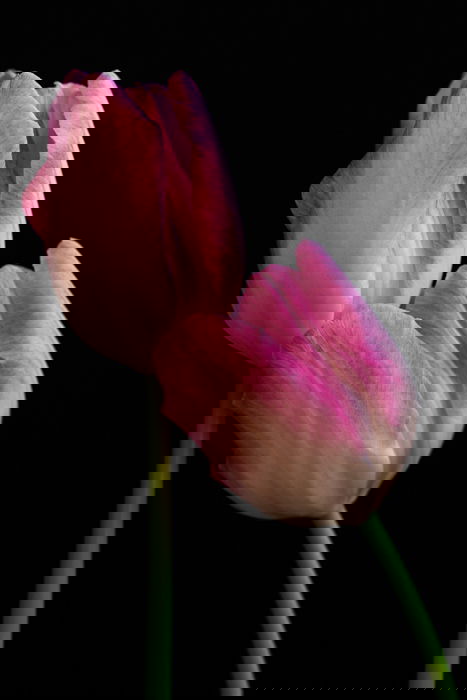
The best ‘echoed’ elements tend to be identical to the main subject. If you’re shooting a flower, you can simply position another flower (of the same species) beside your subject. If you’re shooting a leaf, you can do the same.
While I tend to aim for uniform backgrounds if I can, you really can do a lot with repeating backdrops.
Look at how the repeating flower creates a deeper, more engaging scene in this photo:

Here’s the bottom line. If you can’t find a uniform backdrop, don’t give up.
Try looking around for repeating elements. They’ll guarantee you a macro background full of depth and interest!
Use the Sun-Shade Technique to Capture Stunning Macro Photography Backdrops
The macro photography background techniques that will take your photos above and beyond.
These techniques will ensure you capture unique, original, creative macro photography backgrounds. You’ll be able to create simple backgrounds–but simple backgrounds with color. Simple backgrounds with flair.
Starting with one of my absolute favorite macro background tricks:
The sun-shade technique.

You have to go out shooting during the golden hours. This is the time period just after sunrise and just before sunset when the sunlight is like liquid gold.
Then you should position yourself so that the sunlight is coming from behind your back and over your shoulder. This is referred to as front light.
Now, you should be careful to keep the sun behind your back. And you should look for a beautiful subject that’s completely shaded–perhaps by a tree.
Then you should get down low, and hunt until you find a background that’s not shaded. You want the background to be bathed in beautiful golden light.
As discussed above, use a wide aperture. Make sure the background is simple. Ensure a large subject to background distance.
And take your macro shot.
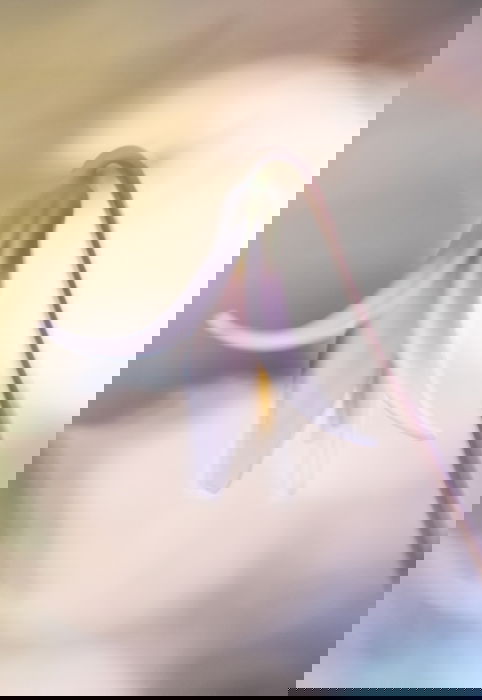
If you maintain the sun-shade difference, you’ll get a photo with a wonderfully creamy backdrop, like this:

That’s the magic of the sun-shade technique!
Use the Broken Backlighting Technique for Beautiful Bokeh
Here’s another favorite macro technique of mine:
I call it the broken backlighting technique.
Now, like the sun-shade technique, you’re going to need to shoot during the golden hours, when the sun is low in the sky.
In fact, the lower the sun is in the sky, the better. The broken backlighting technique works best when the sun is just above the horizon.
You’re also going to need to use backlight.
Backlight comes from in front of you, the photographer, and behind your subject. In other words, your main subject should sit between you and the sun.
So the first step is to point yourself in the direction of the sun and start looking for nice macro subjects.
Pure backlight, even golden-hour backlight, is just too strong. It’ll blow out your photo and make it completely white, which won’t look good.
So you need to find something to ‘break’ the backlight.
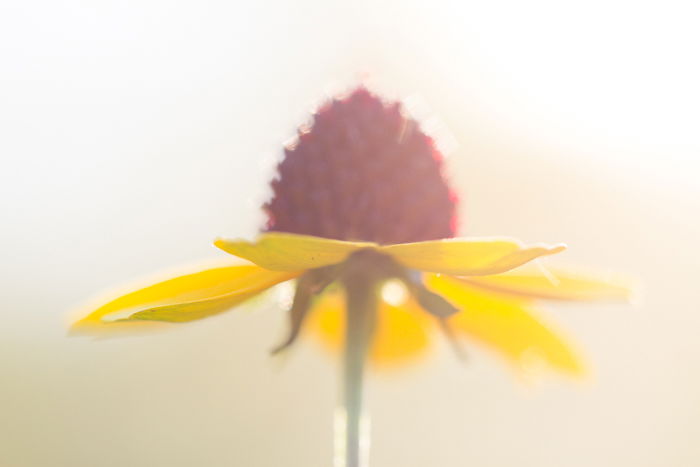
Something like a leafy tree, or a patch of flowers. Then you must get down low so that the broken backlight is just behind your subject. And use a wide aperture, one in the area of f/2.8 to f/4.
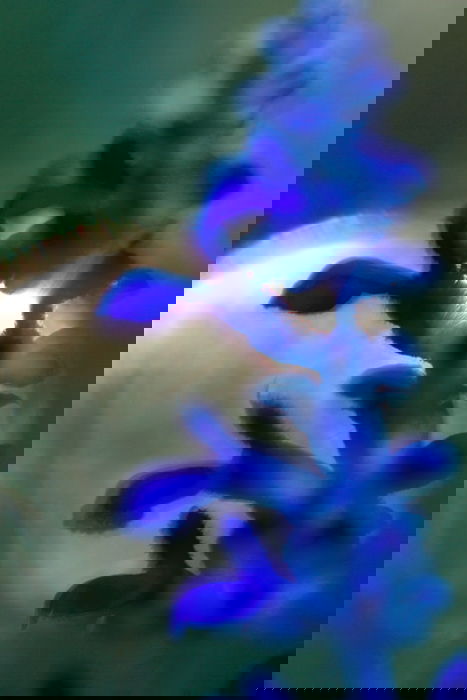
You see, the broken backlight doesn’t appear as spots of light in your photo.
Instead, broken backlight creates stunning geometric bokeh, like this:
But be careful. Even once you’ve broken the backlight, you don’t want the sun to actually appear in the frame.
This will still blow out your background. So make sure that you keep the sun out of the frame!
Shoot Toward the Sky for a White or Orange Macro Photography Background
Here’s your final tip for beautiful macro photography backgrounds.
It’s extremely powerful; in fact, I use it all the time. It’s my ‘go-to’ background technique because you can pull it off in pretty much any situation.
And all you have to do is shoot toward the sky.

As you’ve already discovered, the best backgrounds are simple. They’re uniform.
And what’s more uniform than the sky?
Plus, the sky is always ready to be used as a background.
Get down low to the ground–below your subject, even. This may require you to lie in the dirt, so prepare yourself!
Point your camera upward, so that your subject is framed against the sky.
And start shooting, while being careful to keep your subject nice and bright. If you do this right, you’ll get a nice shot of your subject, framed by a uniform sky.
Now, there are two types of skies that work really well for this type of background.
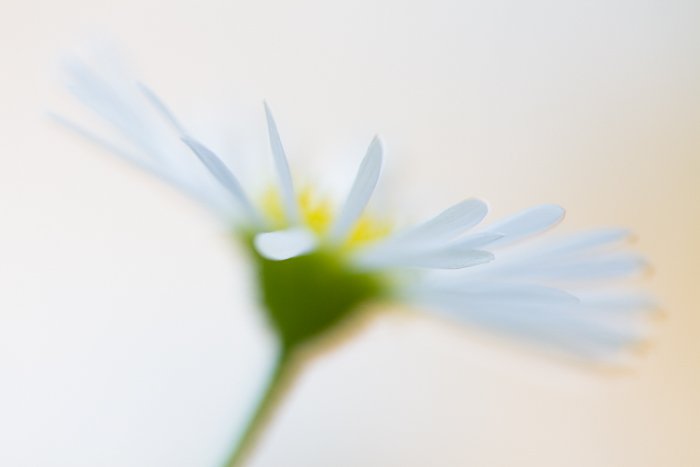
First, you can create beautiful sky backdrops on cloudy days, when the sky is all white. That way, you’ll capture a stunning white background, like this:

Second, you can shoot gorgeous backgrounds just as the sun is rising and setting (plus a few minutes after the sun has gone down).
These backgrounds will generally be a lovely orange color, and they look absolutely amazing, like this:

Make sense?
Just remember. To capture beautiful backgrounds, just get down low–and shoot toward the sky!
Tips for Better Macro Backgrounds: Conclusion
Now that you’ve discovered the secrets for beautiful macro backgrounds, you should be able to capture stunning backdrops.
Just remember the importance of a wide aperture and a large subject to background distance.
And use the techniques I’ve taught you whenever you can.
That way, you’ll create photos that you can be proud of.