Astrophotography is the process of capturing photos of the night sky. It can be a very challenging hobby, but it’s also incredibly rewarding
There are a few basic things you need to know in order to get started with astrophotography: how to choose the right camera and lens, how to set up your shot, and how to post-process your photos. In this article, we’ll teach you everything you need to know about astrophotography Photoshop editing tips.
Astrophotography Photoshop: Image Stack Before Using Photoshop
Photoshop is the last step in the editing process of any kind of astrophotography.
Whether you are photographing a starry landscape or Andromeda, you should shoot for image stacking.
Don’t use Photoshop for this pre-editing task. You are better off using software that is built to align astronomic images.
The most common is:
- Sequator (Win, free) or Starry landscape stacker (Mac OS X, 40$) for starry landscape;
- Sequator (Win, free), Deep Sky Stacker (Win, free), Starry Sky Stacker (Mac OS X, 25$) or SIRIL (Win, Linux, Mac OS X, free) for deep space objects;
- Registax (Win, free), Autostakkert (Win, free) or Lynkeos (Mac OS X, free) for lunar and planetary images;
Most of those programs are easy to use freeware. They will allow you to get the best possible image to begin working in Photoshop.
Here’s how to use Deep Sky Stacker for astrophotography images.
Why Photoshop?
If you are an amateur photographer like me, chances are you are using Lightroom. If you have a CC subscription, you should be able to download Photoshop too (together with Bridge).
Lightroom is a much easier and intuitive software than Photoshop. But editing astronomy images requires some heavy manipulations. Photoshop is your best option after investing in dedicated editing software such as PixInsight.
Many editing steps, in fact, are best performed using layers, filters, and masks. These are powerful tools available in Photoshop (or similar software, such as Affinity Photo and even Gimp).
5 Must-Know Photoshop Tips For Your Astrophotography
There is no shortage of tips and tricks that can help you improve your images. Here are 5 of them.
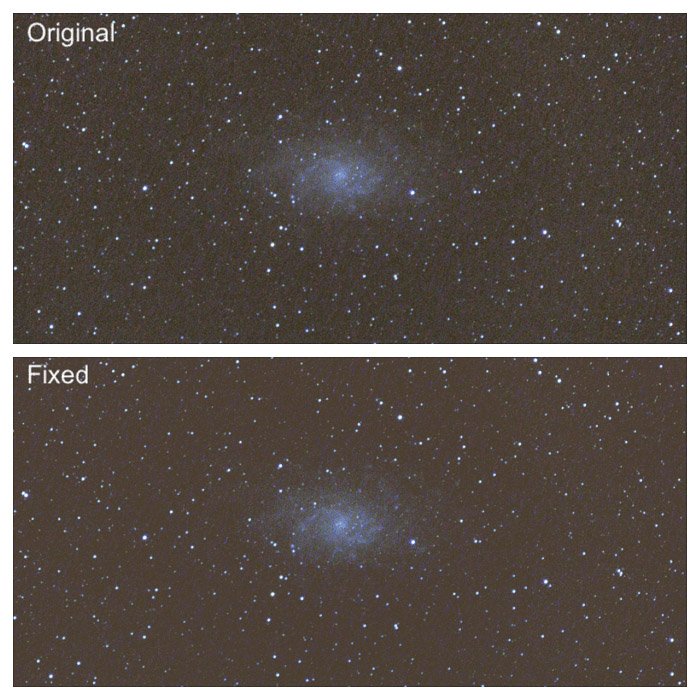
5. Use the Eyedropper Tool to Fix the Background
Sometimes it can happen that the background of your image is ruined. It can be noisy, very dark or have bright little specks or walking noise.
With the eyedropper tool, using the 5×5 average sampling, sample the background far from any star or nebulosity. Use a patch of sky that should be empty.
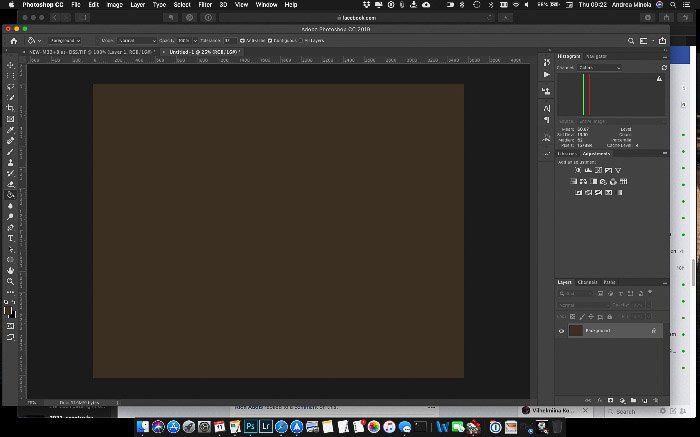
Select the entire image and copy it. Open a new file from clipboard. This will create a new image of the same size as your astro image.
Use the bucket tool to change the color of the image with the color sampled before with the eyedropper tool. You’ll have a nice, solid, homogeneous color.
Now use the Filter-> Noise->Add Noise filter to add some artificial noise in the image. Experiment with the amount of noise and the type (Uniform or Gaussian).
I like to add a 2-3% of Gaussian monochromatic noise.
Noise->Add Noise filter to add some artificial noise in astrophotography editing” class=”aligncenter wp-image-107392 size-full” height=”556″ src=”https://expertphotography.com/wp-content/uploads/2019/05/astrophotography-photoshop-editing-tips-4.jpg” width=”700″>
Next, copy this image and paste it as a new layer in your original image. Add it on top of all the existing layers and blend this level with the lighten mode.
The brightness of the new layer will affect how much of it will blend into the image.
You can use the levels to brighten it enough to replace most of the original background. Be careful not to remove nebulosity and stars.
You can also use the opacity of the level to fine tune the way it will affect your image. Or you can use a mask to be sure you are not losing any interesting detail in the image.
The improvement is evident, as shown in the image below.
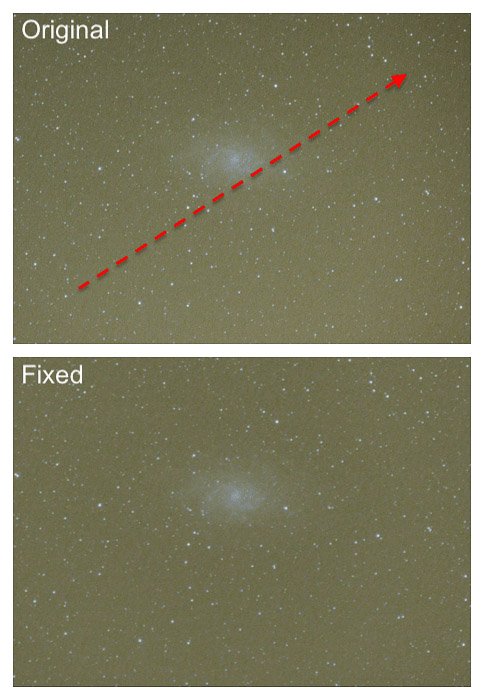
4. Fix the Gradient With Gradient Xterminator Plugin
After you have stacked your images, you will have a luminosity gradient across the image. This will be coming from light pollution and/or moonlight.
A great and easy way to remove this kind of gradient is to purchase and run the RC-Astro Gradient Xterminator plugin for Photoshop. If you are into astrophotography and use Photoshop, it is an absolute must-have.
The plugin is very simple to use. With the lasso tool select the area you want to preserve, typically your DSO. Then invert the selection.
Run the plugin from the menu Filter->RC-Astro->GradientXterminator to even up the luminosity. This will remove the gradient.
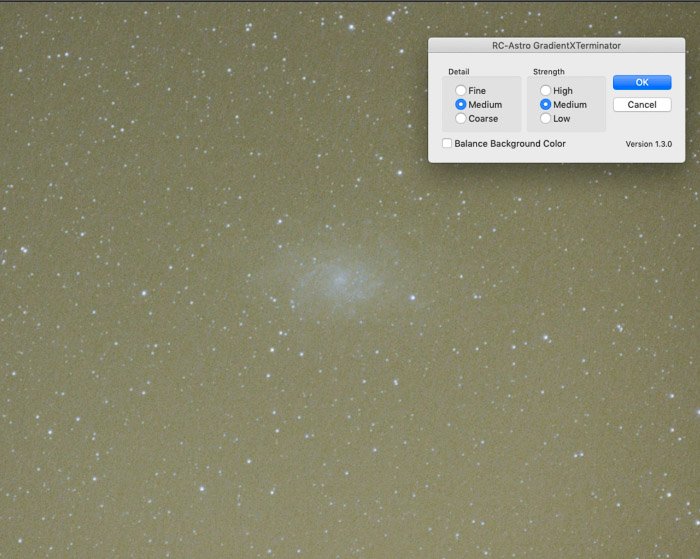
The default settings work like a charm. You may need to run it a couple of times if your gradient is particularly strong.
You could also use the plugin to balance the color of the background. I prefer to do that using the white balance adjustment layer.
3. Use the White Balance Adjustment Layer for More Natural Colors
The white balance can be tricky to set. There is not a neutral color we can sample to set it.
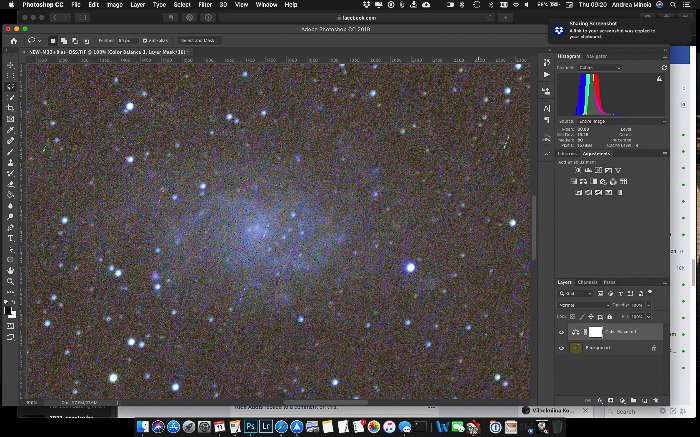
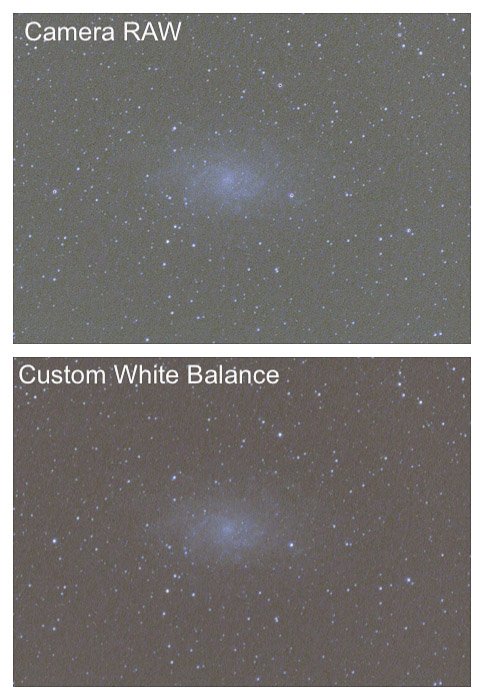
After stretching the histogram, my image of the M33 Galaxy does not look very natural.
You could use camera raw (Filter->Camera Raw Filter …) and the eyedropper tool to sample a region of dark, empty sky. I found most often than not I end up with a white balance that is too cold.
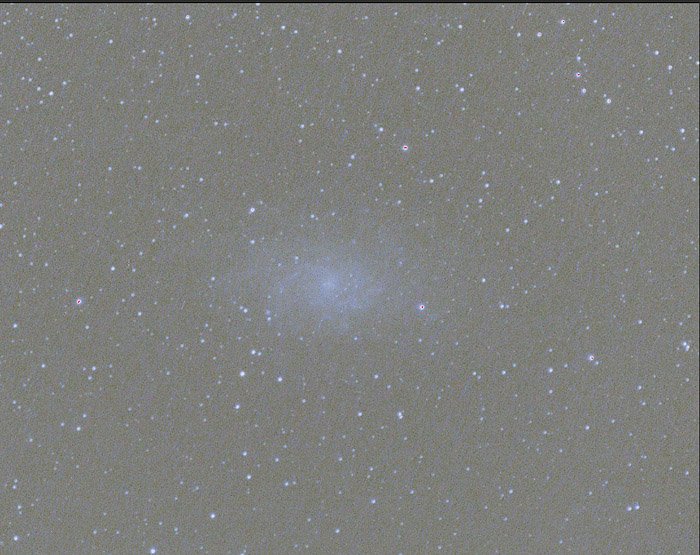
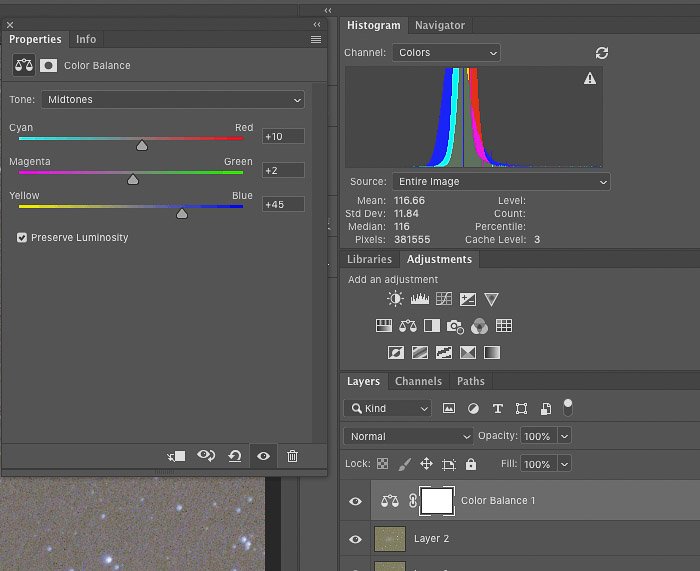
I prefer to use the white balance adjustment layer. Keeping an eye at the histogram, set the color channel to display.
The procedure is the following:
- Create a snapshot of the image (cmd+alt+Shift+e on mac) and add a white balance adjustment layer;
- Be sure the histogram is displaying the color channel;
- Start moving the sliders for the white balance, leaving a bit of blue and red visible on the left and on the right of the main peak in the histogram.
You may need to fix the white balance multiple times during the editing. Some steps can alter it.
The image below shows the difference between the white balance obtained in Camera RAW and with the procedure.
2. Reduce Chromatic Aberration in Adobe Camera Raw
With lenses and telescopes that don’t have ED glass in them, chromatic aberration (CA), is likely to appear around the stars.
The brighter the stars, the more severe the chromatic aberration.
People say Lightroom and Camera RAW are mostly equivalent. One of the differences is that Camera RAW does not have the eyedropper tool to sample the CA, allowing the software to correct it.
In Camera Raw, you have to do it manually. You may find it difficult to remove CA completely.
A quick fix begins by duplicating the layer as a new one. It applies a mild Gaussian blur until CA blends with the surroundings.

The final step is to blend the layer with the previous one using the blending mode Color. This will reduce the amount of visible CA.
You can play with the opacity and masks to retain the best color details in your DSO and in areas that are CA free.
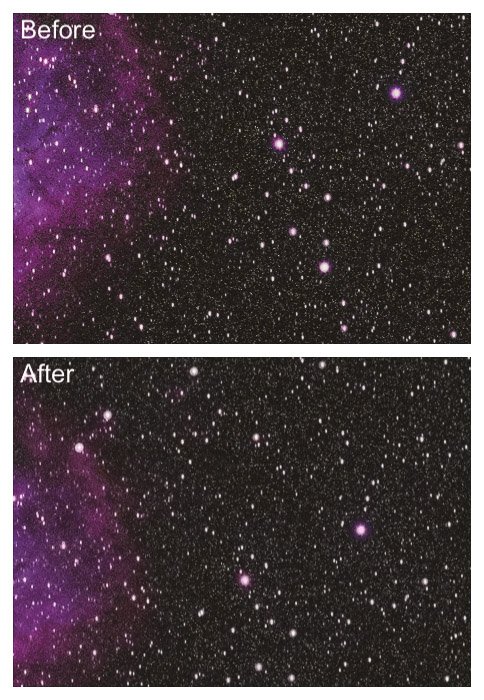
1. Make Your Images Pop With This Final Photoshop Tweak
Sometimes, the final image lacks a bit of punch.
Here is a simple way to make your images shine more.
First, make a snapshot and duplicate the layer.
Use the Scratch and Dust filter to remove the small stars and keep only the major features.
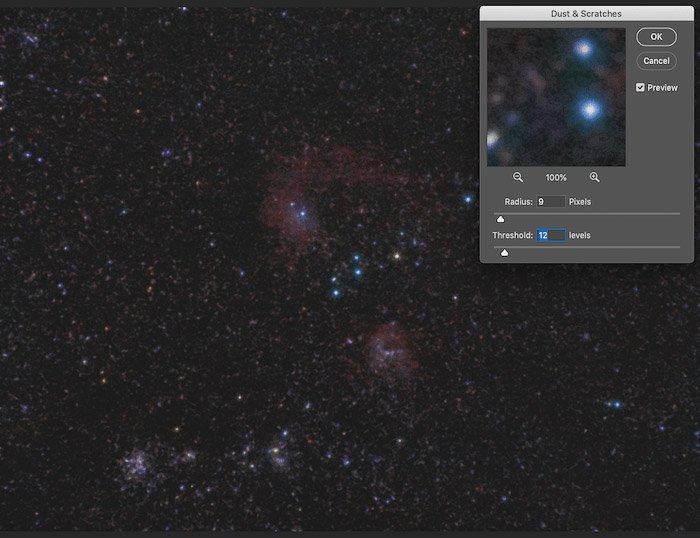
Next, use a Gaussian Blur filter to smooth out the image and the small defects introduced in the previous step.
Noise->Add Noise filter to add some artificial noise in astrophotography editing” class=”aligncenter wp-image-107378 size-full” height=”538″ src=”https://expertphotography.com/wp-content/uploads/2019/05/astrophotography-photoshop-editing-tips-16.jpg” width=”700″>
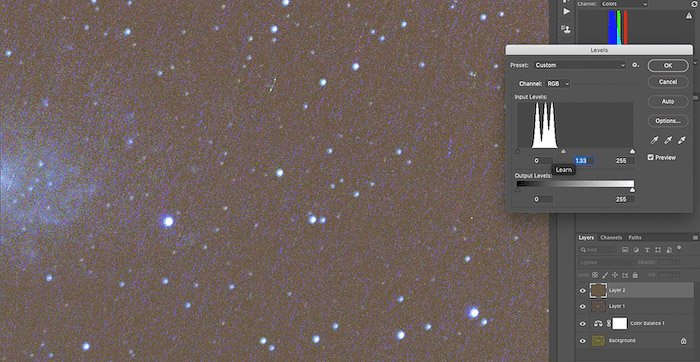
Fire up the Level dialog box (cmd+L on Mac). Push the black point into the right of the histogram so that only the brightest parts of the image remain visible.
Noise->Add Noise filter to add some artificial noise in astrophotography editing” class=”aligncenter wp-image-107381 size-full” height=”528″ src=”https://expertphotography.com/wp-content/uploads/2019/05/astrophotography-photoshop-editing-tips-17.jpg” width=”700″>
Finally, blend the layer using the Screen blending mode. You can change the opacity of the level to fine-tune its effect on the image.
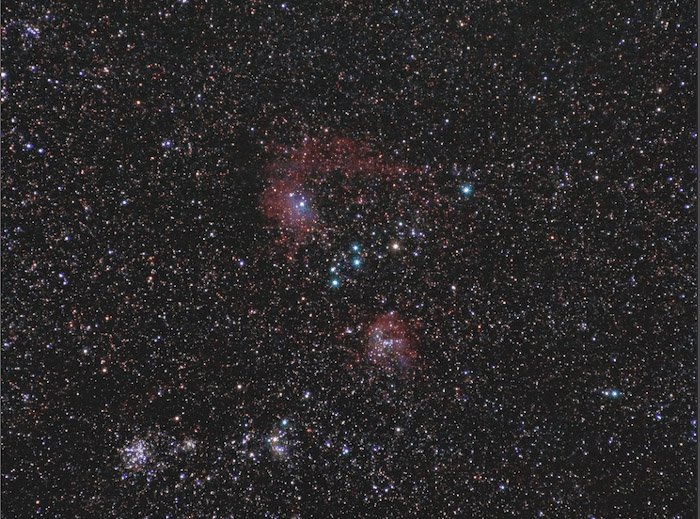 As you can see, this final image is much more interesting. The colors and highlights are also more vibrant.
Conclusion
Editing astrophotography is rather complex and takes some time. The steps you should take vary depending on the quality of the image you are working with.
These 5 tips will help you get started in your astrophotography editing journey.
If you want to find out more about editing each type of astrophotography, check out this article. We have a post on best apps for astrophotography or milky way photography to check out too!