The best Sony lenses for moon photography make this rather tricky task more achievable. These lenses offer the clarity and focal length needed to bring the moon’s surface closer to Earth, making them ideal for both amateur and professional photographers.
Our top pick, the Sony FE 400mm f/2.8 GM OSS, is chosen for its exceptional detail capture and clarity. It’s simply the best for moon photography. However, we also explore six other lenses that offer a range of options for every photographer’s needs.
Our Top 3 Sony Lenses for Moon Photography
Sony FE 400mm F/2.8 GM OSS SEL400F28GM
Sony FE 400mm F/2.8 GM OSS SEL400F28GM
Shop Offers
×
Sony FE 400mm F/2.8 GM OSS SEL400F28GM Deals
|
(second hand)
Check Price
|
(second hand)
|
Check Price
|
Buy Now!
|
If you buy a product through one of our referral links we will earn a commission (without costing you anything).
Prices last updated on .
As an Amazon Associate, I earn from qualifying purchases. Product prices and availability are accurate as of the date/time indicated and are subject to change. Any price and availability information displayed on Amazon at the time of purchase will apply to the purchase of this product.
Unavailable
Sony FE 600mm F/4 GM OSS SEL600F40GM
Sony FE 600mm F/4 GM OSS SEL600F40GM
Shop Offers
×
Sony FE 600mm F/4 GM OSS SEL600F40GM Deals
|
(second hand)
Check Price
|
(second hand)
|
Check Price
|
Buy Now!
|
If you buy a product through one of our referral links we will earn a commission (without costing you anything).
Prices last updated on .
As an Amazon Associate, I earn from qualifying purchases. Product prices and availability are accurate as of the date/time indicated and are subject to change. Any price and availability information displayed on Amazon at the time of purchase will apply to the purchase of this product.
Unavailable
Tamron 150-500mm F/5-6.7 Di III VC VXD A057 for Sony E
Tamron 150-500mm F/5-6.7 Di III VC VXD A057 for Sony E
Shop Offers
×
Tamron 150-500mm F/5-6.7 Di III VC VXD A057 for Sony E Deals
|
(second hand)
Check Price
|
(second hand)
|
Check Price
|
Buy Now!
|
If you buy a product through one of our referral links we will earn a commission (without costing you anything).
Prices last updated on .
As an Amazon Associate, I earn from qualifying purchases. Product prices and availability are accurate as of the date/time indicated and are subject to change. Any price and availability information displayed on Amazon at the time of purchase will apply to the purchase of this product.
Unavailable
What Is the Best Sony Lens for Moon Photography?
Selecting the best Sony lens for moon photography involves considering focal length, sharpness, and the ability to reduce chromatic aberration. Our list includes options that excel in capturing detailed lunar images, from the powerful Sony FE 400mm f/2.8 GM OSS to the versatile Sigma 150-600mm f/5-6.3 DG DN OS | S for Sony E. Each lens will get you beautiful images of the moon’s surface, ensuring clarity and detail in every shot.
Our Top Pick
Sony FE 400mm F/2.8 GM OSS SEL400F28GM
Sony FE 400mm F/2.8 GM OSS SEL400F28GM
- Exceptional sharpness, even wide open at f/2.8
- Fast, silent autofocus with dual XD Motors
- Lightweight design, easy for handheld shooting
- Weather-sealed for challenging outdoor conditions
- Beautiful bokeh with 11-blade circular diaphragm
Shop Offers
×
Sony FE 400mm F/2.8 GM OSS SEL400F28GM Deals
|
(second hand)
Check Price
|
(second hand)
|
Check Price
|
Buy Now!
|
If you buy a product through one of our referral links we will earn a commission (without costing you anything).
Prices last updated on .
As an Amazon Associate, I earn from qualifying purchases. Product prices and availability are accurate as of the date/time indicated and are subject to change. Any price and availability information displayed on Amazon at the time of purchase will apply to the purchase of this product.
Unavailable
Best for Wildlife Photography
Sony FE 600mm F/4 GM OSS SEL600F40GM
Sony FE 600mm F/4 GM OSS SEL600F40GM
- Superior reach for wildlife and sports photography
- Robust, lightweight construction for professional use
- Fast, precise autofocus with dual motors
- Excellent low-light performance at f/4 aperture
- Advanced optical design minimizes aberrations
Shop Offers
×
Sony FE 600mm F/4 GM OSS SEL600F40GM Deals
|
(second hand)
Check Price
|
(second hand)
|
Check Price
|
Buy Now!
|
If you buy a product through one of our referral links we will earn a commission (without costing you anything).
Prices last updated on .
As an Amazon Associate, I earn from qualifying purchases. Product prices and availability are accurate as of the date/time indicated and are subject to change. Any price and availability information displayed on Amazon at the time of purchase will apply to the purchase of this product.
Unavailable
Best Versatile Zoom Lens
Tamron 150-500mm F/5-6.7 Di III VC VXD A057 for Sony E
Tamron 150-500mm F/5-6.7 Di III VC VXD A057 for Sony E
- Broad 150-500mm zoom range for versatile shooting
- Effective Vibration Compensation for sharp handheld shots
- Lightweight design enhances portability and handling
- Quick, silent autofocus with VXD motor technology
- Weather-sealed construction for reliability in adverse conditions
Shop Offers
×
Tamron 150-500mm F/5-6.7 Di III VC VXD A057 for Sony E Deals
|
(second hand)
Check Price
|
(second hand)
|
Check Price
|
Buy Now!
|
If you buy a product through one of our referral links we will earn a commission (without costing you anything).
Prices last updated on .
As an Amazon Associate, I earn from qualifying purchases. Product prices and availability are accurate as of the date/time indicated and are subject to change. Any price and availability information displayed on Amazon at the time of purchase will apply to the purchase of this product.
Unavailable
Best Flexible Telephoto Zoom
Sony FE 100-400mm F/4.5-5.6 GM OSS SEL100400GM
Sony FE 100-400mm F/4.5-5.6 GM OSS SEL100400GM
- Versatile 100-400mm range for diverse shooting scenarios
- Sharp images with G Master optical quality
- Fast, precise autofocus for dynamic subjects
- Durable, weather-sealed construction for outdoor use
- Effective Optical SteadyShot stabilization for sharp results
Shop Offers
×
Sony FE 100-400mm F/4.5-5.6 GM OSS SEL100400GM Deals
|
(second hand)
Check Price
|
(second hand)
|
Check Price
|
Buy Now!
|
If you buy a product through one of our referral links we will earn a commission (without costing you anything).
Prices last updated on .
As an Amazon Associate, I earn from qualifying purchases. Product prices and availability are accurate as of the date/time indicated and are subject to change. Any price and availability information displayed on Amazon at the time of purchase will apply to the purchase of this product.
Unavailable
Best for Long-Range Photography
Sony FE 200-600mm F/5.6-6.3 G OSS SEL200600G
Sony FE 200-600mm F/5.6-6.3 G OSS SEL200600G
- Extensive 200-600mm zoom for unparalleled subject reach
- Sharp, detailed images across the entire zoom range
- Built-in Optical SteadyShot stabilizes high-zoom shots
- Durable, weather-sealed body for harsh conditions
- Fast, precise autofocus system for dynamic tracking
Shop Offers
×
Sony FE 200-600mm F/5.6-6.3 G OSS SEL200600G Deals
|
(second hand)
Check Price
|
(second hand)
|
Check Price
|
Buy Now!
|
If you buy a product through one of our referral links we will earn a commission (without costing you anything).
Prices last updated on .
As an Amazon Associate, I earn from qualifying purchases. Product prices and availability are accurate as of the date/time indicated and are subject to change. Any price and availability information displayed on Amazon at the time of purchase will apply to the purchase of this product.
Unavailable
Best Value Super-Telephoto
Sigma 150-600mm F/5-6.3 DG DN OS | S for Sony E
Sigma 150-600mm F/5-6.3 DG DN OS | S for Sony E
- Extensive 150-600mm range for maximum versatility
- Optical Stabilization for sharp images at long distances
- Robust build with weather sealing for outdoor reliability
- Fast, accurate autofocus with stepping motor technology
- Impressive sharpness and contrast across zoom range
Shop Offers
×
Sigma 150-600mm F/5-6.3 DG DN OS | S for Sony E Deals
|
(second hand)
Check Price
|
(second hand)
|
Check Price
|
Buy Now!
|
If you buy a product through one of our referral links we will earn a commission (without costing you anything).
Prices last updated on .
As an Amazon Associate, I earn from qualifying purchases. Product prices and availability are accurate as of the date/time indicated and are subject to change. Any price and availability information displayed on Amazon at the time of purchase will apply to the purchase of this product.
Unavailable
Best All-Around Telephoto Zoom
Sony FE 70-200mm F/2.8 GM OSS II SEL70200GM2
Sony FE 70-200mm F/2.8 GM OSS II SEL70200GM2
- Bright f/2.8 aperture for low-light performance
- Superior G Master optics ensure stunning clarity
- Fast, precise autofocus with floating focus mechanism
- Lightweight design enhances portability and handling
- Advanced weather sealing for reliable outdoor use
Shop Offers
×
Sony FE 70-200mm F/2.8 GM OSS II SEL70200GM2 Deals
|
(second hand)
Check Price
|
(second hand)
|
Check Price
|
Buy Now!
|
If you buy a product through one of our referral links we will earn a commission (without costing you anything).
Prices last updated on .
As an Amazon Associate, I earn from qualifying purchases. Product prices and availability are accurate as of the date/time indicated and are subject to change. Any price and availability information displayed on Amazon at the time of purchase will apply to the purchase of this product.
Unavailable
Our Favorite Sony Lenses for Moon Photography
Let’s take a closer look at the best Sony lenses for moon photography, and why we have chosen them. From powerful primes to versatile zooms, there’s a lens here for every type of moon shot. Explore these options to find the perfect fit for your night sky adventures.
1. Sony FE 400mm f/2.8 GM OSS
Our Top Pick
Shop Offers
×
Sony FE 400mm F/2.8 GM OSS SEL400F28GM Deals
|
(second hand)
Check Price
|
(second hand)
|
Check Price
|
Buy Now!
|
If you buy a product through one of our referral links we will earn a commission (without costing you anything).
Prices last updated on .
As an Amazon Associate, I earn from qualifying purchases. Product prices and availability are accurate as of the date/time indicated and are subject to change. Any price and availability information displayed on Amazon at the time of purchase will apply to the purchase of this product.
Unavailable
|
Brand |
Brand
Sony
|
|
Lens Weight |
Lens Weight
2895 g
|
|
Maximum Aperture |
Maximum Aperture
f/ 2.8
|
|
Focal Length Range |
Focal Length Range
400 mm
|
|
Image Stabilization |
Image Stabilization
1
|
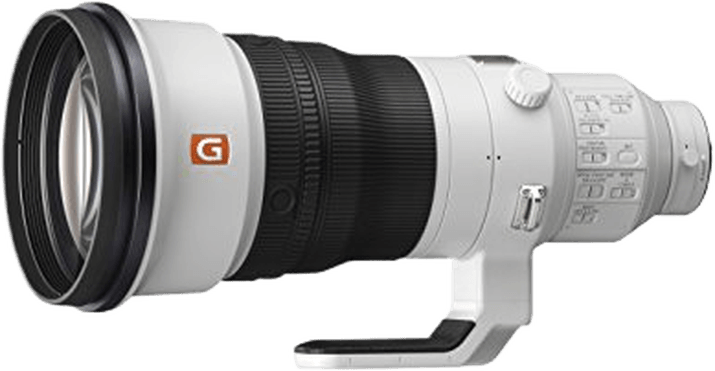
Sony FE 400mm F/2.8 GM OSS SEL400F28GM
The
Sony FE 400mm f/2.8 GM OSS is an exceptional lens for moon photography. This is due to its 400mm focal length, its stunning clarity, and its fast f/2.8 aperture. The moon is surprisingly bright when you photograph it through a telephoto, and you need a lens with excellent contrast. And it needs to be free from distortions and especially flare and aberrations. This lens fits the bill in all areas.
Not surprisingly for a 400mm lens, it is quite heavy at 6.4 lbs (29 kg), but you’d expect to use a tripod with a lens this long most of the time anyway. Part of the reason for its weight is the lens’s build quality, which includes weather sealing, making it durable for outdoor use. Built-in image stabilization has switchable modes to cope with panning and tripod use. Autofocus is hardly an issue for moon photography, but once you have this lens you’ll want to use it for sports and wildlife. And here the AF is excellent, fast, and accurate.
Compared to the Sony FE 600mm f/4 GM OSS, the 400mm f/2.8 offers a wider aperture, which is beneficial in low light but less critical for moon shots where a smaller aperture is used. Both lenses provide excellent sharpness and detail, but the 400mm’s lighter weight makes it slightly easier to handle.
2. Sony FE 600mm f/4 GM OSS
Best Super-Telephoto Lens
Shop Offers
×
Sony FE 600mm F/4 GM OSS SEL600F40GM Deals
|
(second hand)
Check Price
|
(second hand)
|
Check Price
|
Buy Now!
|
If you buy a product through one of our referral links we will earn a commission (without costing you anything).
Prices last updated on .
As an Amazon Associate, I earn from qualifying purchases. Product prices and availability are accurate as of the date/time indicated and are subject to change. Any price and availability information displayed on Amazon at the time of purchase will apply to the purchase of this product.
Unavailable
|
Brand |
Brand
Sony
|
|
Lens Weight |
Lens Weight
3040 g
|
|
Maximum Aperture |
Maximum Aperture
f/ 4.0
|
|
Focal Length Range |
Focal Length Range
600 mm
|
|
Image Stabilization |
Image Stabilization
1
|
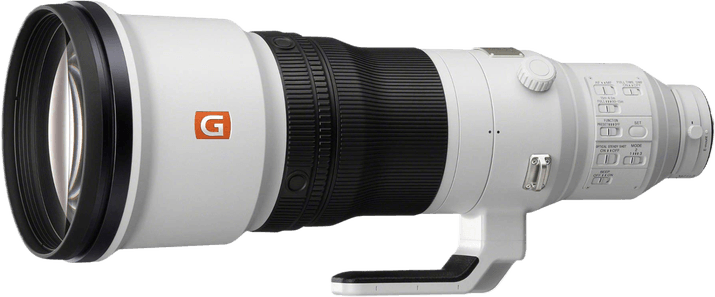
Sony FE 600mm F/4 GM OSS SEL600F40GM
The
Sony FE 600mm f/4 GM OSS is long enough to fill your frame with the moon. It is sharp from edge to edge, ensuring that the features of the moon are clear and distinct. Low dispersion elements in the lens design reduce chromatic aberration, making the edges of the moon crisp against the night sky.
Although the weight of 6.7 lbs (3 kg) is light for its size, it’s still pretty heavy and requires a sturdy tripod to avoid shake during long exposures. The lens’s coatings are effective at reducing glare and lens flare, which can be a challenge when photographing bright objects like the moon.
Sony’s OSS image stabilization system is very advanced and effective in all sorts of scenarios. Likewise, the autofocus, which, although not vital for moon photography, really comes into its own for other genres of photography. If you have a lens like this you might as well catch the local soccer game or some local wildlife. It’s a quality, pro-level lens with substantial build quality, and a price to match.
3. Tamron 150-500mm f/5-6.7 Di III VC VXD for Sony E
Best Versatile Zoom Lens
Shop Offers
×
Tamron 150-500mm F/5-6.7 Di III VC VXD A057 for Sony E Deals
|
(second hand)
Check Price
|
(second hand)
|
Check Price
|
Buy Now!
|
If you buy a product through one of our referral links we will earn a commission (without costing you anything).
Prices last updated on .
As an Amazon Associate, I earn from qualifying purchases. Product prices and availability are accurate as of the date/time indicated and are subject to change. Any price and availability information displayed on Amazon at the time of purchase will apply to the purchase of this product.
Unavailable
|
Brand |
Brand
Tamron
|
|
Lens Weight |
Lens Weight
1710 g
|
|
Maximum Aperture |
Maximum Aperture
f/ 6.7
|
|
Focal Length Range |
Focal Length Range
150-500 mm
|
|
Image Stabilization |
Image Stabilization
1
|
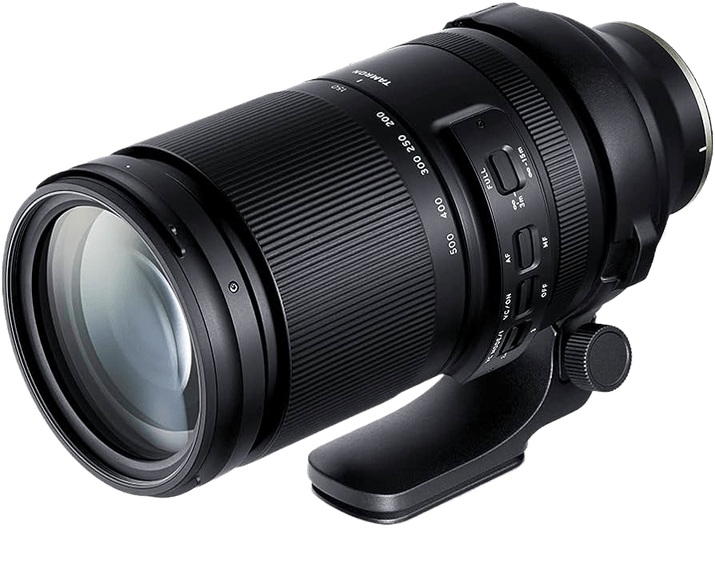
Tamron 150-500mm F/5-6.7 Di III VC VXD A057 for Sony E
The
Tamron 150-500mm f/5-6.7 Di III VC VXD for Sony E is a versatile zoom lens, perfect for moon photography. Its focal length range from 150mm to 500mm allows photographers to capture detailed images of the moon. The lens’s sharpness is impressive, especially when stopped down, ensuring that the moon’s surface features are clear and crisp. Low dispersion elements help reduce chromatic aberration, so there should be no loss of detail.
Weighing in at 4.1 lbs (1.86 kg), this lens is relatively light for its zoom range, making it easier to manage on a tripod for those long exposure shots of the moon. The lens coatings are effective at minimizing glare and lens flare, which is crucial when photographing such a bright object in a dark environment.
Compared to prime lenses, this Tamron offers the flexibility of a zoom, allowing photographers to adjust their framing without changing their position. This can be particularly useful for moon photography, where slight compositional changes can make a big difference in the final image. Despite its variable aperture, which is less of a concern for moon photography due to the use of smaller apertures for sharpness, this lens remains a strong option for capturing the night sky. You’ll no doubt find other uses for such a broad range of focal lengths. And this is where the rather slow maximum aperture might give you pause for thought.
Otherwise, its selectable AF limiters and three IS modes, added to its optical qualities, make this a very attractive and versatile lens.
4. Sony FE 100-400mm f/4.5-5.6 GM OSS
Best Flexible Telephoto Zoom
Shop Offers
×
Sony FE 100-400mm F/4.5-5.6 GM OSS SEL100400GM Deals
|
(second hand)
Check Price
|
(second hand)
|
Check Price
|
Buy Now!
|
If you buy a product through one of our referral links we will earn a commission (without costing you anything).
Prices last updated on .
As an Amazon Associate, I earn from qualifying purchases. Product prices and availability are accurate as of the date/time indicated and are subject to change. Any price and availability information displayed on Amazon at the time of purchase will apply to the purchase of this product.
Unavailable
|
Brand |
Brand
Sony
|
|
Lens Weight |
Lens Weight
1395 g
|
|
Maximum Aperture |
Maximum Aperture
f/ 5.6
|
|
Focal Length Range |
Focal Length Range
100-400 mm
|
|
Image Stabilization |
Image Stabilization
1
|
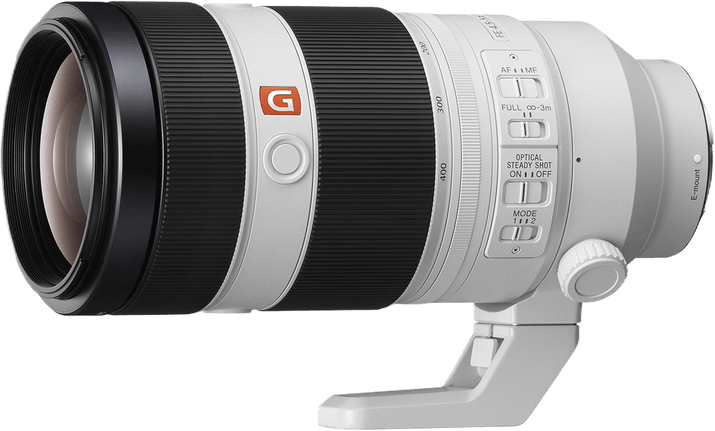
Sony FE 100-400mm F/4.5-5.6 GM OSS SEL100400GM
Amazon.com
$2,294.46 $2,498.00
The
Sony FE 100-400mm f/4.5-5.6 GM OSS is a great choice for moon photography, offering a versatile zoom range that’s ideal for capturing detailed images of the moon. Its focal length allows photographers to zoom in on the moon, filling the frame with the lunar surface’s intricate details. The lens’s sharpness, particularly when slightly stopped down, ensures that features like craters and seas are crisp and clear. Low dispersion elements and quality coatings work together to minimize chromatic aberration and reduce glare, which are always a challenge given the high contrast of the subject matter.
This is a pro-level lens, so it’s no surprise that it weighs 3.07 lbs (1.4 kg), although this is very light for such a long-range zoom. It also means that its build quality is robust, designed to withstand the demands of outdoor photography. While the aperture isn’t the widest, it’s suitable for moon photography where a smaller aperture is often used to maximize sharpness across the frame. It is also remarkable that, even at f/4.5, it produces excellent bokeh. This opens up genres like portraits and weddings as additional uses for this lens.
The optics on this Sony lens are superb. It is sharp across the whole frame even wide open. The autofocus is fast, so fast, in fact, that you can rattle off 20 fps on a Sony A9 without the AF holding you back. There are three programmable AF prefocus points, and focus range limiters. With three IS modes to cope with tripod use and manual panning, it’s got everything you need.
One additional useful feature for moon photography is the adjustable zoom resistance. If your camera is pointed to the sky at full zoom, you can tighten the resistance, so it doesn’t creep. That’s very handy. And of course, with such great AF, bokeh, and useful zoom range, you’ll find plenty of other uses for this excellent lens.
5. Sony FE 200-600mm f/5.6-6.3 G OSS
Best for Long-Range Photography
Shop Offers
×
Sony FE 200-600mm F/5.6-6.3 G OSS SEL200600G Deals
|
(second hand)
Check Price
|
(second hand)
|
Check Price
|
Buy Now!
|
If you buy a product through one of our referral links we will earn a commission (without costing you anything).
Prices last updated on .
As an Amazon Associate, I earn from qualifying purchases. Product prices and availability are accurate as of the date/time indicated and are subject to change. Any price and availability information displayed on Amazon at the time of purchase will apply to the purchase of this product.
Unavailable
|
Brand |
Brand
Sony
|
|
Lens Weight |
Lens Weight
2115 g
|
|
Maximum Aperture |
Maximum Aperture
f/ 6.3
|
|
Focal Length Range |
Focal Length Range
200-600 mm
|
|
Image Stabilization |
Image Stabilization
1
|
Sony FE 200-600mm F/5.6-6.3 G OSS SEL200600G
Amazon.com
$1,898.00 $1,999.99
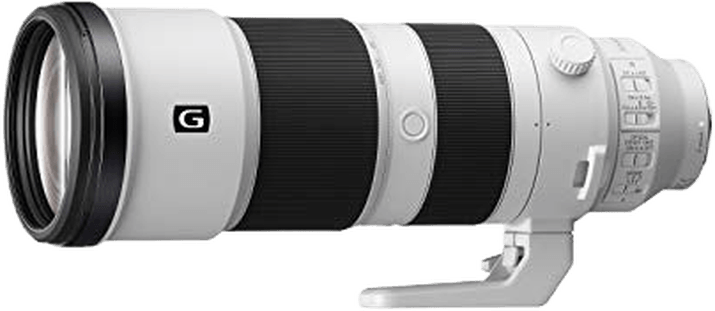
The
Sony FE 200-600mm f/5.6-6.3 G OSS is a super-sharp lens with a powerful zoom range that makes it ideal for moon photography. Its long focal length is key for filling the frame with the moon, and zoomed out it can capture a rising moon with the horizon too. The lens’s sharpness, even at the edges, makes it a reliable tool for this specialized photography. Low dispersion elements and quality coatings work together to reduce chromatic aberration and glare.
It’s no surprise that this is a big lens and it weighs 4.65 lbs (2.1 kg), The length is partly because all the zooming takes place internally. The length remains the same whatever the zoom setting. Its build is robust, designed to endure the demands of outdoor photography, making it a good companion for night sky explorers.
Autofocus is very fast, with selectable focus limiters and programable pre-focus buttons. There is also three-mode image stabilization to cope with a whole range of shooting situations. There’s no doubt that the 600mm focal length is great for the moon, and the rest of this zoom range makes it great for sports photography. Wildlife photography might be limited by the relatively slow maximum aperture, especially if you’re going to add a teleconverter. But for moon shooting, this is a very capable lens.
6. Sigma 150-600mm f/5-6.3 DG DN OS | S for Sony E
Best Value Super-Telephoto
Shop Offers
×
Sigma 150-600mm F/5-6.3 DG DN OS | S for Sony E Deals
|
(second hand)
Check Price
|
(second hand)
|
Check Price
|
Buy Now!
|
If you buy a product through one of our referral links we will earn a commission (without costing you anything).
Prices last updated on .
As an Amazon Associate, I earn from qualifying purchases. Product prices and availability are accurate as of the date/time indicated and are subject to change. Any price and availability information displayed on Amazon at the time of purchase will apply to the purchase of this product.
Unavailable
|
Brand |
Brand
Sigma
|
|
Lens Weight |
Lens Weight
2100 g
|
|
Maximum Aperture |
Maximum Aperture
f/ 6.3
|
|
Focal Length Range |
Focal Length Range
150-600 mm
|
|
Image Stabilization |
Image Stabilization
1
|
Sigma 150-600mm F/5-6.3 DG DN OS | S for Sony E
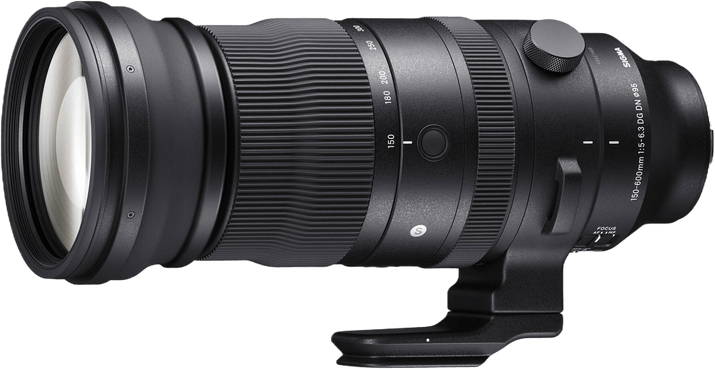
The
Sigma 150-600mm f/5-6.3 DG DN OS | S for Sony E is a versatile zoom lens that is ideal for moon photography. Its broad focal length range allows photographers to capture detailed images of the moon, from wide shots that include the surrounding horizon to tight shots that fill the frame with the moon’s surface. The lens’s sharpness, particularly at the center and extending to the edges, ensures that the moon’s craters and textures are clearly visible. The lens’s construction, using low dispersion elements and multi-coatings, does a good job of controlling flare and chromatic aberrations..
At 4.6 lbs (2.1 kg), this lens is manageable on a sturdy tripod, essential for stable, long-exposure moon shots. Its construction is robust and designed to withstand the demands of outdoor photography.
If the Sigma 150-600mm has weaknesses they lie in its edge sharpness and the speed of its autofocus. Neither of these is a deal-breaker with moon photography. Stopped down, the edge sharpness is absolutely fine. And you can be sure that the moon won’t be moving fast enough to trouble the AF. Selectable AF limiters and three-mode IS complete the package. This is a fine lens for many situations, and especially for moon photography.
7. Sony FE 70-200mm f/2.8 GM OSS II
Best All-Around Telephoto Zoom
Shop Offers
×
Sony FE 70-200mm F/2.8 GM OSS II SEL70200GM2 Deals
|
(second hand)
Check Price
|
(second hand)
|
Check Price
|
Buy Now!
|
If you buy a product through one of our referral links we will earn a commission (without costing you anything).
Prices last updated on .
As an Amazon Associate, I earn from qualifying purchases. Product prices and availability are accurate as of the date/time indicated and are subject to change. Any price and availability information displayed on Amazon at the time of purchase will apply to the purchase of this product.
Unavailable
|
Brand |
Brand
Sony
|
|
Lens Weight |
Lens Weight
1045 g
|
|
Maximum Aperture |
Maximum Aperture
f/ 2.8
|
|
Focal Length Range |
Focal Length Range
70-200 mm
|
|
Image Stabilization |
Image Stabilization
1
|
Sony FE 70-200mm F/2.8 GM OSS II SEL70200GM2
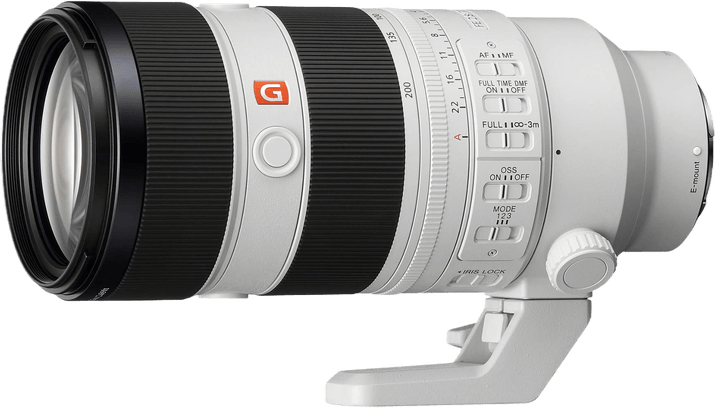
The
Sony FE 70-200mm f/2.8 GM OSS II is a versatile zoom lens that is worth considering for moon photography, even if its longest focal length is a little short. It is such a useful, versatile lens, that it’s worth considering, even if you add a teleconverter to get the moon closer.
That is because you’ll find this lens so useful in a range of situations, and there’s not many of us who can splash out on a lens just for shooting the moon. But add a teleconverter, and you’re ready to go. The loss of lens speed is not really an issue of moon photography, so it makes sense. And the 70-200mm is so good for weddings, sports, portraits, and other events, that it makes it into this review as worth considering.
Conclusion: The Best Sony Lenses for Moon Photography
Choosing the best Sony lenses for moon photography can help you get the best out of your late-night ventures with camera and tripod. We think there should be a lens suited to your needs in this review.
Our top pick, Sony FE 400mm f/2.8 GM OSS, is chosen for its clarity and detail in moon shots. It stands out among the seven other options for its balance of weight, focal length, and optical performance.
Our Top 3 Sony Lenses for Moon Photography
Sony FE 400mm F/2.8 GM OSS SEL400F28GM
Sony FE 400mm F/2.8 GM OSS SEL400F28GM
Shop Offers
×
Sony FE 400mm F/2.8 GM OSS SEL400F28GM Deals
|
(second hand)
Check Price
|
(second hand)
|
Check Price
|
Buy Now!
|
If you buy a product through one of our referral links we will earn a commission (without costing you anything).
Prices last updated on .
As an Amazon Associate, I earn from qualifying purchases. Product prices and availability are accurate as of the date/time indicated and are subject to change. Any price and availability information displayed on Amazon at the time of purchase will apply to the purchase of this product.
Unavailable
Sony FE 600mm F/4 GM OSS SEL600F40GM
Sony FE 600mm F/4 GM OSS SEL600F40GM
Shop Offers
×
Sony FE 600mm F/4 GM OSS SEL600F40GM Deals
|
(second hand)
Check Price
|
(second hand)
|
Check Price
|
Buy Now!
|
If you buy a product through one of our referral links we will earn a commission (without costing you anything).
Prices last updated on .
As an Amazon Associate, I earn from qualifying purchases. Product prices and availability are accurate as of the date/time indicated and are subject to change. Any price and availability information displayed on Amazon at the time of purchase will apply to the purchase of this product.
Unavailable
Tamron 150-500mm F/5-6.7 Di III VC VXD A057 for Sony E
Tamron 150-500mm F/5-6.7 Di III VC VXD A057 for Sony E
Shop Offers
×
Tamron 150-500mm F/5-6.7 Di III VC VXD A057 for Sony E Deals
|
(second hand)
Check Price
|
(second hand)
|
Check Price
|
Buy Now!
|
If you buy a product through one of our referral links we will earn a commission (without costing you anything).
Prices last updated on .
As an Amazon Associate, I earn from qualifying purchases. Product prices and availability are accurate as of the date/time indicated and are subject to change. Any price and availability information displayed on Amazon at the time of purchase will apply to the purchase of this product.
Unavailable

