Attention: Landscape Photographers and Adventure Seekers...
Capture Stunning Landscapes Every Time You Shoot
(Without Having to Travel Far From Home)
Linda Sterling
Thank you so much for simplifying landscape photography with Simply Stunning Landscapes. Purchasing this product was a great move and I really get it now.
Linda Sterling
99% positive reviews
2,524 students
56 Lectures in 5.5 hours
4 FREE bonuses
Online & at your own pace
Downloadable onto any device
Language: English
Level: Beginner
Have you ever captured a landscape that looked stunning in person, but flat and boring in your photographs?
It’s disappointing when it happens once… heartbreaking when it happens over and over again.
I used to return from once-in-a-lifetime trips feeling disappointed and embarrassed. My photos didn’t capture the beauty I witnessed.
They were poorly exposed… I struggled to find great locations… and my composition was uninspiring. I knew I could do better.
That was my experience before I mastered landscape photography. I didn’t know how to close the gap between my vision and my photographs.
But what if I told you that there’s a fun and easy way to master landscape photography?
And that all you need is a simple process (outlined on this page) to consistently get great results?
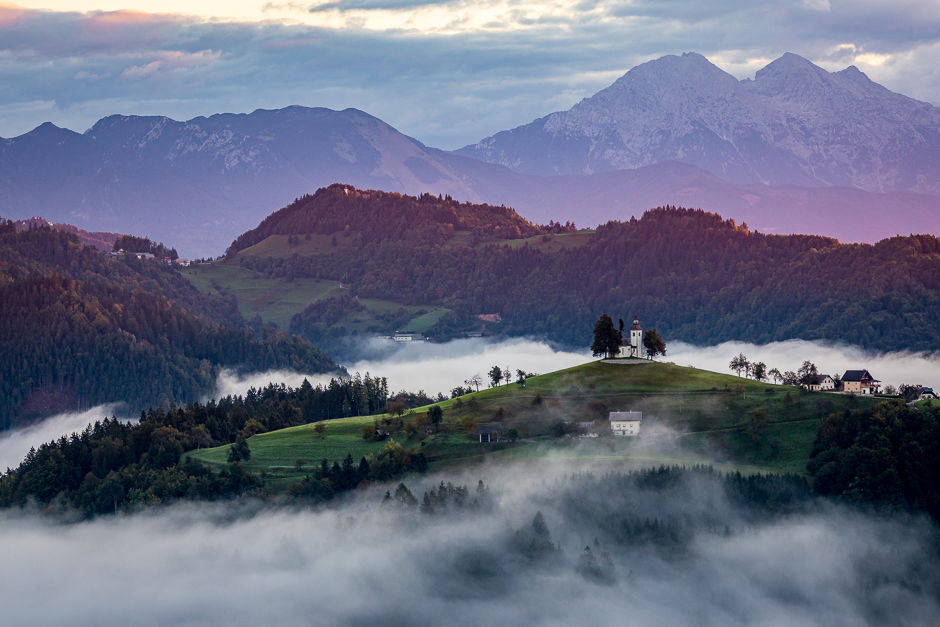
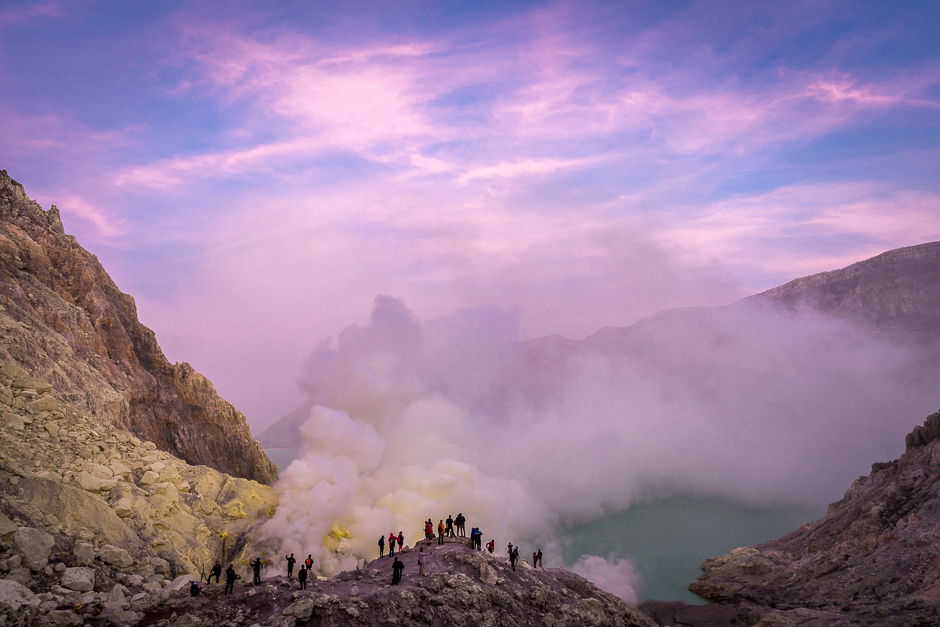
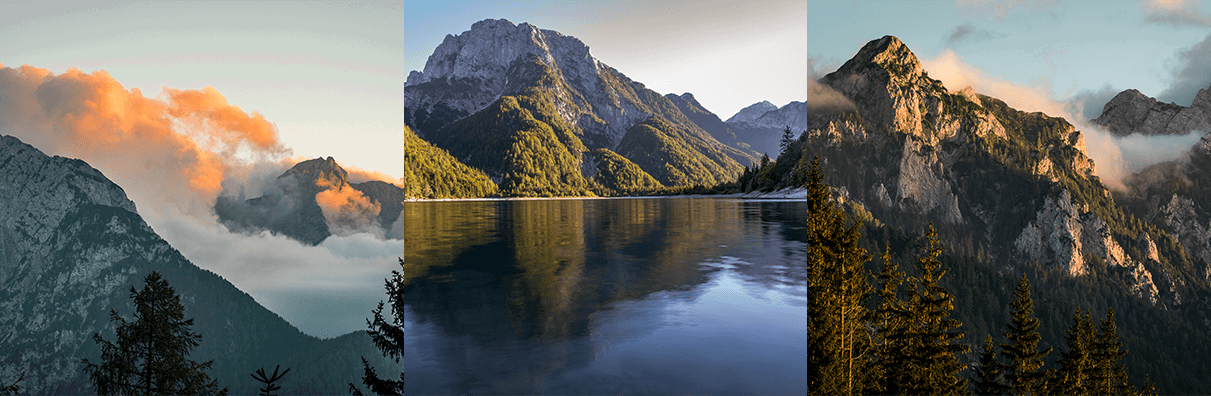
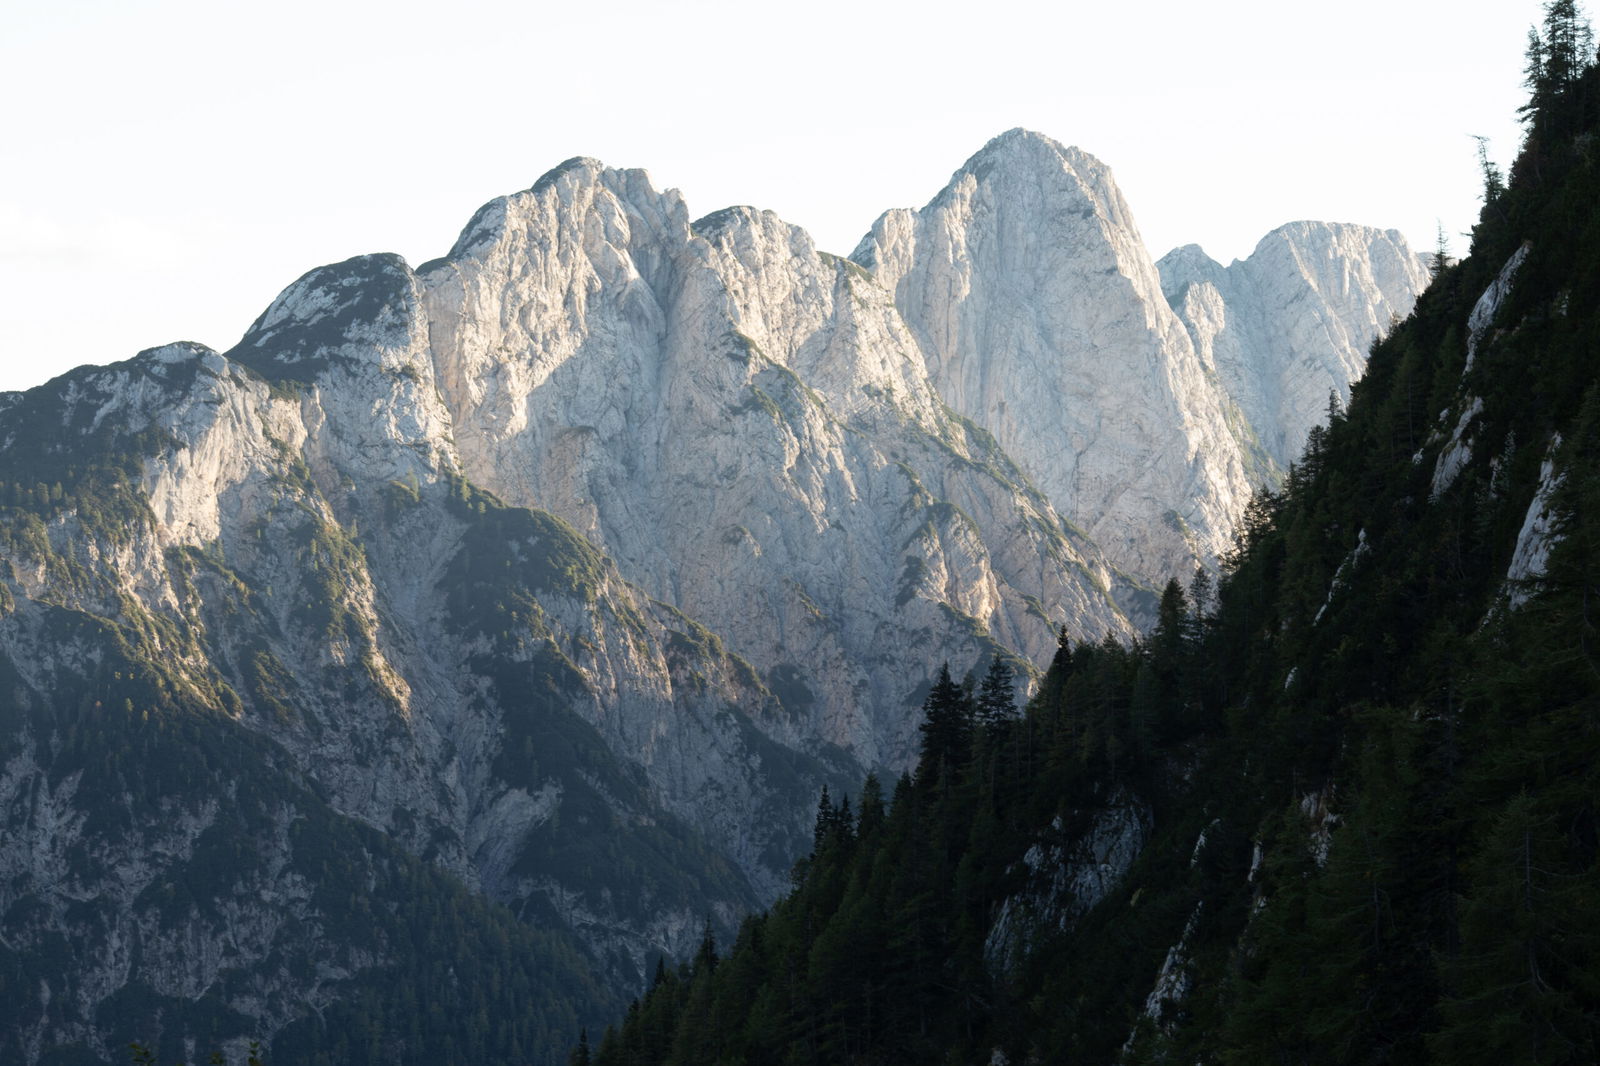
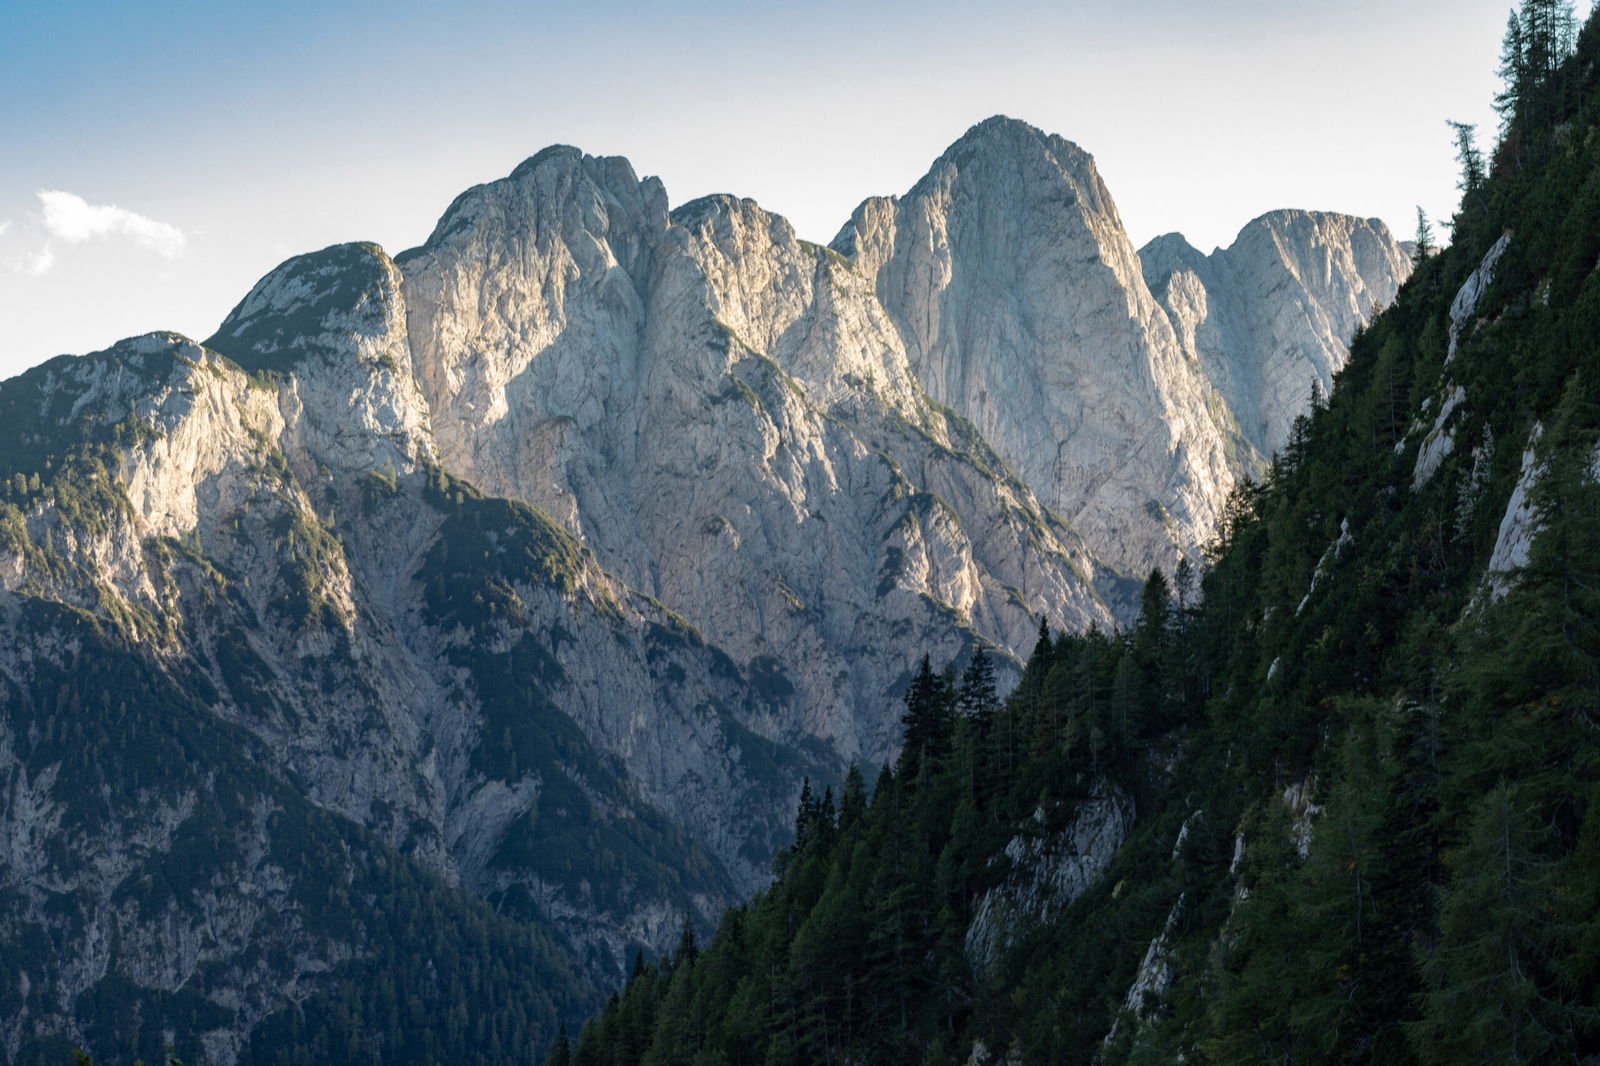
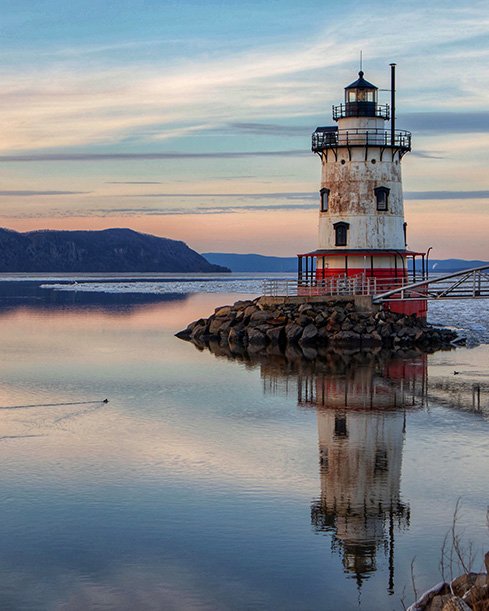
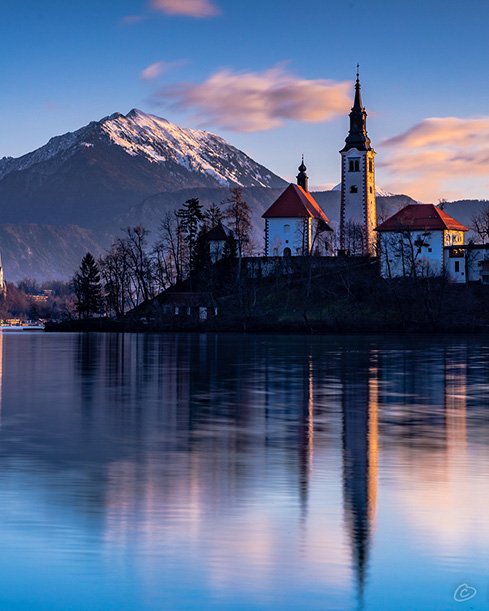
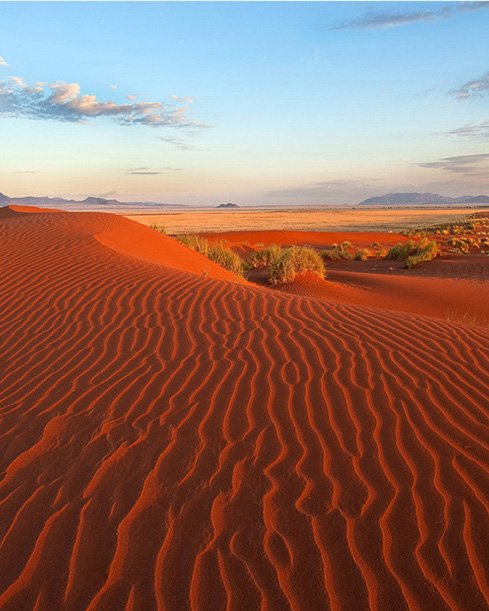
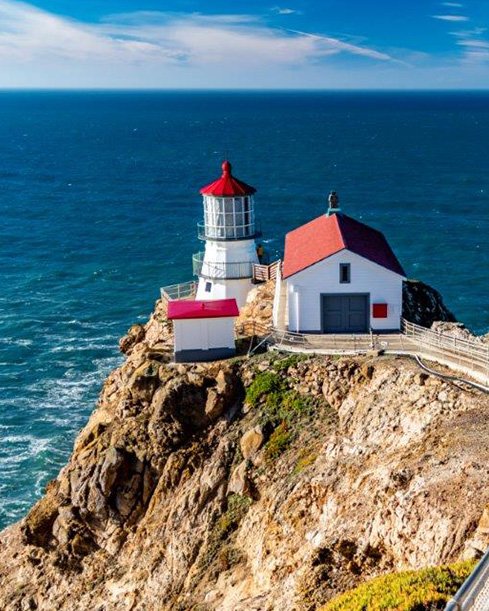
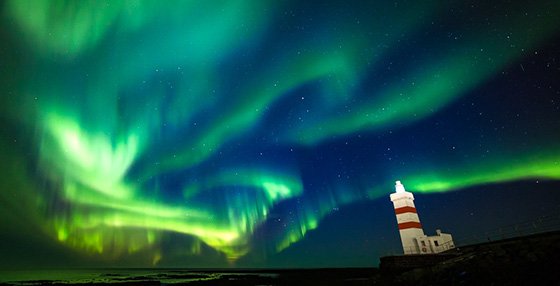
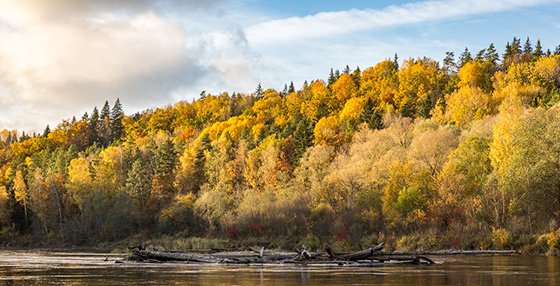
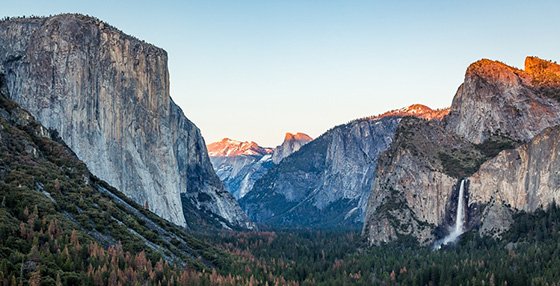
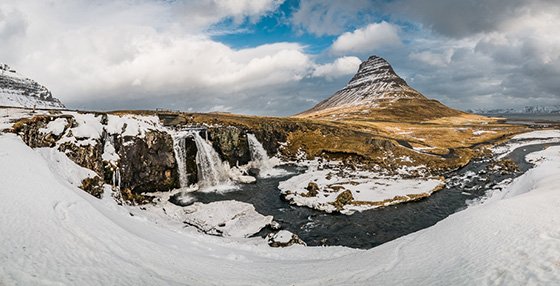
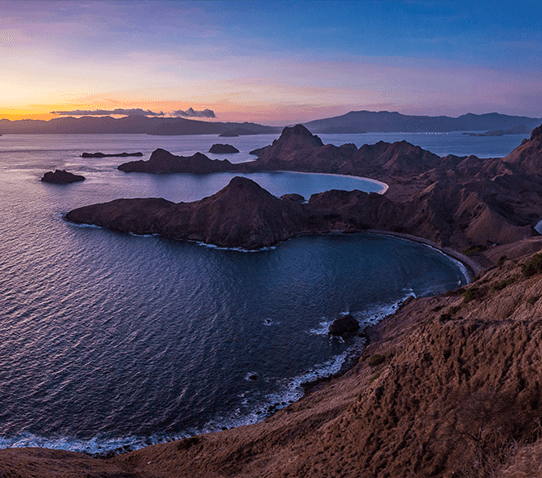
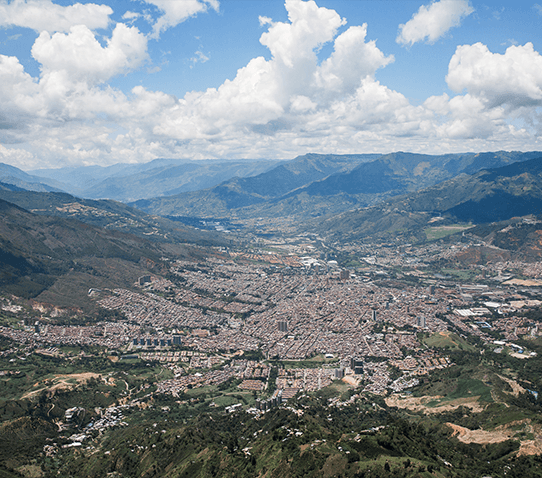
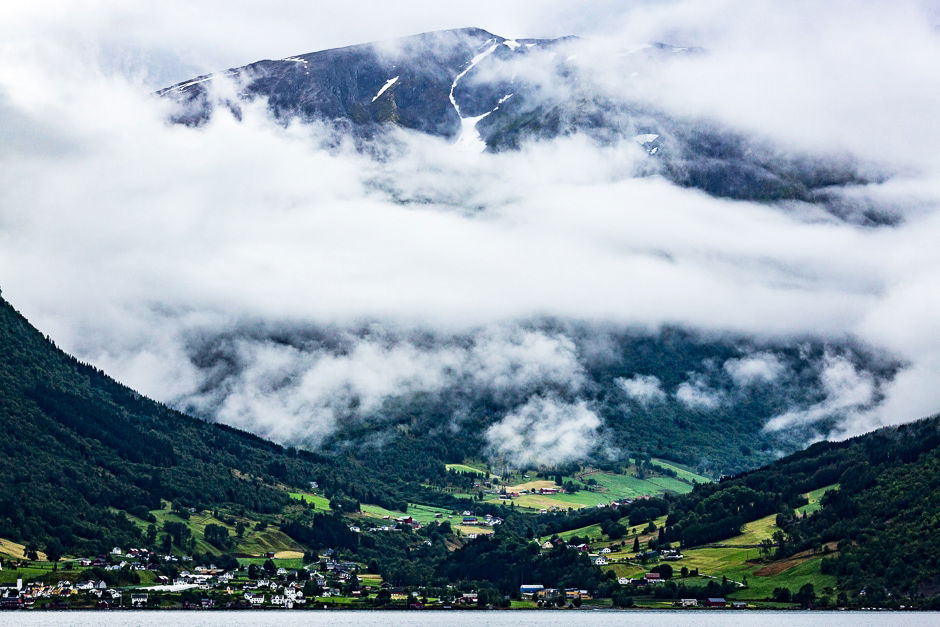
Landscapes so stunning, your friends will beg you for prints to hang on their walls….
Pictures like this…
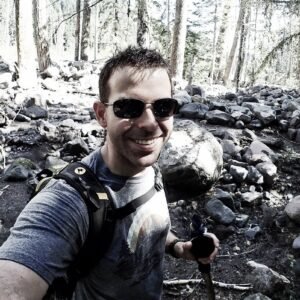
Hi, I’m Joshua Dunlop, Founder of ExpertPhotography
@expertpotography
58.8K Followers
Ever since I started photography, I’ve been in love with landscapes.
There’s nothing more satisfying than capturing a beautiful scene and having my friends beg me for prints.
Since I wanted to share this experience with others, I started analyzing my approach.
I quickly realized that it was unique in a couple of ways. Instead of focusing on fancy cameras or exotic locations I concentrate on:
carefully planning my trips
choosing the right composition
finding the best camera settings for the scene
This is how I ended up pioneering a fun and simple 5-step process (more on that below) for shooting landscapes…
It has already helped 2,600+ photographers in taking stunning photos… Are you next?
Introducing:
Simply Stunning Landscapes
(For illustration purposes only; this is an online course with video downloads)
“Simply Stunning Landscapes” is an online video course on the art of landscape photography. It shows you how to capture world-class images, every time you shoot.
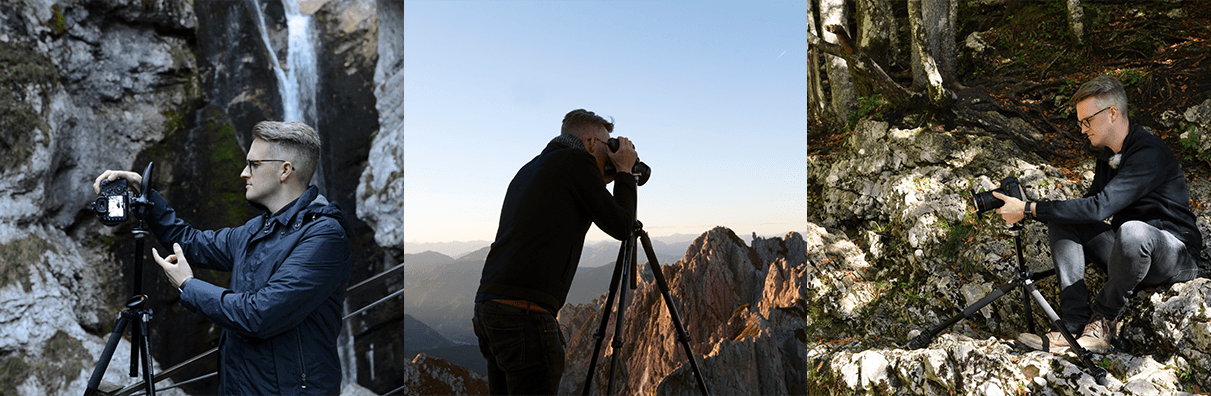
Shot in the field (not a classroom) we explore a mix of stunning European locations, and find the beauty in ordinary scenes along the way.
We don’t just show you the right way to take great photographs… but we point out the common pitfalls that most amateur photographers fall into.
The exact process we use 98% of the time – make good shots foolproof!
How to use Google Maps and Instagram to find great locations
The lazy man’s way to know if your photos are over exposed or under exposed
How to select the perfect exposure for any and every scene
How to capture more dramatic photos by chasing bad weather
The do’s and don’ts of white balance and colour
Why manual focus is king for landscape photography
And much, much more…
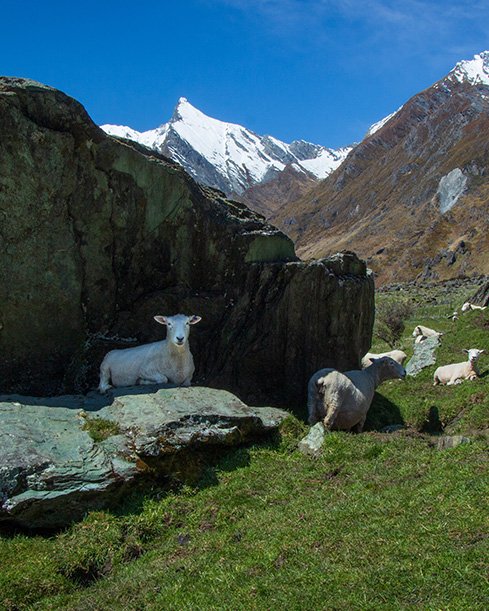
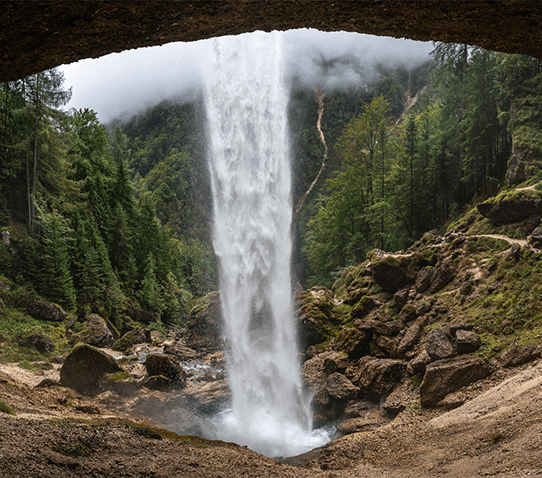
Our process guarantees results, and has helped me to capture the images you see across this page.
Pictures like this…
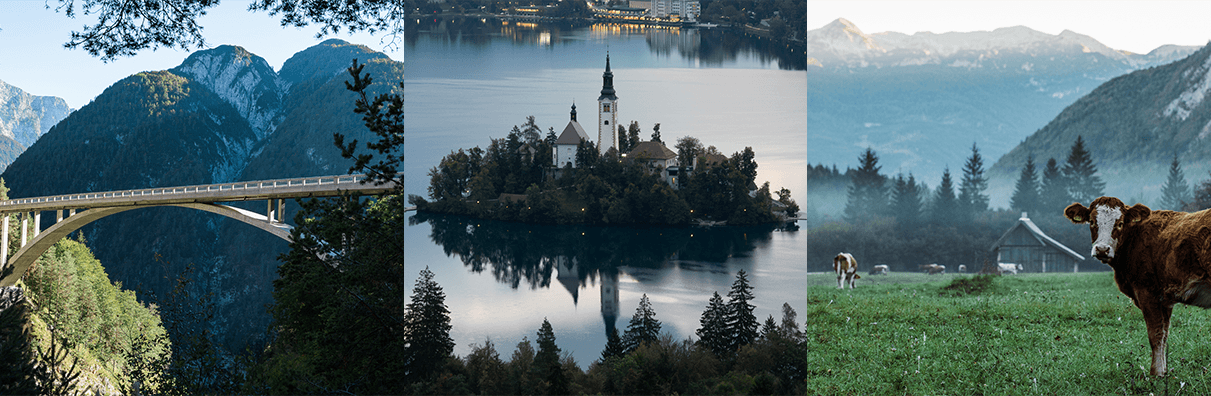
Filmed on location in Slovenia, Austria and Italy with a team of four people, over two weeks, you’ll be able to follow along as we capture stunning landscapes.
Do You Struggle to Capture a Landscape’s Full Beauty?
Even if you find an amazing location, and arrive at the right time… you still have to work out your settings, and find the best spot to shoot from.
On the surface landscape photography looks easy. But anyone who’s tried it knows it’s not as simple as finding a stunning location.
In fact, great photographers often take stunning images in the most average locations.
Because they know:
What to do in different weather and lighting conditions
Composition techniques they can use in any scene
Exactly how to set their cameras up for the best shots
You don’t have to be a professional to get great results. Far from it.
All you have to do is follow a simple five-step process…
Follow These 5 Simple Steps to Capture Great Landscapes
When I developed this simple, yet effective, five-step process… I was able to reliably capture all the images you see on this page…
Step 1 – Location Scouting
I used to leave location scouting up to chance. But by the time I’d found the exact spot I wanted to shoot from, the light and weather had changed, and the moment had passed.
When you master location scouting, you’ll never arrive at a location and think… “dang, wish I was over there instead.”
Step 2 – Weather
You can’t control mother nature. But you can plan your shoots around her, and get great photos regardless of the weather conditions.
Many photographers shy away from adverse weather, but this produces some of the most dramatic scenes. And when you seek this out, your landscape photography will transform.
Step 3 – Time of Day
Take a look at the two photos below. They were shot from the same location and have the exact same processing applied.
This photo was captured at 9:15am, but we were too late… the ideal conditions had passed.
This was captured at 7:30 , as the sun was creeping over the mountains in the distance.
Whether you’re an early bird or a night owl, there’s an opportunity to shoot great landscapes everyday.
Step 4 – Composition
It’s difficult to capture stunning landscapes when you only know one or two rules of composition. Beautiful scenes look flat when they’re not framed properly.
But with a ‘toolkit’ of compositional rules to draw from, you can create new and refreshing images every time you shoot.
Step 5 – Settings
I used to get so hung up on technical terms like hyperfocal distance… it actually slowed me down.
It turns out that I captured my best photos when I focused on just two of my camera’s settings.
Print-Worthy Photos From Every Shoot
Picture this.
Before you leave your house, you know the exact location you’re going to shoot from, and what weather to prepare for.
You arrive with plenty of time to setup your camera and frame the scene… the five step process comes naturally to you.
You wait for the right light, and take photos without a second thought.
A moment later, you’ve captured a photo so exciting, you’ll be jumping for joy (something I’m prone to do).
10 minutes later you’re playing with different compositions… Finding fresh and unique perspectives that other photographers haven’t thought of yet.
When you’re done, you have a selection of the most breathtaking… crystal clear… and exciting photographs you’ve ever taken.
Sound far-fetched? That’s what I thought too.
But my simple system has enabled me to take the most stunning photos of my life.
Landscape photography comes naturally to me, and I’m confident I can capturebeautiful photos in any location.
Even if you struggled in school… or aren’t the greatest at grasping new skills… you’re going to be shocked by how easy it feels to absorb this information.
Although I’ve taught a landscape photography course before, this is completely new material, revised and refreshed with incredible production value.
Here’s what my students have had to say about Simply Stunning Landscapes:
Daniel Campanini
Eric Tadina
Ken Van Wyk
Tom Hansen
Yarny Yarny
Patricia Sherrard
Tom Hansen
“Your simple and straightforward approach is easy to follow and produces results…”
Tom Hansen
Whether you are a skilled landscape photographer, if you love to shoot landscape photography or are just interested in adding this skill to your set of photographic tools, I would highly recommend Josh’s course on creating Simply Stunning Landscapes.
Brian Mitchell
This course covers nearly every category topic related to landscape photography. The timing of the videos overall is approachable and the camera perspective helps to understand how to do it yourself.
David Raymond
I’ve taken a few of your courses now and today was my first day of experimenting with landscape photography. The lessons truly work. I’m a novice at best and I am so excited to continue my journey to become a better photographer. In my opinion, I have taken some wonderful photos today and plan to print and hang them up in my office at work. Your simple and straightforward approach in each lesson is easy to follow and produces results. Thanks again.
Linda Sterling
Thank you so much for simplifying landscape photography with Simply Stunning Landscapes. Purchasing this product was a great move and I really get it now.
Course Breakdown: 5 Modules for Stunning Landscape Shots (Value $535)
Module 1: Gear - Take Professional Photos with Basic Gear
Experienced photographers don’t fuss over gear. Not because they have more of it, but because they know how to use it.
Before you can master exposure and composition, you must first understand how your gear works.
Including: (click to open)
How to use any camera for landscape photography
How to steady your camera for super sharp photos
My toolkit of inexpensive accessories to keep my gear clean and dry
A common misconception for focal length that’s holding you back (I defy this daily)
Which lenses will take the sharpest photos
How to balance your exposure using graduated filters (no more harsh contrasts)
Why polarising filters make your colours ‘pop’
Three different tripods for every budget and shooting situation
Module 2: Exposure - Simple Settings for Stunning Landscapes
We keep things as simple as possible and avoid confusing jargon. Instead of using terms like hyperfocal distance… we simply tell you where to focus.
It’s frustrating having to take several pictures to find the correct exposure. And it can be tempting to resort to ‘bracketing’ so that you can fix it later. But this isn’t the answer.
Instead, we cover:
Why you should prioritise the aperture in (almost) every exposure
The simplest way to get perfectly sharp landscapes
Common reasons amateur photographers take soft photos (and how to avoid them)
How to tastefully capture motion blur of flowing rivers and blowing trees
An easy way to understand exposure with the exposure triangle
The only reliable way to tell if your photo is over or underexposed (using a hidden camera feature)
Common settings every photographer should use (for example, if you’re not already shooting in raw, you’ll be amazed by the difference in image quality)
The best way to capture accurate colours (or, how to change the colour creatively)
The two metering modes we use (and the ones we never bother with)
Module 3: Location Scouting - Find Amazing Locations Close to Home
Not everyone can travel 1000’s of miles to exotic places. Which is why it’s important to know how to find landscapes close to home.
We all know one or two local photographers who have stunning photos of the local area. So what do they do differently?
That's what we cover in this module:
How to location scout from home (in 10 minutes or less)
Common tools (like Google’s reverse image search) for finding where amazing photos were taken
Exactly when to visit a location you’ve discovered (based on the weather and time of year)
Why it’s important to revisit locations at different times of the year
The best way to predict the weather and light for each shoot
What to do when you discover amazing locations by chance (but the timing is wrong)
How to pack your bag so you’re prepared for any shooting situation
My favourite app for planning landscape photography (it makes life a lot easier!)
Module 4: Composition - 9 Rules to Transform Your Landscapes
Knowing the technical side of photography is one thing, but composing it beautifully is a whole new challenge.
Even using something as simple as the rule of thirds can add depth, interest, and an interesting balance between the foreground and the background.
In “Simply Stunning Landscapes”, we’ve dedicated an entire section to help you get started with composition.
We go into detail on how to…
Add depth and interest to your photos with the Rule of Thirds
Direct your viewers’ attention using Leading Lines
Frame your scene you add context, depth, and scale
Find striking examples of perfect balance, using Symmetry
Include Dynamic Tension to encourage your viewer to explore the whole scene
Prioritise the most important part of your frame using Horizon Placement
Create pleasing and harmonious, or unfinished and unresolved photos… using Balance and Visual Weight
Align key features of your frame to stand out with Golden Triangles
Draw your viewers into the frame by adding Foreground Interest and Depth
Module 5: Techniques - Your New Landscape Skills in Action
Once you’ve mastered the basics of landscape photography, it’s time to start shooting.
By following the simple videos in this module, you’ll soon be able to:
Open to see more...
Capture breathtaking sunrises that leave your friends in awe
Know exactly how to capture perfect sunsets with bright pink skies
Use your drone to take your photography to new heights (if you’ll excuse the pun)
Stitch multiple photos together for a fresh perspective with panoramas
Choose between wide-angle and telephoto lenses in every shooting scenario
Capture mesmerising reflections and lakes for unique landscapes
Use long exposures to capture flowing waterfalls and blowing winds
What else is included?
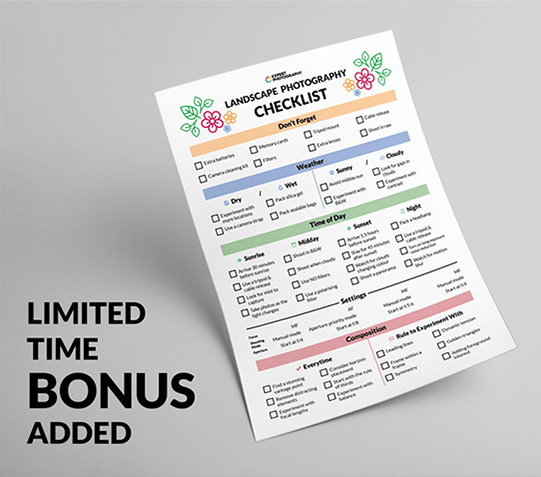
New Bonus: The Landscape Photography Checklist (Value $49)
The best landscape photographs are taken after planning and preparation. That’s what separates it from most other forms of photography.
And there can be a lot to think about. From packing your gear to planning the shoot around the weather and time of day.
That’s why we’ve worked with our designer to make this simple checklist, to ensure you never miss anything.
Simply print it off at home, and use it to help you capture stunning landscape photographs.
Bonus #1 - Picturesque Panoramas (Value $169)
We’re including an unreleased 1hr 20min course (only available here) on panorama photography.
Shot with a co-instructor Casey Kiernan (who you may know from Milky Way Mastery and Effortless Editing with Lightroom), we walk you through the process to capture fresh perspectives with stunning panoramas.
The 19 videos in “Picturesque Panoramas” show you:
How to capture a panorama with any focal length (it doesn’t have to be wide-angle)
Tips on how to set up your tripod for the best results
Which shooting mode to use to ensure the same exposure in every shot
Why we always use manual focus instead of autofocus
The best way to stitch your photos together using Lightroom or Photoshop (or even your phone)
A strange technique to create miniature globes from your panoramas
Bonus #2 - 5 Landscape Case Studies (Value $99)
Have you ever seen a stunning photograph and wondered how it was captured?
Photographers rarely reveal the secrets behind their best photos, which is why students have always loved my case studies. They allow you to get into the mind of a photographer, to see how they think, and follow their instincts.
While shooting this course, we selected five different locations to shoot as case studies.
From sunrises and sunsets, to waterfalls and rivers… these five bonus videos show you how I set up my gear, choose my settings, and compose my scenes… from start to finish.
Bonus #3 - Sell Your Art (Value $49)
Have you ever wanted to make money from your photography?
In this video bonus, I walk you through the strategies I used to get my photography sold in galleries.
“Sell Your Art” shows you:
The outreach email I used to get my art featured in galleries (you can use this too)
How to present your portfolio without overwhelming gallery owners
Exactly what gallery owners are looking for in photography (and what they don’t want to see)
How to price your photography
Alternative places to have your photography featured (don’t just rely on galleries alone)
100%
90 Days Guarantee
I stand behind every product we offer. And having planned and commissioned this course, I’m happy to put the ExpertPhotography name on it.
So I’m putting my money where my mouth is with these two guarantees:
Guarantee #1: If you don’t think “Simply Stunning Concepts” is the best $99 you’ve spent on your landscape photography… send me an email. I’ll provide you with a full refund.
Guarantee #2: If you DO what’s recommended, and your results aren’t great, I’ll refund double your money. All I ask is that you give it an honest effort. How’s that for fair?
And these guarantees are good for 90 days after purchase!
Here’s The Amazing Deal We’ve Put Together
A private photography tutor can demand over $100 an hour to teach the same knowledge we cover in this course.
With “Simply Stunning Landscapes”, we solve all of these problems, plus:
We show you how to shoot in dozens of locations (not just 2 or 3)
You can learn at your own pace, and on your own schedule (with our succinct videos)
Each concept is covered in a single video, making it easier to absorb the information
The course is always available online (and downloadable to your devices) so you can view the content anytime you like
My teaching style makes it feel as if you have a tutor sitting by your side, helping to correct your mistakes before you even make them
A workshop of this caliber could easily cost $1,499 (and that’s excluding the $366 in bonuses).
But you won’t be paying anything close to that… because we want to make landscape photography accessible to everyone.
Simply Stunning Landscapes
Capture Stunning Landscapes Every Time You Shoot
The entire course contains:Value
Gear (4 Videos / 33 minutes)
$79.00
Camera & Exposure (9 Videos / 51 minutes)
$99.00
Planning (3 Videos / 39 minutes)
$79.00
Styles & Techniques (7 Videos / 49 minutes)
$159.00
Composition (9 Videos / 36 minutes)
$119.00
Total Value:
$535.00
Plus... you're also getting these powerful bonuses:
The Landscape Photography Checklist
$49.00
Picturesque Panoramas (19 Videos / 77 Minutes)
$169.00
5 Landscape Case Studies (5 Videos / 37 Minutes)
$99.00
Sell Your Art (Video Tutorial)
$49.00
Total Value:
$366.00
A combined value of $901.00
But you won’t be paying $901.00 today. You won’t even be paying $299.00. Or even half of that.
It’s Yours Today For Just $99🔥
But hurry! Only the first 500 copies are discounted!
Save an amazing $802.00 before the countdown ends.
Get Instant Access to:
“Simply Stunning Landscapes”
Yes, I want it! I want access to this course right now!
When we release a new product, we always discount the price for the first 500 people. But it’s 500 people only.
For that reason, time is very much “Of the Essence”… I can’t stress the time-sensitiveness of this offer enough.
Not only will the 500 courses go quickly, but at that point, the $802.00 discount will expire. And I’m taking the bonuses away too.
Why? The reduced price is to celebrate the launch of the new course. The value of the course is far higher. It doesn’t make long-term sense to sell it for such a low price.
One Week From Now…
Your portfolio will have some of the most vivid and vibrant landscape photography.
Your loved ones will be amazed by how much you’ve improved. Your confidence will have grown immensely, and you’ll realise just how easily the skills you gained through landscape photography translate to photography in general.
In short: You’ll be a better, more exciting and more excited photographer.
But only when you choose to act.
You see, some might choose to do nothing. They won’t “do nothing” on purpose, it’s usually procrastination. They bookmark a page like this and think they’ll come back to it later.
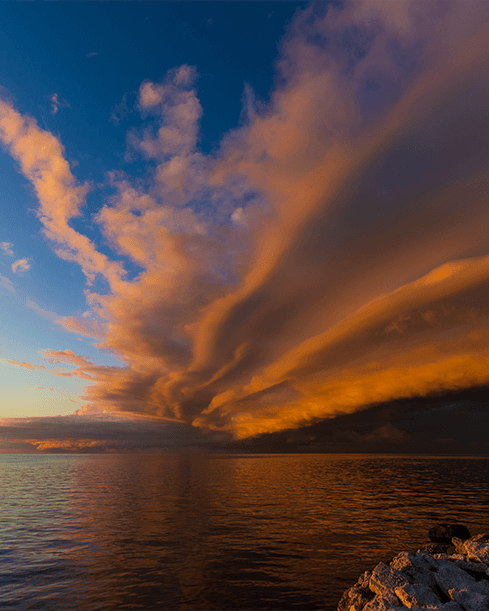
Three months pass and they find themselves in the same exact position they were before. Still thwarted by a camera that feels too complicated. Taking pictures that are not up to their full potential. Feeling the creative urge but unable to turn what they “see” into real pictures like this:
I wouldn’t be where I am today, doing what this course promises, if I hadn’t chosen to act.
You have a chance to do things differently.“Simply Stunning Landscapes” is your path to becoming a much better, more fulfilled photographer. But it’s up to you to take the first step.
The choice is yours.
Yours Truly,
Josh Dunlop
Founder, Expert Photography
P.S. – You’re getting everything you need to capture stunning landscapes, AND you’re getting the “Landscape Photography Checklist”, the “Picturesque Panoramas”, “5 Landscape Case Studies”, and “Sell Your Art” for FREE. But remember – 500 is the magic number.
Questions?
Who is ExpertPhotography?
ExpertPhotography was founded in 2011 by Joshua Dunlop.
Since then ExpertPhotography has grown into the world’s largest photography education website with a variety of online courses, ebooks, cheat sheets, presets, and more.
Everything we do here is to make the process of learning photography easier, so you can experience the same joy we do.
We’ve taught photography to 140,000+ very happy and satisfied students over the past 11 years.
Photography has changed our lives, and we hope we can help it to change yours too.
What is the structure of the course?
The course has 5 Modules:
Gear
Camera and Exposure
Planning
Styles and Techniques
Composition
Plus, you are getting three bonuses:
Case Studies
Picturesque Panoramas
Sell My Art
The lessons in each module are short and succinct on individual topics. This makes it easy to digest and simple to find and revisit specific concepts. Lesson lengths vary between 2-15 minutes.
May I see the course contents?
The course has 5 modules with a total of 32 lessons, plus the 3 bonuses with a total of 25 lessons:
Gear
Lenses
Filters
Tripod
Misc Accessories
Camera and Exposure
Aperture
Depth of Field
Shutter Speed
ISO
Exposure Triangle
Histogram
White Balance
Metering Modes
Image Quality
Planning
Location Scouting: Weather, Time of Day, And the Power of Revisiting
How to Do Location Scouting From Home
Weather
Styles and Techniques
Shooting Sunrise
Shooting Sunset
Panoramas
Wide vs Telephoto Shots
Lakes and Reflections
Long Exposure
Aerial Landscape Photography / Drone
Composition
Rule of Thirds
Leading Lines
Framing
Symmetry
Dynamic Tension
Horizon Placement
Balance and Visual Weight
Golden Triangles
Foreground Interest and Depth
Case Studies
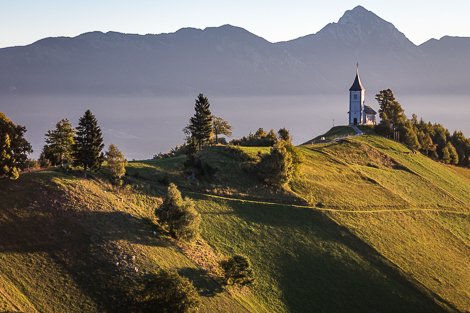
Church at Jamnik
Lake Bled
Mostnica
Pericnic Waterfall
Versic Pass
Picturesque Panoramas
Camera Choice
Lens Choice
Cable Release
Tripod Head
Camera Settings
RAW and Camera Settings
Manual Focus
Histogram
Panorama vs Single Photo
Suitable Scenes
Camera Placement on the focal Plane
Portrait vs Landscape
Overlap Percentage
Shooting Mode
In-app vs LR
Processing Panos
Lightroom Processing
Boundary Wrap
Tiny Planet
Sell Your Art
Is this an online course or will you send me DVDs?
This is an online course only.
This is the best way to cater to our customers all over the world with easy and instant access to their purchases, downloads, captions, links, and more. However, once purchased, you can download all the videos to your device and access them without an internet connection.
Can I download the videos?
Yes! We have downloads for every single video.
Do you offer closed captions / subtitles?
Yes! I’m proud to say that we offer these for all of our online courses.
Will this work with my camera?
So long as you have a DSLR, a mirrorless or a bridge camera, it should work fine. You won’t be able to make the most of this course (specifically, the gear and settings modules) using a point-and-shoot, but the modules on planning, styles and composition would still be useful even using a phone!
How long do I have to finish the course?
You will have lifetime access and the video downloads ensure that you can watch them on any device, at any time. You can take all the time you need, and go through the material at your own pace.
So even if you feel you don’t have time to dedicate to this course currently, you can take advantage of this one-time-only special launch offer and watch the course when it will be right for you.
How does the guarantee work?
If you would like to get your money back, all you need to do is send me an email at photojosh@expertphotography.com within 90 days of your purchase. I won’t ask any questions, and I will give you a full refund.
Simple as that. So if you are unsure right now about buying this course… It’s not a final decision.
You can make sure you don’t miss out on the deal, have a taste of the course and decide whether you want to keep it or not. You may wonder why I would do this – it’s because I’m sure you’ll love it.
And if it’s not for you, it’s only right I give you your money back.
What if I am a beginner photographer?
While many not specifically “beginner” photography courses assume the customer has already mastered their camera, our course covers the settings we use in each situation. The course is truly for all experience levels, beginners included.
It is jargon-free – we don’t get hung up on technical terminology.
What if I'm an experienced photographer already?
Although our course is suitable for beginners, it’s can also valuable for experienced photographers. You’ll surely be familiar with some of the concepts and techniques that are covered in this course.
However, you may find some fresh ideas and useful tricks that will improve your photography further.
If you’re concerned you won’t learn anything new, you can sign up and go through a module of your choice, and ask for a refund in 90 days if you already knew everything.
What if I don’t have the time or money to travel to amazing locations?
As you can see from the photos on this page, we indeed went to beautiful locations… But we stopped at ordinary scenes along the way and were able to capture great images! All because we followed a simple system you can follow too.
Landscape photography doesn’t require travelling. I will teach you how to scout locations near you to practice and enjoy landscape photography!