

The best affordable camera for landscape photography should have a decent sensor. You want image resolution that meets the demands of landscape photography. Many guides tell you only very high-resolution cameras are good enough. And they direct you to cameras with eye-watering prices. But your options don’t have to break the bank!
The Canon EOS Rebel T7 is our choice as the best affordable camera for landscape photography. It produces excellent images that bring out the best in your landscapes. It has helpful photography features for beginners and nails the affordability brief.
What Is the Best Affordable Camera for Landscape Photography?
Our list of the best affordable cameras for landscapes includes all types. There are DSLR, mirrorless, bridge, and compact cameras. They all meet the demands of landscape photography and have an affordable price tag. But the Canon EOS Rebel T7 is our top choice.
Here is a quick overview before we dive deeper into each camera. If you want more info about what to look for in a landscape photography camera, skip to the bottom section.
- Excellent image quality from the 24.1 MP sensor
- Vibrant colors and impressive dynamic range
- Very strong low-light performance
- Excellent image quality, colors, and dynamic range
- Built-in 5-axis image stabilization
- Advanced AF system for capturing movement
- Wide ISO range and excellent low-light performance
- Shake-reduction system built-in
- Rugged and thoroughly weather-sealed body
- Outstanding image quality with vibrant colors
- Class-leading AF system that's great for wildlife as well
- Compact and lightweight mirrorless body
- Impressive image quality for a cheap compact
- 30x zoom range from the fixed Leica lens
- Dual optical and sensor-shift image stabilization
- Guide modes for absolute beginners
- Excellent image quality with rich colors and details
- Wide ISO range for low-light photography
- Built-in 5-axis image stabilization for sharper photos
- Incredible 50 MP images with High Res mode
- Brilliant hybrid features including 4K video recording
- Lovely optical quality throughout the 16x zoom range
- Optical image stabilization for sharper images
- Excellent video features
- Outstanding image quality from the 26 MP sensor
- Wide dynamic range from the full frame sensor
- Reliable image stabilization for more exposure control
- 21mm wide-angle focal length for broad landscapes
- Incredible 65x zoom range
- 4K time-lapse feature built-in
10 Best Affordable Cameras for Landscape Photography
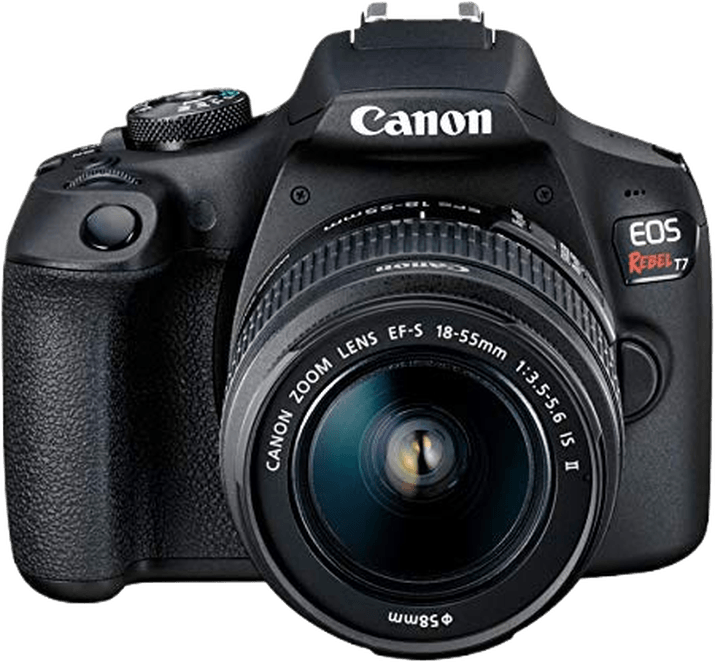
1. Canon EOS Rebel T7
| Camera Type |
Camera Type
DSLR
|
| Sensor Format |
Sensor Format
APS-C
|
| Megapixels |
Megapixels
24.1 MP
|
| Autofocus Points |
Autofocus Points
9
|
| Minimum ISO (Native) |
Minimum ISO (Native)
100
|
| Maximum ISO (Native) |
Maximum ISO (Native)
6400
|
| Camera Highlights |
Camera Highlights
Fantastic image quality and very budget-friendly
|
The Canon EOS Rebel T7 is a fantastic entry-level DSLR camera at a fabulous price. It’s not the most recent Canon EOS Rebel release, but it is an excellent beginner landscape photography camera. It’s one of the most accessible DSLR cameras with many good features.
Good image quality is what you want for landscape photography. And the 24.1 MP Rebel T7 won’t disappoint. The vibrant colors and the dynamic range are impressive for a camera at this level. And the ISO range gives you plenty to play with, going from 100 to 12,800 ISO.
The optical viewfinder makes composition easy. The vari-angle LCD screen is a handy feature. The battery life is very good. Plus, you have built-in wireless connectivity. Wi-Fi and Bluetooth make transferring and sharing images a simple process.
But there are a few downsides. The continuous shooting speed is very slow at 3 fps. The video quality is limited to Full HD. And the autofocus is limited, with only nine focus points. But that all won’t matter if you stick to landscapes.
You can buy the newer Canon EOS Rebel T8i with a bigger budget. But the downsides of the Rebel T7 won’t get in the way of your landscape photography.
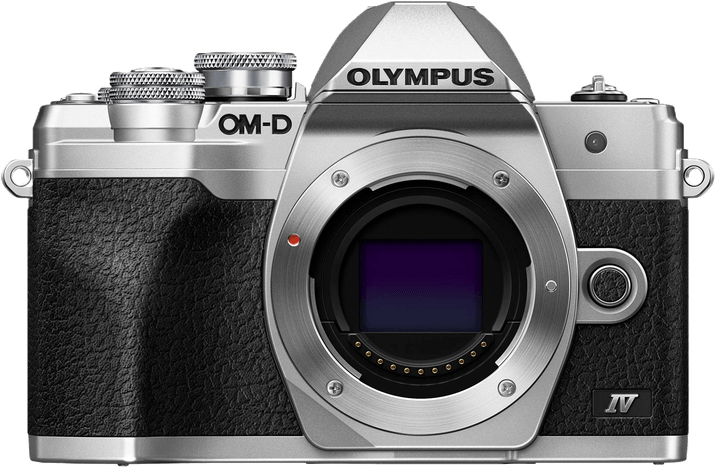
2. Olympus OM-D E-M10 IV
| Camera Type |
Camera Type
Mirrorless
|
| Sensor Format |
Sensor Format
Micro Four Thirds
|
| Megapixels |
Megapixels
20 MP
|
| In-body Stabilization |
In-body Stabilization
1
|
| Autofocus Points |
Autofocus Points
121
|
| Minimum ISO (Native) |
Minimum ISO (Native)
200
|
| Maximum ISO (Native) |
Maximum ISO (Native)
6400
|
| Camera Highlights |
Camera Highlights
Compact mirrorless body and built-in stabilization for handheld photography
|
A Micro Four Thirds (MFT) sensor is smaller than an APS-C and full-frame sensor. That might not sound ideal for landscapes. But MFT cameras are compact, powerful, and full of features.
Olympus specializes in MFT cameras. That’s why the OM-D E-M10 Mark IV makes it to the top of our list of the best affordable cameras for landscape photography.
The Micro Four Thirds camera has an image resolution of 20 MP. That doesn’t sound like much, but you still get stunning image quality.
The color rendition and dynamic range are excellent. The ISO range starts at 100, which is ideal for landscapes. And you can raise it to 25,600 in manual mode if you’re in low light.
Image stabilization is a handy feature for capturing landscape photos. This camera uses a five-axis sensor-shift image stabilization system. It reduces camera shake, giving you more options for shooting handheld. You won’t need a tripod on your next landscape expedition.
The autofocus system is excellent. It uses 121 focus points and has face detection and subject tracking. You get a continuous shooting speed of 15 fps. And you have 4K video quality.
The lack of weather sealing is a downside. But the fantastic camera features make the Olympus OM-D E-M10 Mark IV versatile. So it’s one of the best cameras for landscape photography if you’re on a budget.
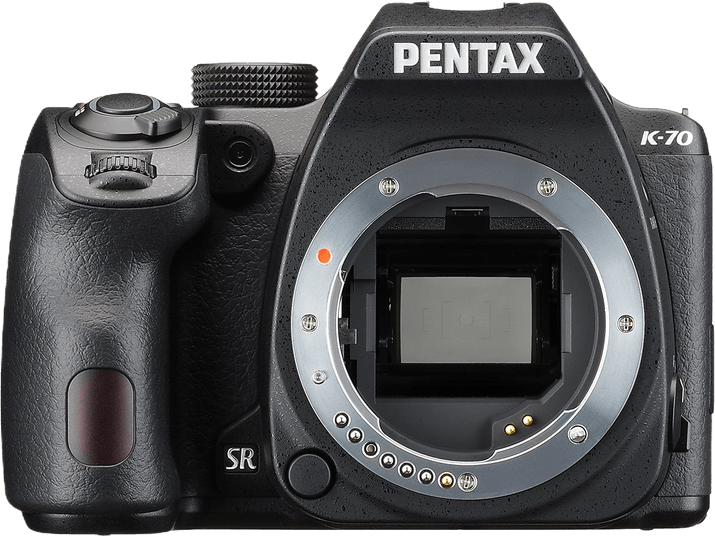
3. Pentax K-70
| Camera Type |
Camera Type
DSLR
|
| Sensor Format |
Sensor Format
APS-C
|
| Megapixels |
Megapixels
24 MP
|
| In-body Stabilization |
In-body Stabilization
1
|
| Autofocus Points |
Autofocus Points
11
|
| Minimum ISO (Native) |
Minimum ISO (Native)
100
|
| Maximum ISO (Native) |
Maximum ISO (Native)
102400
|
| Weather Sealing |
Weather Sealing
1
|
| Camera Highlights |
Camera Highlights
Excellent image quality, shake-reduction system, and weather-resistant body
|
The Pentax K-70 is ideal for shooting landscape photos. It’s a rugged DSLR camera built on Pentax’s reputation for durable cameras. It’s a popular entry-level camera in the landscape photography world. And it combines performance, toughness, and an affordable price.
This Pentax camera is completely weather-sealed. You can shoot landscapes in rain or snow down to 14 F (-10 C). You can’t control the weather. But the K-70’s weather-resistant body means it’s no longer a concern.
The performance inside the body is also excellent. The APS-C sensor gives you a resolution of 24.2 MP, which is far better than any smartphone camera. The dynamic range is outstanding for a camera at this level.
You also get an impressive ISO range, starting at 100, with a top limit of 204,800. That makes it one of the best cameras for landscape and night photography.
The shake-reduction system is another handy feature for landscape photographers. It doesn’t offer the same shake reduction as a sensor-shift system. But it does improve quality when shooting handheld.
The lack of 4K video will put off video makers. But all the features combine to make a fantastic camera for landscape photography. The Pentax K-70 offers excellent value for money with a kit lens included (18-135mm or 18-55mm).
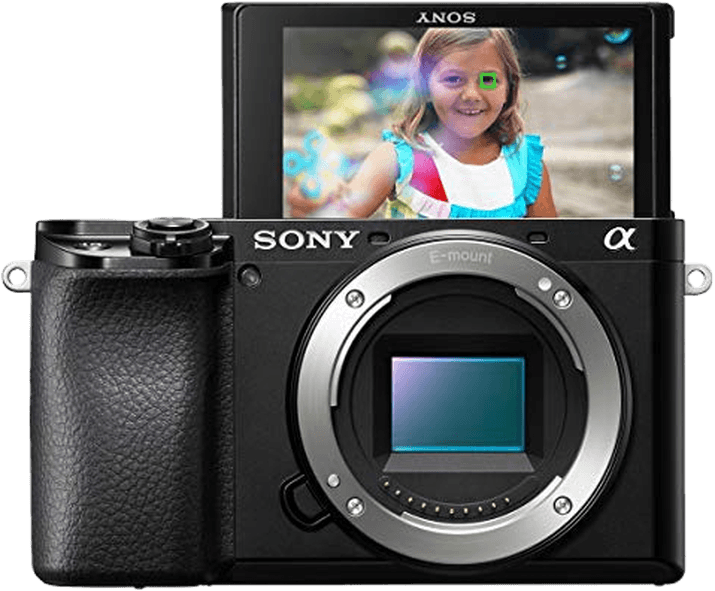
4. Sony a6100
| Camera Type |
Camera Type
Mirrorless
|
| Sensor Format |
Sensor Format
APS-C
|
| Megapixels |
Megapixels
24 MP
|
| Autofocus Points |
Autofocus Points
425
|
| Minimum ISO (Native) |
Minimum ISO (Native)
100
|
| Maximum ISO (Native) |
Maximum ISO (Native)
32000
|
| Camera Highlights |
Camera Highlights
Vibrant, detailed images with a wide dynamic range and excellent AF for wildlife
|
The a6100 is an older model in the Sony Alpha series, but it remains a high-quality camera. Its age makes it more of a budget camera for landscape photography.
Sony mirrorless cameras are considered some of the best. And the a6100 is the best mirrorless camera for landscape photography if you’re on a budget.
This mirrorless offers excellent image quality. The APS-C sensor has a 24.2 MP count, so your landscape shots are vibrant with an outstanding dynamic range. It’s good enough for enlargement and print media.
The camera offers a good set of ISO settings. ISO 100 is ideal for daylight landscapes, but you can increase it to 51,200 for dawn and dusk shots.
The autofocus system is a leader in its class. It has 425 contrast—and phase-detection points for tracking subjects. It also detects the eyes of humans and animals, which is a bonus if you want to try wildlife photography. The 11 fps burst mode helps you capture animals in motion.
The Sony a6100 is an interchangeable lens camera. It also comes with excellent kit lenses. Its small, lightweight body is easy to transport, making it an excellent choice for traveling landscape photographers.
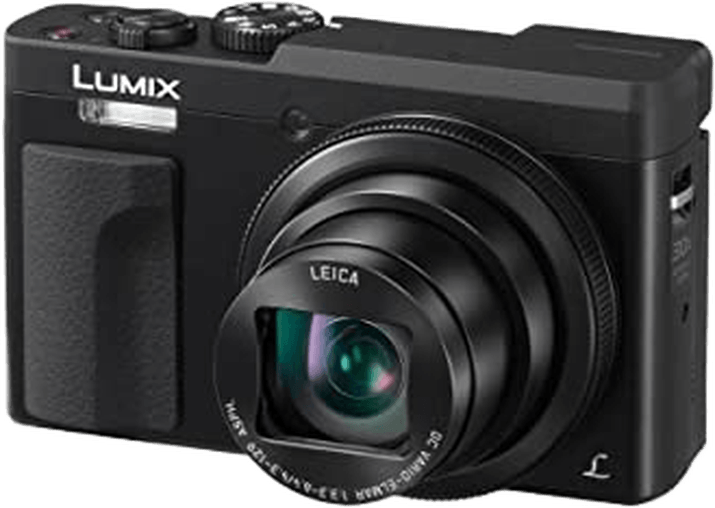
5. Panasonic DC-ZS70
| Camera Type |
Camera Type
Compact
|
| Sensor Format |
Sensor Format
1/2.3”
|
| Megapixels |
Megapixels
20 MP
|
| In-body Stabilization |
In-body Stabilization
1
|
| Autofocus Points |
Autofocus Points
49
|
| Minimum ISO (Native) |
Minimum ISO (Native)
80
|
| Maximum ISO (Native) |
Maximum ISO (Native)
3200
|
| Camera Highlights |
Camera Highlights
30x zoom with dual image stabilization
|
The Panasonic Lumix DC-ZS70K is the best compact camera for landscape photography. It’s powerful, has excellent features, and is small enough to fit in a backpack pocket. It’s an impressive, cheap compact with plenty of bang for your buck!
The DC-ZS70K only has a 1/2.3-inch camera sensor, which provides an impressive 20.3 MP resolution. The fixed lens enhances image quality for landscapes. It’s a Leica lens, so you can’t fault the quality. It also provides an incredible focal length range, with 30x zoom capabilities.
Image stabilization isn’t common in compact cameras. But the DC-ZS70K combines optical and sensor-shift stabilization. It ensures sharp images without a tripod.
The other camera features are excellent, too. The Lumix 4K Photo mode also gives you a 30 fps burst rate. The electronic viewfinder and LCD screen are bright and detailed. You can record amazing 4K videos.
The Lumix DC-ZS70K is a versatile camera. And we think it’s excellent for landscape photography.
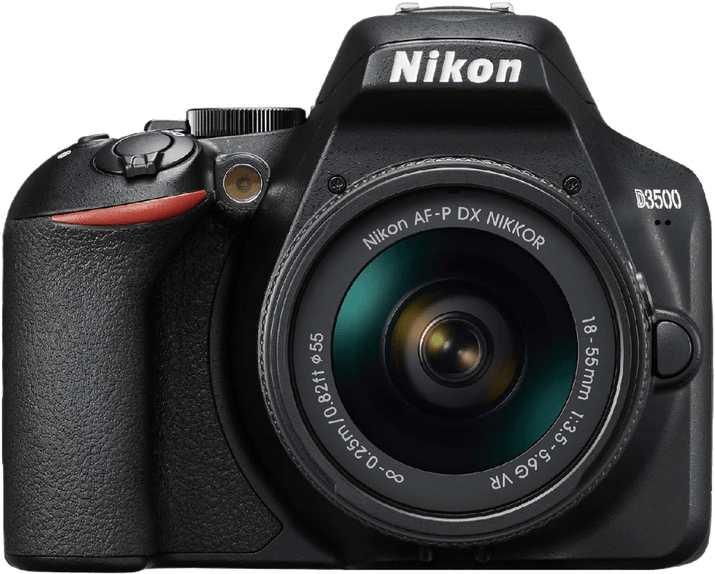
6. Nikon D3500
| Camera Type |
Camera Type
DSLR
|
| Sensor Format |
Sensor Format
APS-C
|
| Megapixels |
Megapixels
24 MP
|
| Autofocus Points |
Autofocus Points
11
|
| Minimum ISO (Native) |
Minimum ISO (Native)
100
|
| Maximum ISO (Native) |
Maximum ISO (Native)
25600
|
| Camera Highlights |
Camera Highlights
Guide mode for beginners, excellent image quality, and good high-ISO performance
|
The Nikon D3500 is one of the best entry-level DSLR cameras. It’s a fantastic choice for anyone wanting to start photography. It also has features and good performance for new landscape photographers. It’s an affordable DSLR that won’t let you down.
A Nikon DSLR camera is a great place to start with photography. Its 24.2 MP resolution gives you excellent image quality, a big jump from smartphone photography. It will fuel your enthusiasm for landscape photography.
This beginner Nikon has a solid ISO range, starting at 100, with a top-level 25,600 setting. That means you can try low-light photography when the sun goes down. There’s a good selection of auto and semi-auto modes. Plus, there are built-in guides for absolute beginners.
The Nikon D3500 comes with an excellent kit lens. But it also allows you to expand your horizons with other Nikon DLSR lenses. It’s compatible with all Nikon F-mount lenses, so you have hundreds to choose from.
You have a high-quality optical viewfinder. The autofocus is primitive, but it’s reliable. And the battery life is excellent. The D3500 isn’t a camera for video makers. So there’s no 4K, only full HD. But it’s the perfect DSLR camera for a budding landscape photographer.
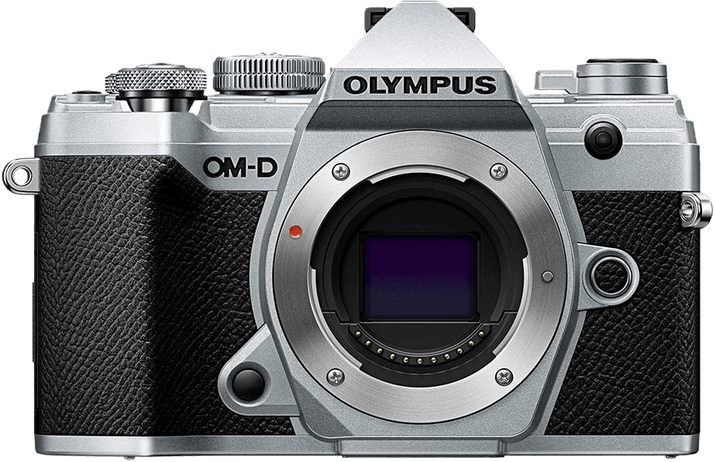
7. Olympus OM-D E-M5 III
| Camera Type |
Camera Type
Mirrorless
|
| Sensor Format |
Sensor Format
Micro Four Thirds
|
| Megapixels |
Megapixels
20 MP
|
| In-body Stabilization |
In-body Stabilization
1
|
| Autofocus Points |
Autofocus Points
121
|
| Minimum ISO (Native) |
Minimum ISO (Native)
200
|
| Maximum ISO (Native) |
Maximum ISO (Native)
6400
|
| Weather Sealing |
Weather Sealing
1
|
| Camera Highlights |
Camera Highlights
Powerful 50 MP High Res mode, image stabilization, and a weather-sealed body
|
We’ve included another Micro Four Thirds camera from Olympus. They’re fabulous mirrorless cameras for landscape photography. That is because they’re compact and lightweight. And they have excellent features for this type of photography.
The Olympus OM-D E-M5 Mark III may stretch your budget. But it’s a quality camera for landscape photographers.
This mirrorless camera’s image resolution is 20 MP, which is powerful for an MFT sensor. You can expect detailed images with fantastic quality.
If 20 MP isn’t enough, you have a High Res Shot mode. It’s best to use a tripod for this, but it gives you incredible 50 MP photos—perfect for landscape photography.
But don’t worry if you left your tripod at home. The camera has built-in image stabilization, which reduces camera shake when shooting handheld. And that allows you to use slower shutter speeds without blurring your images.
Another highlight is the autofocus. It uses 121 focus points for locking and tracking subjects. The continuous shooting speed is 30 fps so you won’t miss a thing on your next outing. Plus, the body is completely weather-sealed for outdoor photography.
The OM-D E-M5 Mark III isn’t the cheapest camera on the list, but it’s one of the best for landscape photography.
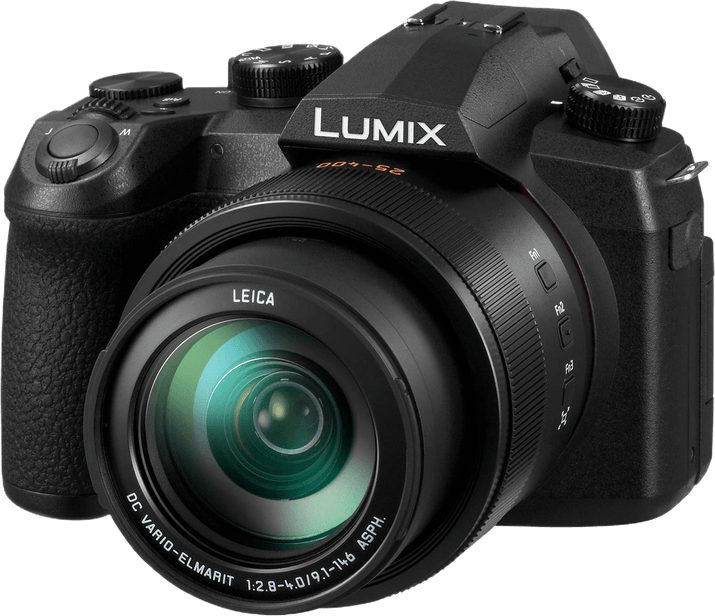
8. Panasonic FZ1000 II
| Camera Type |
Camera Type
Bridge
|
| Sensor Format |
Sensor Format
1"
|
| Megapixels |
Megapixels
20 MP
|
| In-body Stabilization |
In-body Stabilization
1
|
| Autofocus Points |
Autofocus Points
49
|
| Minimum ISO (Native) |
Minimum ISO (Native)
125
|
| Maximum ISO (Native) |
Maximum ISO (Native)
12800
|
| Camera Highlights |
Camera Highlights
Quality wide Leica lens with 16x zoom and optical stabilization
|
The Panasonic Lumix FZ1000 II is a bridge camera. They’re excellent for beginners as a cross between a point-and-shoot and a DSLR camera. The FZ1000 II is ideal for casual landscape photographers. It may be an entry-level camera but has advanced features for superior-quality photos.
This bridge camera only has a one-inch sensor, but it’s powerful. It gives detailed images with a 20.1 MP resolution, enough for stunning landscape shots. The FZ1000 II is a hybrid camera with fantastic 4K video recording.
This Panasonic camera has a fixed Leica lens. When you see the name Leica, you know the lens quality isn’t in question.
With a large focal length range, it’s ideal for taking landscape photos. The wide angle is 25 mm, which expands to 400 mm. That’s a 16x zoom range to frame a landscape to your liking.
Things can get shaky at that kind of focal length. But the camera keeps things steady with the optical image stabilizer. And it combines that with a sensor-shift system for extra shake reduction.
The Lumix FZ1000 II guarantees sharp images, making it one of the best cameras for landscape photographers.
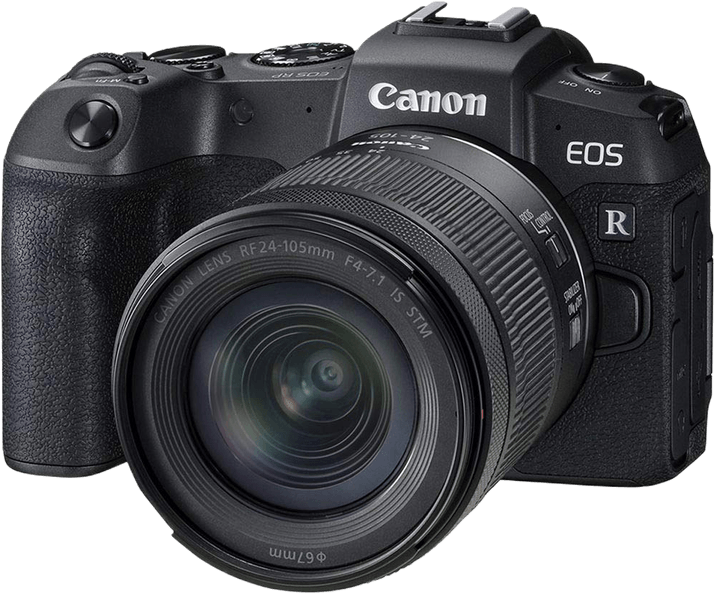
9. Canon EOS RP
| Camera Type |
Camera Type
Mirrorless
|
| Sensor Format |
Sensor Format
Full Frame
|
| Megapixels |
Megapixels
26 MP
|
| Autofocus Points |
Autofocus Points
4779
|
| Minimum ISO (Native) |
Minimum ISO (Native)
100
|
| Maximum ISO (Native) |
Maximum ISO (Native)
40000
|
| Camera Highlights |
Camera Highlights
Full frame sensor with a fantastic dynamic range and weather-sealed body
|
Full-frame mirrorless cameras are excellent for landscape photos but aren’t cheap. The EOS RP is one of the most affordable full-frame cameras. It may stretch your budget, but it makes our list of the best affordable cameras for landscape photography.
This affordable Canon camera‘s full-frame sensor gives it a resolution of 26.2 MP. That’s not record-breaking for a full-frame camera, but you’ll be impressed with the image quality.
And it’s not just about how many megapixels the sensor has. The larger pixel size means you have an improved dynamic range. That’s ideal for more complex landscape photos.
The autofocus system is excellent. Its LCD screen allows touch-and-drag focusing, and optical stabilization keeps images sharp. As a bonus, filmmakers will enjoy the 4K video options.
The Canon EOS RP is the best budget option for a full-frame mirrorless camera. Its performance is excellent. Landscape photographers will be pleased with the weather-sealed body. It will let you snap some eye-catching landscape shots.
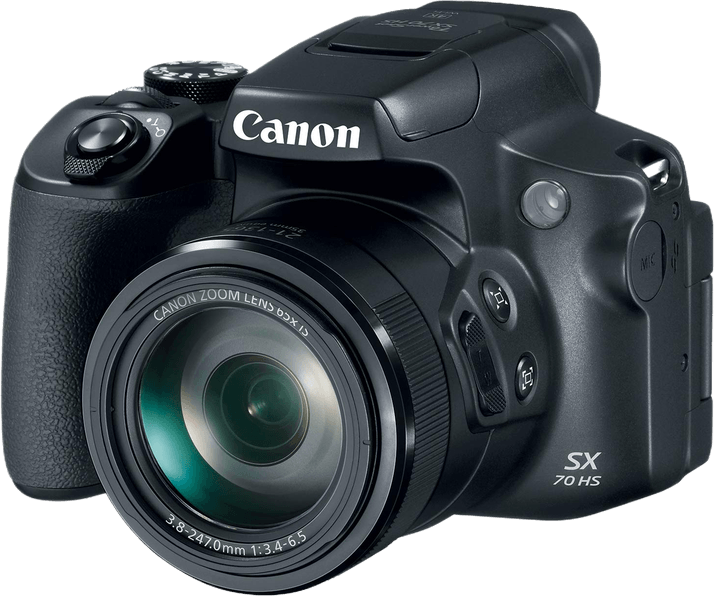
10. Canon PowerShot SX70
| Camera Type |
Camera Type
Bridge
|
| Sensor Format |
Sensor Format
1/2.3”
|
| Megapixels |
Megapixels
20 MP
|
| Autofocus Points |
Autofocus Points
9
|
| Minimum ISO (Native) |
Minimum ISO (Native)
100
|
| Maximum ISO (Native) |
Maximum ISO (Native)
3200
|
| Camera Highlights |
Camera Highlights
A 21mm wide-angle focal length and incredible 65x zoom range
|
The final entry on our list is another affordable bridge camera. Bridge cameras are excellent options for beginners and casual photographers. And the PowerShot SX70 has all the features to be one of the best cameras for landscape photography.
The sensor might be small, but you get fantastic image quality. 20.1 MP is impressive from a 1/2.3-inch sensor. The Digic 8 image processor gets the most out of every pixel, which is also true for video mode.
Bridge cameras aren’t known as hybrid machines. But the PowerShot SX70 gives you a lovely 4K video recording feature.
The fixed lens is fantastic. It gives you a 65x zoom range, meaning nothing is too far. And you have a 21mm wide-angle focal length for stunning landscapes. The optical quality is excellent. It also has optical stabilization to keep your photos crisp.
The electronic viewfinder is bright and accurate. The LCD screen flips out and rotates for ease of use. The camera can double as a webcam with the EOS Utility app. And you have Wi-Fi connectivity.
The Canon PowerShot SX70 has more than you might expect. And the price makes it one of the best affordable cameras for landscape photography.
What to Look for in a Landscape Photography Camera
When you set out to photograph landscapes, your camera must be up for the job. Landscape photography has unique demands. So, not every camera works well for landscapes. Here are four specs to look for in the best affordable camera for landscape photography.
1. Image Quality
Image quality is the key to good landscape photography. You want to show beautiful landscapes in all their glory. But you lose a landscape’s natural beauty if the camera doesn’t produce high-quality images. And your landscape photos may end up flat and uninspiring.
The camera sensor’s megapixel (MP) count plays a large part in image quality. A higher MP count usually means better image quality. But also be aware of the size of the sensor. Some MP counts might look low. But they can still produce excellent images on a smaller sensor.
Medium-format cameras have large sensors. Medium-format sensors are bigger than APS-C and full-frame ones. They are excellent cameras for landscape photography. And professionals love the incredible images they produce.
But medium format cameras don’t fit this post’s affordable theme. Our list of the best cameras for landscape photography includes some of these options.
2. ISO Settings
ISO also affects the quality of your images. Landscape photographers use lower ISO settings for the best image quality.
The low ISO setting ensures the best details in shadows and highlights with the least noise. ISO 100 is excellent, but anything lower is even better.
3. Image Stabilization
Image stabilization systems used to be a feature of only high-end cameras. They were a luxury rarely found in more affordable cameras. But now we see it in affordable cameras, too.
Image stabilization can be optical or sensor-shift. Both types counteract camera shake, reducing motion blur in your images. A stabilizer lets you use slower shutter speeds and helps you shoot landscapes without a tripod.
4. Environmental and Weather Sealing
Landscape photography is 99% shot outdoors. This setting is why landscape photography cameras sometimes must withstand harsh weather conditions.
Environmental sealing means the camera is resistant to dust and humidity. But a weather-sealed camera is ideal. It can take wind and rain, so you don’t have to pack up when the sky opens.
Conclusion: The Best Affordable Camera for Landscape Photography
We hope this list shows you can master landscape photography on a budget. There are plenty of fantastic cameras for landscape photography. And you can pick the best budget-friendly option. You don’t need to re-mortgage your house to finance good landscape photography!
There’s a good selection of mirrorless, DSLR, bridge, and compact cameras. It depends on your needs and preferences. Landscape photography is for everyone, regardless of your skill level or budget.
The Canon EOS Rebel T7 is the best affordable camera for landscape photography. It’s an affordable entry-level DSLR, and the results will fuel your enthusiasm for shooting landscapes.

