
Urban landscape photography captures the beauty of the human-made environment. Here are 9 tips for shooting urban landscapes that really make an impact.
What Is Urban Landscape Photography?
The term landscape photography evokes impressions of stunning nature-based vistas.
Waterfalls, mountains, harsh desert, and abundant forests… Landscape photographers spend their time documenting the beauty of the natural world.
Urban landscape photography aims to illustrate the essence of a scene. In this way, it is like traditional landscape photography.
But unlike landscape photographers, urban landscape photographers document human-made interventions, structures, and environments.
The oldest surviving camera image is also the earliest example of an urban landscape. That’s Nicéphore Niépce’s View from the Window at Le Gras. The picture shows the countryside of his estate in Saint-Loup-de-Varennes in France.
Today, urban landscape photographers capture the intriguing and dynamic environments of cities.
9. Explore the Urban Environment
No matter where you are, photography is all about exploration.
Macro photography requires photographers to explore minute worlds of fine detail.
Street photographers traverse the street, scouring for incidental moments of life.
In urban landscape photography, exploration is crucial.
Alleyways, busy streets, old buildings, shopfronts… exploring reveals the heart of a sprawling urban landscape.
Every space, every manhole, and every skyline is a visual record. It embodies the history and culture of an urban environment.
When you have the chance, grab your camera and lose yourself in urban exploration for a couple of hours.
You never know what you might discover!
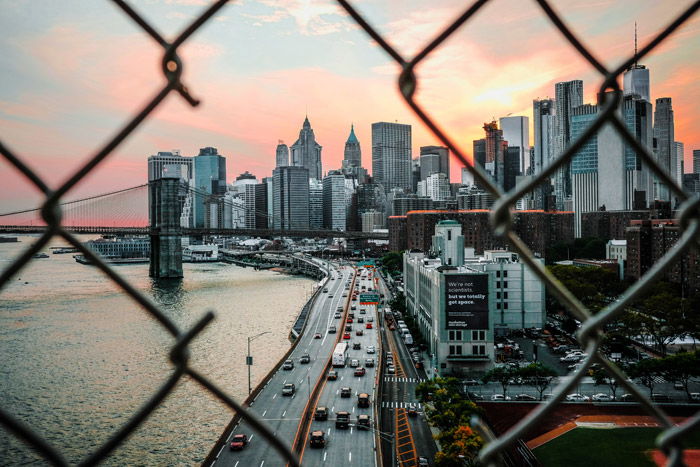
8. Look for New Perspectives
Looking left and right isn’t reserved for crossing a busy street.
Sometimes as photographers we can get stuck photographing only what is ahead of us.
In an urban landscape, everything is happening everywhere at once.
This means that as an urban photographer, it is important to be aware of what is going on around you.
Look above you as well as at your feet and keep your camera moving with you.
Try a worm’s perspective by taking a photograph with your camera on the ground.
Find a lookout and take a bird’s eye view of the urban sprawl below.
You could even make use of a drone. Be sure to abide by any laws on drone usage in the area.
Adjust your perspective. This will create imagery that speaks to the immersive nature of urban life.
7. Embrace Repetition for Striking Shots
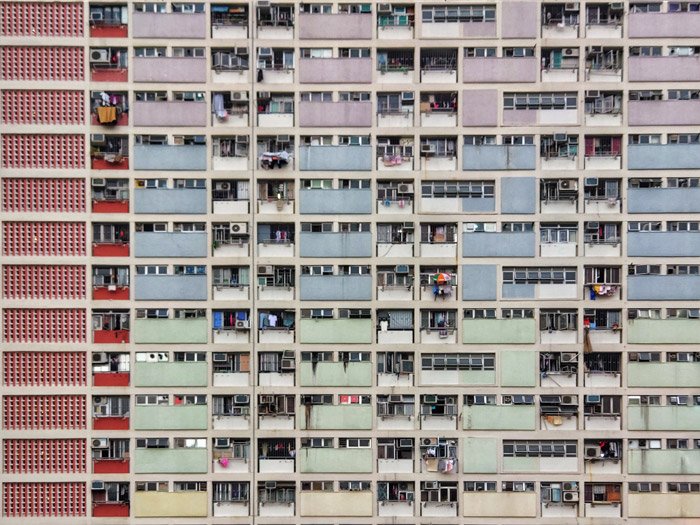
The urban landscape is brimming with pattern and repetition.
While living life on repeat can prove dull, repetition can create striking urban landscape photography.
Color schemes, architectural features, overhead wires, people – look for repetition and patterns. This way, you can capture the construction of the urban landscape itself.
Of course, breaking repetition is another way to create eye-catching urban landscape photography.
Disrupting a pattern leads a viewer’s eye straight to a disruptive focal point.
Keep an eye out for repeating subjects, but don’t be afraid to add a little disruption for emphasis.
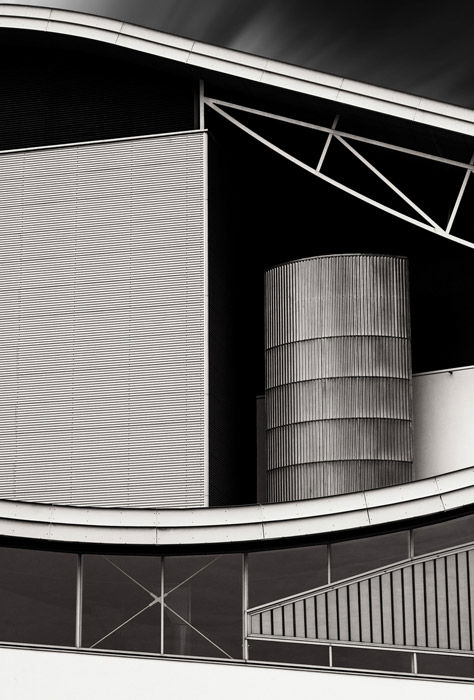
6. Enhance Textures in Black and White
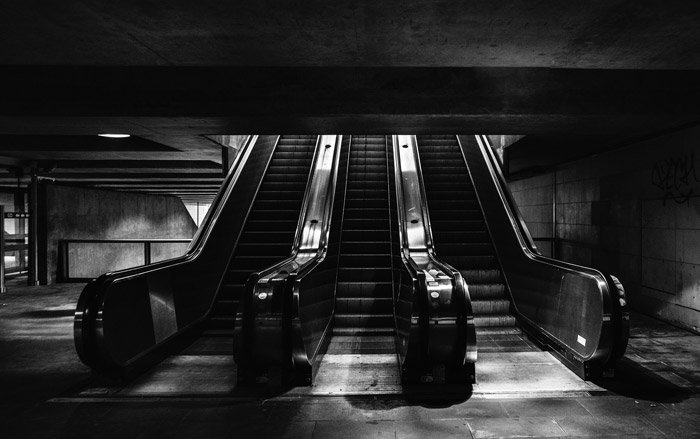
Black and white photography emphasizes texture, shape, and form. It can turn an urban landscape into an evocative study of light.
Color is active and vibrant. Black and white photography is more subdued and reflective.
A black and white portrayal of an urban landscape invites an analytic viewing.
Black and white urban landscape photography also gets rid of the distraction of color. This can create impact and depth.
If an urban scene is too busy in color, try a black and white scheme in-camera or later in post-processing.
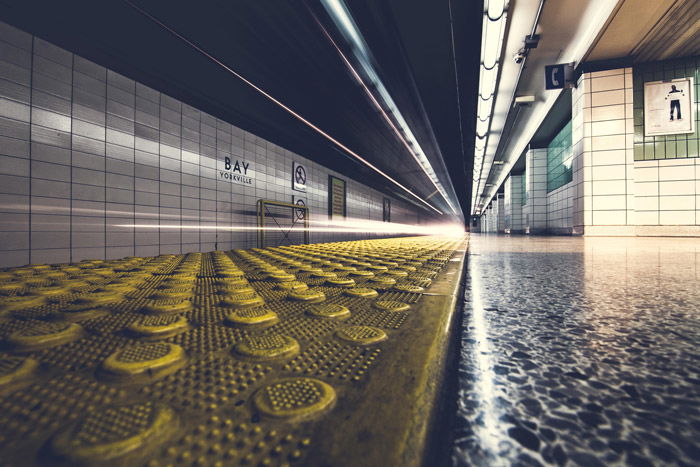
5. Guide the Eye With Leading Lines
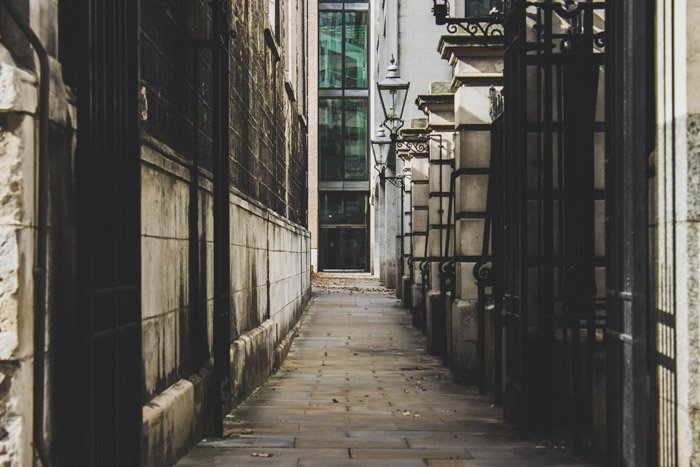
Leading lines are a compositional technique used to guide a viewer’s eye around an image.
The human eye is naturally drawn to the order that lines suggest
Bridges, roads and architecture all cultivate strong leading lines.
Try photographing bold lines in an urban landscape. This way, you can funnel the viewer’s attention to key components of a photograph.
4. Use Photography Apps to Find the Best Light

There is only so much daylight in 24 hours. Urban landscape photography can make use of every minute.
There are countless variations in subject matter and lighting conditions. These can keep you on your toes.
Luckily, there are lighting calculators like The Photographer’s Ephemeris. You can use the app to help you figure out optimal natural lighting conditions for a given location.
That said, don’t be reluctant to head out on a day when conditions aren’t at their greatest.
Some of the best urban landscape photography happens in dim weather or in harsh light.
Get up early and stick around rain, hail or shine to reveal the best an urban landscape has to offer.
3. Up Your Night Life for Atmospheric Scenes
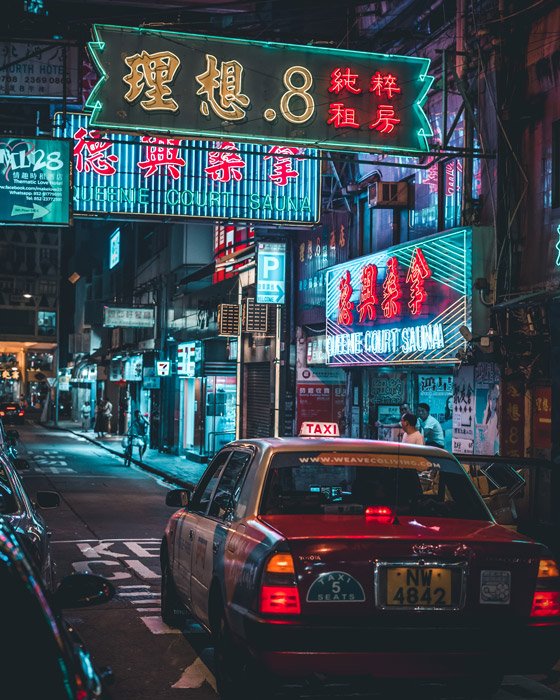
While plenty goes on in the urban landscape during the day, a lot goes on at night too.
Artificial light can illuminate an environment, revealing atmospheric scenes of urban sprawl.
If you find an interesting urban location, revisit it at night. This will give you a different perspective of urban photography.
When the sun sets, pack a tripod and keep an eye out for neon signs, car lights, street lights, shop fronts… anything that will lend a little illumination to a nighttime scene.
A high vantage point allows you to look over the beautiful lights of the city landscape at night.
A low perspective illuminates the often foreboding dimensions of urban nightscapes.
2. In With the Old – Find Abandoned Venues for Surreal Images
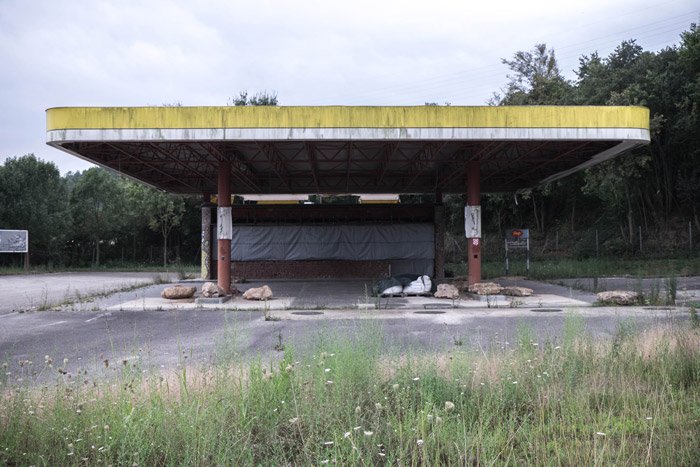
Urban landscapes are often a mix of the old vs. new and nature vs. the artificial.
Abandoned urban landscapes can be surreal and sometimes spooky. They are also rich with the markings of time and great photo subjects.
Urban exploring, (urbexing) often involves the photography of abandoned locations.
But if you’ve seen a photogenic abandoned venue, your first step is to gain permission to access the site.
While this can be tricky, getting caught trespassing can wreck your day.
Abandoned sites can also be a safety hazard.
As a rule, always err on the side of caution and don’t go urbexing alone.
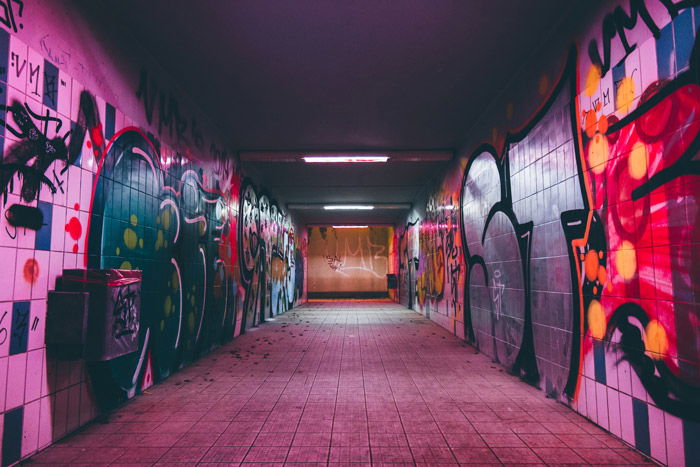
1. Use Small Details to Create a Whole Image
The term urban landscape tends to suggest taking a step back to record a scene in its entirety.
But the genre also encompasses the microcosms of detail that make up the whole picture.
Signs, graffiti, architectural elements, textures, colors… all these subjects and more contribute intriguing imagery in their own right.
You could even build macro photography into your practice. Take a deep dive into the building blocks of our urban world.
Conclusion

Urban landscape photographers seek to depict the essence of a scene.
Through awareness and exploration, urban photographers uncover the heart of an urban landscape.
By depicting repetition and leading lines, we can visually deconstruct our urban surrounds.
Shooting in black and white creates a formal study of the urban landscape.
And photographing during both the day and night documents the character of an ever-evolving urban habitat.
If you find yourself in the midst of an urban landscape, put on some comfy shoes, grab your camera and head on out. The urban jungle awaits!


