
There’s no question that the iPhone is one of the best smartphone cameras for taking landscape photos. With its powerful lenses and a 48 MP resolution, you can capture stunning images of mountains, valleys, and rolling hills with ease.
But to get the most out of your iPhone camera, there are a few things you need to know. In this article, we’ll show you how to take landscape photos on your iPhone and give you some tips on how to improve your composition and get the most out of your shots.
How to Take Landscape Photos on iPhone
Below is everything you need and need to know to take the best landscape photos on your iPhone.
Equipment for Amazing Landscape Smartphone Photos
In most situations, your phone is all you need when taking landscape photos. But it doesn’t hurt to bring a few accessories with you to help you get the best shot possible in any situation.
Tripod
You’ll find tripods useful whenever you need to keep your phone stable while shooting. Set it up when taking photos in low-light conditions or when using different shutter speeds to prevent motion blur.
Smartphones don’t have screws for tripods, so don’t forget to get a mount for your device.
Remote
When you touch the screen to take a photo, you can still get motion blur even if your phone is on a tripod. To avoid this issue, you can get a phone remote. It’ll allow you to trigger the shutter without touching your device.
Fisheye Lens
Want to create breathtaking panoramas? Then you’ll need to include a fisheye lens in your kit. This type of lens makes anything look wider than it is.
When you use it to shoot landscape photos, you’ll end up with images that appear vast and dramatic.
Smartphone Settings for Landscape Photos
Your smartphone has a variety of features you can use for different shooting conditions. How do you know which settings to use when shooting landscape images?
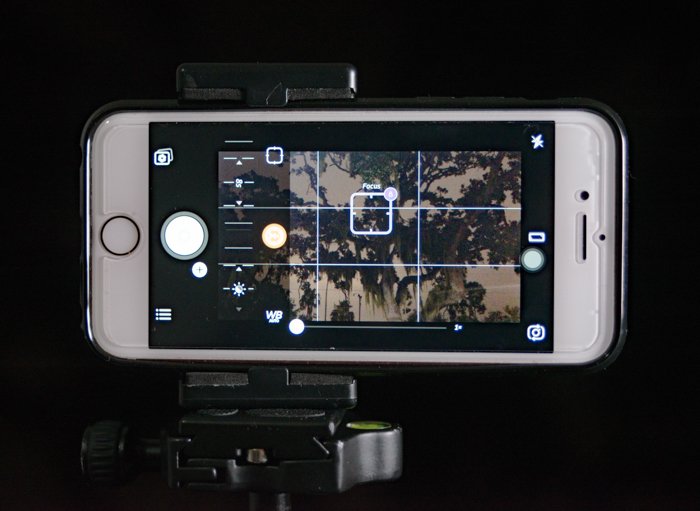
First, you’ll need to turn on your camera grid. The lines help you see whether your frame is straight or not. A simple way to ensure your phone is not tilted is to look for the horizon and use that as a reference to level your device.
Next, tap your screen to activate your camera’s focus. Look for an area in your frame that you want to be your main point of interest. Select it and make sure it turns green before you take a picture.
To keep your exposure uniform, consider using the Auto Exposure (AE) lock. In normal situations, your camera continuously adjusts the exposure as the lighting conditions change. The AE lock is what you use to prevent this from happening.
It’s useful for creating silhouettes or photographing backlit landscapes.
If you want to create silhouettes, tap on the brightest area of your frame, then tap AE lock. Meanwhile, if you want a backlit area to look brighter, tap that section, activate the AE lock, and take a photo.
For complicated lighting conditions with deep contrasts, use high dynamic range (HDR). Once you activate it, your camera will take several photos of the scene automatically once you press the shutter. Your phone will then combine these images into one photo that best represents the lighting and the colors of the landscape.

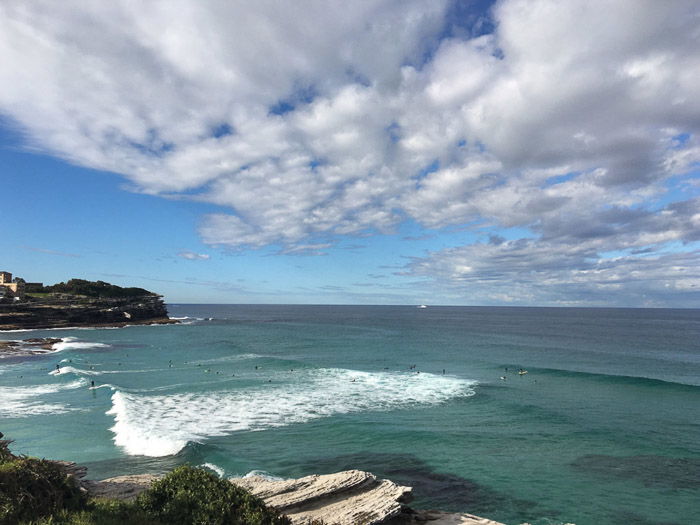
How to Find the Best Location for Smartphone Photography
Just because you’re in a beautiful place doesn’t necessarily guarantee you’ll get nice pictures. The secret is to know where to find good angles for the best compositions.
Look for an area that’s not too busy. The best landscape photos convey space as much as they convey beautiful scenery.
To give your image a 3D feeling, consider including a point of interest in the foreground. It could be a tree or even a lone person in front of the scene.
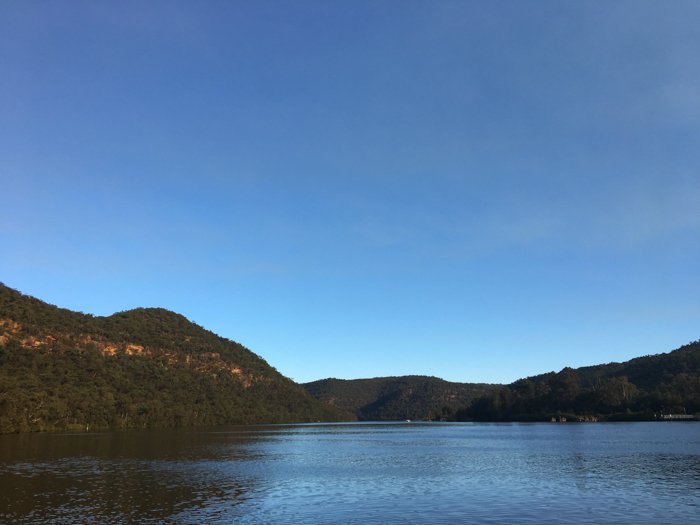
Include a vanishing point to give an even more 3D look to your image. Place a road or a river in your frame that runs from the foreground to the background. This helps create depth in your image as well as give it a sense of scale.
Finally, integrate shapes and lines in your composition. You can consider them as guides that drive your audience’s eyes to your main subject.
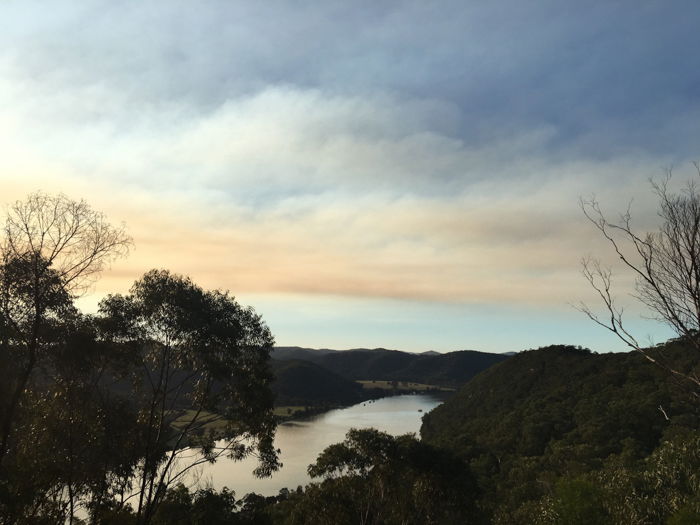
Shoot at Sunrise or Sunset for the Best Light
Apart from the views, landscape photography is also all about lighting. If you’re not careful, good scenery can look bland in bad lighting.
On the flip side, you could also turn an average place into a beautiful photo with perfect lighting. Although not a hard and fast rule, it’s always a good idea to wait for the sunrise or sunset when shooting landscapes.
The best time is often right after sunrise or before sunset. It’s the perfect opportunity to capture beautiful colors and shadows since the sun is low on the horizon. You can also capture sunrises or sunsets with iPhone timelapse videos.
And if you want even more dramatic photos, you can also try shooting before sunrise or after sunset. Also called the blue hour, this is the time when the sun is barely above the horizon and casts deep blue hues.
The blue hour is perfect for capturing both the sun and the stars on the horizon as well. Make sure to set a slow shutter speed and use a tripod to capture everything in sharp focus.
Consider getting a sun-tracking app on your phone. This helps you predict where the sun is going to rise or set.
Knowing its trajectory will help you better plan your shots, especially if you want to include the sun rising or setting in your image.
How to Compose Landscape Shots on Your Smartphone
Some think that all you need in landscape photography is to look for a nice location and snap a casual photo. But excellent photographers know that it takes a lot more than that. We’ll show you a few guidelines to make sure your composition is perfect.
First, turn on your grid and use it as your guideline for the rule of thirds. All you have to do is look for an area that you want to highlight in your photo. It could be anything from a tree to a mountain peak.
Next, adjust your framing until your main subject hits a point where the lines in the grid intersect. Now, all you have to do at this point is press the shutter, and you’ll have a well-composed image.
You should also create a balance between the scenery and the sky. Just because the sky looks beautiful doesn’t mean you should let it dominate the frame. Remember, you’re doing landscape photography, not cloud photography.
You can break the rule if you think the sky would help elevate the quality of your image.

Should You Use HDR for Landscape Photos on Your Smartphone?
We mentioned high dynamic range earlier, but let’s discuss it in detail. This way, you’ll know what it really does and how to use it.
Cameras have their limitations when it comes to how they capture the darkest and brightest areas of a beautiful landscape.
Even the most high-tech options aren’t capable of documenting the truest hues of landscapes. This is where HDR comes in.
By capturing several pictures with different exposure levels, HDR creates a more accurate depiction of a scene. It does this by using the information from the different shots to reconstruct the colors of the places you shoot.
Remember that HDR isn’t always necessary for every landscape picture. In fact, it could actually be detrimental to your images if you use it in the wrong situation.
So how do you know if you need to use HDR? Generally, when the lighting looks uneven. For instance, you can activate it when the sky is too bright and creates silhouettes and blows out the horizon.
Once you turn on this neat feature, you’ll end up with a photo that shows a more balanced exposure.
To use HDR for smartphone photography, all you have to do is tap HDR on your screen. Once you activate it, your phone will take the sequence shots for you and stitch them together into one image.
Just remember to keep your phone stable while the camera is taking a succession of photos. In most situations, your device does a good job of keeping the frames straight.
But to avoid risking blurry shots, consider using a tripod instead.
How to Edit Landscape Photos on Your Smartphone
If you do everything according to our landscape tutorial, you’ll get the highest chance of having nice images. But you can make them even better once you retouch them.
There are plenty of photo editing apps out there for your phone. But the best ones we recommend are VSCO, Snapseed, and Lightroom.
The first thing you need to do is adjust your image’s white balance. You’ll have several options to choose from, but you can start with Auto WB. If it still looks off, then try the other choices, such as Daylight or Shady.
If the tones in your image still appear inaccurate, then use Custom WB and adjust the setting yourself.
Next, tweak the basic settings such as Exposure, Contrast, Highlights, and Shadows. It’s easy to go overboard with these adjustments. But the trick is to make sure your scenery pictures stay as realistic as possible.
Finally, use presets to bring out the drama and colors of your landscape photo. Choosing a filter is a matter of personal preference. But whatever option you choose, make sure that the colors stay true to life.
Also, consider adjusting vibrance and saturation to make the colors look more punchy. Like the other settings, use these features in moderation.
Conclusion
Landscape photography is so easy to do with your smartphone. Now that you have more techniques up your sleeve, you can create even more beautiful landscape pictures.
At this point, all you have to do is go out there and train your eyes to see the beauty in every place you visit. You can find the coolest scenery in even the most unexpected locations. And now you know how to capture those scenes with the phone that’s always in your pocket!


