
Iceland has become a very popular country thanks to its gorgeous and diverse landscapes. It’s also a challenging place because of its popularity.
This can make your Iceland photos look unoriginal and its harsh weather conditions can slow down your journey.
Here are 21 best Iceland photography spots and tips to make your photos stand out without turning yourself into a frozen statue.
Iceland Photography Tips to Inspire You
6. Bring the Right Equipment to Ensure That You’re Prepared for Any Situation
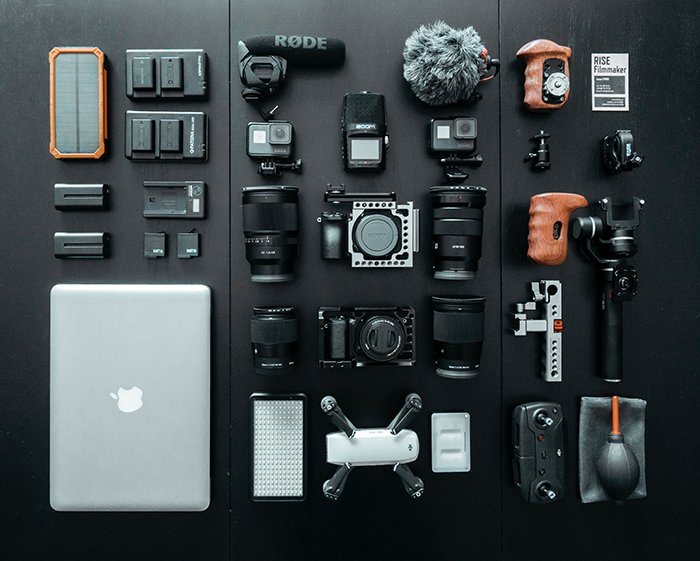
Different regions in Iceland require different camera settings and equipment.
In general, you should have the following things in your camera bag:
- A camera that shoots RAW. This will ensure that you take uncompressed photos. These are larger in size and easier to edit than JPGs.
- A variety of lenses such as a wide-angle, prime, and telephoto lens. These will allow you to take interesting and diverse photos throughout your trip.
- A neutral-density filter. This is great for blocking out unnecessary light and creating long exposure photos.
- A lot of memory cards and batteries.
- A flexible travel tripod.
- Weather and rainproof bag to keep everything safe.
Optional equipment:
- Battery grip. This usually requires at least two batteries and lets you take photos for longer periods of time.
- A Polaroid or Instax for quick snapshots.
- Photography gloves in case it gets very cold.
5. Wear Warm and Stretchy Clothes to Feel Comfortable at All Times
In addition to bringing the right equipment, you need to know how to dress properly.
Iceland tends to be pretty cold all year round. Its weather isn’t extreme unless you’re visiting in the middle of winter.
If you plan on visiting in the warmer months, you should wear a jacket on top of a long-sleeved t-shirt.
Make sure your clothing is warm and comfortable so that you can freely move around with your camera.
4. Travel Far to Find Secret Places
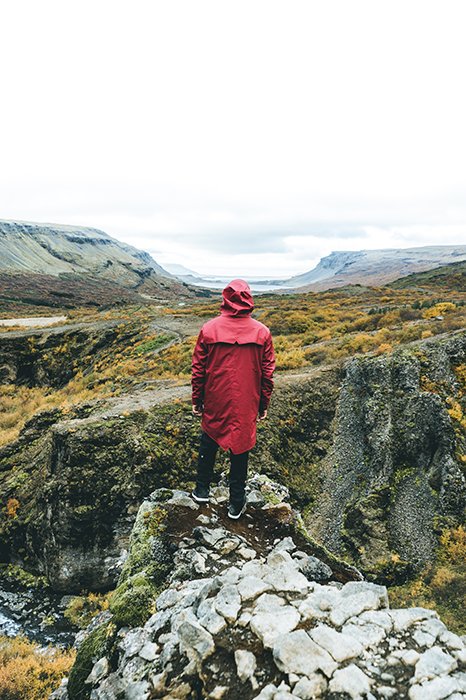
Iceland is popular for travel photographers all the time. It can be difficult to take original photos of the same locations.
You can solve this problem by looking for unique places on your own. Feel free to take a few photos of popular Iceland destinations, but don’t stop there.
The gems you discover on your own will look stunning in your pictures.
You can also ask locals for location tips. This is a great opportunity to meet new people and discover hidden gems at the same time.
3. Take Photos From Your Window to Capture as Much of Iceland as Possible
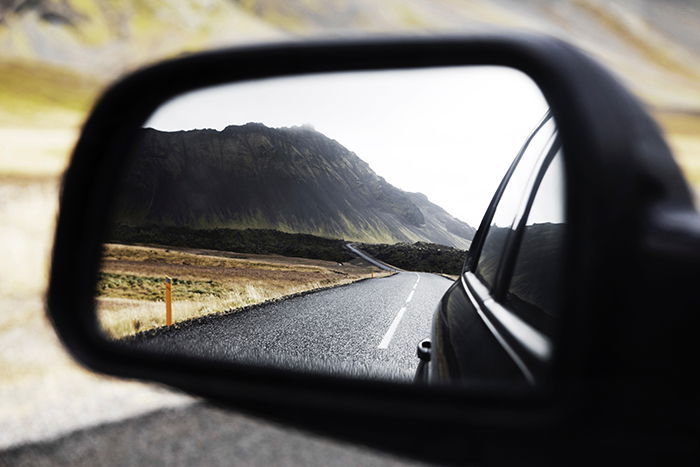
Iceland has thousands of beautiful locations. Even if you can’t stop at every spot, you can still take eye-catching photos directly from your car window.
Make sure your shutter speed is fast so that your photos are as sharp as possible.
Don’t be afraid of getting creative like the photographer in the image above!
2. Get to Know the Locals to Add Depth to Your Photos
The best way to photograph a country is to understand its citizens. Befriend a few locals to find out about Iceland’s history.
You might learn something that will intensify your love for Iceland and, as a result, inspire you to take more emotive photos of it.
If you’re lucky, some locals will let you take photos of them and their homes!
1. Use a Large ISO to Make up for the Gloominess
Iceland is pretty cold all year round. This means you’ll have to deal with a lot of gloomy clouds during your trip.
To make up for the lack of light, use an ISO that’s a little higher than your average ISO.
This will be enough to take bright, sharp photos of people and landscapes.
The Best Spots for Amazing Iceland Photography
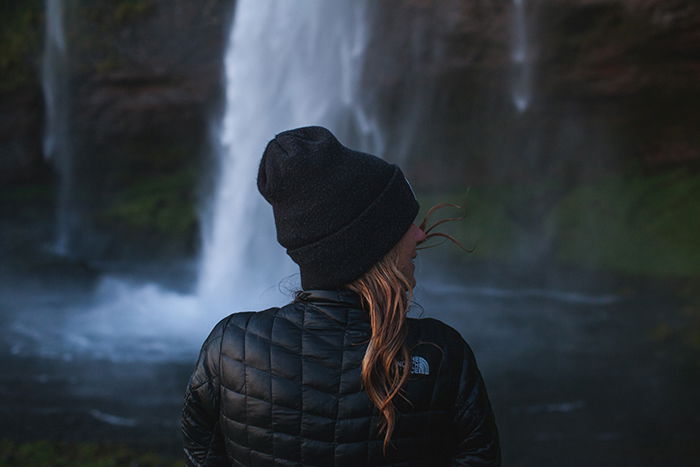
15. Seljalandsfoss Waterfall
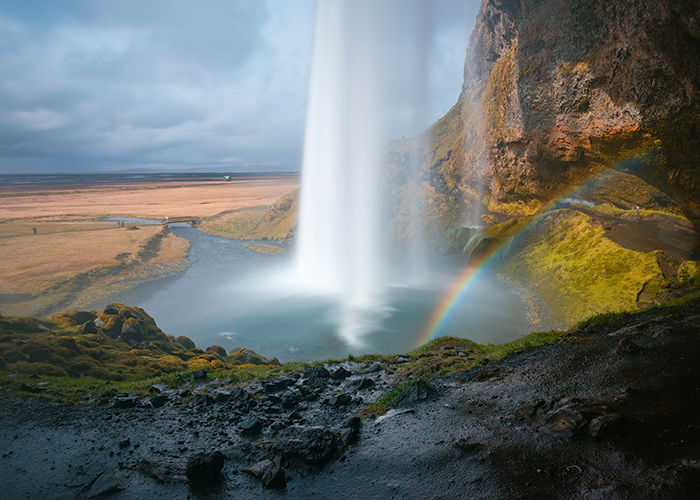
Seljalandsfoss Waterfall is located in the South Coast of Iceland. It’s one of the most famous waterfalls in the country.
It’s completely surrounded by a pathway, so you can photograph the waterfall from any angle you want. You might even come across a few caverns.
You can also take sharp photos of it at night thanks to the floodlights placed in the location.
14. Diamond Beach
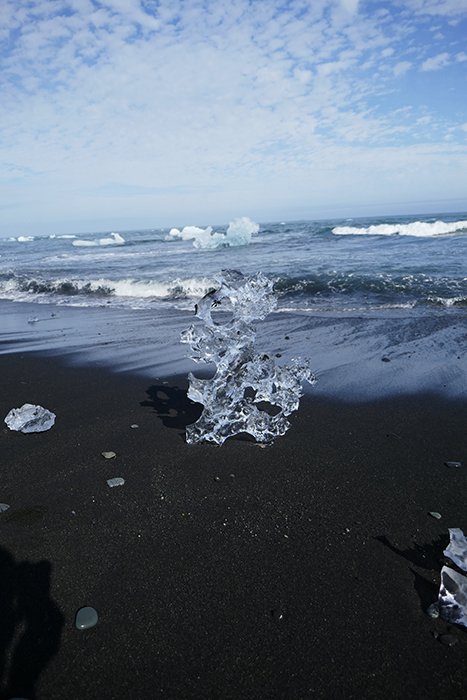
While you won’t find actual diamonds on Diamond Beach, you’ll definitely find pieces of ice that resemble them.
The beach itself is black. You’ll be able to take detailed photos of the ice against a dark background.
Diamond beach also features wildlife, such as orcas and seals. These are perfect subjects for animal photos.
13. Gullfoss Falls
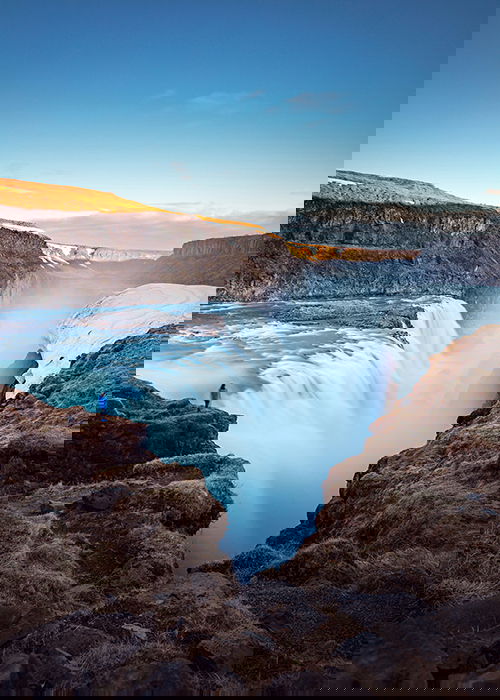 Another famous waterfall, Gullfoss means Golden Falls. In the summer, all the water creates a golden light effect. This is perfect for dreamy photography enthusiasts.
From where you stand, you’ll be able to see Gullfoss from above. This will create the illusion of water falling into the depths of the earth.
An angle like this is perfect for conceptual and surreal landscape shots.
12. Reynisfjara
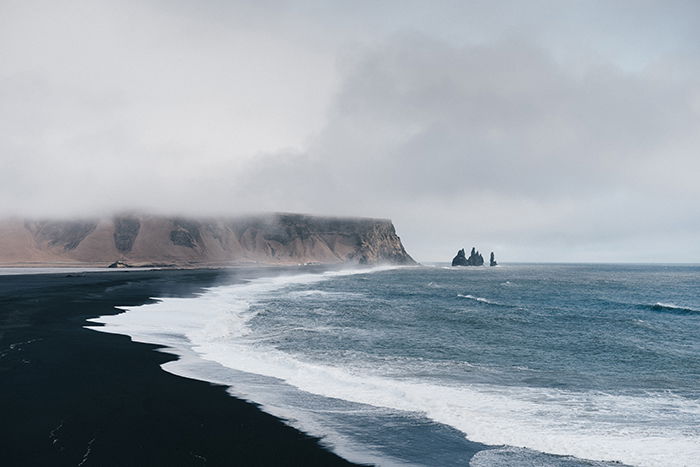 Reynisfjara is a black sand beach. Combined with gloomy weather, it will allow you to take atmospheric and moody landscape pictures.
You can also photograph the Reynisdrangar (large sea stacks) from here.
Fans of Game of Thrones can take fantasy-themed pictured in front of the stacks. They were featured in Season 7 of the show.
11. Sólheimasandur
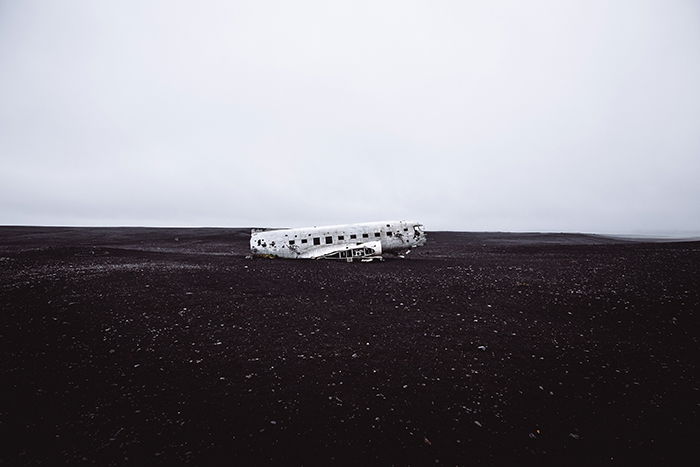
Possibly the eeriest location in Iceland, Sólheimasandur belong to a plane wreck surrounded by an empty landscape.
This location is even creepier because of its ambiguous story. No one knows for sure how the plane crashed.
Even though it has been photographed thousands of times, you can still add it to your Iceland travel portfolio.
10. Skógafoss
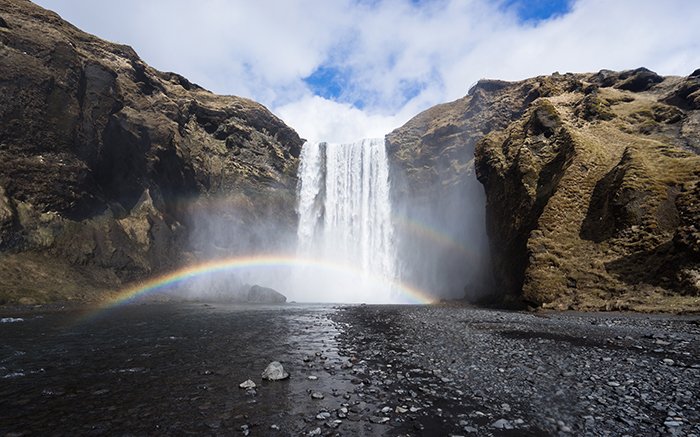
Skógafoss is one of Iceland’s biggest waterfalls. It’s so powerful that you’ll probably find it impossible to stand close to it without damaging your camera.
All of this water creates vibrant rainbows that will complement all of your waterfall landscapes.
Even from a distance, these rainbows will look amazing in your pictures.
9. Sun Voyager
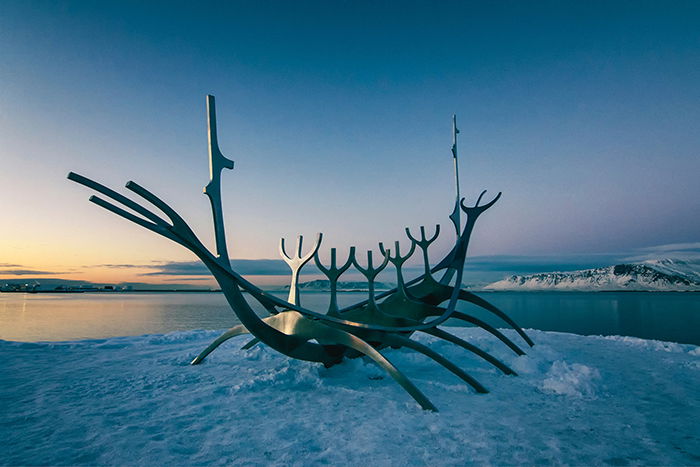 Originally made by an Icelandic sculptor, The Sun Voyager is a very popular tourist destination.
It symbolizes the idea of a ship and is meant to be an ode to the sun.
For the best results, photograph it during sunset, the golden hour, or the blue hour.
You can also take interesting selfies or portraits in front of it.
8. Fjaðrárgljúfur Canyon
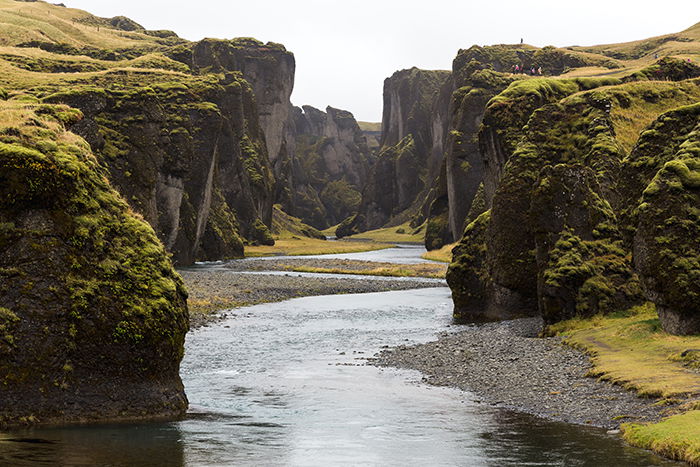 Fjaðrárgljúfur was once a secret location. Thanks to popular music videos, it became increasingly popular.
Unfortunately, this led to environmental damage.
The canyon has been closed since February 27th, 2019, but authorities are planning to reopen it soon.
As long as you don’t wander too far in Fjaðrárgljúfur, you’ll be able to take stunning and peaceful photos of it.
7. Blue Lagoon
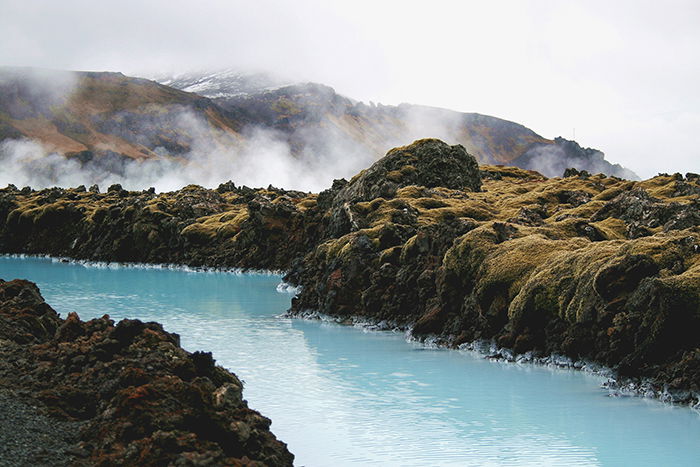 Located near lava, Blue Lagoon is a luxurious spa resort. Entrance tickets start from $55 and come with a mud mask, a drink of your choice, and more.
This is a great place to enjoy the warmer side of Iceland and take dreamy portraits of your friends and family.
6. Hallgrimskirkja Church
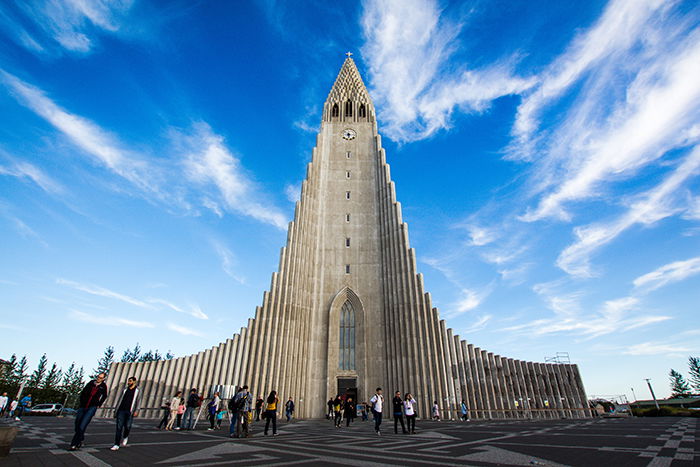 Hallgrimskirkja is a Lutheran parish church that’s one of the tallest buildings in Iceland. The design alone makes it the perfect subject for fans of architecture and symmetry.
Make sure you use a wide-angle lens so your camera doesn’t end up cropping parts of the church.
You can use a lift to get to the top of the church. From there, you’ll have an incredible view of the surrounding area, including a statue and a part of the capital city, Reykjavík.
5. Thórsmörk
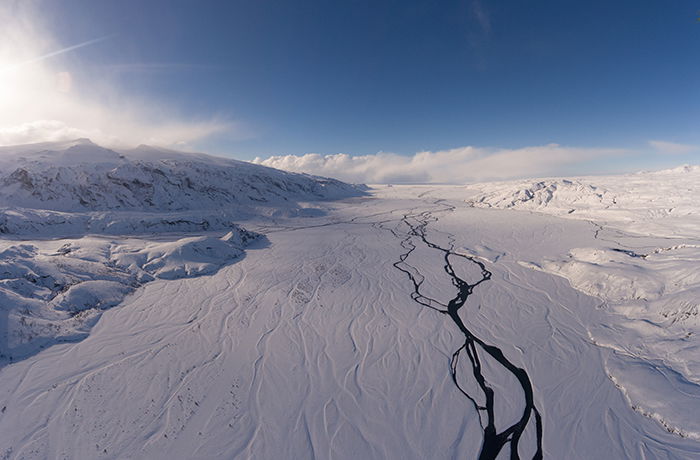 Thórsmörk is a mountain ridge named after Thor, the god of thunder. You might be familiar with the name if you like Norse mythology or The Avengers.
This large expanse of land is usually filled with forests and vegetation. In the winter, as you can see above, it’s a simple yet striking white landscape.
If you want to stay there longer, you can stay at one of the nature reserves that offer cozy volcano huts.
4. Mývatn Lake
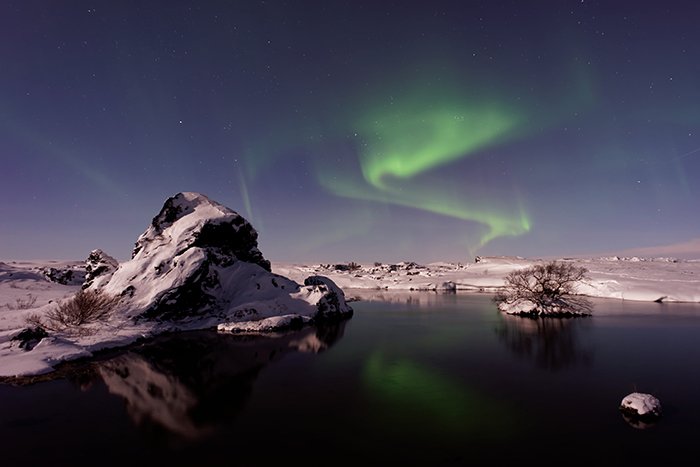 Mývatn is a volcanic lake where you can find the northern lights and other fascinating phenomenons.
In the same area, you’ll find glacial canyons, a camping area where you can fish for salmon, an ice cave, and much more.
To put it simply, there’s something for every kind of photographer there.
3. Hvítserkur
 Hvítserkur is an unusual sea stack. If captured from the right angle, it will look like an unidentifiable creature.
From another angle, it will look like a simple, narrow sea stack.
This is a great place to relax, get better at shooting from different angles, and improve simple landscape photography skills.
2. Landmannalaugar
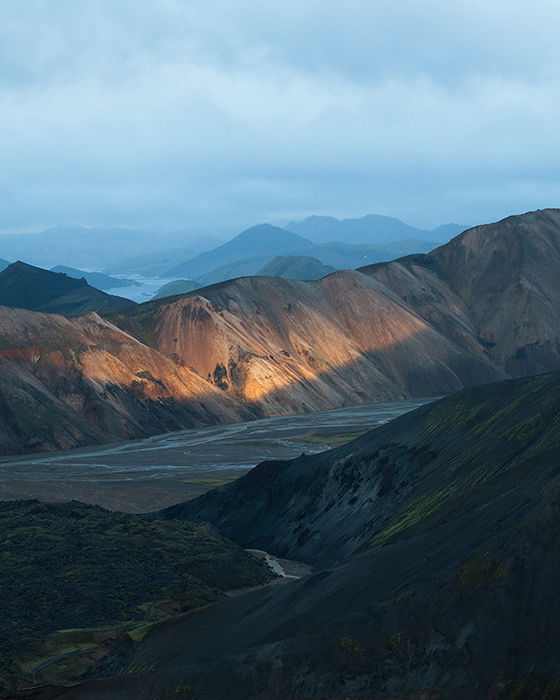 Landmannalaugar is the place to be if you enjoy hiking or hot springs. The best time to visit it is in the summer. Everything is a luscious green.
Landscape photographers will enjoy photographing the colorful mountains and fields in Landmannalaugar.
1. Goðafoss Waterfall
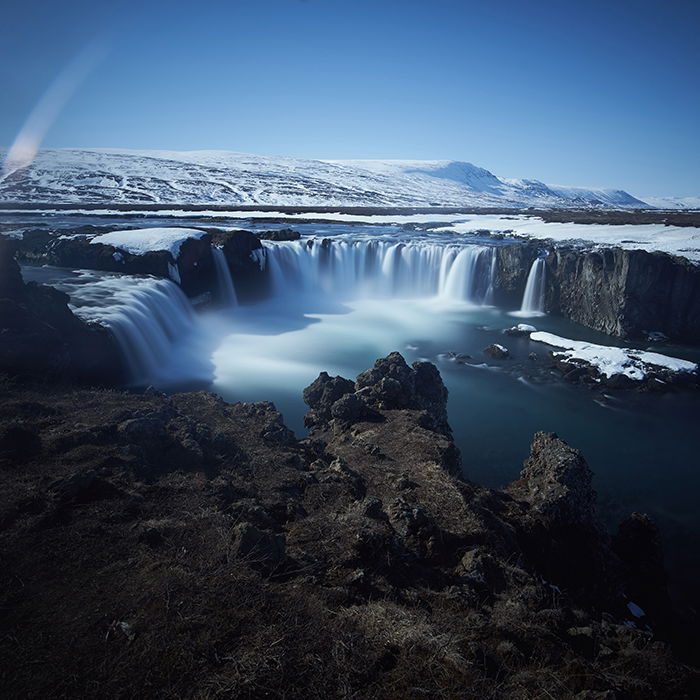 Goðafoss, also known as Waterfall of the Gods, is the fourth largest waterfall in Iceland.
According to legend, when Iceland’s official religion became Christianity, a lawspeaker threw every Norse god idol into the waterfall.
Because the waterfall is so wide, it’s ideal for soft long exposure photos and panoramas. At certain times of the year, you’ll be able to photograph it in front of vibrant northern lights.
Conclusion
Iceland has an abundance of photography opportunities for anyone who loves to travel.
Every place you visit will reward you with stunning landscapes, rich traditions, and unforgettable natural phenomenons.
All of these are bound to look spectacular in your travel photography portfolio.


