
If you’re looking for an unforgettable outdoor photography adventure, look no further than Yosemite National Park. With its awe-inspiring landscapes and diverse wildlife, the park offers photographers of all skill levels a wealth of photo opportunities. Here are ten of the best photo spots in Yosemite to get you started!
10. Photo Spots In Yosemite: Capture Majestic Landscape Photos Of El Capitan
El Capitan is a massive rock formation that’s around 900 metres tall. It’s surrounded by similar mountains and rock formations.
This can make it easy for you to take landscape photos with depth.
You can photograph it from a very low angle to emphasize its size. Or you can take close-ups to highlight all the stunning rock details.
If you’re a fan of sports photography, you can take outstanding silhouette photos of people climbing the rock formation.
If you photograph El Capitan during the day, you should use a neutral-density filter (or something similar). This will prevent overexposure and neutralize every color in the frame.
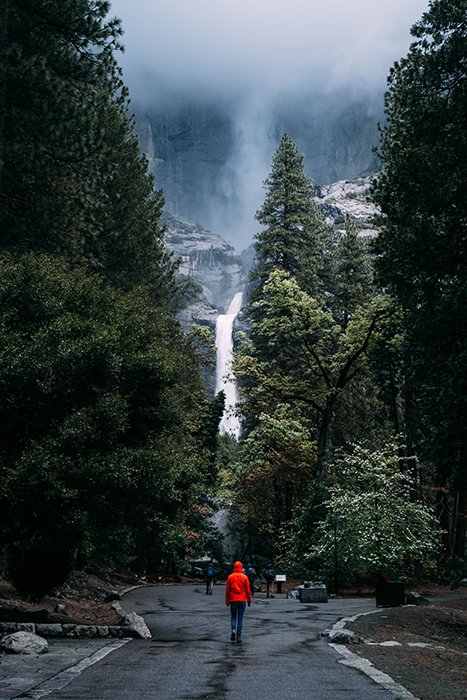
9. Take Powerful Photos of the Highest Waterfall in Yosemite Park
The highest waterfall in the park, Yosemite Falls is a sight to behold. Unfortunately, like most waterfalls in the park, you won’t be able to photograph it at every time of year.
If you want to photograph Yosemite Falls at its finest, visit the park in the spring. There will be enough water for you to take as many long exposure photos as you want.
In the summer, it will either trickle a little or dry out. In the winter, parts of the waterfall will freeze. This makes it look like an elegant frozen statue.
To emphasize its size, take vertical photos or manually create a panorama.
If you’re lucky, you’ll witness Yosemite Falls’ ‘moonbow’, a rainbow made by the moon. This happens only a few times a year and isn’t visible to the human eye.
If captured from the right angle, it will provide you with unforgettable pictures.
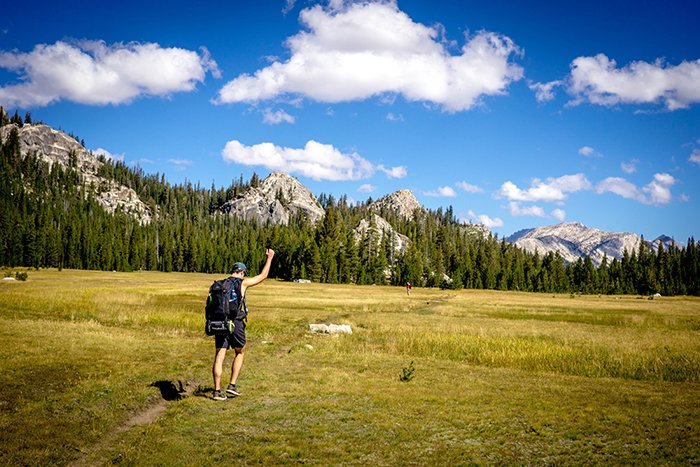
8. Take Peaceful Photos In Tuolumne Meadows
Pronounced too-AH-lum-ee, Tuolumne Meadows is an underrated location that’s open only in the summer.
It’s not as massive as other spots in Yosemite Park. But it’s a peaceful area with many interesting sights.
You can use it as both a short hiking area and a place to take gorgeous pictures of lakes and springs.
It’s not as popular as places like Yosemite Falls. You’ll have lots of time to take gorgeous pictures without worrying about photobombs or distractions.
7. Experience an Unforgettable View From Sentinel Dome
Sentinel Dome is considered one of the best viewing spots in the entire park. A short hike will lead to a 360 view of the surrounding area.
Here, you can have a picnic, create gorgeous panoramas, and take exceptional landscape photos.
For the best experience, visit Sentinel Dome when it’s cloudy (but not gloomy). This will allow you to take well-lit photos of any view that catches your eye.

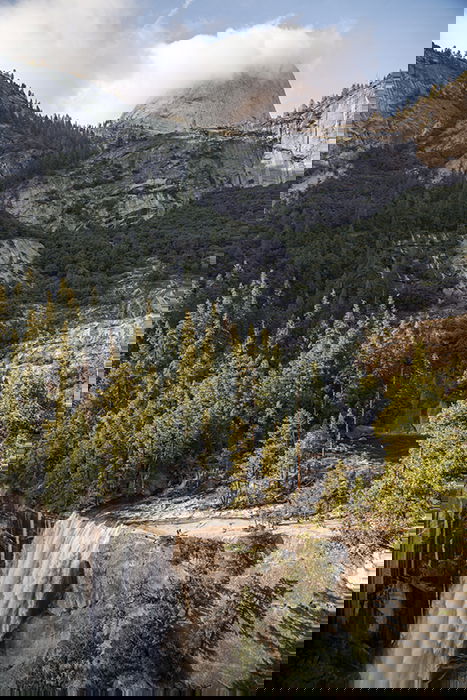
6. Photograph the Most Powerful Waterfall in Yosemite Park
Even though Vernal Fall is smaller than the other waterfalls on this list, it’s one of the most powerful ones in the park.
Because of this, you need to be careful when approaching it to avoid falling or damaging your equipment.
You can take the Mist Trail to get to the top of the waterfall. Again, be aware of all the waterfall spray to avoid camera damage.
One of the best ways to photograph Vernal Fall is from a higher point.
Drones aren’t allowed in the park. This is a fantastic opportunity to hike and find new places during the process.
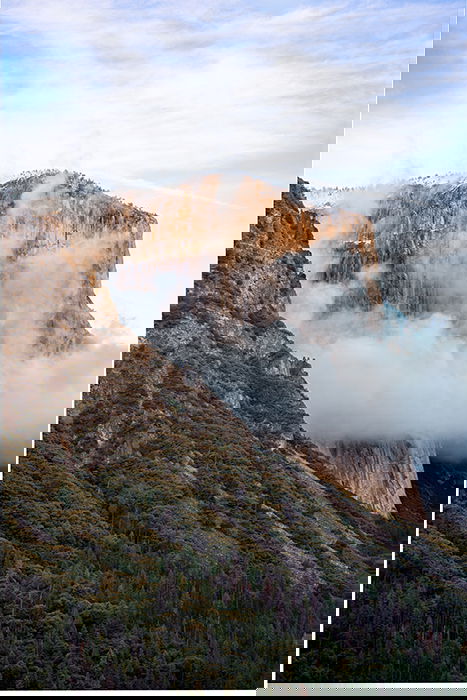
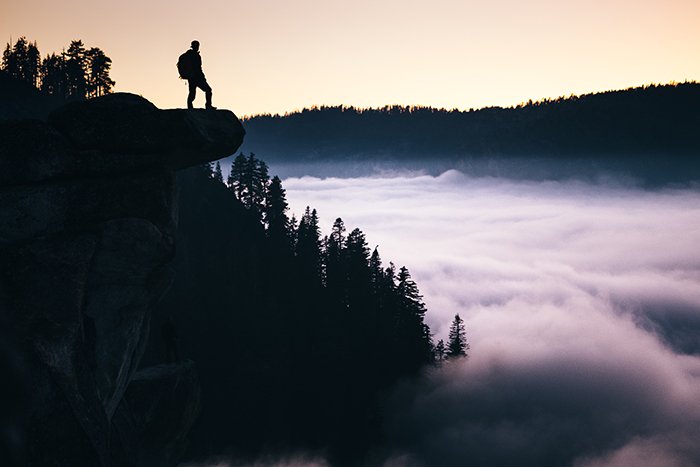
5. Take Atmospheric Photos of People Enjoying Glacier Point
If you want to see several popular destinations at once, Glacier Point is for you.
From this spot, you’ll be able to see Yosemite Valley, Yosemite Falls, and more. This is a perfect opportunity to take diverse landscape photos with a zoom lens.
Glacier Point is also used for birdwatching and stargazing, making it a go-to for wildlife and nighttime photographers.
You can also photograph it from a nearby location to capture fog, silhouettes, and moody lighting, as pictured in the image above.
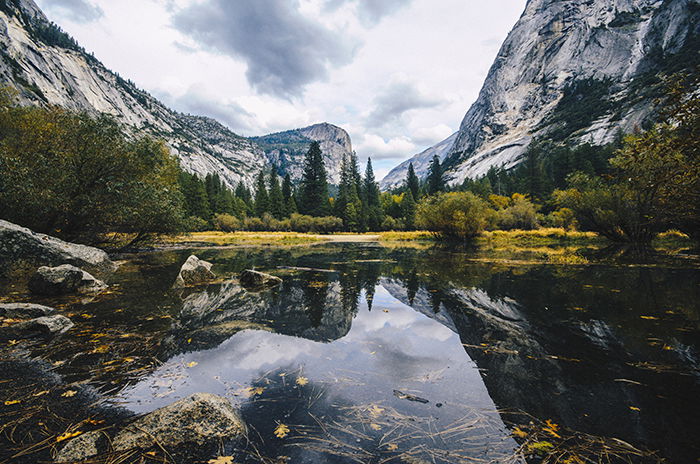
4. Enjoy the Reflective Beauty of Mirror Lake
As its name suggests, Mirror Lake is a beautiful lake surrounded by meadows. This is a great place for biking and photographing wildlife.
If you’re lucky, you’ll even spot a few coyotes and bobcats there!
If you visit Mirror Lake at the right time (usually in the spring), you’ll be able to photograph gorgeous landscapes and their reflections.
This location is great for long exposure photos and peaceful travel portraits.
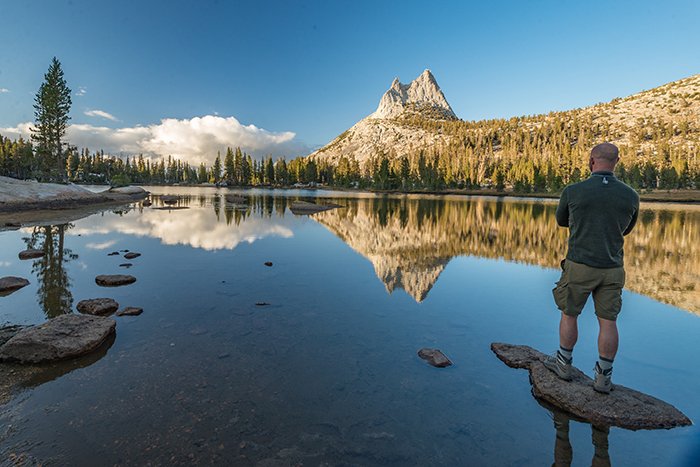
3. Take Exciting Rock Climbing Photos at Cathedral Peak
Cathedral Peak is every rock climber’s dream. You can take exciting action photos of climbers from a very low or very high angle.
It also looks stunning from afar, as you can see in the photo above. You can take photos of the lake and the peak to create a wholesome landscape composition.
Again, use a neutral-density filter to make sure that the sky, peak, and lake all look good in the same frame.
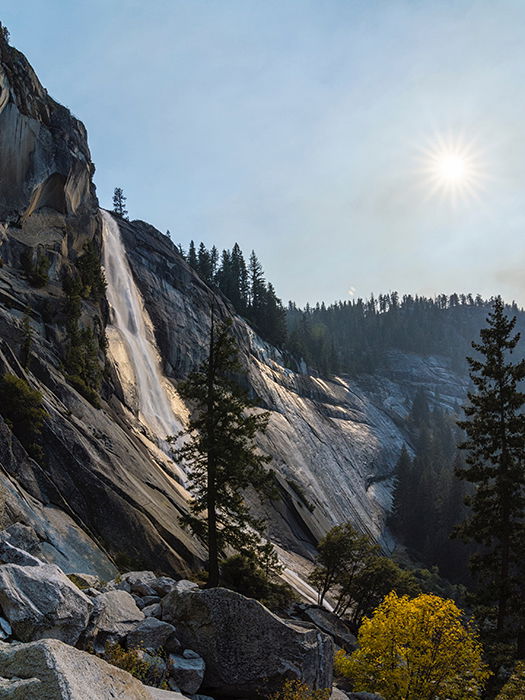
2. Enjoy Nevada Fall’s Refreshing Mist (But Don’t Get Too Close!)
Nevada is Spanish for ‘snowy’. In this case, the so-called snow is actually water that’s every landscape photographer‘s dream.
When there’s enough water, the waterfall roughly hits the rocks and creates a dream-like mist.
If you want to experience both Nevada and Vernal falls, take the Mist Trail. It’s a relatively short hike that starts at Happy Isles and ends at Nevada Fall.
You’ll be able to take lots of interesting photographs during the hike.
There’s also a pool above the waterfall where swimming is allowed.
1. Re-Create Ansel Adams’ Famous Photo of Tunnel View
Tunnel View doesn’t require any hiking and is easily accessible. This is a great place to relax after a long day. You can take breathtaking photos of El Capitan, Half Dome, and Bridalveil Falls all at once.
The best time of day to photograph this view is the golden hour. The light is warm and when your camera isn’t susceptible to overexposure.
Summer is a great time to visit Tunnel View is spring when the waterfall is visible. So is autumn, when the trees are a vibrant mix of oranges and greens and the mountains are lightly covered in snow.
If you visit in the autumn, make sure you shoot during the golden hour, as it tends to be at its most beautiful during this time of year.

Conclusion
Yosemite park is a wonderful and affordable place that can teach you something new, refresh your creative side, and give you an opportunity to be present in nature.
Whether you’re a landscape enthusiast, a budding wildlife photographer, or a curious wanderluster, you’ll find an abundance of extraordinary subjects to photograph in this park.


