
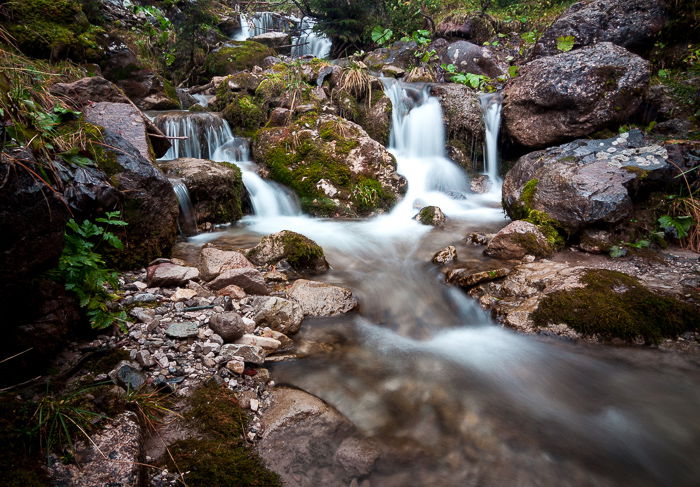
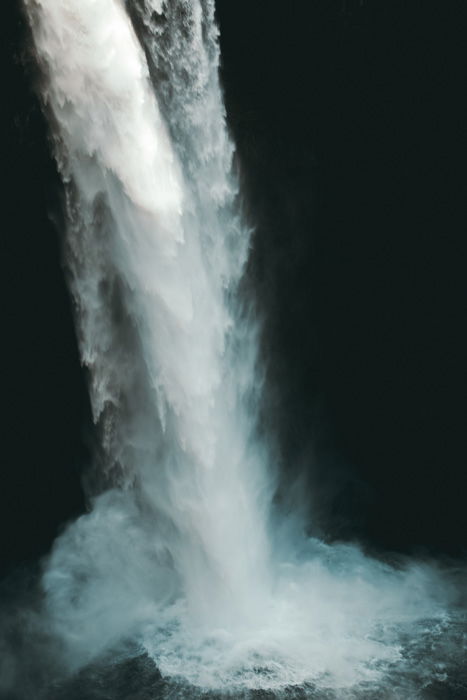
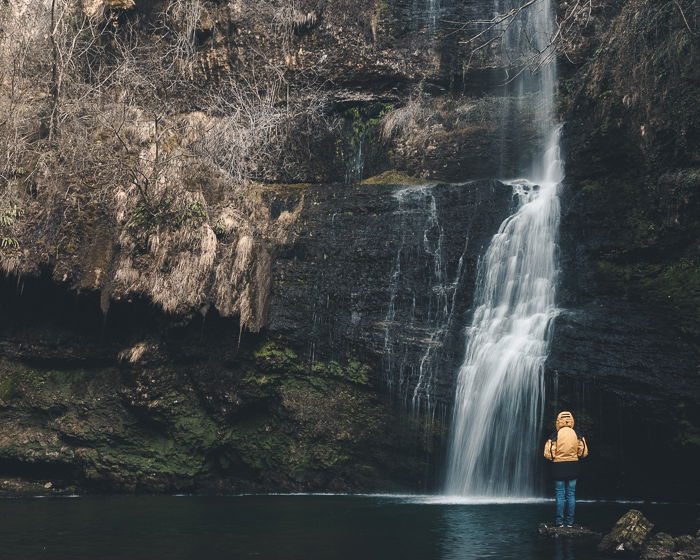
Waterfalls are one of nature’s wonders for landscape photography. When I’m in front of a waterfall, I want to get smooth, silky water and motion blur with a long exposure. That can be tricky.
In this article, I’ll share seven tips for breathtaking waterfall photography.
Waterfall Photography: Staying Safe
Photographing waterfalls can be a dangerous field. You will find yourself in slippery terrain when learning how to photograph waterfalls. Every rock, leaf and tree is wet, muddy or full of moss and lichens. So keep in mind to constantly watch your step.
Depending on the season, water streams and waterfalls can be big and powerful. The moving water can make you lose your balance or drag your equipment away.
The closer you get to a waterfall, the more water spray and airflow there will be. Your camera gear and equipment can be damaged while capturing the perfect shot.
To keep your camera safe, use a plastic bag to protect the front lens or any filters. I found a practical solution with hair shower caps found in hotels. They’re very light and get the job done.
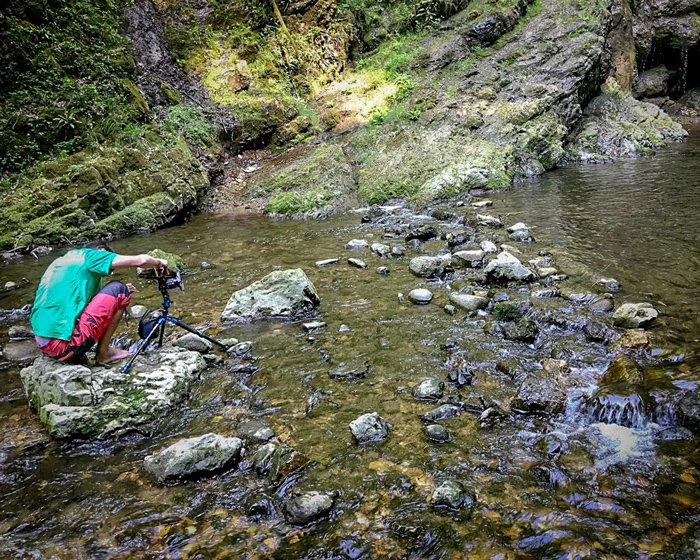
Try Composing Your Shots From the River
It’s an old truth: if you want good photographs, you need to move your feet.
The problem with water photography is that you are moving in wet and slippery terrain. So, before you go in, take all the precautions needed.
You might find a rock in the river that will be great for the foreground or as a platform for your tripod. You can often find a better angle in the river to give your beautiful waterfall photography all the justice it deserves.
Another good reason to wet your feet is the composition. There is a high probability that the waterfall photography composition will work better from the river. You can use the stream itself as an element of interest guiding towards the waterfall.
A good solution, if you don’t like to wet your feet or legs, is to use fishing boots. Some you can even hook to your belt or, even better, overalls. That way you can immerse yourself to your waist.
What Gear Do You Need for Waterfall Photography?
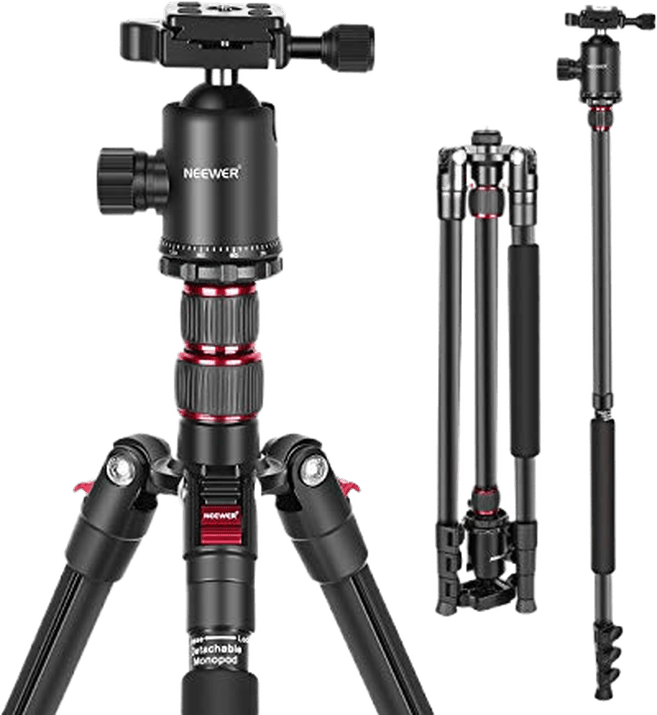
Tripod
The first accessory for water photography is a sturdy tripod to avoid camera shake.
It’s typical for my tripod to be in the middle of the stream with rushing water everywhere. It’s absolutely necessary to have a firm anchor for the camera. It’s better to have spikes at the end of the tripod’s legs for mud.
A tripod also allows you to take long exposure photography.
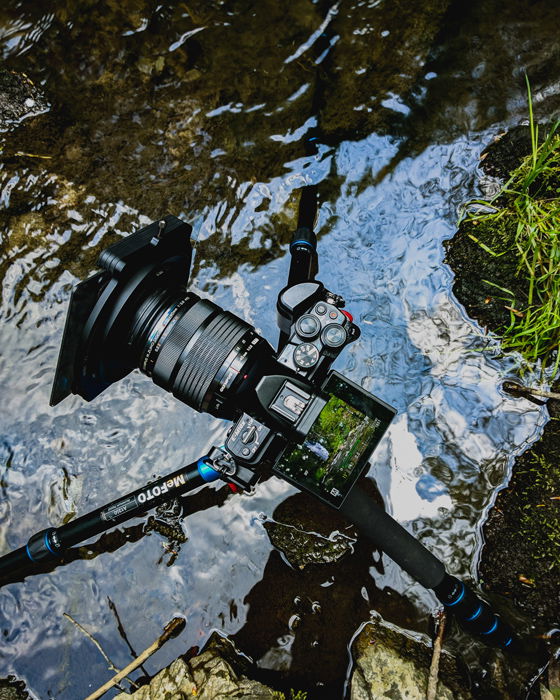
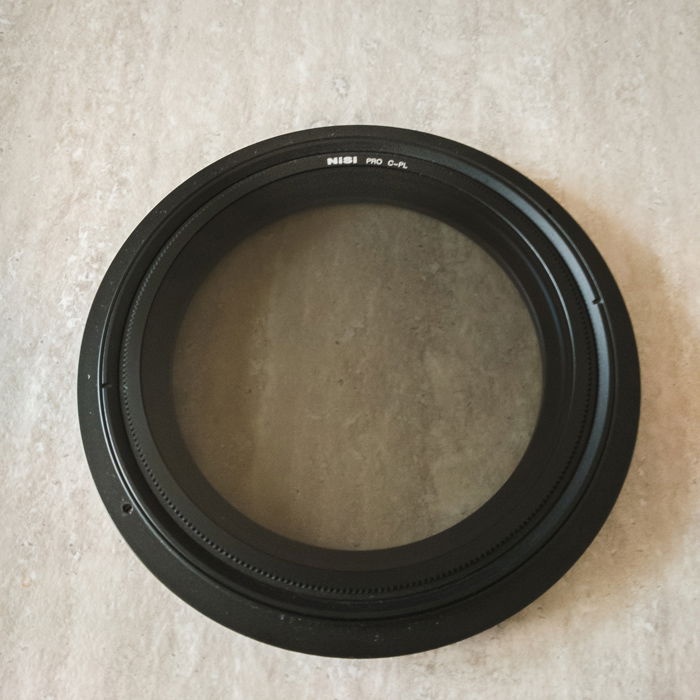
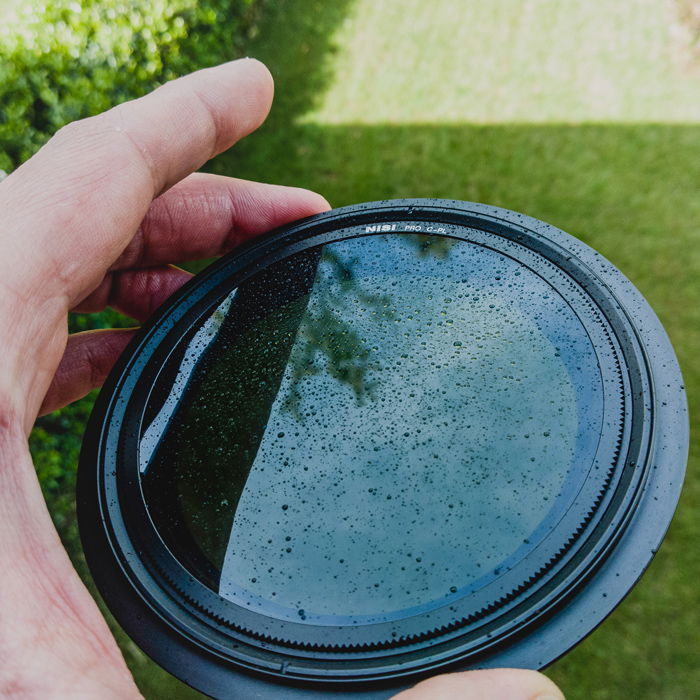
Polarising Filter
Using a circular polarizing filter or CPL is fundamental for landscape photography, especially for water photography in general. With a CPL you can get interesting exposure times because you’ll lose almost a stop of light. These exposure times are what make long exposures possible.
The CPL removes reflections from non-metallic surfaces. This means it will eliminate the reflections from leaves and water pools. You will be able to see the bottom of the stream and the rocks below the water with their beautiful colors.
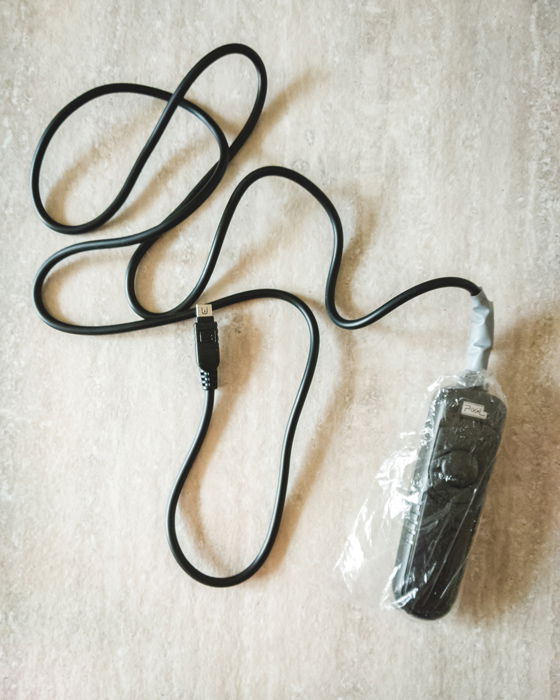
Remote Shutter
Another necessity is a remote shutter. This will prevent blurry images.
With a remote camera shutter, you don’t have to be so close to your camera all the time. I can always use a 2-sec delayed shot, but I prefer an old-fashioned remote with a cable.
It cost me a fraction of the ones that use radio waves, Bluetooth, IR or Wi-Fi, and it doesn’t need batteries. You can also wrap it in a little plastic bag secured with duct tape, and you’ll have no worries if it falls in the water.
Lens
There is no perfect lens for photographing waterfalls. As in any other photographic field, lens choice is part of the composition you want.
A wide angle lens lets you fit more elements into your image. For example, if you want to frame your subject with a tree or you want to include a rock formation.
Using a telephoto lens, or a lens with a focal length of more than 50mm, can add a unique perspective. Focusing on detailed rocks or another interesting element with the waterfall in the background can add interest.
Neutral Density Filters
You might be wondering, what ND filter do I need for waterfalls? ND filters are not strictly required but can be useful in long-exposure photography. If you are shooting waterfalls, you are most likely in a tight canyon, in a low light scenario. Using ND filters lets you shoot with slow shutter speed. It could be a 20-30 seconds exposure. If you go with a very dense filter like 10-stop ND filters, it could be slower shutter speed.
But you have to be careful if you decide to use a Neutral Density filter. The image will be very smooth and silky water movement, but everything else will be blurry. You will also lose details in the waterfall.
Graduated Neutral Density Filters
In some cases, I also use a Graduated Neutral Density (GND filter) to control the light hitting the camera sensor. I use these when my scene is not completely in the shade, and I need to manage the sunlight. This way, I can decide which element to emphasise and which to hide.
How to Compose Waterfall Shots
When you first arrive at your waterfall, don’t set up your camera and tripod straightaway. Instead, walk around, bend down, change your perspective, change your point of view, etc.
I walk around to check where I can easily and safely go and try to look at every angle. Next, I grab my camera, and I repeat the same thing. I try to look at every corner, especially if it’s my first time in that place. I climb rocks and fallen trees. I approach the location and leave it several times.
If I’m not shooting a waterfall exposed to light, I have the time to find and improve my composition. The light or rather, the shadow will not change much. It will always be manageable.
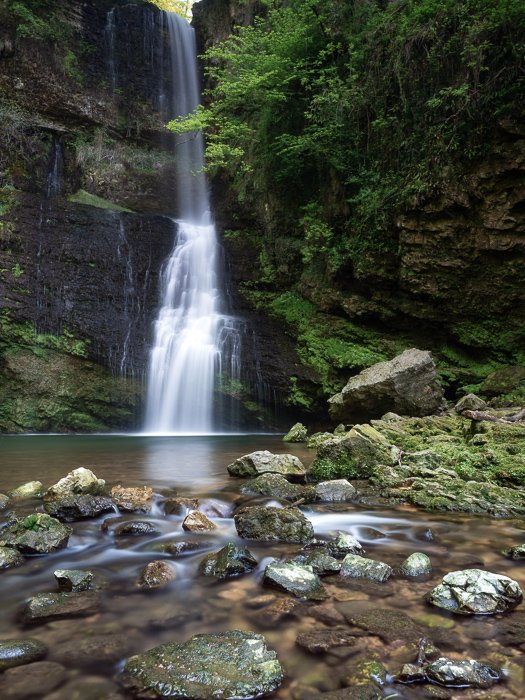
What I always worry about is an anchor point in the foreground for the viewer’s eye. Something that will guide them in reading the image from the foreground to the waterfall. This point of interest could be an autumn leaf, a beautiful rock with green moss, or the shape of the stream. There is always a sort of S-curve composition with streams and rocks.
Next, I try to avoid the sky. As mentioned before, you are in a tight canyon. All the scene could easily be in the shade. It might be difficult to manage the correct exposure with a triangle of light at the top.
I always use the rule of thirds, and I try to put elements on those four points.
After exploring the composition, I set up my tripod and camera. I choose a focal point, usually a rock or a detail in one of the lower thirds, and I let the magic begin.

Camera Settings for Perfect Waterfall Photos
You might be asking, how do you photograph waterfalls with a DSLR?
Shooting in Aperture Mode or Manual Mode is a matter of taste. I usually find myself in Aperture Mode. By shooting at f/9.0 or f/10 or even more, I have a large depth of field. This ensures everything is in focus. If you decide to use manual mode, start with the lowest ISO (this is ISO 100).
But what is the best shutter speed for waterfalls? I use slow shutter speed to make the water appear silky smooth.
Now comes the CPL. I spin the filter four or five times to be sure of the effect. I prefer to spend some time testing the effect, so I check the live view of the camera while its spinning.
I also make sure that my main elements are in focus. And I take more test shots whether I have to do additional fine-tuning. I look over for the foreground, the light reflections, the greens from vegetation.
Every time I take a shot, I read the histogram.
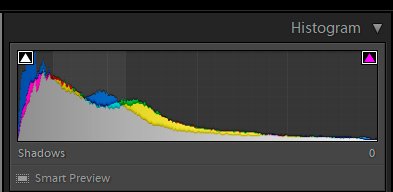 I try to manage the highlights and the whites right in the field; you can’t manage them in post-processing. If I burn the highlights, I cannot recover them in Lightroom.
These are so important for the waterfall and all its details. Even silky water can have fascinating details like tiny water drops. These can give impact and movement to the image.
Overall, I try to have a well balanced and truthful histogram. It will most likely be a little to the left, to the shadows. But, that is okay as it’s consistent with the scene.
If the histogram shifts to the right, I try to change the light coming to the sensor using a GND (Graduated Neutral Density) filter. The beauty of modern filter holders is that they can turn 360 degrees. This allows us to shape the light as we want.
I put on a Neutral Density filter only when I am sure I want to smooth the water’s movement and have the right amount of motion blur.
An exposure time of four or five seconds is plenty for a stream or fall with a good amount of water and movement. If the result is okay, then I take another last shot. That’s the shot that I have built myself with a simple but effective mental and practical process.
Using an iPhone to Shoot Waterfalls
If you don’t have a DSLR camera, you can also use your iPhone to shoot long exposures.
But, how do you take waterfall pictures on iPhone?
On the native camera app on the iPhone, turn on Live Photos. This feature that lets you take a series of photos and turns your shot into a short video clip. This feature also lets you apply various built-in effects on your native camera app, including long exposure. After taking a live photo, apply the “long exposure” effect to your image. Your iPhone will automatically apply the effect on your photos.
Using Live Photos is a simple way to create long exposure shots, but there is no guarantee the shot will come out well. To have more control over your images, use a third-party app.
What to Watch Out for in Waterfall Photography
You can shoot waterfalls in any weather conditions. I prefer to avoid heavy rain because I have to face the splashes of water that come from the waterfall. The raindrops can turn everything into a real nightmare.
It’s a constant game of patience. I put the camera in position, and the front lens or ND filter will be completely wet. So I dry it and try to protect it. When I’m ready to shoot, the little drops return to ruin everything.
In short, protect your lens, but be ready to clean it up many times if you shoot when it’s raining.
 There is another aspect to keep in mind when you want to take pictures of waterfalls, especially if you want a long exposure waterfall photograph and motion blur.
You can divide waterfalls into two broad categories. Those that are at low altitude and those that are higher up.
In late spring the waterfalls of low or medium altitude are more loaded with water. The snow up high is melting down and flowing rapidly in the streams. So the waterfalls will be more scenic but also more dangerous.
Waterfalls that are higher up in altitude can be icy. You have to wait until summer when the snow at high altitude melts so you can see them full of water.
However, in the summertime, the heat can cause river levels to decrease, so low-altitude waterfalls can dry up.
My favourite moment to go hunting for waterfalls is in autumn after a rainy day. The temperature has already started to cool down, and it’s raining more often. This will increase water flow.
Autumn also helps with those vibrant and intense colors. The leaves begin to fall from trees, and they turn red, orange, yellow. They are an excellent point of attraction for compositions. Using the CPL accentuates these bright colors.
Conclusion
These are my tips for beautiful waterfall photography. Remember that you are going into nature so your primary goal should be safety.
Be cautious but enjoy the beautiful spectacle of nature on your own, with your friends or with other photographers. Have fun and enjoy your time photographing!


