
Fall photography is weird. The colors throw our perceptions through a loop, and getting the right photos becomes a challenge.
This article will take you through everything you need to know about autumn photography so you can capture anything from detail macro shots to sprawling landscapes.
Colors and Fall Photography
Last autumn, I led a photo workshop that carried my students and me through Denali National Park and the Alaska Range. The trip was timed to coincide with the peak of autumn colors and it didn’t disappoint.
We spent dozens of hours over the week exploring the vibrant colors and trying hard to make the bizarre oranges, reds, and yellows of the landscape look the way we wanted.
As we made images, and I pondered how to capture the colors, it occurred to me that fall photography is strange.
My world is normally a place of green and blue in summer, and white and blue or grey in the winter. In the autumn, however, our normal color scheme is shifted to crazy warm tones of yellow, orange and red.
To capture these colors, we need to not only refocus our cameras but also our brains. The standard “rules” of landscape photography need to shift during the fall.
While composition remains important, the relative importance of our subjects can change. In a standard landscape shot, the big mountains of the backdrop may be the most important part of our images.
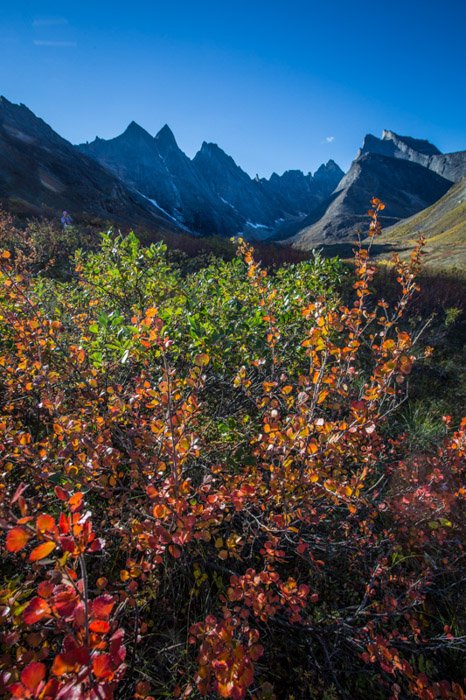
But during the fall, the colors of the foreground, the yellow aspens, or red and orange tundra, suddenly draw the eye.
Our attention falls upon the foreground. After all, that is where the colors are exploding.
To capture autumn photography scenes, I suggest three compositional strategies:
- Look at the landscape close up in the form of details;
- Step back (both literally and figuratively) and look at the local landscape surrounding your focal detail;
- Finally, step back again and see the broad scene and all that surrounds you.
When combined, these three types of images will help you tell a compelling and complete story of your fall photography experience.
Let’s get started.
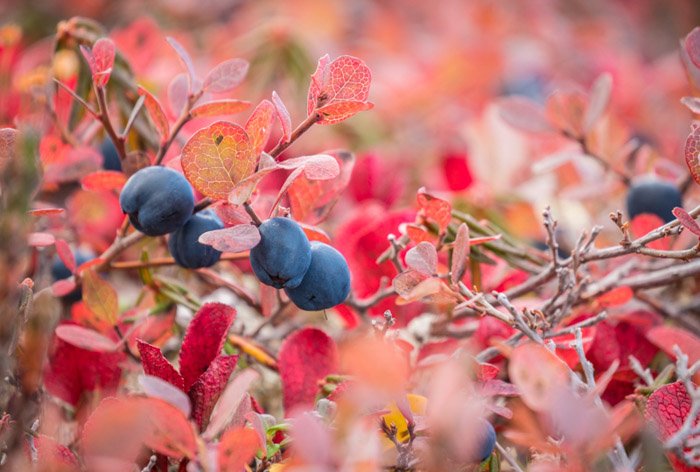
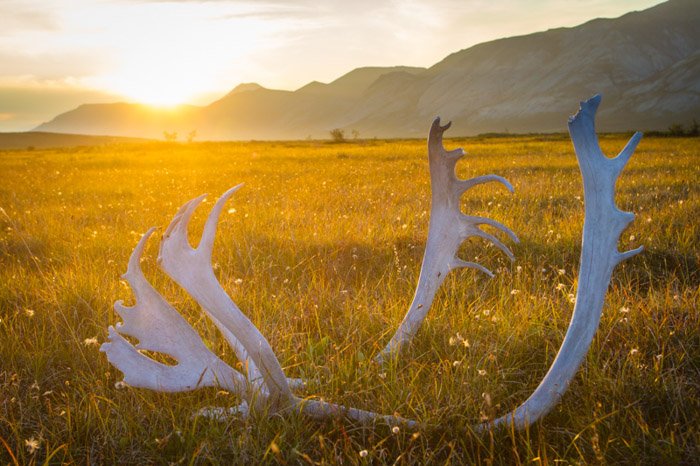
Capturing Details in Fall Landscapes
Fall photos of the details lie in the fuzzy grey area between macro photography and landscape. Sometimes it’s one or the other, sometimes it’s a little bit of both.
In general, I see photographing the details as another aspect of landscape photography. Detail images tell a small, but important part of the story.
Within the photographic process, details give us a starting point. I see these as an entry point for the landscape. By photographing the details in autumn, we can start the processing of viewing the scene as a larger whole.
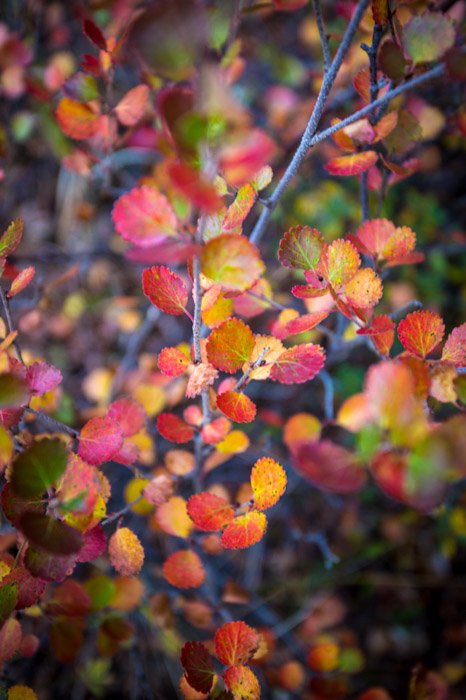
They are great for discovering the way a landscape will come together, but they also play an important role in providing a sense of scale.
Details are an important part of our field experience. When used properly, they can lead to more effective large landscape scenes.
These are also an important part of the story we are telling our audience. To anyone who has read articles or books about landscape photography, you’ll have read about the importance of the foreground.
Details are ALL foreground. So capture them well, and then use them to move on to the larger view.
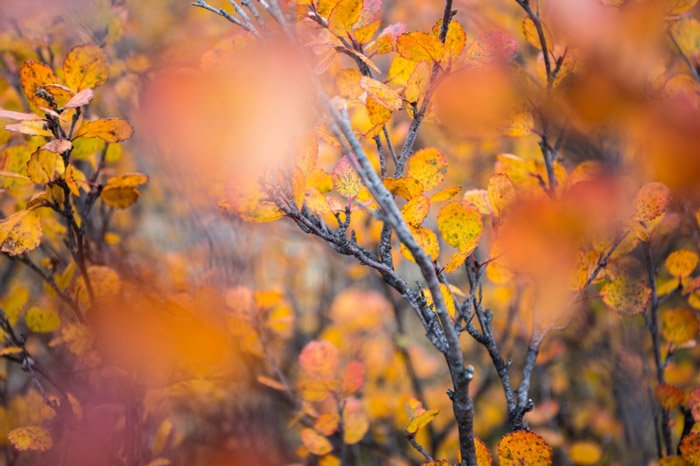
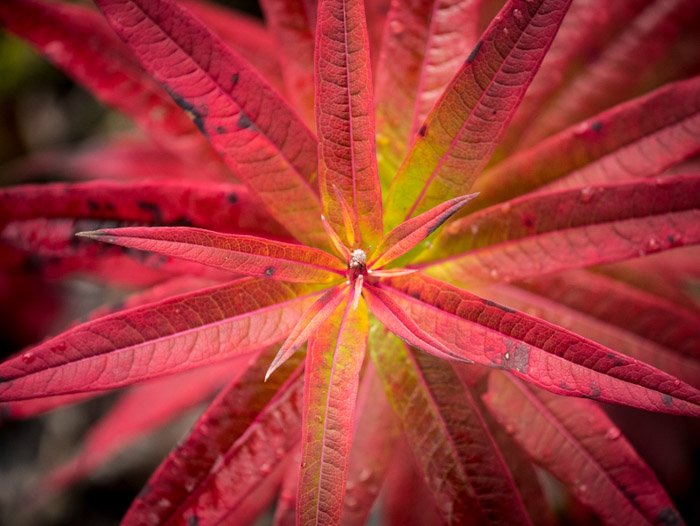
Equipment and Techniques for Shooting Fall Photography Details
Up close work requires a lens capable of a relatively close focus, or a powerful telephoto. I’ve used big 500 and 600mm lenses for this kind of shot and I’ve used wide angles that have the ability to focus a few inches away from the lens.
But most often I use a moderate telephoto with decent macro capabilities. Nothing fancy, just a good lens that lets me get close.
Camera settings vary too much with the available light to offer any real guidelines here, but I do urge you to be thoughtful.
A shallow depth of field that will blur distracting backgrounds may be just the ticket to isolate a patch of colorful foliage, or you may want to offer more depth, providing a chaotic riot of color and pattern.
My point is to be thoughtful and consider your settings in the context of the image you hope to create.
Whichever settings you choose, detail shots are about pattern and color. Here are a few things to look at as you compose:
- Consider how the lines in the image interact. Do they cross distractingly or guide your eye around the frame in a pleasing way?
- Which color dominates? In the autumn, colors like red can be overwhelming and often need to be balanced by cooler greens or blues.
- Isolate your subject by cropping extraneous details, or using a shallow depth of field.
- Embrace the autumn colors, but don’t overwhelm your viewer with too much of the same thing. Good images usually have a variety of textures and colors.
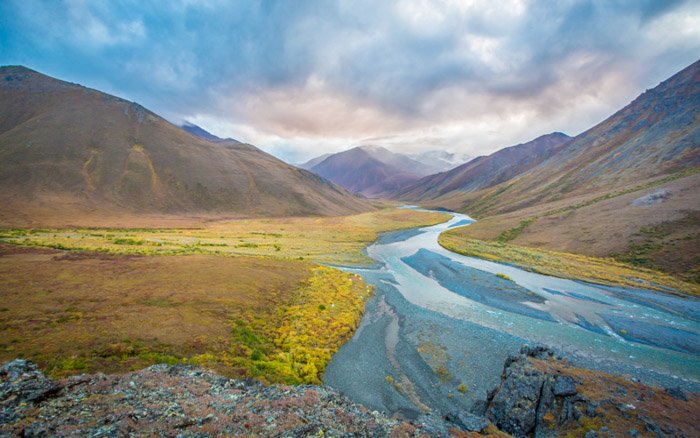
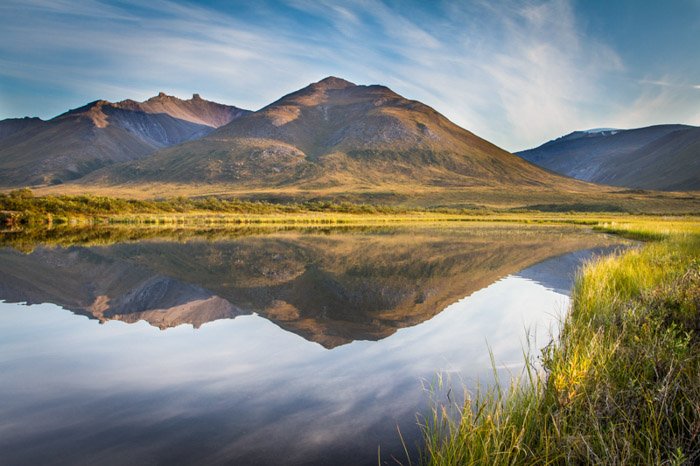
The Local Landscape
The next step in our landscape progression is to pull back from the details of the scene. Look at what surrounds your detail, the context. When we zoom back a bit from the details, we get local scenes within the landscape.
Startup close, but don’t end your search for photos with your immediate surroundings. Some of the best local landscapes may be on the far side of the valley, far away from where you are standing.
Whether close or far, this type of image is rarely shot wide. Rather you’ll want to apply medium to strong telephotos which allow you to isolate compelling parts of the scene.
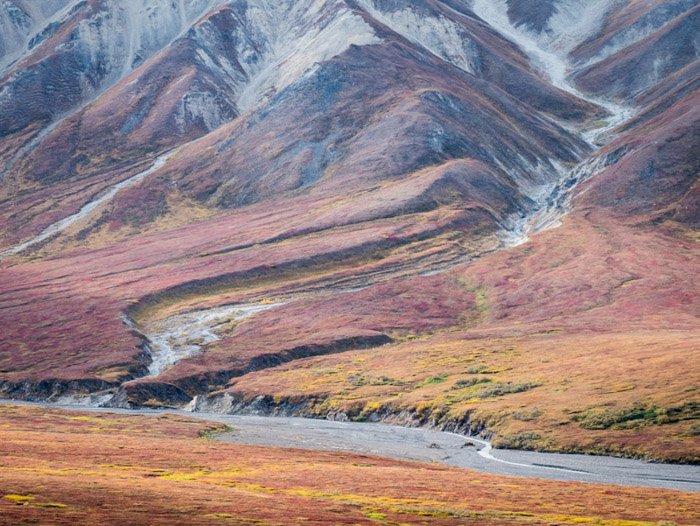
I really like this type of image. They allow enough space to apply the compositional tools of depth and scale, and yet are tight enough that distractions are more easily avoided.
Local landscape photos are particularly suited to autumn photography because fall colors, are by nature, patchy.
Using a short to moderate telephoto you can select the patches of dramatic color that may be surrounded by less interesting browns in late autumn or green early in the season.
Focal lengths in the 70-200 range are a good place to start. When I’m creating this kind of image I may spend minutes with my camera to my eye, panning about the scene in front of me.
I’ll look to see how elements interact, where the colors are most appealing, and trying to discover the story of the place I’m photographing.
Is there a mountain peak that should be included? What of the distant rock slide through the tundra meadow? Are there interesting juxtapositions of color and texture?
Eventually, I select those parts of the landscape that caught my eye. Then, using natural lines that guide my eye through the frame (not out of it), I’ll find my composition.
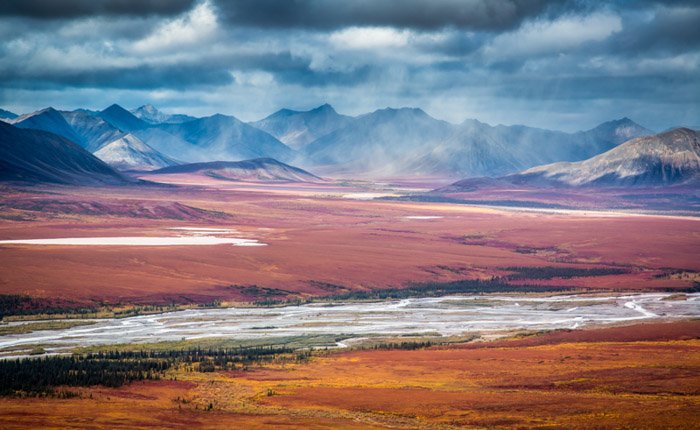
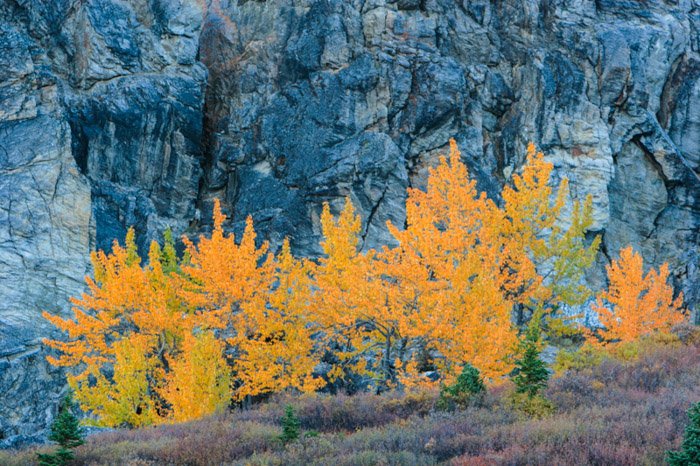
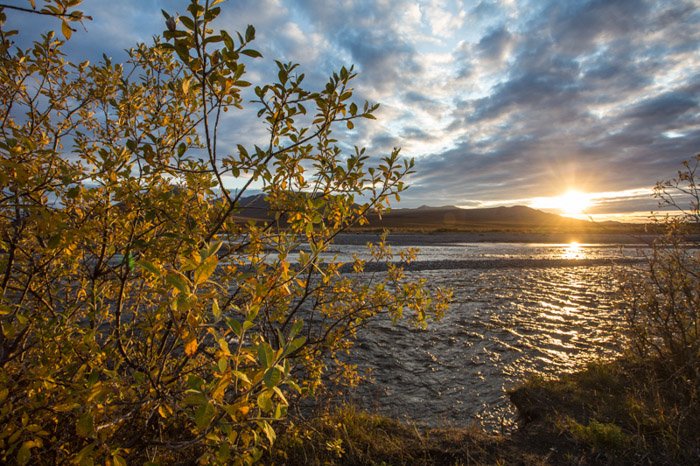
The Open Landscape
I’m going to be honest: in the fall, when the colors of my home state are going off like fireworks, it is rarely the wide-open scenes that draw my eye. The details and local landscapes are often the most appealing way to capture the colors and textures of fall.
However, sometimes the scope and size of the landscape cannot be ignored. It is in those rare moments that I reach for my wide-angle lenses.
On my autumn photography workshop in the Alaska Range, I encountered just such an opportunity.
My students and I were hiking through the tundra of Denali National Park, and the colors were vivid and bright.
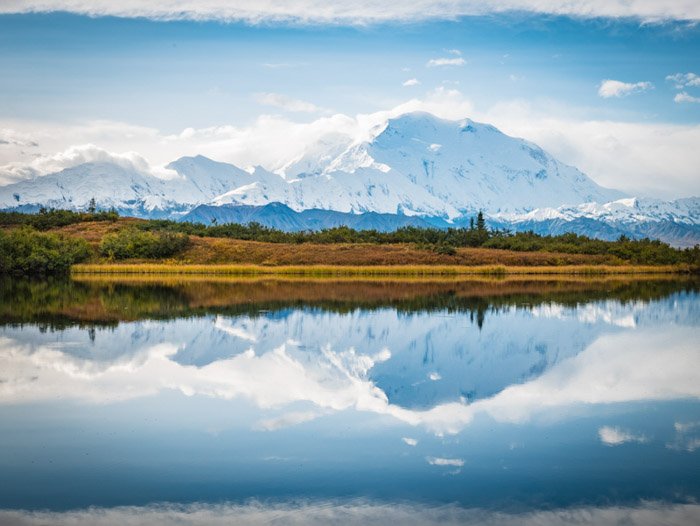
We’d been dealing with low clouds for the past couple of days, and the big peaks of the Alaska Range had stayed hidden behind layers of fog, cloud, and misty rain. But the night before the weather had cleared and we woke to blue skies.
The Alaska Range, including Denali (the tallest mountain in North America), had emerged from behind the clouds to loom, white and glaciated, over the landscape.
It was beautiful, and yet my focus kept falling on the colors in front of me.
I didn’t ignore that dramatic backdrop, but I used it as just that, a backdrop.
The foreground in the autumn, perhaps even more than other times of the year, is vital. When shooting wide, I will often get low, using my background not as the subject, but as the setting for something bright, flashy and interesting close by.
The work you put into finding photogenic landscape details will pay dividends when approaching a large scale landscape. This the challenging work of putting it all together.
The details are your entry point, the local landscape your setting and foreground, and last the dramatic backdrop of your open landscape.
Together, during the rare times when it all comes together, these can tell the complete story of the place in a single image.
I was once told that using a wide-angle lens for landscape photography was the easy way out. I disagree entirely, wide angles are the hardest because there is so much space for distraction.
But when it comes together, when you have an understanding of compelling foreground subjects. Also, the local landscape, and the open scene, you will more frequently be able to find dynamic wide-angle landscapes.
More Than a Single Image
In a world where most of our images end up on Facebook and Instagram, the art of a photo story is fading. Stand-alone shots get the most attention, the most likes, hearts, or whatever, on social media. But they do a lousy job of telling the whole story.
Details, local scenes, and wide landscapes in combination are far superior.
I encourage you to tell the whole story of autumn by embracing numerous shots. Use the focal lengths available to you, all of them. Through your lens, explore the fall landscape, and share with me what you capture!
Now you’re getting to grips with fall photography, why not check our spring and winter photography tips.


