
Autumn is the perfect time of year for taking images of beautiful colors, cozy moments, and breathtaking scenery. It’s also the perfect season to get into creative autumn photography to improve your skills and impress your viewers.
We collected 15 tips for you to improve your autumn images. Take a look, and try working them into your photography.

- Learn to effortlessly set up your camera for any situation.
- Master the art of selecting the perfect exposure every time.
- Discover 10 composition rules that elevate your photos instantly.
Our Top 15 Autumn Photography Ideas
The gorgeous fall scenery offers tons of chances to take incredible photos. Continue reading to learn how to take advantage of these wonderful colors and textures!
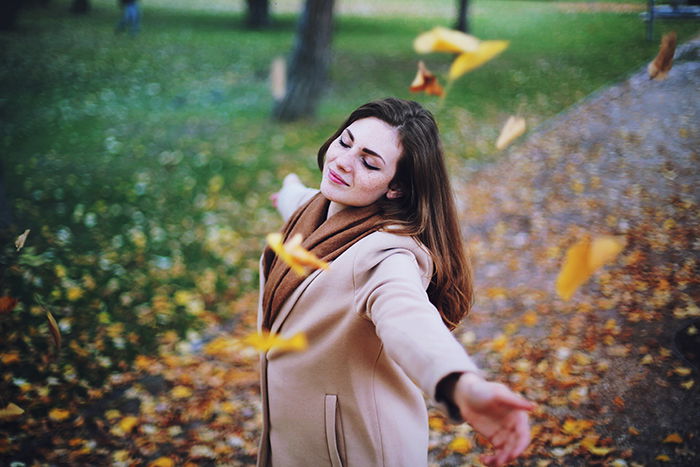
1. Focusing on Thrown Leaves to Create Exciting Compositions
Pictures of people throwing leaves in the air are a classic action shot in autumn photography. But this idea is so popular that it might make your photos look like any other autumn portrait.
To avoid this, experiment with a different focal point to make them stand out. For example, the subject in your portrait doesn’t always have to be in focus.
For something a little abstract, set your aperture to a small number like f/1.8. Then, pull your focus away from the person as they throw leaves in the air. Focus on a couple of leaves instead, turning your subject into a blurry outline.
2. Paint Leaves to Add More Intense Colors
Another way to breathe life into autumn photography is to paint your leaves with eco-friendly paint. You can intensify the colors if they’re dull or paint them a completely different color for a surreal effect.
You can also use painted leaves as backgrounds, foregrounds, or simple props for people to hold. This is a perfect activity for family photography, especially if small children are involved. You can use the paint to distract them and take candid photos of them at the same time.
Painted leaves are not only great as props but as the sole subject of your photos too. You can capture magnificent patterns and textures in these photographs.
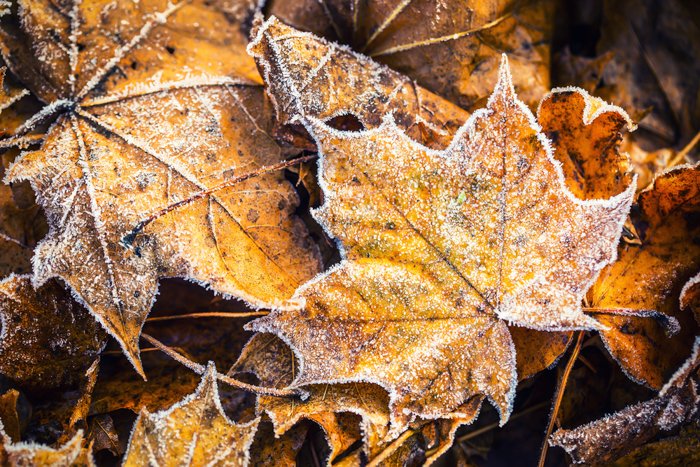
3. Highlight the Transitions Between Summer, Autumn, and Winter
You can always find reminders of summer when wandering in nature at the beginning of the fall season. It can be a little flower or a few green plants or trees among the changing red and yellow leaves. This is a great opportunity to capture compelling contrast.
This is true at the end of fall as winter approaches, too. You can sense when it’s coming, and sometimes, the orange leaves meet the first frost. Try capturing these seasonal phases to enhance autumn’s beauty.
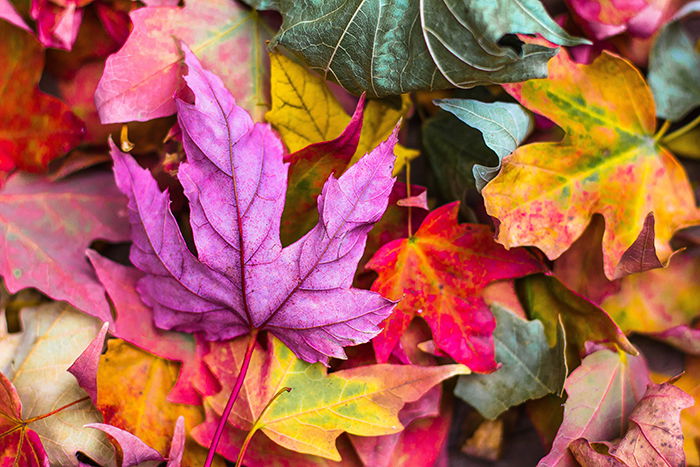
4. Use Monochromatic Color Palettes for Eye-Catching Photos
Some of the most beautiful autumn photos feature subjects that seem to blend in with their surroundings. This monochromatic look isn’t typically desirable in other photography genres. But it’s a winner in autumn photography.
Before a photo shoot for portrait photography, ask your model to wear an outfit with red, orange, or yellow tones. Then match them with the appropriately colored background. You can scout out some monochromatic autumn scenes beforehand.
You can also do this with leaves by focusing on a specific color. Use a background that has more autumn leaves of the same color, as it will make the same blending effect.

5. Take Photos at Golden Hour to Emphasize Autumn’s Colors
Autumn may not be the sunniest time of year. But it does still come with the warm, soft, directional light of golden hour. This light is found both in the morning as the sun rises and later as it sets. It’s ideal for bringing out the golden colors of autumn photography.
Use key light to take classic portraits, backlight to create silhouettes, and sidelight for atmospheric portraits.
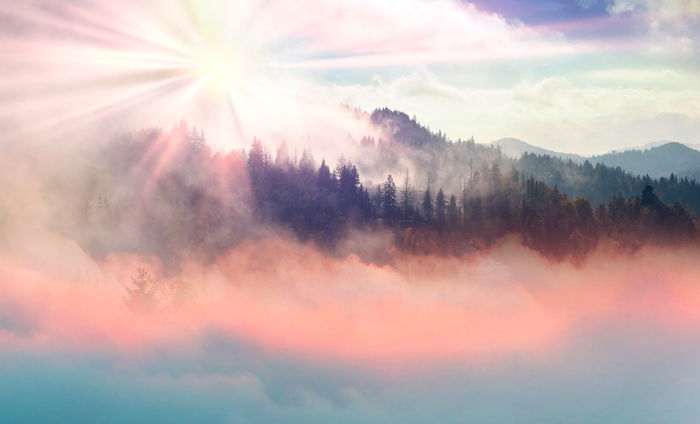
6. Capture Rays of Sunlight for Ethereal Autumn Photos
Autumn is the perfect season to capture rays of sunlight. High humidity and sunshine can create these stunning scenes.
You have the best chance to catch these in the morning when the sun is not too high over the horizon. Sometimes, you’re just lucky to see scenes like this. But pay attention to the weather to improve your chances. If it predicts a sunny, humid day, it’s worth going to the forest to photograph these moments.
You can also take off your sun hood to create lens flares.
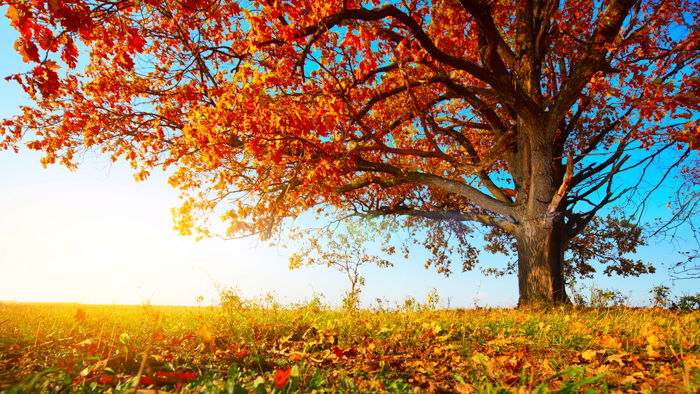
7. Shoot Low-Angle Shots to Capture More Layers of Depth
Autumn photography is mostly about the beautiful surroundings and colors of nature. Shoot from a low angle to include more of the foreground and the background. This will nicely frame the subject in your image.
For instance, when taking a picture of an autumn tree, it can be beautiful by itself. But getting down low and showing colorful leaves in the foreground allows you to show the details of its leaves in greater detail. And you capture the lovely contrast of the leaves against the blue sky.
Shooting from a low angle lets you frame the entirety of a fall scene. This is perfect for places with large trees, lots of leaves, and a beautiful expanse of sky.
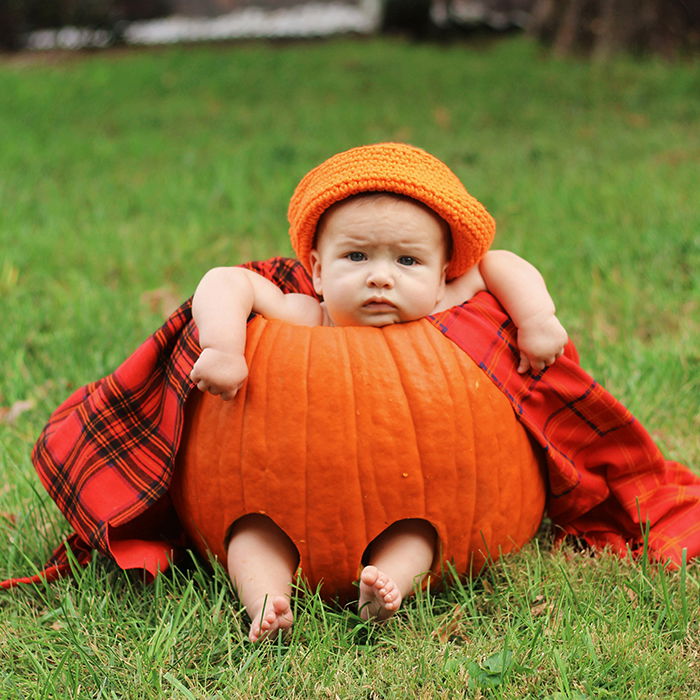
8. Take Pumpkin-Themed Halloween Photos
Halloween and autumn are often associated with each other. Halloween can be about scary and dark scenes with a lot of props and decorations. Or you can capture children going from house to house for candy.
And, of course, there are plenty of Halloween photography scenes you can take with pumpkins. But aside from Halloween pumpkin carvings, you can use these vibrant props for baby portraits!
You can carve holes in a pumpkin so the baby sits in it and pokes their legs out. Baby portraits like the one below are fun for family and child photographers.
9. Take Thanksgiving Photos of Sharing Abundance
Like Halloween, Thanksgiving also has its own autumn atmosphere that you can capture. It’s about harvest time and sharing that abundance with others.
Thanksgiving is about food, family, friends, and warm hospitality. You can best capture this holiday season through family gatherings and dinners. Take time to capture pictures of scrumptious food on the table and fun times with loved ones.

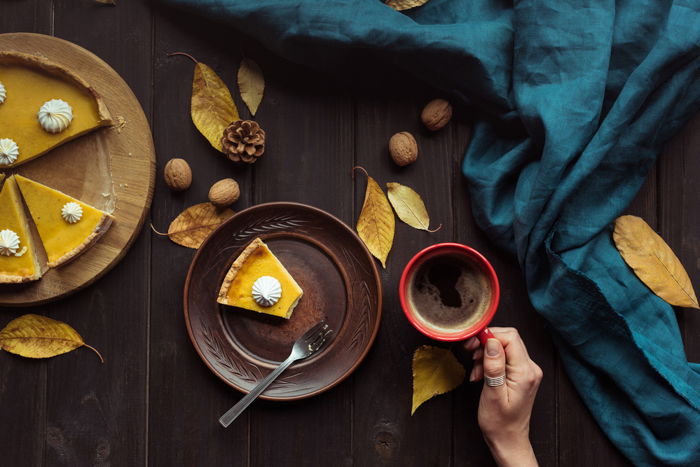
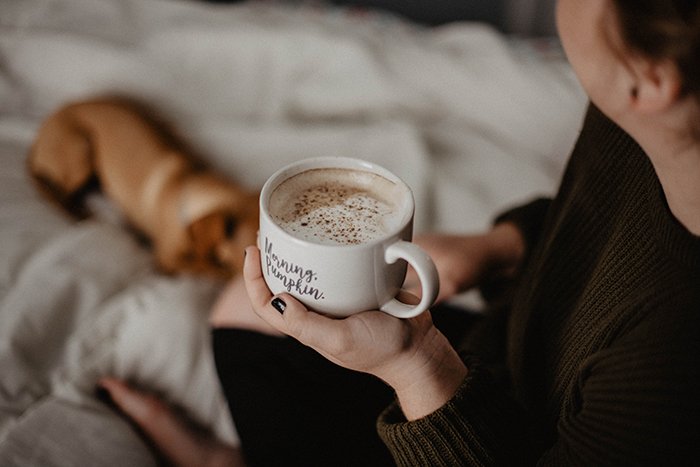
10. Use Food Photography to Capture the Essence of Autumn
Autumn photography involves taking pictures of seasonal food as well. It’s all about hot beverages, pumpkin pie, squash, walnuts… the list goes on. Plus, food photography is a great indoor activity when the autumn weather is bad. You don’t have to go outside to enjoy autumn. You can bring a piece of it with you inside instead.
You can collect autumn reminders like leaves and pinecones to decorate the table. This will complement the colors of the food on the table. They can add the perfect touch to your food photography.
Also, use autumn produce as decorations too. Buy a pumpkin for the photoshoot, and you can even make a soup of it the next day. That way, your decoration won’t go to waste!
11. Throw Leaves at Your Subject For Better Poses and Camera Angles
As we talked about earlier, a lot of times, autumn photography features people posing the same way while throwing leaves in the air. To make this idea more interesting, throw leaves at your subject while they pose. This will allow your model to pose without restrictions.
It’s impossible to throw leaves at someone and hold your camera at the same time. So use a tripod and a timer. Or ask someone to throw the leaves for you. You’ll get the leaf-throwing concept. And you’ll also be able to experiment with interesting angles at the same time.
12. Create Stunning Autumn Landscape Photos
The months of autumn are the perfect opportunity to take more landscape photos. And there are several ways to approach them.
Sometimes you can’t capture a scene because there are so many distracting details. In this instance, we suggest using a telephoto lens or a prime lens with a wide aperture. Using a shallow depth of field will help you blur those distracting elements from your image.
However, sometimes you want to capture more details. If you want your autumn photography to be more detailed, use a narrow aperture like f/16. This will ensure that your whole landscape is in focus.
Then there are times when the scene is so magnificent, but you can’t capture the grandeur of it all. A wide-angle lens will help you create a sense of scale. But you will want a strong subject in your photo to show depth and perspective.
13. Take Photos in Fog and Rain for a Different Look
The magic of autumn isn’t only shown through sunny images with orange leaves. Don’t forget how beautiful misty and rainy weather can be.
Get up early or go out in the late afternoon to capture fog. And, with the proper waterproof camera and gear, shoot on rainy days.
Umbrellas are great props for portrait photography in the rain. And street photography can be rewarding after heavy rain, with large puddles you can use to reflect urban landscapes.
14. In Bad Weather, Create Cozy Images of People Indoors
One of the downfalls of taking pictures in autumn is bad weather. But if the weather isn’t ideal, you can take portrait photos and cozy images of people indoors.
Indoor photography can be perfect for photo sessions with families and couples. Use details in their homes to bring out and capture their personalities. It’ll give your photos more meaning. You can practice by taking photos of your own friends and family in their homes.
When it comes to lighting, take photos of people next to large windows. And be sure to adjust your camera’s white balance if you’re using artificial light sources.
It’s also a great opportunity to experiment with taking self-portraits or still-life images in your home.
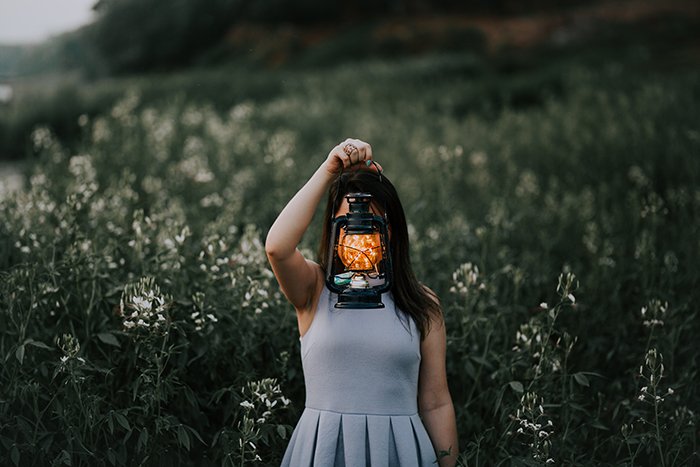
15. Combine Fairy Lights With Autumn Colors for Glowing Portraits
Fairy lights are often used in nighttime photography to create ethereal portraits. You can also use them in the autumn to add a touch of dreaminess to your photoshoot.
Use fairy lights to make your portraits more interesting by placing them in your background for a bokeh effect. You can place them in a lantern or jar and have your model hold them in their hands or even up in front of their face to add a glowing detail to the photo.
For the best results, use colored fairy lights that complement autumn’s reds, yellows, and oranges.
Conclusion—Improving Your Autumn Photography
Autumn’s colors, landscapes, and light create the perfect outdoor studio for every kind of photographer. Autumn colors are so iconic that taking incredible photos with them will be easy. And even when foul fall weather keeps you inside, there are lots of indoor photography options too.
We encourage you to go out and make the most of your surroundings. Or stay in and take images of family gatherings, food, decorations, and people.
- Learn to effortlessly set up your camera for any situation.
- Master the art of selecting the perfect exposure every time.
- Discover 10 composition rules that elevate your photos instantly.


