
If you want to capture the beauty and power of coastal landscapes in your photos, then you need to use the right settings. In this article, we’ll discuss the best coastal photography tips for better cliffs and coastlines.
We’ll provide tips on how to use each setting effectively. And we’ll show you some stunning examples of photos that were taken with these settings.
Coastal Photography: A Point of Interest Will Add Depth to Your Image
This is the leitmotif of all photography. For coastline landscapes, you not only have to choose one but also make sure it’s not overshadowed by other elements.
This is necessary to avoid finding yourself with a frame half full of flat sea or endless blue sky.
Undoubtedly, the sea itself could be your point of interest. But try to focus on the idea of giving the eye of the observer a path to follow within the photo.
The famous S-curve composition is a good place to start because it works well in almost any situation.
Early Mornings and Late Afternoons Are the Best times for Cliff Photography
The other important point for creating an excellent coastline photograph is light.
Getting to the chosen location at the right time could make the difference between a great photo and one where the sun is too strong. Arriving early will at least give you enough time to adapt your settings to the light.
So a possible choice could be early in the morning. That’s because the dawn could draw a totally unexpected picture with its soft lights. Another possible choice is the warm and beautiful light of the sunset. Or before and after the sun has dived into the sea.
Even the weather can create a play of light on your scene and your composition. With the right clouds, you can play with shutter speeds, leaving long crawls in the sky.
Seasons
Another important consideration when photographing the coastline is finding the right season. During the year, the sea and the landscape change. Potential flora along the coast that you can include in your photography will also change.
Other elements that can highlight your subject are incoming or outgoing tides. And tide pools make for amazing land and water features.
I live in Italy. The daily tides here are either small or smaller. This is consistent throughout the year, so the tides don’t really affect my photography.
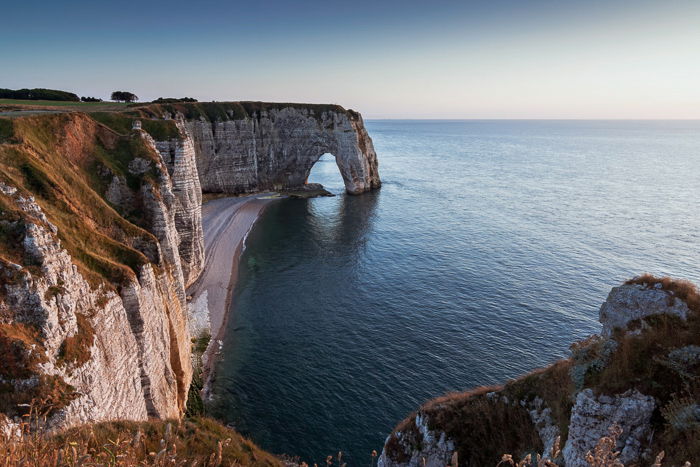
But in the north of Europe, for example, it’s common to find daily tides of 5-10 meters. While photographing along the coast of Scotland or near Etretat in France, the sea took over the beach within a few hours.
Even local storms can be very interesting. They can give your composition and picture a totally unexpected look.
Look for Reflections
Speaking of seas, one of the elements that can immediately come to mind is the reflections. Reflections can help or ruin your composition. It all depends on the scene you have before you and what you want to achieve.
It is necessary that your composition has an element of interest that can be reflected in the water. The water itself must be still enough to create the reflection.
If you notice that the reflection ruins or complicates your composition, you can solve this by using a polarizing filter.
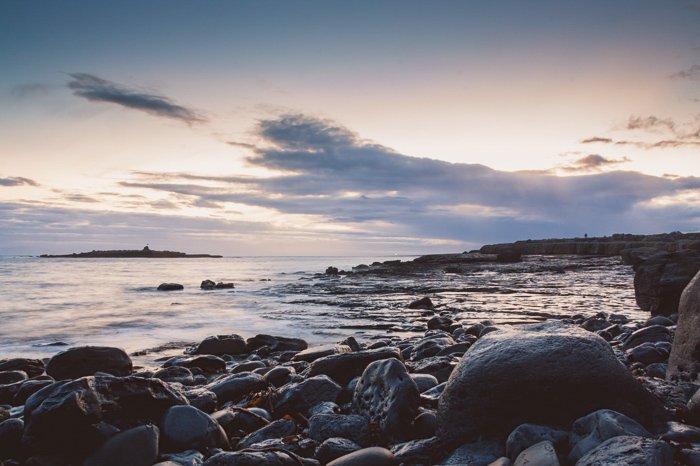
Include the Foreground for Unusual Compositions
The vastness of the sea meeting the sky is a beautiful subject to photograph. But it is also overused and sometimes even boring.
So use the foreground to break up this common composition. A rock or a rock formation, a stone that draws stripes on the sand, or a series of rocks arranged by the sea are all examples of a good foreground. Incorporate these in your composition by positioning your camera close to the ground.
By positioning your camera very low, your foreground will receive attention. It will probably change the overall shape and proportion. And it will do so in relation to the other elements of your composition.
You need to be very careful not to create an unbalanced photograph when it comes to the composition.
You should also pay attention to the colors. If you photograph at dawn or at dusk, the sky will probably be colored with very intense and warm colors.
It also depends on the atmospheric conditions and the passage of important cloud formations. Remember that your foreground usually has less intense and sometimes less interesting colors than the sea or the sky.
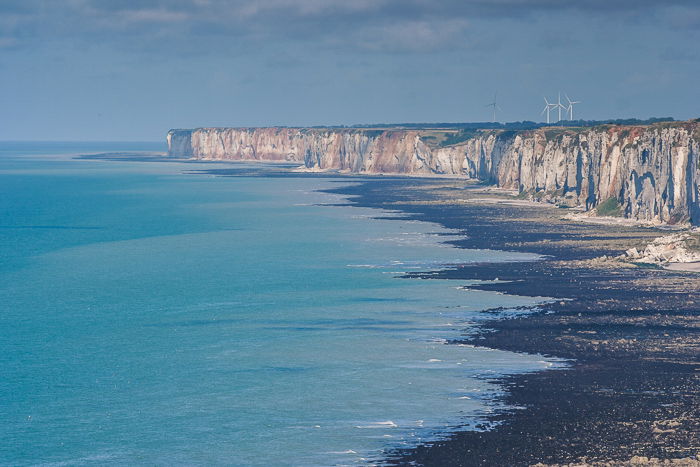
Try Photographing From Higher Ground
You can also try going higher than the ground. This depends a lot on the scene and on the possibilities that the landscape offers. It could be an excellent option if you are near a cliff.
Going up a cliff will give you an image that includes the cliff line stretching out for hundreds of meters or even kilometers.
If you are the lucky owner of a drone, here is a great time to make a flight with it. Then plan your composition and photo from above.
Drone coastline photography has become increasingly popular recently, especially on Instagram.
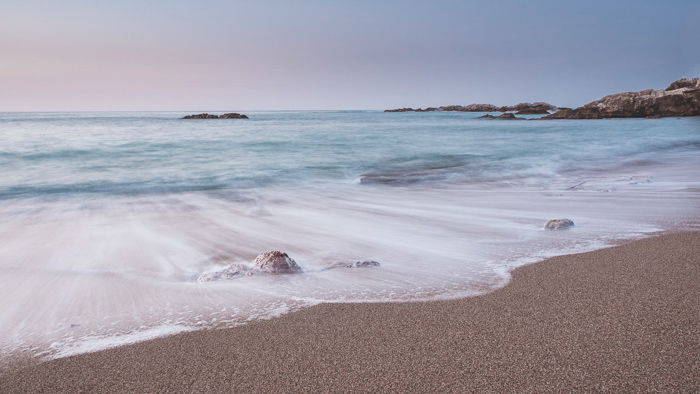
Use Long Exposures for a Silky Water Effect
The long exposure technique is the most important in coastal photography. You can use it to capture the movement of seawater on the coast.
It is also one of the easiest compositions to find, especially because seawater is always on the move. This means that on a windy day with beautiful waves and fast movements, you will still have a nice subject.
But be careful. A big wave can completely drown you, including your equipment. Safety comes first. Trust me, the last thing you want is your photography session to end with a dripping camera. I speak from experience.
With the movement of the water, you can play in many different ways. You can have a super long exposure of two minutes or more. Or you can have an exposure of one or two seconds and capture the lines and signs that the backwash leaves on the sand of the beach.
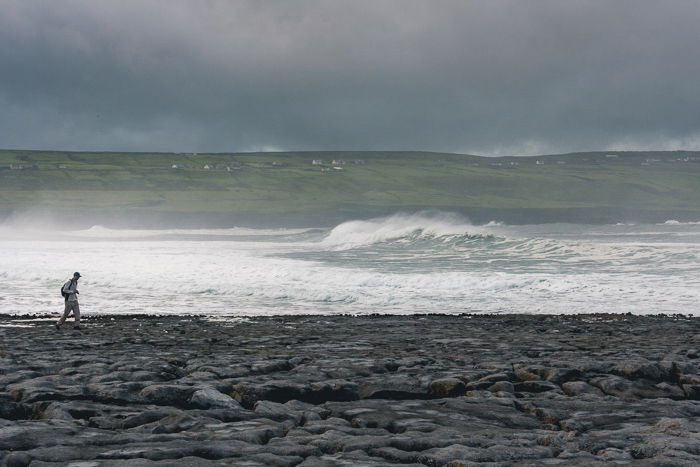
Include a Hint of Human Presence
It depends a lot on the landscape and the look you want to give your shot. It might be interesting to add people (or hints that people have been in those places before). Or even human activities.
I prefer to avoid people. I tend to shoot when no one is on the beach, either very early in the morning or later in the evening.
This is because a human presence can disturb my composition, making it unpredictable. People also leave footprints on the sand and other signs of their presence. This is very often something that causes me to lose appealing compositions or even interest in particular views.
The best way to avoid bumping into other people is to visit your photography location during bad weather or thunderstorms. It makes everything more dramatic, leading to impressive photos. And it tends to keep most people away.
The one element of human presence I do like adding is car headlights or taillights. These are proof of human activity along the coast and lend themselves very well to being photographed.
Use Multiple Exposures for Sunset Photography
If you shoot while the light changes very quickly, consider taking different exposures of the same scene. I’ll typically use multiple exposures during a sunset.
You can take three pictures with a difference of one or two stops between one shot and the next. Or five shots or seven. This allows you to get almost the entire dynamic range of your scene in changing light conditions.
Once in front of the computer, you can choose the photo with the best exposure. Or you can use two or more shots to combine exposures together and get better highlights and shadows in your scene.
No, I’m not at all talking about creating an HDR, even though I’ve used that in the past.
What I mean is using modern techniques like luminosity masks. With this tool, you can have a shot formed by several different exposures without HDR. It will give your image a completely natural look.
Take Detailed Shots for More Interesting Compositions
It is easy to always focus on the big panorama—the widest view of the scene in front of you. Especially with the increasingly popular wide-angle lens.
But all this can also make us lose interest in the search for a good composition. Everything is inside your frame, so you don’t have to frame anything.
I disagree.
We should find a way to train the eye again to look for details in all landscape photography, including coastlines and cliffs.
Next time you are at the foot of a cliff, try to find the details of the rocks. Watch how the water moves against them, as well as the small stones of the beach. Or look at the particular shape of the coast that you have a few miles in front of you.
Conclusion—Best Coastal Photography Tips
Coastal and seascape photography can open up a whole new world of landscape photography. The combination of land and sea together creates incredible photos.
Use our top tips to take the most incredible landscape photos on your next vacation!


