The best lens for sports photography lets you catch the action. Sports photography is a tough discipline. Athletes move quickly, the action is intense, and you can’t always get close to the players. The best sports photography lens helps you get the shots you need from the pitch, court, or track.
The Canon EF 70-200mm f/2.8L IS III USM is our top sports photography lens. It has the all-around qualities you need to succeed: It’s fast, has image stabilization, and has a zoom range to get you close to the action. We also have fantastic Nikon, Sony, and Fujifilm sports photography lenses.
What Is the Best Lens for Sports Photography?
The best lens for sports photography should have a telephoto zoom, a large focal length, image stabilization, and a low max aperture. That’s why the Canon EF 70-200mm f/2.8L IS III USM, Nikon AF-S DX 18-300mm f/3.5-6.3 VR, and Sony E 70-350mm f/4.5-6.3 ED G top our list.
Here’s a quick rundown of our selected best lenses for sports photography. It’s a brief look at each lens to show you which suits you best. We include lenses by Canon, Nikon, and Sony. But we also include other brand options, including third-party lenses.
- Fast lens for action
- Wide aperture for stunning low-light performance
- Incredible build quality that gives you edge-to-edge clarity
- A versatile zoom range for for everything from environmental shots to portraits
- Large zoom range for a variety of sports shots
- Reliable vibration reduction system keeps your images sharp
- The 18mm wide angle is perfect for environmental sports photos
- The long telephoto focal length gives you incredible reach
- The XD AF motor is rapid and accurate with moving subjects
- A convenient button to easily switch between auto and manual focus
- A fast lens with a wide aperture to capture action shots
- The focus range limiter increases focusing efficiency
- It's compatible with Canon and Nikon DSLR cameras
- The powerful image stabilizer gives you sharp images and more exposure options
- The weather-sealed construction makes it ideal for sports photography
- Compatible with all Fujifilm X-series cameras

- Excellent vibration reduction system for sharper images
- Minimal chromatic aberration throughout the focal length range
- Lightweight for a full frame DSLR lens
- Fantastic value for a telephoto lens
- The built-in image stabilizer gives you sharp and clear sports photos
- The 55mm focal length is perfect for athlete portraits
- Sony's OSS image stabilization gives you four stops of shutter speed compensation
- One of the best AF systems in any sports photography lens
- Constant f/4 max aperture is decent for night and indoor sporting events
- Compatible with all Olympus MFT cameras
- Super-wide and long zoom for varied sports shots
- The durable construction means you can shoot sports in all conditions
- Pristine image quality and powerful magnification
- Sharper images and better low-light performance with the vibration reduction system
- Extensive weather-sealing for sports photography in all conditions
10 Best Lenses for Sports Photography in Detail
We’ve included lenses for Canon, Nikon, and Sony cameras for sports photography. Each brand offers an APS-C and full-frame option. Fujifilm and Olympus lenses are also included. Sigma’s best lens from their sports range is also included.
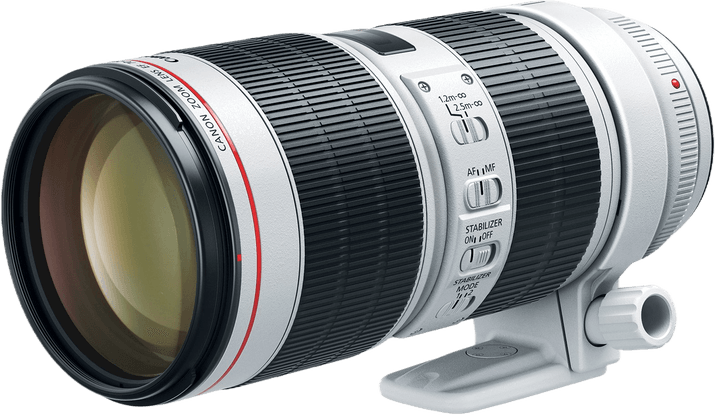
1. Canon EF 70-200mm f/2.8L IS III
| Brand |
Brand
Canon
|
| Maximum Aperture |
Maximum Aperture
f/ 2.8
|
| Focal Length Range |
Focal Length Range
70-200 mm
|
| Image Stabilization |
Image Stabilization
|
| Lens Mount |
Lens Mount
Canon EF
|
| Top Selling Points |
Top Selling Points
A large f/2.8 aperture gives you brilliant low-light performance. You get stunning optical quality with no aberration throughout the zoom range.
|
The Canon EF 70-200mm f/2.8L IS III is a versatile sports photography lens for Canon cameras. Some sports photographers need a longer focal length. But the f/2.8 aperture gives you more freedom with your exposure settings to capture action shots.
The build quality is excellent. It has weather sealing. And the image stabilization keeps your photos sharp.
The 70-200mm focal length range is exactly what a versatile sports photographer needs. The 70mm end is great for wider environmental shots and snapping portraits of athletes. The 200mm end provides the magnification you need to get close to the action from the sidelines.
The optical quality is excellent. The lens has 23 glass elements arranged in 19 groups. It uses Canon’s Air Sphere Coating (ASC) to reduce ghosting and flare. This provides edge-to-edge sharpness throughout the zoom range.
The Canon lens uses an Ultrasonic Motor (USM) for the autofocus. It’s quick and reliable. And an important feature for some sports photographers… it’s quiet. You can get the shot you want when the sport requires silence, like golf, tennis, or ballet.
Another selling point for sports photographers is the durability of the EF 70-200mm f/2.8L IS III. Its rugged construction makes it highly resistant to dust and water. It’s not completely waterproof, but you can keep shooting when the weather turns bad.
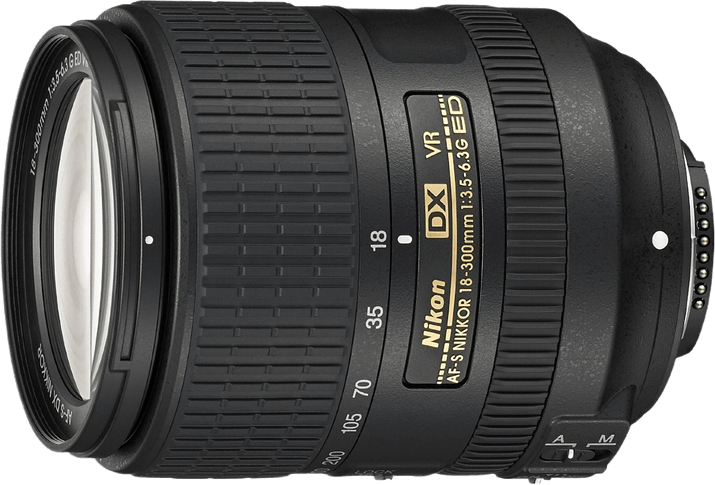
2. Nikon AF-S DX 18-300mm f/3.5-6.3
| Brand |
Brand
Nikon
|
| Maximum Aperture |
Maximum Aperture
f/ 6.3
|
| Focal Length Range |
Focal Length Range
18-300 mm
|
| Image Stabilization |
Image Stabilization
1
|
| Lens Mount |
Lens Mount
Nikon F
|
| Top Selling Points |
Top Selling Points
The large focal length range allows for a various sports shots, including a wide-angle view. It's excellent value for money.
|
This is the best sports photography lens for a Nikon APS-C DSLR camera. It has a large zoom range, which is ideal for various sports photography shots. It’s compact for a telephoto lens. And it’s one of the best-value lenses on our list.
The Nikon AF-S DX 18-300mm f/3.5-6.3 VR lens has an incredible range. Its 18 mm focal length lets you shoot wide stadium shots and has a lovely 76-degree viewing angle for tighter spaces.
The 300mm magnification lets you see the pitch from the stands. With this lens, no sporting moment is out of reach!
Lenses can be very sensitive to movement when at their longest focal length. You can use a monopod for extra stability. But the AF-S DX 18-300mm has Nikon’s built-in Vibration Reduction (VR) system. This helps limit the effects of camera shake, giving you sharper images.
Nikon doesn’t make low-quality lenses. And this lens is the perfect blend of precision engineering and affordability. It’s compatible with cameras like the D500 and D7500. It is a must-have lens for sports photographers with an APS-C Nikon.
It also works on Nikon Z cameras like the Z50 with an FTZ II lens mount adapter. But photos taken with a full-frame camera will be cropped.
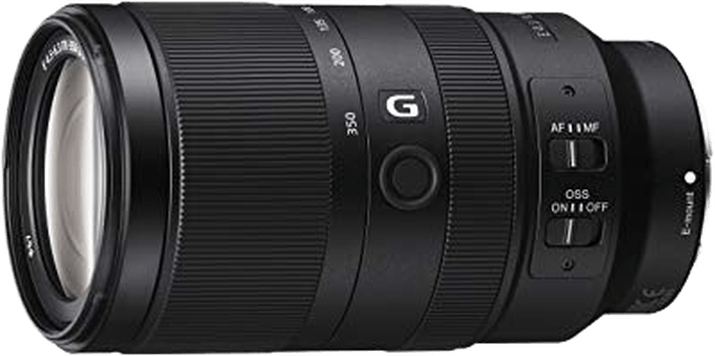
3. Sony E 70-350mm f/4.5-6.3 G OSS
| Brand |
Brand
Sony
|
| Maximum Aperture |
Maximum Aperture
f/ 4.5-6.3
|
| Focal Length Range |
Focal Length Range
70-350 mm
|
| Image Stabilization |
Image Stabilization
|
| Top Selling Points |
Top Selling Points
The 350mm focal length provides excellent magnification. The AF system is optimized for fast-moving subjects.
|
Sports photographers with a Sony crop sensor camera need this lens. The Sony E 70-350mm f/4.5-6.3 ED G has the beautiful build quality you’d expect from the Sony G Series. It gives fantastic magnification and has one of the best AF systems on any telephoto lens.
It has a max focal length of 350mm. So you can capture goal-line action from row Z. The large zoom range means you can shoot everything from stadium shots to portraits. Plus, the seven-blade diaphragm helps give you a beautiful background bokeh.
Sony cameras have excellent autofocus systems, and this lens improves AF performance even further. The XD linear motor is fast and accurate, even with moving subjects. It’s exactly what you need with fast sporting action. The focus mode switch makes it easy to change to manual focus.
This lens rarely exhibits chromatic aberration. Image quality is unquestioned, and its dust—and moisture-resistant design makes it ideal for outdoor sports. As a Sony E lens, it’s compatible with cameras like the Sony a6400, a6600, or a6700.
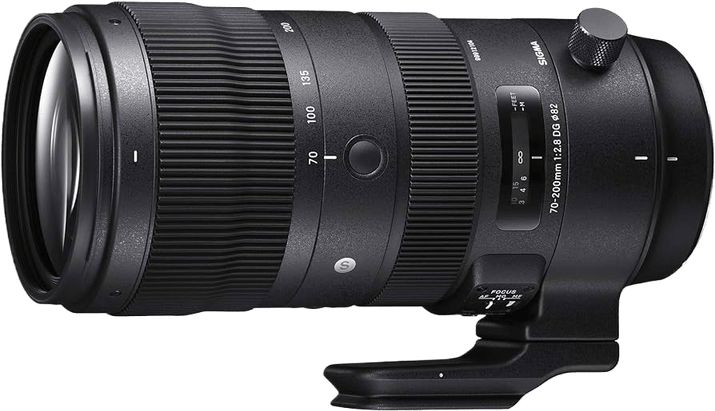
4. Sigma 70-200mm f/2.8 DG OS
| Brand |
Brand
Sigma
|
| Maximum Aperture |
Maximum Aperture
f/ 2.8
|
| Focal Length Range |
Focal Length Range
70-200 mm
|
| Image Stabilization |
Image Stabilization
|
| Lens Mount |
Lens Mount
Canon EF
|
| Top Selling Points |
Top Selling Points
A fast lens for action shots. The large f/2.8 aperture is ideal for nighttime and indoor sporting events. Available for Canon and Nikon cameras.
|
Sigma has bridged the gap between third-party and branded lenses. They are no longer the also-rans of the lens world. The Sigma sports range can compete with the best lenses. The Sigma 70-200mm f/2.8 DG OS is the best lens from that range.
The optical quality of the glass elements is fantastic. Aberration and flare are kept to a minimum.
The build quality is excellent. The shaft includes a thermally stable composite material. This helps to regulate the temperature when working in hot or cold conditions. You can shoot everything from beach volleyball matches to ski events.
The lens uses a HyperSonic Motor (HSM) for autofocus. It works well with fast-moving subjects like motorsports. It also makes little noise when finding focus. You can also change to manual focus with the flip of a switch.
The focus range limiter is another handy feature for sports photographers. You can set a range limit for the autofocus. It’ll search for a subject within this range, reducing the focus time even more.
The fast f/2.8 aperture provides plenty of natural light. This wide aperture setting makes it one of the best lenses for low-light situations (on our list).
The Sigma 70-300mm Sports lens uses an 11-blade diaphragm, which is more than most lenses. This results in beautiful background bokeh when shooting with a shallow depth of field.
The Sigma 70-200mm f/2.8 DG OS is also available for Nikon F-mount cameras.
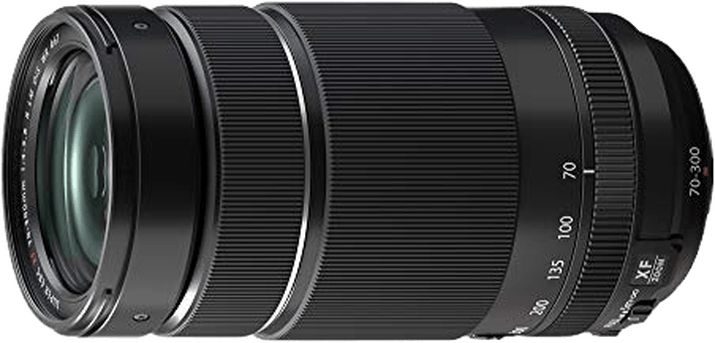
5. Fujifilm XF 70-300mm f/4-5.6 LM
| Brand |
Brand
Fujifilm
|
| Maximum Aperture |
Maximum Aperture
f/ 5.6
|
| Focal Length Range |
Focal Length Range
70-300 mm
|
| Image Stabilization |
Image Stabilization
|
| Lens Mount |
Lens Mount
Fujifilm X
|
| Top Selling Points |
Top Selling Points
Fast lens with a large aperture. The large focal range gives you excellent shot versatility. And it's weather-resistant for outdoor shooting.
|
Fujifilm has an excellent range of APS-C mirrorless cameras. And if you’re a Fujifilm user, the XF 70-300mm f/4-5.6 LM is the best lens for sports photography.
It’s a versatile lens. The wider angles are perfect for stadium shorts and environmental portraits. And the 300mm focal length helps you get close-up shots from far away. You can capture the action in detail without disturbing the players.
An aperture of f/4 isn’t the fastest. But the quality of the glass helps make up for it. You also have optical image stabilization built-in. That gives you more freedom with exposure settings. And it ensures you have sharp sports shots every time.
The durability of the construction makes it ideal for sports photography. It’s weather-resistant, so you can keep shooting when the heavens open. It also works in sub-zero temperatures, which is ideal for the next Winter Olympics or snowboarding championship.
The XF 70-300mm f/4-5.6 LM is compatible with Fujifilm’s X Series cameras, including the X-S10 and X-T5. Those are both great cameras for sports photography.
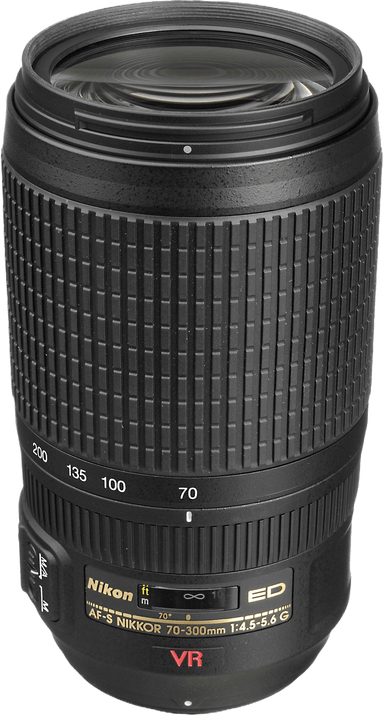
6. Nikon AF-S FX 70-300mm f/4.5-5-6
| Top Selling Points |
Top Selling Points
Bargain price. It uses Nikon's advanced Vibration Reduction system. This keeps your images sharp and clear.
|
Telephoto zoom lenses are known for being expensive. But the Nikon AF-S FX 70-300mm f/4-5.6 lens is an absolute bargain. It’s a can’t-miss lens for a sports photographer with a full-frame Nikon camera. The only drawback is its smaller max aperture compared to others.
It has a wide focal length range. It lets you capture different types of sports shots without changing lenses. And the 300mm magnification gets you close to the action without invading the pitch.
The optical quality is outstanding. Every glass element is made with precision. Nikon has used several Extra-low Dispersion (ED) elements to help reduce aberration and distortion. You get a crystal-clear image from corner to corner.
Nikon’s VR system is a big bonus for sports photographers. It keeps your images sharp without a tripod. The AF-S FX 70-300mm f/4-5.6‘s VR lets you shoot at four shutter speed stops lower without the risk of motion blur.
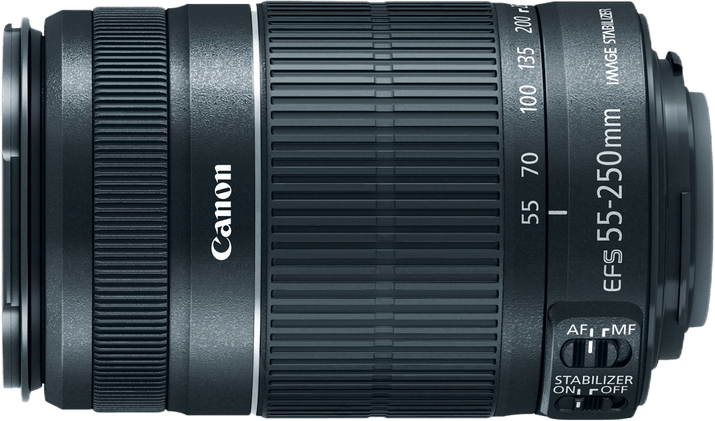
7. Canon EF-S 55-250mm f/4-5.6 IS II
| Brand |
Brand
Canon
|
| Maximum Aperture |
Maximum Aperture
f/ 5.6
|
| Focal Length Range |
Focal Length Range
55-250 mm
|
| Image Stabilization |
Image Stabilization
|
| Lens Mount |
Lens Mount
Canon EF-S
|
| Top Selling Points |
Top Selling Points
It's lightweight for a telephoto to shoot handheld. And the 55mm focal length is good for wider sports shots. It's also excellent value.
|
The EF-S 55-250mm f/4-5.6 IS II is the best sports photography lens for a Canon APS-C DSLR camera. These cameras include the Canon EOS Rebel T8i and the EOS 90D. Plus, the telephoto lens is excellent value for money.
The 250mm end of your focal length gives you the reach a sports photographer needs. You can capture the on-court action from the stands. And the 55mm focal length lets you capture environmental shots and athlete close-ups.
Sports photographers of all levels will appreciate the image stabilizer. It reduces the effect of camera shake and provides more freedom with shutter speed settings.
The lens uses Canon’s older Direct Drive (DC) motor for the autofocus. It doesn’t have the smoothness of Canon’s USM or STM motors. And it makes a little more noise. But it’s still reliable when the action has started.
The Canon EF-S 55-250mm f/4-5.6 IS II has excellent build quality and is lightweight for a telephoto lens. It isn’t Canon’s most advanced lens, but its agreeable price makes it a must-have for sports photographers.
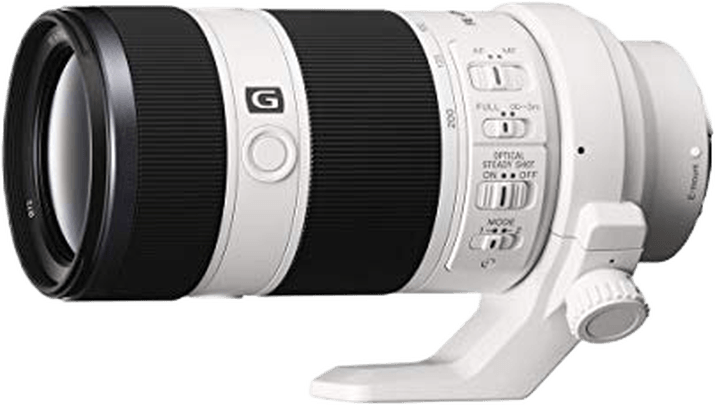
8. Sony FE 70-200mm f/4 ED G
| Brand |
Brand
Sony
|
| Maximum Aperture |
Maximum Aperture
f/ 4.0
|
| Focal Length Range |
Focal Length Range
70-200 mm
|
| Image Stabilization |
Image Stabilization
|
| Lens Mount |
Lens Mount
Sony E
|
| Top Selling Points |
Top Selling Points
Sony's OSS stabilizer is one of the best in any telephoto zoom lens. It reduces camera shake and motion blur.
|
The Sony FE 70-200mm f/4 ED G lens is the perfect partner for a full-frame Sony camera. Sony’s mirrorless cameras have all the features a sports photographer needs. And this lens completes their sports photography setup.
The 200mm focal length doesn’t give you the range of some other lenses on our list. But it provides enough magnification to capture the action from the sidelines. The zoom range is large enough for various sports photography shots.
The f/4.0 max aperture is decent for a telephoto zoom lens. It stays at f/4.0 throughout the zoom range, a blessing for night and indoor sporting events.
The FE 70-200mm f/4 ED G uses Sony’s Optical SteadyShot (OSS) image stabilization system. It reduces the effects of motion blur and camera shake.
You take sharp images no matter how fast the action is. And it lets you shoot with a slower shutter speed. That’s another bonus for low-light situations.
The autofocus system is one of the best in any sports photography lens. It uses dual-linear motors for fast and precise focusing. It’s super-reliable with moving subjects. The operation is also near-silent, which is ideal for quieter sports settings.
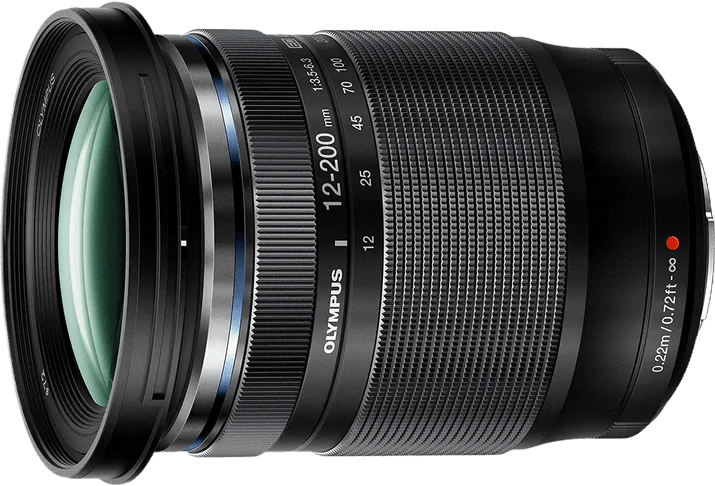
9. Olympus ED 12-200mm f/3.5-6.3
| Brand |
Brand
Olympus
|
| Maximum Aperture |
Maximum Aperture
f/ 3.5-6.3
|
| Focal Length Range |
Focal Length Range
12-200 mm
|
| Image Stabilization |
Image Stabilization
|
| Top Selling Points |
Top Selling Points
It's compatible with all Olympus's MFT cameras. You get good magnification and a lovely wide-angle view at the 12mm focal length.
|
This lens is compatible with Olympus’s Micro Four Thirds (MFT) camera range. These compact mirrorless cameras have fantastic features for sports photography. The ED 12-200mm f/3.5-6.3 is the ideal lens for sports photographers with an MFT camera.
The large focal length range gives you versatility. MFT cameras use a smaller sensor, so the 200mm focal length is the same as 400mm on a full-frame camera!
That’s the type of magnification you need from a sports photography lens. Plus, the 12mm focal length gives you a beautiful wide angle. It’s great for portraits, too.
The best lenses for sports photography are durable and tough. This Olympus lens fits that description. It’s dustproof for summer events and frostproof for winter sports. It’s also weather-resistant for shooting in all conditions. So, there will be no rain delays at your next photoshoot!
The Olympus ED 12-200mm f/3.5-6.3 doesn’t have image stabilization. But cameras like the Olympus OM-D E-M5 III and OM-D E-M10 IV have built-in stabilization. It’s a high-quality lens that offers excellent value for money.
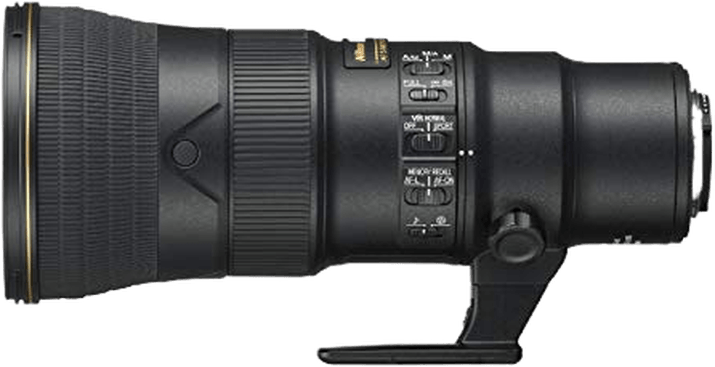
10. Nikon AF-S FX 500mm f/5.6 ED VR
| Brand |
Brand
Nikon
|
| Maximum Aperture |
Maximum Aperture
f/ 5.6
|
| Focal Length Range |
Focal Length Range
500 mm
|
| Image Stabilization |
Image Stabilization
|
| Lens Mount |
Lens Mount
F-Mount
|
| Top Selling Point |
Top Selling Point
Pristine image quality with fantastic super-telephoto reach. It has vibration reduction for sharper images and is weather sealed for outdoor photography.
|
The Nikon AF-S FX 500mm f/5.6 ED VR is one of Nikon’s finest telephoto prime lenses. You don’t have the shot versatility of a zoom lens. But the image quality is second to none. It’s a professional lens with a professional price tag. But it’s a worthy investment for anyone serious about sports photography.
Many sports photographers opt for prime lenses because of the superior image quality. And this Nikon lens is the perfect example. You get outstanding optical quality with edge-to-edge clarity. Distortion and chromatic aberration are non-existent.
With a max aperture of f/5.6, it isn’t the fastest lens. That can be limiting if you’re shooting sporting events at night. But Nikon’s VR system compensates for the slow aperture. It reduces the effect of camera shake and lets you shoot with slower shutter speeds.
The AF system uses a Silent Wave Motor (SWM). It’s quick and reliable enough for fast sporting action. And it’s practically silent. That means you can still shoot when the crowd is hushed. There’s no distraction for the player, and you can still get the shot you need.
The AF-S FX 500mm f/5.6‘s extensive weather-sealing makes it suitable for outdoor sports photography. It might be a rainy day pitchside. But the weather can’t stop you from shooting incredible sports photography.
4 Features of the Best Lens for Sports Photography
Finding the best lens is a good step in your sports photography career. If you still need more information on choosing a lens, we provide it below.
1. A Telephoto Zoom
A telephoto zoom lens is the best lens for photography. A telephoto or super-telephoto lens has a large focal length range, which means it has the power of magnification. It gets you closer to far-off subjects, which is ideal for sports photography.
You can get prime telephoto lenses. But they have a fixed focal length. A prime lens with a 200mm focal length gives you good magnification. But you have to move to change the distance.
A 70-200mm zoom lens lets you adjust the focal length anywhere in that range. So, changing the focal length zooms in or out.
2. A Large Focal Length
A large focal length and zoom range give more shooting options. Versatile sports photographers often use something like 70-200mm lenses.
Pro sports photographers may opt for prime lenses with longer focal lengths and fixed apertures. These provide higher-quality images. But they are a lot more expensive.
But 200mm gives you an excellent level of magnification. You can capture sporting action from the stands. The 70mm focal length is wide enough for environmental shots and good for sports portraits.
You don’t need 70-200mm exactly. But something in that range gives the magnification and variety of shots sports photographers need.
3. Image Stabilization
An image stabilization system is handy for sports photographers. Telephoto lenses are very sensitive to movement when you use them at the higher end of the focal length. An image stabilizer helps to reduce the effects of camera shake.
Image stabilization also lets you use slower shutter speeds with less risk of blur. It’s ideal for night matches and indoor sporting events. It also helps because telephoto lenses often have slow max apertures.
Image stabilizers are handy but not essential for all sports photographers. Many cameras have built-in image stabilization. So you can use a lens without stabilization and still achieve sharp results.
4. A Low Max Aperture
The max aperture is important in any lens. The lower the f-stop number, the more light it allows. A lower max aperture, like f/2.8, gives you more options in low-light situations. You can also use faster shutter speeds for action shots.
While an f/4 max aperture isn’t bad, an f/2.8 gives you more light to work with. A lens with a lower max f-stop is better in low-light conditions. Consider it if you want this to shoot night sports or indoor events.
Conclusion: The Best Lens for Sports Photography
Do you want your sports photos on the cover of Sports Illustrated or FourFourTwo? Then, the first thing you need is the best lens for sports photography. It’ll help you get the shots you need to succeed as a sports photographer.
The Canon EF 70-200mm f/2.8L IS III is our best sports photography lens choice. It’s a fast lens. It has a versatile focal length range a sports photographer needs. The large f/2.8 aperture helps you cover night and indoor sporting events.