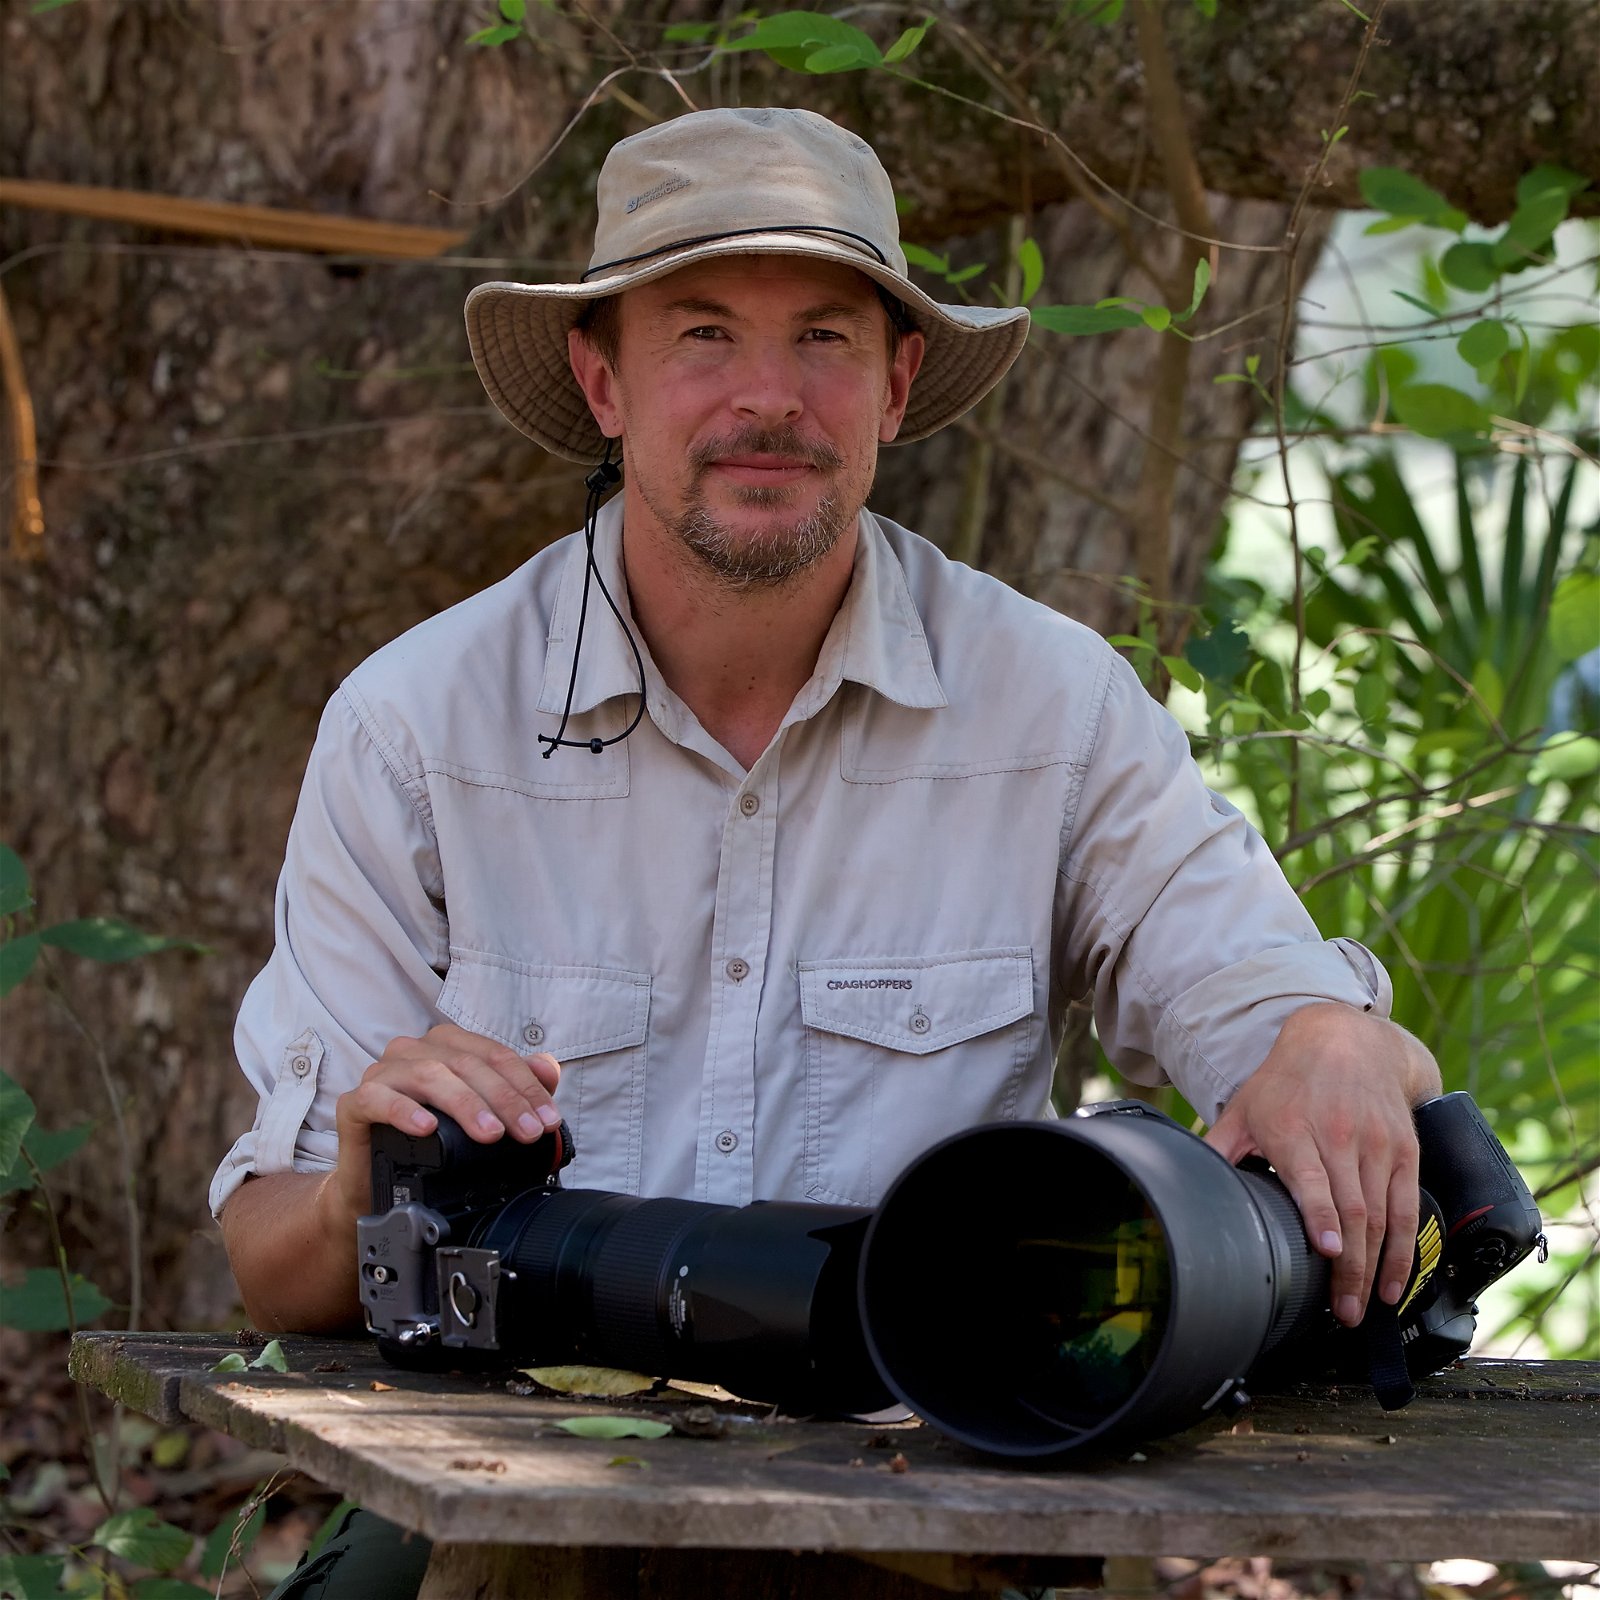
Today we’re looking at the best super telephoto lenses. I’m a wildlife photographer, and I love taking close-ups of animals. But they can be pretty skittish, so I often have to shoot from a distance.
Fortunately, it’s much easier with a super telephoto lens. That means anything over 400mm… the point at which lenses start to get very heavy—and expensive!
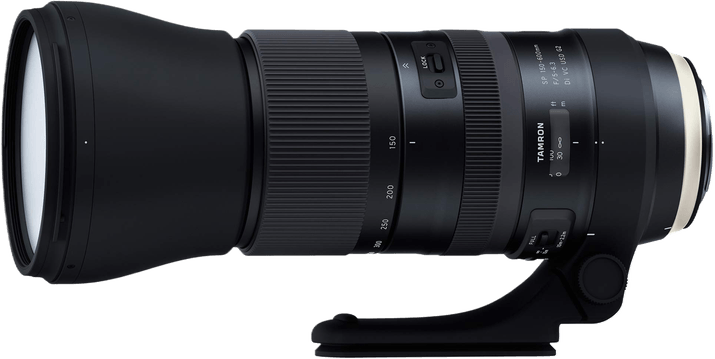
After looking at all the factors, we decided the best super telephoto lens is the Tamron SP 150-600mm f/5-6.3 Di VC USD G2. It performs to a high standard while also being available for an amazing price!
Our Top 3 Choices for The Best Super Telephoto Lens
Tamron SP 150-600mm f/5-6.3 Di VC USD G2
Tamron SP 150-600mm f/5-6.3 Di VC USD G2
Shop Offers
×
Tamron SP 150-600mm f/5-6.3 Di VC USD G2 Deals
|
(second hand)
Check Price
|
(second hand)
|
Check Price
|
Buy Now!
|
If you buy a product through one of our referral links we will earn a commission (without costing you anything).
Prices last updated on .
As an Amazon Associate, I earn from qualifying purchases. Product prices and availability are accurate as of the date/time indicated and are subject to change. Any price and availability information displayed on Amazon at the time of purchase will apply to the purchase of this product.
Unavailable
Sigma 60-600mm F/4.5-6.3 DG OS HSM | S for Canon EF
Sigma 60-600mm F/4.5-6.3 DG OS HSM | S for Canon EF
Shop Offers
×
Sigma 60-600mm F/4.5-6.3 DG OS HSM | S for Canon EF Deals
|
(second hand)
Check Price
|
(second hand)
|
Check Price
|
Buy Now!
|
If you buy a product through one of our referral links we will earn a commission (without costing you anything).
Prices last updated on .
As an Amazon Associate, I earn from qualifying purchases. Product prices and availability are accurate as of the date/time indicated and are subject to change. Any price and availability information displayed on Amazon at the time of purchase will apply to the purchase of this product.
Unavailable
Sigma 500mm F/4 DG OS HSM | S for Sigma SA
Sigma 500mm F/4 DG OS HSM | S for Sigma SA
Shop Offers
×
Sigma 500mm F/4 DG OS HSM | S for Sigma SA Deals
|
(second hand)
Check Price
|
(second hand)
|
Check Price
|
Buy Now!
|
If you buy a product through one of our referral links we will earn a commission (without costing you anything).
Prices last updated on .
As an Amazon Associate, I earn from qualifying purchases. Product prices and availability are accurate as of the date/time indicated and are subject to change. Any price and availability information displayed on Amazon at the time of purchase will apply to the purchase of this product.
Unavailable
13 Best Super Telephoto Lenses
We have divided our list into two parts:
Best Super Telephoto Lenses for DSLRs
There are plenty of zoom lenses available for a DSLR. Everything depends on your camera brand and on how far your budget stretches!
Our Top Choice
Tamron SP 150-600mm F/5-6.3 Di VC USD A011 for Canon EF
Tamron SP 150-600mm F/5-6.3 Di VC USD A011 for Canon EF
- Amazing price for its abilities
- Very lightweight
- Flex lock allows the zoom lens to be set in any position
Shop Offers
×
Tamron SP 150-600mm F/5-6.3 Di VC USD A011 for Canon EF Deals
|
(second hand)
Check Price
|
(second hand)
|
Check Price
|
Buy Now!
|
If you buy a product through one of our referral links we will earn a commission (without costing you anything).
Prices last updated on .
As an Amazon Associate, I earn from qualifying purchases. Product prices and availability are accurate as of the date/time indicated and are subject to change. Any price and availability information displayed on Amazon at the time of purchase will apply to the purchase of this product.
Unavailable
Widest Zoom Range
Sigma 60-600mm F/4.5-6.3 DG OS HSM | S for Canon EF
Sigma 60-600mm F/4.5-6.3 DG OS HSM | S for Canon EF
- Wide zoom range for multiple styles of photography
- Sharp and contrast-heavy imagery
- Short minimum focusing distance
Shop Offers
×
Sigma 60-600mm F/4.5-6.3 DG OS HSM | S for Canon EF Deals
|
(second hand)
Check Price
|
(second hand)
|
Check Price
|
Buy Now!
|
If you buy a product through one of our referral links we will earn a commission (without costing you anything).
Prices last updated on .
As an Amazon Associate, I earn from qualifying purchases. Product prices and availability are accurate as of the date/time indicated and are subject to change. Any price and availability information displayed on Amazon at the time of purchase will apply to the purchase of this product.
Unavailable
Best Prime Lens
Sigma 500mm F/4 DG OS HSM | S for Sigma SA
Sigma 500mm F/4 DG OS HSM | S for Sigma SA
- Super-fast autofocus abilities
- Wide maximum aperture
- Great build quality and handling for a large lens
Shop Offers
×
Sigma 500mm F/4 DG OS HSM | S for Sigma SA Deals
|
(second hand)
Check Price
|
(second hand)
|
Check Price
|
Buy Now!
|
If you buy a product through one of our referral links we will earn a commission (without costing you anything).
Prices last updated on .
As an Amazon Associate, I earn from qualifying purchases. Product prices and availability are accurate as of the date/time indicated and are subject to change. Any price and availability information displayed on Amazon at the time of purchase will apply to the purchase of this product.
Unavailable
Best Nikon Choice
Nikon AF-S NIKKOR 800mm F/5.6E FL ED VR
Nikon AF-S NIKKOR 800mm F/5.6E FL ED VR
- Exceptionally sharp
- Supplied teleconverter pushes focal length to 1000mm
- Fast and near-silent autofocus
Shop Offers
×
Nikon AF-S NIKKOR 800mm F/5.6E FL ED VR Deals
|
(second hand)
Check Price
|
(second hand)
|
Check Price
|
Buy Now!
|
If you buy a product through one of our referral links we will earn a commission (without costing you anything).
Prices last updated on .
As an Amazon Associate, I earn from qualifying purchases. Product prices and availability are accurate as of the date/time indicated and are subject to change. Any price and availability information displayed on Amazon at the time of purchase will apply to the purchase of this product.
Unavailable
Best 600mm Lens
Nikon AF-S NIKKOR 600mm F/4G ED VR
Nikon AF-S NIKKOR 600mm F/4G ED VR
- Amazing image quality
- Super-fast autofocus abilities
- Great vibration reduction (VR) abilities
Shop Offers
×
Nikon AF-S NIKKOR 600mm F/4G ED VR Deals
|
(second hand)
Check Price
|
(second hand)
|
Check Price
|
Buy Now!
|
If you buy a product through one of our referral links we will earn a commission (without costing you anything).
Prices last updated on .
As an Amazon Associate, I earn from qualifying purchases. Product prices and availability are accurate as of the date/time indicated and are subject to change. Any price and availability information displayed on Amazon at the time of purchase will apply to the purchase of this product.
Unavailable
Sharpest 500mm Lens
Nikon AF-S NIKKOR 500mm F/5.6E PF ED VR
Nikon AF-S NIKKOR 500mm F/5.6E PF ED VR
- 4-stop vibration reduction with Normal and Sport mode
- Fast and near-silent autofocus
- Relatively lightweight
Shop Offers
×
Nikon AF-S NIKKOR 500mm F/5.6E PF ED VR Deals
|
(second hand)
Check Price
|
(second hand)
|
Check Price
|
Buy Now!
|
If you buy a product through one of our referral links we will earn a commission (without costing you anything).
Prices last updated on .
As an Amazon Associate, I earn from qualifying purchases. Product prices and availability are accurate as of the date/time indicated and are subject to change. Any price and availability information displayed on Amazon at the time of purchase will apply to the purchase of this product.
Unavailable
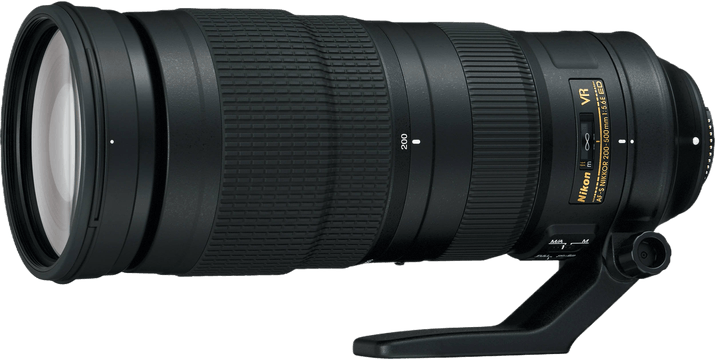
Great Build Quality
Nikon AF-S NIKKOR 200-500mm F/5.6E ED VR
Nikon AF-S NIKKOR 200-500mm F/5.6E ED VR
- Sharp results from edge to edge
- 4.5-stop vibration reduction with Normal and Sport mode
- Strong and rigid build quality
Shop Offers
×
Nikon AF-S NIKKOR 200-500mm F/5.6E ED VR Deals
|
(second hand)
Check Price
|
(second hand)
|
Check Price
|
Buy Now!
|
If you buy a product through one of our referral links we will earn a commission (without costing you anything).
Prices last updated on .
As an Amazon Associate, I earn from qualifying purchases. Product prices and availability are accurate as of the date/time indicated and are subject to change. Any price and availability information displayed on Amazon at the time of purchase will apply to the purchase of this product.
Unavailable
Best Canon Lens
Canon EF 800mm F/5.6L IS USM
Canon EF 800mm F/5.6L IS USM
- Amazing image quality
- Fast and precise autofocus
- 4-stop optical image stabilization with single-shot, panning, and exposure-only modes
Shop Offers
×
Canon EF 800mm F/5.6L IS USM Deals

|
(second hand)
Check Price
|
(second hand)
|
Check Price
|
Buy Now!
|
If you buy a product through one of our referral links we will earn a commission (without costing you anything).
Prices last updated on .
As an Amazon Associate, I earn from qualifying purchases. Product prices and availability are accurate as of the date/time indicated and are subject to change. Any price and availability information displayed on Amazon at the time of purchase will apply to the purchase of this product.
Unavailable
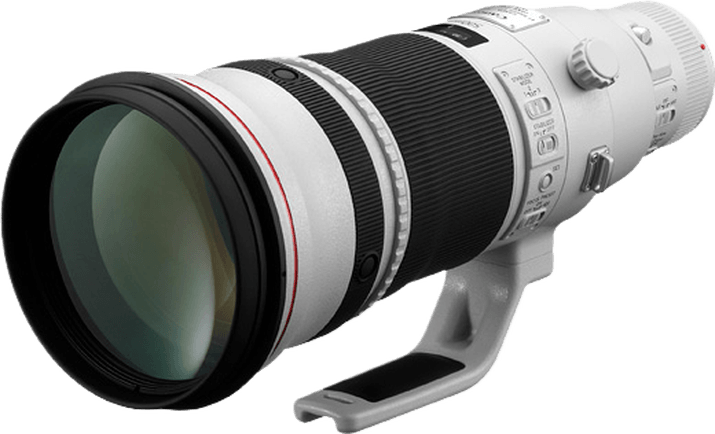
Best Image Stabilization
Canon EF 600mm F/4L IS III USM
Canon EF 600mm F/4L IS III USM
- 5-stop optical image stabilization with single-shot, panning, and exposure-only modes
- Fast and near-silent autofocus
- Wide maximum aperture
Shop Offers
×
Canon EF 600mm F/4L IS III USM Deals
|
(second hand)
Check Price
|
(second hand)
|
Check Price
|
Buy Now!
|
If you buy a product through one of our referral links we will earn a commission (without costing you anything).
Prices last updated on .
As an Amazon Associate, I earn from qualifying purchases. Product prices and availability are accurate as of the date/time indicated and are subject to change. Any price and availability information displayed on Amazon at the time of purchase will apply to the purchase of this product.
Unavailable
Best Canon 500mm Lens
Canon EF 500mm F/4L IS II USM
Canon EF 500mm F/4L IS II USM
- Sharp results from edge to edge
- 4-stop optical image stabilization with single-shot, panning, and exposure-only modes
- Wide maximum aperture
Shop Offers
×
Canon EF 500mm F/4L IS II USM Deals
|
(second hand)
Check Price
|
(second hand)
|
Check Price
|
Buy Now!
|
If you buy a product through one of our referral links we will earn a commission (without costing you anything).
Prices last updated on .
As an Amazon Associate, I earn from qualifying purchases. Product prices and availability are accurate as of the date/time indicated and are subject to change. Any price and availability information displayed on Amazon at the time of purchase will apply to the purchase of this product.
Unavailable
1. Tamron SP 150-600mm f/5-6.3 Di VC USD G2
Shop Offers
×
Tamron SP 150-600mm f/5-6.3 Di VC USD G2 Deals
|
(second hand)
Check Price
|
(second hand)
|
Check Price
|
Buy Now!
|
If you buy a product through one of our referral links we will earn a commission (without costing you anything).
Prices last updated on .
As an Amazon Associate, I earn from qualifying purchases. Product prices and availability are accurate as of the date/time indicated and are subject to change. Any price and availability information displayed on Amazon at the time of purchase will apply to the purchase of this product.
Unavailable
|
Brand |
Brand
Tamron
|
|
Maximum Aperture |
Maximum Aperture
f/ 5-6.3
|
|
Focal Length Range |
Focal Length Range
150-600 mm
|
|
Image Stabilization |
Image Stabilization
|
|
Best For |
Best For
Photographers who want a super telephoto for a great price
|
Tamron SP 150-600mm f/5-6.3 Di VC USD G2
This Tamron lens is an upgraded version of the SP 150-600mm G1, first introduced in December 2013. The SP 150-600mm f/5-6.3 Di VC USD G2 provides better overall optical performance. And it has a faster autofocus speed.
It also features vibration compensation enhancements, fluorine coating, and a flex zoom lock. And it has an optional custom-made 1.4x teleconverter.
It’s designed for amateurs who’d rather not spend quite so much as professionals… but want to squeeze that last drop of sharpness out of their images!
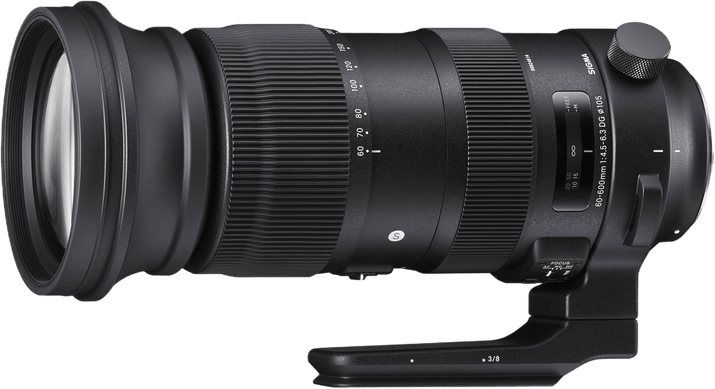
2. Sigma 60-600mm f/4.5-6.3 DG OS HSM
Shop Offers
×
Sigma 60-600mm F/4.5-6.3 DG OS HSM | S for Canon EF Deals
|
(second hand)
Check Price
|
(second hand)
|
Check Price
|
Buy Now!
|
If you buy a product through one of our referral links we will earn a commission (without costing you anything).
Prices last updated on .
As an Amazon Associate, I earn from qualifying purchases. Product prices and availability are accurate as of the date/time indicated and are subject to change. Any price and availability information displayed on Amazon at the time of purchase will apply to the purchase of this product.
Unavailable
|
Brand |
Brand
Sigma
|
|
Maximum Aperture |
Maximum Aperture
f/ 6.3
|
|
Focal Length Range |
Focal Length Range
60-600 mm
|
|
Image Stabilization |
Image Stabilization
|
|
Best For |
Best For
Photographers who want a wide zoom range
|
Sigma 60-600mm F/4.5-6.3 DG OS HSM | S for Canon EF
Sigma’s 60-600mm f/4.5-6.3 DG OS HSM is the only lens with that range on the market. It offers such a huge zoom range. You could look at it as two lenses in one!
It also has a reasonably lightweight body. It comprises magnesium alloy, carbon-fiber-reinforced plastic, and a thermally stable composite. But the max aperture is a little narrow and gets narrower as you zoom in.
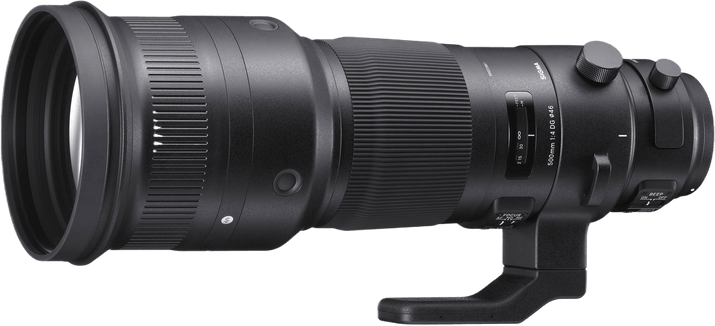
3. Sigma 500mm f/4.0 DG OS HSM
Shop Offers
×
Sigma 500mm F/4 DG OS HSM | S for Sigma SA Deals
|
(second hand)
Check Price
|
(second hand)
|
Check Price
|
Buy Now!
|
If you buy a product through one of our referral links we will earn a commission (without costing you anything).
Prices last updated on .
As an Amazon Associate, I earn from qualifying purchases. Product prices and availability are accurate as of the date/time indicated and are subject to change. Any price and availability information displayed on Amazon at the time of purchase will apply to the purchase of this product.
Unavailable
|
Brand |
Brand
Sigma
|
|
Maximum Aperture |
Maximum Aperture
f/ 4.0
|
|
Focal Length Range |
Focal Length Range
500 mm
|
|
Image Stabilization |
Image Stabilization
|
|
Best For |
Best For
Photographers who love prime lenses
|
Sigma 500mm F/4 DG OS HSM | S for Sigma SA
The 500mm f/4.0 DG OS HSM is Sigma’s flagship lens for sport and nature photography. It provides sharp images with a fast and accurate autofocus system and a wide max aperture.
It has one Special Low Dispersion (SLD) and two Fluorite Low Dispersion (FLD) lens elements. They help minimize chromatic aberration and distortion and preserve image clarity.
4. Nikon AF-S FX 800mm f/5.6 ED VR
Shop Offers
×
Nikon AF-S NIKKOR 800mm F/5.6E FL ED VR Deals
|
(second hand)
Check Price
|
(second hand)
|
Check Price
|
Buy Now!
|
If you buy a product through one of our referral links we will earn a commission (without costing you anything).
Prices last updated on .
As an Amazon Associate, I earn from qualifying purchases. Product prices and availability are accurate as of the date/time indicated and are subject to change. Any price and availability information displayed on Amazon at the time of purchase will apply to the purchase of this product.
Unavailable
|
Brand |
Brand
Nikon
|
|
Maximum Aperture |
Maximum Aperture
f/ 5.6
|
|
Focal Length Range |
Focal Length Range
800 mm
|
|
Image Stabilization |
Image Stabilization
|
|
Best For |
Best For
Nikon photographers who want the longest focal length
|
Nikon AF-S NIKKOR 800mm F/5.6E FL ED VR
The AF-S FX 800mm f/5.6 ED VR is the longest Nikon lens. The sharpness of the images is outstanding, and it paired very well with my old Nikon D850. It comes with a 1.25x attachment.
It’s the one I owned until very recently. If you don’t mind the weight and don’t often need to handhold, this is the lens for you!
5. Nikon AF-S FX 600mm f/4.0 ED VR
Shop Offers
×
Nikon AF-S NIKKOR 600mm F/4G ED VR Deals
|
(second hand)
Check Price
|
(second hand)
|
Check Price
|
Buy Now!
|
If you buy a product through one of our referral links we will earn a commission (without costing you anything).
Prices last updated on .
As an Amazon Associate, I earn from qualifying purchases. Product prices and availability are accurate as of the date/time indicated and are subject to change. Any price and availability information displayed on Amazon at the time of purchase will apply to the purchase of this product.
Unavailable
|
Brand |
Brand
Nikon
|
|
Maximum Aperture |
Maximum Aperture
f/ 4.0
|
|
Focal Length Range |
Focal Length Range
600 mm
|
|
Image Stabilization |
Image Stabilization
|
|
Best For |
Best For
Nikon users who need a wide f/4 aperture
|
Nikon AF-S NIKKOR 600mm F/4G ED VR
Nikon’s AF-S FX 600mm f/4.0 ED VR is the slightly longer equivalent of the 500mm AF-S f/4G ED VR SWM. It’s aimed at professional sports and nature photographers.
It has a wide max aperture. It features a sophisticated autofocus system for good low-light performance. And it shows Nikon’s usual level of sharpness and camera build quality.
It introduces lighter fluorite elements at the front. This makes it much easier to handle than the previous version. But it’s still heavier than the latest 600mm Canon equivalent.
6. AF-S FX 500mm f/5.6E PF ED VR
Shop Offers
×
Nikon AF-S NIKKOR 500mm F/5.6E PF ED VR Deals
|
(second hand)
Check Price
|
(second hand)
|
Check Price
|
Buy Now!
|
If you buy a product through one of our referral links we will earn a commission (without costing you anything).
Prices last updated on .
As an Amazon Associate, I earn from qualifying purchases. Product prices and availability are accurate as of the date/time indicated and are subject to change. Any price and availability information displayed on Amazon at the time of purchase will apply to the purchase of this product.
Unavailable
|
Brand |
Brand
Nikon
|
|
Maximum Aperture |
Maximum Aperture
f/ 5.6
|
|
Focal Length Range |
Focal Length Range
500 mm
|
|
Image Stabilization |
Image Stabilization
|
|
Best For |
Best For
Nikon photographers who want complete control over manual focus
|
Nikon AF-S NIKKOR 500mm F/5.6E PF ED VR
Amazon.com
$3,296.95 $3,596.95
The AF-S FX 500mm f/5.6E PF ED VR is a brilliant super-telephoto lens for Nikon DSLR cameras. It doesn’t have the fastest max aperture at f/5.6. But the built-in vibration reduction system helps you achieve the right exposure in low light. It’s also one of the sharpest 500mm lenses on the market.
7. Nikon AF-S FX 200-500mm f/5.6 ED VR
Shop Offers
×
Nikon AF-S NIKKOR 200-500mm F/5.6E ED VR Deals
|
(second hand)
Check Price
|
(second hand)
|
Check Price
|
Buy Now!
|
If you buy a product through one of our referral links we will earn a commission (without costing you anything).
Prices last updated on .
As an Amazon Associate, I earn from qualifying purchases. Product prices and availability are accurate as of the date/time indicated and are subject to change. Any price and availability information displayed on Amazon at the time of purchase will apply to the purchase of this product.
Unavailable
|
Brand |
Brand
Nikon
|
|
Maximum Aperture |
Maximum Aperture
f/ 5.6
|
|
Focal Length Range |
Focal Length Range
200-500 mm
|
|
Image Stabilization |
Image Stabilization
|
|
Best For |
Best For
Nikon photographers who want a super telephoto zoom lens
|
Nikon AF-S NIKKOR 200-500mm F/5.6E ED VR
Amazon.com
$1,056.95 $1,396.95
The AF-S FX 200-500mm f/5.6 ED VR is designed for the “enthusiast” rather than the professional. Still, it outperforms the 150-600mm counterpart from Tamron. The Nikon has better focusing ability. And it performs better in low-light conditions or with a teleconverter.
It also has a constant max aperture of f/5.6. It’s an advantage over similar third-party lenses.
8. Canon EF 800mm f/5.6L IS USM
Shop Offers
×
Canon EF 800mm F/5.6L IS USM Deals
|
(second hand)
Check Price
|
(second hand)
|
Check Price
|
Buy Now!
|
If you buy a product through one of our referral links we will earn a commission (without costing you anything).
Prices last updated on .
As an Amazon Associate, I earn from qualifying purchases. Product prices and availability are accurate as of the date/time indicated and are subject to change. Any price and availability information displayed on Amazon at the time of purchase will apply to the purchase of this product.
Unavailable
|
Brand |
Brand
Canon
|
|
Maximum Aperture |
Maximum Aperture
f/ 5.6
|
|
Focal Length Range |
Focal Length Range
800 mm
|
|
Image Stabilization |
Image Stabilization
|
|
Best For |
Best For
Canon photographers who want the longest focal length
|
Canon EF 800mm F/5.6L IS USM
The EF 800mm f/5.6L IS USM is the longest lens in Canon’s current range. And it’s excellent for getting close-ups or distance shots if you’re a wildlife photographer.
I had a Nikon 800mm lens for many years. And I took around two-thirds of all my shots with it. It was about the same weight as this Canon one. But that meant it was too heavy to handhold for more than a few seconds at a time.
9. Canon EF 600mm f/4L IS USM
Shop Offers
×
Canon EF 600mm F/4L IS III USM Deals
|
(second hand)
Check Price
|
(second hand)
|
Check Price
|
Buy Now!
|
If you buy a product through one of our referral links we will earn a commission (without costing you anything).
Prices last updated on .
As an Amazon Associate, I earn from qualifying purchases. Product prices and availability are accurate as of the date/time indicated and are subject to change. Any price and availability information displayed on Amazon at the time of purchase will apply to the purchase of this product.
Unavailable
|
Brand |
Brand
Canon
|
|
Maximum Aperture |
Maximum Aperture
f/ 4.0
|
|
Focal Length Range |
Focal Length Range
600 mm
|
|
Image Stabilization |
Image Stabilization
|
|
Best For |
Best For
Canon users who need a wide f/4 aperture with a long focal length
|
Canon EF 600mm F/4L IS III USM
The EF 600mm f/4L IS USM is another L-series lens. It’s great for sports, wildlife, or photojournalism. It’s also light enough to handhold. The new design shifts most glass elements to the back of the lens to improve balance and handling.
It’s the sixth generation of Canon’s 600mm f/4 series. And it’s the third version with image stabilization to help with camera shake. It encapsulates the very best in lens technology.
10. Canon EF 500mm f/4.0L IS II USM
Shop Offers
×
Canon EF 500mm F/4L IS II USM Deals
|
(second hand)
Check Price
|
(second hand)
|
Check Price
|
Buy Now!
|
If you buy a product through one of our referral links we will earn a commission (without costing you anything).
Prices last updated on .
As an Amazon Associate, I earn from qualifying purchases. Product prices and availability are accurate as of the date/time indicated and are subject to change. Any price and availability information displayed on Amazon at the time of purchase will apply to the purchase of this product.
Unavailable
|
Brand |
Brand
Canon
|
|
Maximum Aperture |
Maximum Aperture
f/ 4.0
|
|
Focal Length Range |
Focal Length Range
500 mm
|
|
Image Stabilization |
Image Stabilization
|
|
Best For |
Best For
Canon users who need a wide f/4 aperture
|
Canon EF 500mm F/4L IS II USM
The EF 500mm f/4.0L IS II USM is part of Canon’s premium L-series of telephoto lenses. This lens is designed for wildlife and sports photographers. It provides sharpness, fast autofocus, and exemplary performance in low light.
Best Super Telephoto Lenses for Mirrorless Cameras
There are very few extreme telephoto lenses available for mirrorless cameras. And Nikon doesn’t have a single one over 400mm! This will change in the next couple of years. But Canon and Sony are currently the market leaders.
Our Top Choice
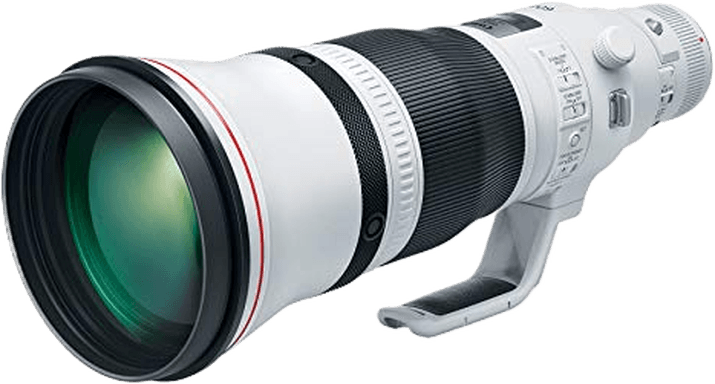
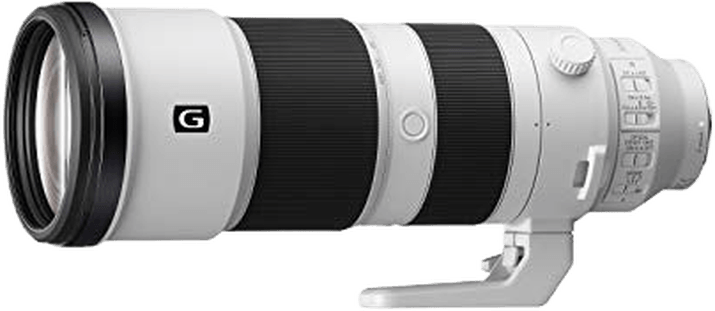
Sony FE 600mm F/4 GM OSS SEL600F40GM
Sony FE 600mm F/4 GM OSS SEL600F40GM
- Fast and precise autofocus
- Great selection of lens controls
- Durable and lightweight build quality
Shop Offers
×
Sony FE 600mm F/4 GM OSS SEL600F40GM Deals
|
(second hand)
Check Price
|
(second hand)
|
Check Price
|
Buy Now!
|
If you buy a product through one of our referral links we will earn a commission (without costing you anything).
Prices last updated on .
As an Amazon Associate, I earn from qualifying purchases. Product prices and availability are accurate as of the date/time indicated and are subject to change. Any price and availability information displayed on Amazon at the time of purchase will apply to the purchase of this product.
Unavailable
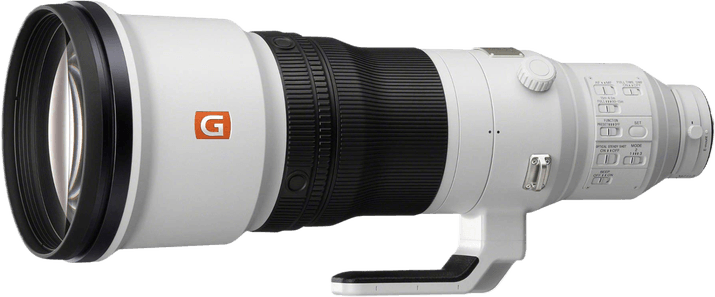
Best Zoom Option
Sony FE 200-600mm F/5.6-6.3 G OSS SEL200600G
Sony FE 200-600mm F/5.6-6.3 G OSS SEL200600G
- Wide telephoto zoom range
- Teleconverter compatibility
- Internal zoom design
Shop Offers
×
Sony FE 200-600mm F/5.6-6.3 G OSS SEL200600G Deals
|
(second hand)
Check Price
|
(second hand)
|
Check Price
|
Buy Now!
|
If you buy a product through one of our referral links we will earn a commission (without costing you anything).
Prices last updated on .
As an Amazon Associate, I earn from qualifying purchases. Product prices and availability are accurate as of the date/time indicated and are subject to change. Any price and availability information displayed on Amazon at the time of purchase will apply to the purchase of this product.
Unavailable
Best Canon Lens
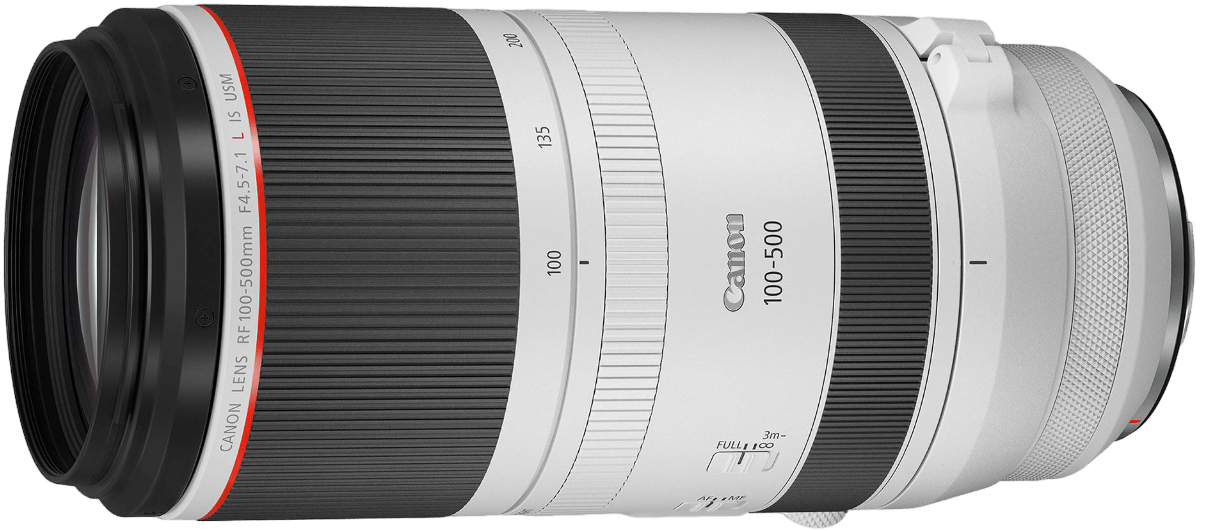
Canon RF 100-500mm F/4.5-7.1L IS USM
Canon RF 100-500mm F/4.5-7.1L IS USM
- Sharp telephoto from edge to edge
- Adjustable zoom tension
- Lightweight and compact design
Shop Offers
×
Canon RF 100-500mm F/4.5-7.1L IS USM Deals
|
(second hand)
Check Price
|
(second hand)
|
Check Price
|
Buy Now!
|
If you buy a product through one of our referral links we will earn a commission (without costing you anything).
Prices last updated on .
As an Amazon Associate, I earn from qualifying purchases. Product prices and availability are accurate as of the date/time indicated and are subject to change. Any price and availability information displayed on Amazon at the time of purchase will apply to the purchase of this product.
Unavailable
1. Sony FE 600mm f/4.0 GM
Shop Offers
×
Sony FE 600mm F/4 GM OSS SEL600F40GM Deals
|
(second hand)
Check Price
|
(second hand)
|
Check Price
|
Buy Now!
|
If you buy a product through one of our referral links we will earn a commission (without costing you anything).
Prices last updated on .
As an Amazon Associate, I earn from qualifying purchases. Product prices and availability are accurate as of the date/time indicated and are subject to change. Any price and availability information displayed on Amazon at the time of purchase will apply to the purchase of this product.
Unavailable
|
Brand |
Brand
Sony
|
|
Maximum Aperture |
Maximum Aperture
f/ 4.0
|
|
Focal Length Range |
Focal Length Range
600 mm
|
|
Image Stabilization |
Image Stabilization
|
|
Best For |
Best For
Sony mirrorless users
|
Sony FE 600mm F/4 GM OSS SEL600F40GM
Sony’s FE 600mm f/4.0 GM prime lens belongs to the premium G Master series of lenses. It is the longest lens in the Sony lineup and the lightest 600mm lens on the market.
It’s designed for wildlife, sports, and action photography. And it boasts excellent image quality and rapid, precise autofocus. I already have the 400mm f/2.8… and this is next on my list!
2. Sony FE 200-600mm f/5.6-6.3 G OSS
Shop Offers
×
Sony FE 200-600mm F/5.6-6.3 G OSS SEL200600G Deals
|
(second hand)
Check Price
|
(second hand)
|
Check Price
|
Buy Now!
|
If you buy a product through one of our referral links we will earn a commission (without costing you anything).
Prices last updated on .
As an Amazon Associate, I earn from qualifying purchases. Product prices and availability are accurate as of the date/time indicated and are subject to change. Any price and availability information displayed on Amazon at the time of purchase will apply to the purchase of this product.
Unavailable
|
Brand |
Brand
Sony
|
|
Maximum Aperture |
Maximum Aperture
f/ 6.3
|
|
Focal Length Range |
Focal Length Range
200-600 mm
|
|
Image Stabilization |
Image Stabilization
|
|
Best For |
Best For
Sony photographers who want a wide zoom
|
Sony FE 200-600mm F/5.6-6.3 G OSS SEL200600G
Amazon.com
$1,898.00 $1,999.99
Sony’s FE 200-600mm f/5.6-6.3 G OSS is another lens designed for wildlife, sports, and action photography. It boasts excellent image quality. And its affordable price shows that it’s aimed at the “enthusiast” market.
3. Canon RF 100-500mm f/4.5-7.1L IS USM
Shop Offers
×
Canon RF 100-500mm F/4.5-7.1L IS USM Deals
|
(second hand)
Check Price
|
(second hand)
|
Check Price
|
Buy Now!
|
If you buy a product through one of our referral links we will earn a commission (without costing you anything).
Prices last updated on .
As an Amazon Associate, I earn from qualifying purchases. Product prices and availability are accurate as of the date/time indicated and are subject to change. Any price and availability information displayed on Amazon at the time of purchase will apply to the purchase of this product.
Unavailable
|
Brand |
Brand
Canon
|
|
Maximum Aperture |
Maximum Aperture
f/ 4.5
|
|
Focal Length Range |
Focal Length Range
100-500 mm
|
|
Image Stabilization |
Image Stabilization
|
|
Best For |
Best For
Canon mirrorless users
|
Canon RF 100-500mm F/4.5-7.1L IS USM
Canon’s RF 100-500mm f/4.5-7.1L IS USM lens is part of Canon’s premium L-series. It is a specialist mirrorless lens designed for sports and nature photographers. It gives you sharpness, fast autofocus, and portability. The weather sealing and lens coatings also make it a durable kit.
What to Look for in Super Telephoto Lenses
There are four main factors for super telephoto lenses:
All those come at a price, though. You might have to compromise in a few different ways:
Conclusion
If you shoot wildlife like me, I’d go mirrorless and pair a Sony 600mm f/4 GM OSS with a Sony a1. But not everyone can afford the best super telephoto lenses at any price. If your budget doesn’t stretch that far, I recommend going for the Sony 200-600mm with a cheaper mirrorless camera, such as a second-hand Sony A7.
Finally, do you already have a DSLR and can’t face trading it in? I suggest saving for either the Nikon AF NIKKOR 800mm f/5.6E FL ED VR or the Canon EF 200-400mm f/4L IS USM with a built-in extender. But most importantly, which is the best super telephoto lens for you?
Our Top 3 Choices for The Best Super Telephoto Lens
Tamron SP 150-600mm f/5-6.3 Di VC USD G2
Tamron SP 150-600mm f/5-6.3 Di VC USD G2
Shop Offers
×
Tamron SP 150-600mm f/5-6.3 Di VC USD G2 Deals
|
(second hand)
Check Price
|
(second hand)
|
Check Price
|
Buy Now!
|
If you buy a product through one of our referral links we will earn a commission (without costing you anything).
Prices last updated on .
As an Amazon Associate, I earn from qualifying purchases. Product prices and availability are accurate as of the date/time indicated and are subject to change. Any price and availability information displayed on Amazon at the time of purchase will apply to the purchase of this product.
Unavailable
Sigma 60-600mm F/4.5-6.3 DG OS HSM | S for Canon EF
Sigma 60-600mm F/4.5-6.3 DG OS HSM | S for Canon EF
Shop Offers
×
Sigma 60-600mm F/4.5-6.3 DG OS HSM | S for Canon EF Deals
|
(second hand)
Check Price
|
(second hand)
|
Check Price
|
Buy Now!
|
If you buy a product through one of our referral links we will earn a commission (without costing you anything).
Prices last updated on .
As an Amazon Associate, I earn from qualifying purchases. Product prices and availability are accurate as of the date/time indicated and are subject to change. Any price and availability information displayed on Amazon at the time of purchase will apply to the purchase of this product.
Unavailable
Sigma 500mm F/4 DG OS HSM | S for Sigma SA
Sigma 500mm F/4 DG OS HSM | S for Sigma SA
Shop Offers
×
Sigma 500mm F/4 DG OS HSM | S for Sigma SA Deals
|
(second hand)
Check Price
|
(second hand)
|
Check Price
|
Buy Now!
|
If you buy a product through one of our referral links we will earn a commission (without costing you anything).
Prices last updated on .
As an Amazon Associate, I earn from qualifying purchases. Product prices and availability are accurate as of the date/time indicated and are subject to change. Any price and availability information displayed on Amazon at the time of purchase will apply to the purchase of this product.
Unavailable