I’ve been using the Sony A7 III since it was released. I have taken thousands of photos and shot countless videos with it. So this review is based on years of hard use and intimate knowledge of its strengths and weaknesses.
With a newer model available, perhaps the question is whether this full frame mirrorless camera is still a good choice. I hope my experience will help you decide whether the Sony A7 III is a good fit for your needs and your pocket. Read on to find out more!
Sony A7 III Overview and Specifications
Sony A7 III
| Released |
Released
2018
|
| Sensor Format |
Sensor Format
 Full Frame Full Frame |
| Lens Mount |
Lens Mount
Sony FE
|
| Megapixels |
Megapixels
24.2 MP |
| Autofocus Points |
Autofocus Points
693 |
| Maximum ISO (Native) |
Maximum ISO (Native)
51,200 |
| Frame Rate |
Frame Rate
10 fps |
| In-body Stabilization |
In-body Stabilization
|
| Video |
Video
|
Sony’s digital cameras are getting more and more popular, and the brand innovates continuously. Sony releases new versions of their camera bodies every two to three years. Nikon and Canon only do that every four to five years. They clearly have the desire to continually innovate as a brand. And that shows by how frequently they release revolutionary cameras.
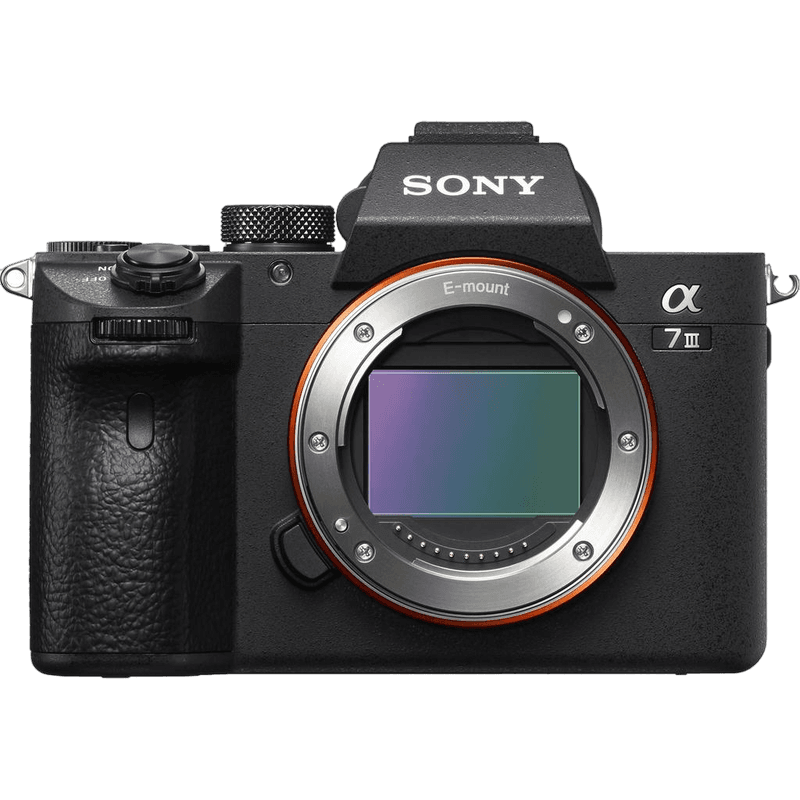
The Sony A7 III has a full frame 24 MP CMOS image sensor and shoots 10 frames per second. It also captures 4K video at up to 30 fps and has handy dual memory card slots. It’s a full frame camera that is positioned as an all-rounder within the Sony camera lineup.
I consider it a great fit, especially for portrait and event photographers. In comparison, the A9 lineup is mostly for sports and wildlife photographers. And the A7R cameras are aimed at professional studio and landscape photographers who appreciate extra detail in their images.
One of the key features of the A7 III is its fast and accurate autofocus. Its eye autofocus system finds the eye almost instantly. It’s a great addition for photographers and videographers alike.
Despite the competition, this camera still holds its position amongst the best full frame mirrorless cameras. And there are quite a few reasons for that.
Who Is The Sony A7 III For?
The Sony A7 III is a smart choice for many photographers. It’s a great all-rounder that comes at a reasonable price.
The high-resolution sensor, fast and reliable autofocus, and good dynamic range made it wildly popular among portrait and landscape photographers. And due to the outstanding autofocus and 10 fps burst, I even recommend it to photographers who are shooting action on a budget.
The camera’s smaller size makes it a good option for street and travel photography. This is particularly true when paired with a smaller lens.
Quite frankly, it does a marvelous job in all niches of photography.
Key Features
So let’s see how the A7 III lives up to its expectations in a real-life test.
Mount and Compatibility
The Sony A7 III uses the E-mount lens system that’s been on the market for many years. Now a wide range of E-mount lenses is available, both by Sony and by other third-party manufacturers. The E-mount has a typically short flange distance that results in great compatibility and easy adaptability.
As an ex-Canon user, I use lens mount adapters. These allow me to apply Canon EF lenses on an E-mount camera (like the A7 III). It gives aperture control and full autofocus. But the AF will be a bit slower than with native E-mount lenses.
One of the reasons people switch from DSLRs to mirrorless cameras is the smaller size and reduced weight. If you’re looking to make this choice, the A7 III is a good starting point.
It is worth mentioning that most of the native Sony E-mount lenses are quite heavy pieces. Not to mention the high-end alternatives like the Distagon T* FE 35mm f/1.4 ZA, which is comparable to the size of DSLR lenses. This is a bit contradictory to the general idea behind lightweight mirrorless cameras.
The greatest thing about the E-mount is the range of Sony cameras that use it. E-mount lenses work on the three main camera models and all their different iterations in the Sony full frame lineup. These are the A9, A7, A7R, A7S and A7C series. It’s worth noting that the full frame compatible lenses can also be used on Sony’s APS-C models.
Sensor and Image Quality
The A7 III has a 24 MP full frame BSI CMOS sensor. This results in 6000 x 4000-pixel images and great low-light performance.
The dynamic range of the sensor is 13.8 EV. And having worked with this camera a great deal, I can confirm it’s excellent. This dynamic range allows amazing recovery of details, especially in shady parts.
I have to warn you that the dynamic range is compromised when shooting compressed RAW files. But uncompressed RAW files are larger and take longer to write to memory cards. I only advise using compressed RAW when shooting fast-paced action or events. In other cases, go for the larger files with a better dynamic range.
Another great asset is the in-body image stabilization (IBIS) with 5 stops of stabilization. This is extremely helpful in low-light situations. And you can use it for handheld shots with a slower shutter speed.

Another favorite feature of mine is the high ISO performance. I can shoot at up to ISO 12,800 in low-light events where using a flash isn’t permitted. There is obviously some noise at that level, but not a lot. See for yourself in the image above!
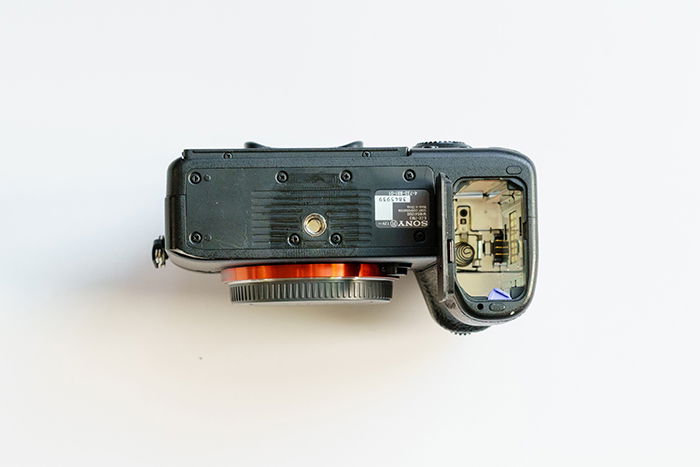
A minor drawback is that when taking the lens off the camera, the sensor isn’t covered—unlike the Canon EOS R models. This means the sensor is exposed to dust if the camera is left while changing lenses.
To avoid dust damage and ensure a longer lifespan, turn the camera off and wait a few seconds before removing a lens. This gives the sensor time to switch off. A handy feature is the built-in sensor cleaning function. This shakes the sensor to remove any dust, but it doesn’t always do a perfect job.
Focusing and Burst
The Sony A7 III‘s autofocus is so outstanding that it has turned many DSLR users into Sony fans.
There are 693 phase-detection points that give a 93% coverage of the frame. And the continuous focusing mode makes a calculation 30 times per second. This results in a highly responsive and accurate autofocus system.
One drawback should be mentioned here, though. When shooting in continuous focus mode with a high f-stop, the camera doesn’t open the aperture to allow more light in. But if you shoot with a wide aperture, it’s not an issue.

Eye Autofocus is an awesome feature that makes a photographer’s life easier. The camera detects human eyes (or animal eyes!) in the scene. Then, using continuous autofocus, it locks on the eye and tracks it.
It’s a killer feature for portrait and event photographers. For example, at a wedding, it can track the bride’s eye as she walks down the aisle.
There are several different focus modes available. It’s got wide, flexible spot focus of different sizes, zone, center, expandable flexible spot, and lock-on versions of all these modes. Eye Autofocus can be allocated to a custom button on the camera. This can be a handy customization as Eye AF overrides almost all the other AF modes.

The A7 III can shoot 10 frames per second both with a mechanical or a silent electronic shutter. The silent shutter mode is great for static subjects. But if the camera or subject is moving, the images will suffer from a major rolling shutter effect.
There are four different burst speeds—Low, Medium, High, and High+. The High+ mode shoots at 10 frames per second. It’s worth noting that this burst speed fills up the camera’s memory buffer quickly, even with fast SD cards. It can be frustrating, especially if you’re shooting fast. Sometimes this prevents you from tweaking your camera settings.
Video Features
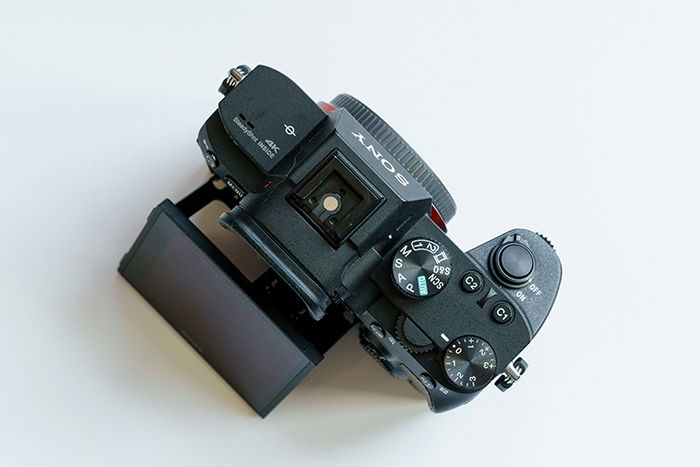
The A7 III shoots 4K video up to 30 frames per second and 1080p up to 60 frames per second. These assets make the A7 III a capable camera for videography. But due to its 8-bit mode, the color depth is not as good as in professional videography cameras. But if you look at the Sony family, the A7 III’s video feature set is better than the more expensive A9‘s.
You can record videos in different picture profiles and logs. This makes color grading the footage in post-production easier and better. Sound recording is easy thanks to the external microphone and headphone ports.
Unfortunately, the autofocus in video mode doesn’t compare to stills. It performs well with slow-moving and predictable subjects. But the fantastic continuous focus tracking doesn’t work as well for videos as it does for photos. But wide open, you’ll be pretty satisfied using the autofocus in scenes that are not too busy. The A7 III will automatically prioritize and lock on to faces.

In manual focus, the A7 III offers focus peaking with adjustable intensity. It’s especially helpful when shooting with a shallow depth of field. It also offers exposure warning zebras to ensure that no important parts of the frame are overexposed.
The A7 III doesn’t offer all the bells and whistles of more specialized video bodies like the Panasonic Lumix GH6 or the Sony A7S III. But the A7 III certainly offers great video features, making it a popular choice for many videographers on a budget. And it’s great for taking B-roll footage.
Body and Handling
One of the biggest benefits of mirrorless cameras is their smaller size. And true to form, the Sony A7 III weighs only 650 g (1.43 lbs) including a battery. In comparison, my previous camera was the Canon 5D Mark IV which weighs 890 g (1.96 lb). And it’s not just lighter. The A7 III is also smaller, measuring 127 x 96 x 74 mm (5 x 3.78 x 2.91 in).
The smaller size is great in theory, but how does it handle?
The grip is smaller than on a DSLR. This makes many people—especially those with larger hands—purchase a battery grip or a grip extension that screws into the bottom of the camera. This will improve usability and comfort.
The A7 III is an extremely customizable camera. There are four official custom buttons. But you can actually customize 13 buttons. You can program these buttons so they suit your needs and preferences. Another great feature is that you can recall a group of settings with the touch of a button.
The magnesium-alloy camera body has decent weather sealing. But it’s not as advanced as high-end DSLRs. The bottom of the camera is the weakest area. So make sure you don’t put the camera down on a wet surface.
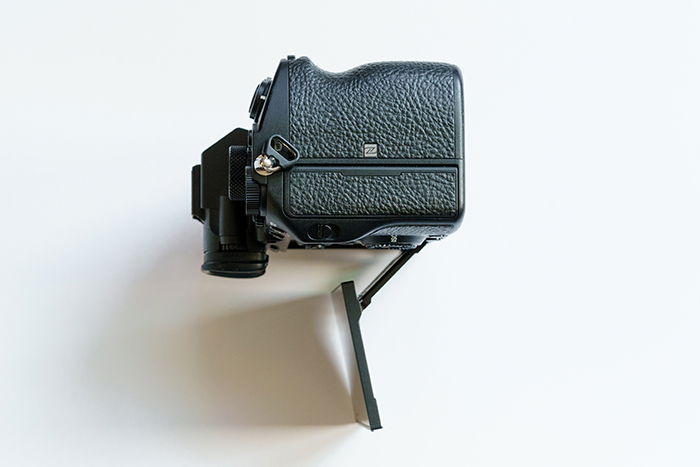
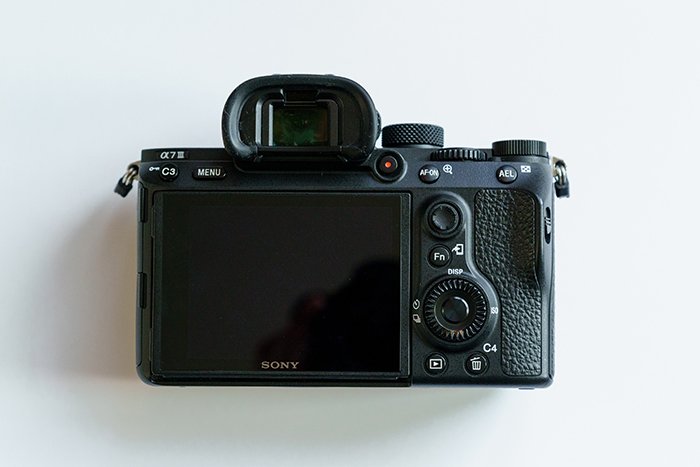
The flip-out screen is definitely something to love. It’s great when shooting from above or below your eye level. But I have to mention that it’s not a fully articulating screen.
The LCD is a touchscreen that you can even use for selecting a focus point. It can also serve as an alternative to the joystick for moving the focus point when shooting with the camera up to your eye.
The viewfinder is bright and responsive. But there are many competitors that have more advanced ones. And the little rubber eye cup that attaches to the EVF has a habit of falling off. I’ve lost a few.
The body also has two SD card slots. One supports the faster UHS-II and the other is UHS-I. This means if you’re shooting to both cards, the transfer speed is limited to the slower slot.
The battery life on the A7 III with the Sony NP-FZ100 battery is excellent. Sony says the A7 III will take 710 shots from a fully charged battery.
Alternatives
The A7 III was released in April 2018, so there are some more up-to-date alternatives. I’ll mention a few of the most relevant ones.
The EOS R6 is one of Canon’s newer full frame mirrorless cameras. It can shoot 20 MP images, which might seem a bit low. But it has caught up with the A7 III when it comes to features. It uses the RF-mount, so lenses are big, heavy, and expensive.
Nikon’s Z6 is another worthy competitor to the A7 III. It uses the Z-mount. This Nikon model has a slightly upgraded list of features. If you’re a Nikon shooter, it’s worth checking out.
The Panasonic Lumix DC-S1 and the Lumix S5 II are also worth mentioning. If your primary aim is to shoot videos, the S5 II has a strong set of features. It can record 10-bit video footage. And the S1 offers a good balance of features that make it ideal for both photos and video.
Our Verdict—Sony A7 III
The Sony A7 III, although released in 2018, is still a brilliant full frame mirrorless camera. Almost any photographer will find it to be a great all-rounder. The diverse set of features and the reasonable price make it a great buy.
The attributes I found the most impressive throughout my years of use are the autofocus, image quality, and low-light performance.
But if you’re considering this model, you should keep in mind that the Sony A7 IV is the newest version. It’s got a higher resolution and a better dynamic range than the A7 III. And the Eye Autofocus works in video mode, which is a shortcoming of the A7 III.
However, I don’t think I’d rush to get the A7 IV. The A7 III will stay an extremely capable camera for years to come.
Scores
| Measurement |
Measurement
Score
|
| Main Features |
Main Features
|
| Extra Features |
Extra Features
|
| Construction and Durability |
Construction and Durability
|
| Handling and Ergonomics |
Handling and Ergonomics
|
| Value for Money |
Value for Money
|
| Total Score |
Total Score
|