Photographers never want to miss a moment. We want to capture everything we can. But sometimes, it can feel like you’re carrying a whole photography studio around with you.
Sometimes you just want to have fun without having a heavy camera around your neck. You want something compact and easy to carry. That used to mean having to compromise. But not anymore.
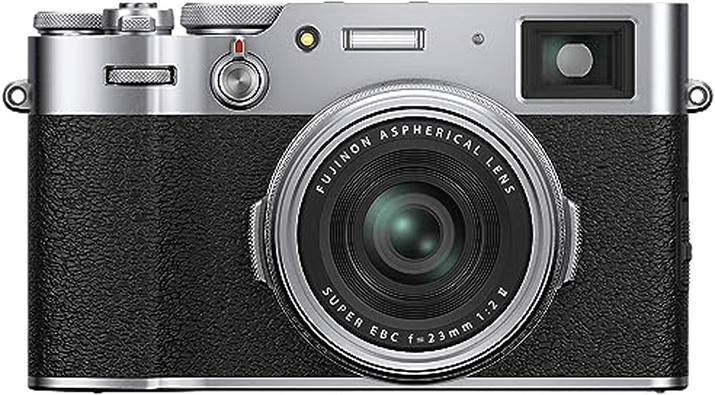
There are some excellent pocket-sized cameras on the market right now. Our top pick is the Fujifilm X100V. It’s an example of perfect retro-styling with up-to-the-minute technology, including a unique, hybrid electronic viewfinder.
What Is the Best Compact Camera?
We’ll explain in more detail why we’ve chosen these cameras. But first, here is a summary of all our picks.
- Beautifully styled and finished
- Impressive 26 MP sensor
- Hybrid optical/electronic viewfinder
- Excellent low-noise JPEGs
- Impressive high dynamic range
- Genuinely compact size
- Can be easily used for live streaming
- High speed continuous shooting
- Amazing value for money
- 4K video
- Incredible 60x zoom
- Built-in image stabilization
- Incredible 90 fps burst speed
- Zeiss zoom lens for quality images
- Very neat and compact
- Impressive 4K video
- Beautiful quality from the Leica 14-75mm lens
- Focuses down to 1.2 inches (3 cm)
- Built-in image stabilization
- 4K video at 30 fps
- Directional microphone is excellent for vlogging
- Superb eye-recognition autofocus
- Very compact and neat body
- Impressive 24 fps burst speed

- Full frame sensor for exceptional quality
- 42.4 MP sensor
- Fast f/2 Zeiss lens
- Variable low-pass filter
- Unmatched image quality
- Fast f/1.7 maximum aperture
- Classic Leica styling and build quality
- 20 fps burst speed with mechanical shutter

- High 24 fps burst speed
- Impressive 24-600mm zoom lens
- 4K video
- Super-fast autofocus
- Class-leading 125x zoom lens
- Built-in image stabilization
- Focuses as close as 0.4 of an inch (1 cm)
- 4K video
- Inbody image stabilization
- Maximum f/1.4 aperture at wide angle
- Leica zoom lens for quality
- 1-inch sensor gives super results
- Impressive in-body image stabilization
- 24.2 MP APS-C sensor
- High maximum ISO of 102,400
- 14-bit RAW mode
12 Best Compact Cameras
Let’s look at each of our recommendations starting with our top pick.
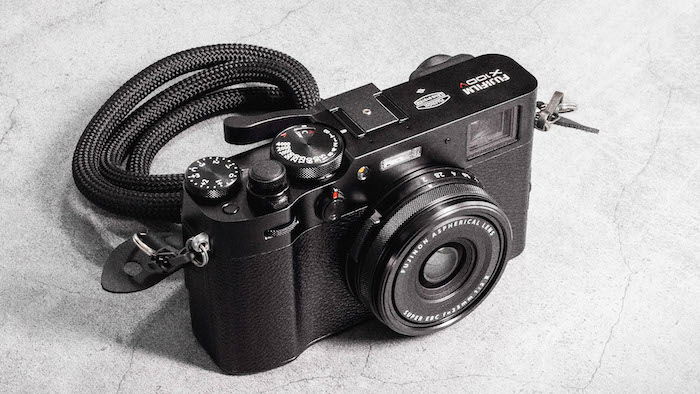
1. Fujifilm X100V
| Brand |
Brand
Fujifilm
|
| Sensor Format |
Sensor Format
APS-C
|
| Megapixels |
Megapixels
26 MP
|
| Autofocus Points |
Autofocus Points
425
|
| Minimum ISO (Native) |
Minimum ISO (Native)
160
|
| Maximum ISO (Native) |
Maximum ISO (Native)
12800
|
| Frame Rate |
Frame Rate
11 fps
|
| Video |
Video
1
|
| Screen Size |
Screen Size
3
|
| Weight |
Weight
478 g
|
| Size |
Size
128 x 75 x 53 mm
|
| Best For |
Best For
Taking super photos while learning the techniques of exposure
|
Everything about the Fujifilm X100V works. It features a 26.1 MP APS-C sensor. And it has a high-performance f/2 lens for great image quality and dynamic range.
It looks splendid with its brushed metal and faux leatherette. The knobs and dials are real analog controls with electronic effects.
It really is a superb blend of old and new. This is perhaps nowhere more evident than in its hybrid viewfinder.
This lets you frame your shot with the optical or electronic viewfinder (EVF). Or you can frame it optically but see a preview of the final result. It’s an elegant solution.
Another up-to-date feature is the tilting touchscreen that allows focus point selection. Plus, it has 4K video and in-camera multiple exposures.
They always say that the best camera is the one you have with you. And the X100V is a camera you will always want to have with you.
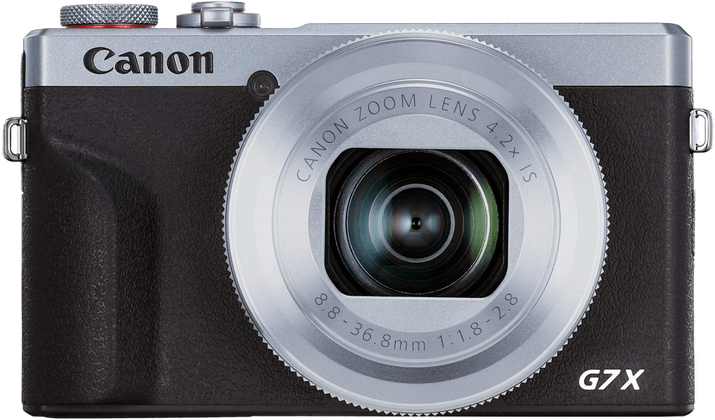
2. Canon PowerShot G7 X Mark III
| Brand |
Brand
Canon
|
| Sensor Format |
Sensor Format
1"
|
| Megapixels |
Megapixels
20 MP
|
| In-body Stabilization |
In-body Stabilization
1
|
| Autofocus Points |
Autofocus Points
31
|
| Minimum ISO (Native) |
Minimum ISO (Native)
125
|
| Maximum ISO (Native) |
Maximum ISO (Native)
12800
|
| Frame Rate |
Frame Rate
30 fps
|
| Video |
Video
1
|
| Screen Size |
Screen Size
3
|
| Weight |
Weight
304 g
|
| Size |
Size
105 x 61 x 41 mm
|
| Best For |
Best For
Live streaming on the go
|
The Canon Powershot G7 X Mark III is a pocket rocket of the camera world. The camera body is small and slim. But this Canon has excellent image quality for its size.
The name Powershot is not misleading. The sensor may only be one inch. But with a 20 MP resolution, the images will surprise you. They’re sharp and vibrant with color.
Its burst speed is 8.2 fps (frames per second). This is rapid for a camera of this size.
The in-camera RAW file processing is a brilliant feature, making images easier to work with in post-processing. And the Wi-Fi and Bluetooth capabilities make it easy to move and share your images.
This compact Canon camera also has a good ISO range of 125 to 128,000. And the DIGIC 7 image processor keeps noise to a minimum when working in low light.
The 4K video quality is very good. And the video image stabilization will keep the footage quality high. It’s a great vlogging camera too.
It’s a great point-and-shoot camera for a beginner on the go. It fits in your pocket, and its images are impressive. That makes the PowerShot G7 X Mark III one of the best compact cameras you can buy.
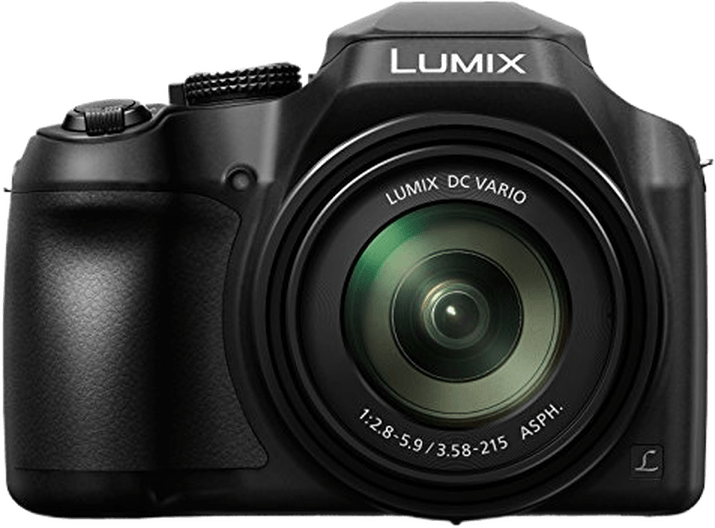
3. Panasonic Lumix FZ80
| Brand |
Brand
Panasonic
|
| Sensor Format |
Sensor Format
1/2.3”
|
| Megapixels |
Megapixels
18 MP
|
| In-body Stabilization |
In-body Stabilization
1
|
| Autofocus Points |
Autofocus Points
49
|
| Minimum ISO (Native) |
Minimum ISO (Native)
80
|
| Maximum ISO (Native) |
Maximum ISO (Native)
3200
|
| Frame Rate |
Frame Rate
10 fps
|
| Video |
Video
1
|
| Screen Size |
Screen Size
3
|
| Weight |
Weight
616 g
|
| Size |
Size
130 x 94 x 119 mm
|
| Best For |
Best For
Those on a tight budget
|
The Panasonic Lumix FZ80 is a versatile compact camera. It’s perfect for travelers who want to take great stills and videos on the road. And it’s great value for your money.
The 18.1 MP MOS sensor produces stunning images. And you get a rapid 30 fps continuous shooting mode. It’s a function that’s great for capturing sports or action shots.
This compact Panasonic camera has a fixed 20-1200mm (60x) optical zoom lens. So you can get close or shoot far away. And the optical image stabilization will keep your images sharp.
A function you might not expect in such a small camera is its Post Focus. It lets you set your focus after you’ve taken the photo. And you can even stake focus points to give yourself creative freedom.
The Lumix FZ80 has an ergonomic design. It fits nicely in your hand and never feels like a burden. It’s lightweight but full of functions. And the video and stills quality is fantastic.
Combined with a modest price tag, all that makes it one of the best compact cameras for beginners.
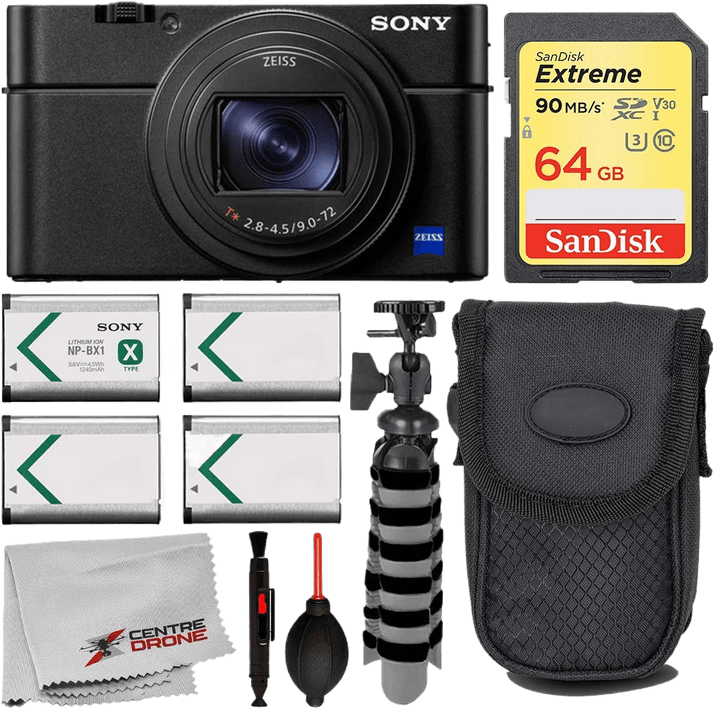
4. Sony Cyber-Shot RX100 VII
| Brand |
Brand
Sony
|
| Sensor Format |
Sensor Format
1"
|
| Megapixels |
Megapixels
20 MP
|
| In-body Stabilization |
In-body Stabilization
1
|
| Autofocus Points |
Autofocus Points
357
|
| Minimum ISO (Native) |
Minimum ISO (Native)
100
|
| Maximum ISO (Native) |
Maximum ISO (Native)
12800
|
| Frame Rate |
Frame Rate
5 fps
|
| Video |
Video
1
|
| Screen Size |
Screen Size
3
|
| Weight |
Weight
302 g
|
| Size |
Size
102 x 58 x 43 mm
|
| Best For |
Best For
High-speed action
|
The Sony Cyber-shot RX100 VII is for people who take photography seriously. A 20.1 MP resolution might not look like much. But it’s from a one-inch sensor. So it is pretty powerful.
That’s impressive image quality for a pocket-sized camera. And its autofocus system is very sophisticated for a camera this size, too.
It uses 357-point focal plane detection or 425-point contrast detection. And it uses AI tracking to hone in on eyes and faces for both stills and videos.
You’ll find this compact Sony camera in the pocket of many vloggers and videographers. The 4K video is excellent. And you can use the microphone jack for synced audio recording.
The Cyber-shot RX100 VII is expensive for a compact camera. But there are a lot of features and functions packed into this camera’s small stature. It’s a true compact with a lot of power!
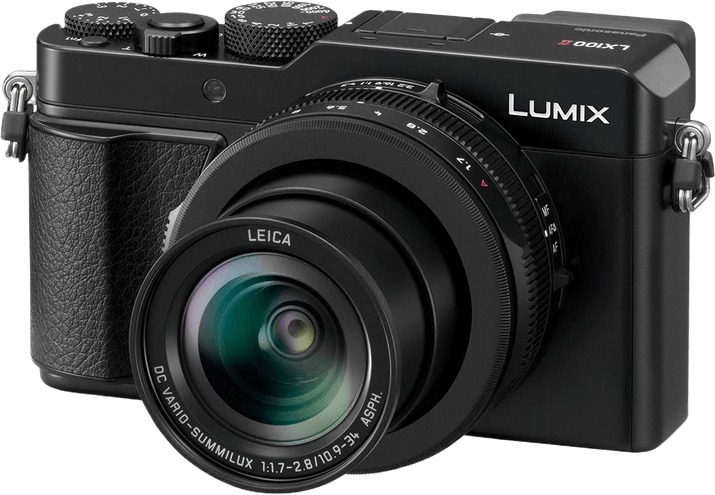
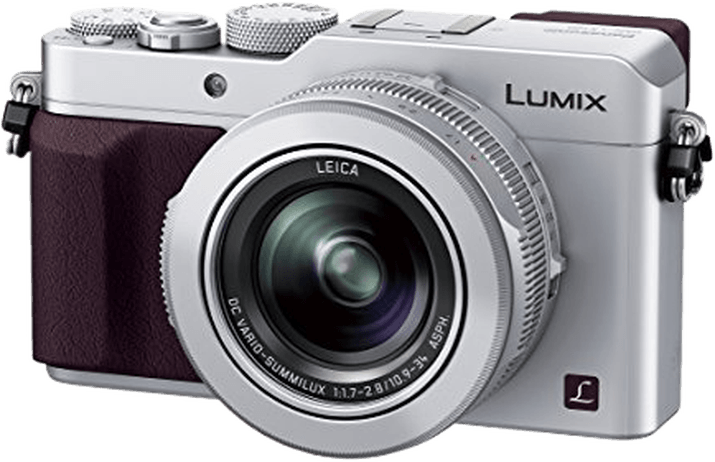
5. Panasonic Lumix LX100 II
| Brand |
Brand
Panasonic
|
| Sensor Format |
Sensor Format
Micro Four Thirds
|
| Megapixels |
Megapixels
12.8 MP
|
| In-body Stabilization |
In-body Stabilization
1
|
| Autofocus Points |
Autofocus Points
49
|
| Minimum ISO (Native) |
Minimum ISO (Native)
100
|
| Maximum ISO (Native) |
Maximum ISO (Native)
25600
|
| Frame Rate |
Frame Rate
11 fps
|
| Video |
Video
1
|
| Screen Size |
Screen Size
3
|
| Weight |
Weight
393 g
|
| Size |
Size
115 x 66 x 55 mm
|
| Best For |
Best For
Close-up photography
|
The Lumix LX100 II is a unique landmark entry in the world of compact cameras. It uses a Micro Four Thirds sensor, larger than the one-inch sensors commonly found in compact cameras.
It is a compact Panasonic camera for genuine photography enthusiasts. The on-camera controls give it the feel of a larger mirrorless camera. But it is still compact and lightweight.
It has a Leica DC zoom lens with a 24-75mm focal range. It gives macro camera capabilities as close as 1.2 inches (3 cm). And the telephoto length is pretty good too.
The zoom speed is noticeably slow. But you get optical image stabilization to compensate for any camera shake.
The electronic viewfinder has excellent resolution. But some people might not like the fact it’s not adjustable. But that adds to the feeling that this camera is for serious photographers.
The video and image quality is excellent. And the price is more than reasonable. So for a true enthusiast, the Panasonic Lumix LX100 II is one of the best compact cameras they will find!
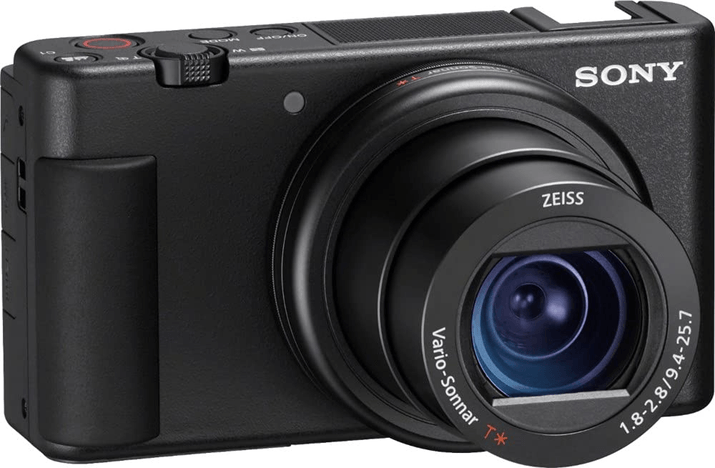
6. Sony ZV-1
| Brand |
Brand
Sony
|
| Sensor Format |
Sensor Format
1"
|
| Megapixels |
Megapixels
20 MP
|
| In-body Stabilization |
In-body Stabilization
1
|
| Autofocus Points |
Autofocus Points
315
|
| Minimum ISO (Native) |
Minimum ISO (Native)
125
|
| Maximum ISO (Native) |
Maximum ISO (Native)
12800
|
| Frame Rate |
Frame Rate
24 fps
|
| Video |
Video
1
|
| Screen Size |
Screen Size
3
|
| Weight |
Weight
294 g
|
| Size |
Size
105 x 60 x 44 mm
|
| Best For |
Best For
Vloggers looking to travel light
|
The Sony ZV-1 is often overlooked in favor of the RX100 II. This is because some of the specs are similar. But the ZV-1 is a camera designed for vloggers and videographers.
This Sony camera‘s image quality for photos is still excellent. The 20.1 MP sensor has a lot of firepower. And you can happily snap away all day.
The strength of the camera lies in the autofocus (AF). It’s incredibly responsive for stills and videos. Even if your shots are full of movement, the AF system will lock on to people and keep them in focus.
The electronic viewfinder is variable at all angles. So you can see yourself while you’re filming. And you even get a wind protector. So the audio quality matches the image quality.
If video is your thing, the ZV-1 is one of the best compact cameras available. Plus, you can still capture some great shots. And it has a modest price tag!
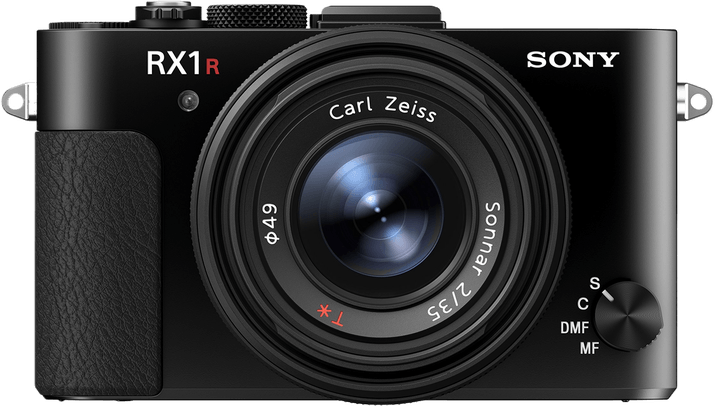
7. Sony Cyber-shot DSC-RX1 RII
| Brand |
Brand
Sony
|
| Sensor Format |
Sensor Format
Full Frame
|
| Megapixels |
Megapixels
24.3 MP
|
| Autofocus Points |
Autofocus Points
25
|
| Minimum ISO (Native) |
Minimum ISO (Native)
100
|
| Maximum ISO (Native) |
Maximum ISO (Native)
25600
|
| Frame Rate |
Frame Rate
5 fps
|
| Video |
Video
1
|
| Screen Size |
Screen Size
3
|
| Weight |
Weight
482 g
|
| Size |
Size
113 x 65 x 70 mm
|
| Best For |
Best For
Professionals looking for a compact companion
|
When you look at the specs for the Sony Cyber-Shot DSC-RX1 RII, one stands out. And no, you’re not seeing things. This camera has an image resolution of 42.4 MP!
It’s hard to believe that a full frame sensor can be squeezed into a compact camera. But Sony has done it. The video is only 1080p. And the burst is a sluggish 5 fps. But at 42.4 MP, you can’t complain.
Stills are the main focus of this camera. And the image quality is amazing with that kind of horsepower under the hood. The camera has an incredible dynamic range. So the detail is excellent.
This compact Sony camera has the first user-selectable optical low-pass filter. It gives photographers a new dimension of creative control over their images.
Plus, the hybrid AF is one of the best we’ve seen—not just in compact cameras! You get 399 points of phase detection with 45% coverage. And AI predicts subject movement to keep them in focus.
The Cyber-shot DSC-RX1 RII isn’t cheap. But if you need professional-standard stills, it’s the best compact camera on the market.
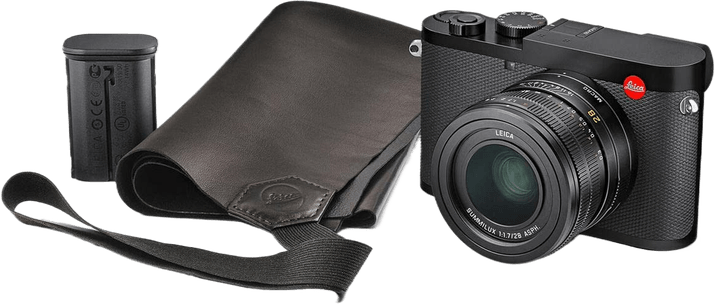
8. Leica Q2
| Brand |
Brand
Leica
|
| Sensor Format |
Sensor Format
Full Frame
|
| Megapixels |
Megapixels
47.3 MP
|
| Autofocus Points |
Autofocus Points
225
|
| Minimum ISO (Native) |
Minimum ISO (Native)
50
|
| Maximum ISO (Native) |
Maximum ISO (Native)
50000
|
| Frame Rate |
Frame Rate
10 fps
|
| Video |
Video
1
|
| Screen Size |
Screen Size
3
|
| Weight |
Weight
482 g
|
| Size |
Size
113 x 65 x 70 mm
|
| Best For |
Best For
Photographers wanting the best, whatever the cost
|
The Leica Q2 is something to behold. It almost doesn’t seem possible. But when you look at the price, reality hits you pretty hard.
The 47.3 MP full frame camera sensor has redefined what’s possible with a point-and-shoot. This level of image quality is usually reserved for professional-level full frame mirrorless cameras.
No zoom lens is disappointing. But you get a fixed 28mm f/1.7 prime lens. And Leica camera lenses are renowned for their excellence.
Plus, the autofocus system is precise and responsive. So shooting moving subjects isn’t a problem.
The video quality is very good but not outstanding. The footage is perfectly acceptable. But keep in mind that this camera is designed for stills rather than video.
The Leica Q2 is the most powerful compact camera there is. There’s no better compact camera for taking exquisite stills.
The problem is that the price is similar to the GDP of a small country! If you can afford it, go for it. But for the rest of us, it’s just not a possibility.
9. Sony Cyber-Shot RX10 IV
| Brand |
Brand
Sony
|
| Sensor Format |
Sensor Format
1"
|
| Megapixels |
Megapixels
20 MP
|
| In-body Stabilization |
In-body Stabilization
1
|
| Autofocus Points |
Autofocus Points
315
|
| Minimum ISO (Native) |
Minimum ISO (Native)
100
|
| Maximum ISO (Native) |
Maximum ISO (Native)
12800
|
| Frame Rate |
Frame Rate
24 fps
|
| Video |
Video
1
|
| Screen Size |
Screen Size
3
|
| Weight |
Weight
1095 g
|
| Size |
Size
133 x 94 x 145 mm
|
| Best For |
Best For
Photographers who want super-quick autofocus and a long zoom
|
The Sony Cyber-shot RX10 IV is an excellent all-around compact camera for professional photographers. It may not have the power of some previous options. But it is more versatile.
The stacked CMOS sensor gives you a 20.1 MP resolution. That’s not bad, considering the size of the sensor. But the other features bring this camera up to par.
The autofocus system is one of the best in a point-and-shoot camera. It has the world’s fasted acquisition speed of 0.03 seconds. That’s quicker than the blink of an eye!
It also uses a high-density phase detection system that predicts movement. So it keeps the focus of your subject locked on.
Plus, the autofocus also functions with precision when shooting at 24 fps. So low light is no trouble for it either. And you can be assured of sharp shots in all conditions.
This Soncy camera has a fixed lens with a powerful optical zoom. And it has an incredible focal range of 24-600mm.
The quality of the glass elements also reduces chromatic aberration. So you can push the lens to its fullest zoom without fear of losing image quality. And the 4K video is also excellent if you vlog.
All these great features make the Sony Cyber-shot RX10 IV one of the best compact cameras for professionals.
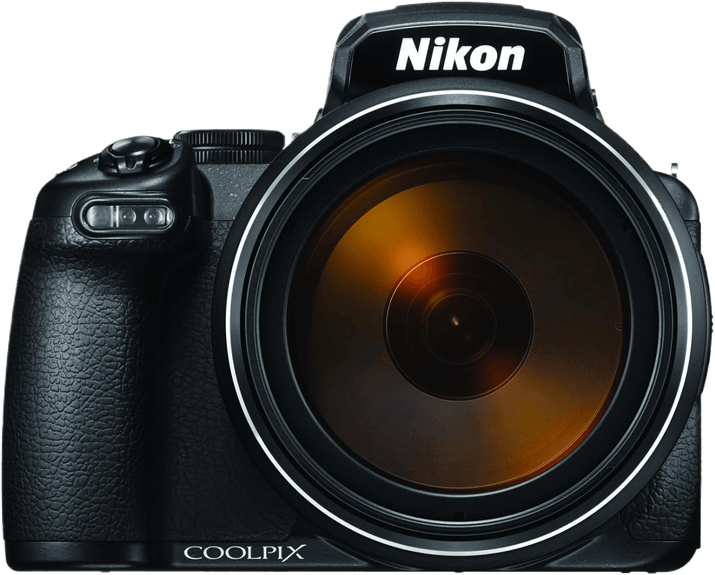
10. Nikon Coolpix P1000
| Brand |
Brand
Nikon
|
| Sensor Format |
Sensor Format
1/2.3”
|
| Megapixels |
Megapixels
16 MP
|
| In-body Stabilization |
In-body Stabilization
1
|
| Autofocus Points |
Autofocus Points
1
|
| Minimum ISO (Native) |
Minimum ISO (Native)
100
|
| Maximum ISO (Native) |
Maximum ISO (Native)
6400
|
| Frame Rate |
Frame Rate
7 fps
|
| Video |
Video
1
|
| Screen Size |
Screen Size
3.2
|
| Weight |
Weight
1415 g
|
| Size |
Size
146 x 119 x 181 mm
|
| Best For |
Best For
Anyone who needs an ultrazoom lens on a compact camera
|
The Nikon Coolpix P1000 isn’t the most powerful compact camera in town. But it has one of the best zoom lenses you’ll find on a compact. And all its other features are reliable too.
The sensor only gives you an image resolution of 16.7 MP, which is a bit disappointing. But the image quality is still very good.
But the spec that sets this Nikon camera apart is its monster optical zoom lens. It gives you the equivalent of a 24-3000mm focal range. That’s a 125x zoom! So geography is no limitation.
The lens also gives you macro photography capabilities. It lets you focus on your subject as close as one foot away.
Plus, the viewfinder is excellent. The autofocus system is fast and reliable, even when stretching the zoom lens. And the 4K video quality is solid.
The Coolpix P1000 is larger than most. It looks and feels more like a small DLSR than a traditional compact. It isn’t the best in its class. But it does a lot well. And the price is very reasonable.
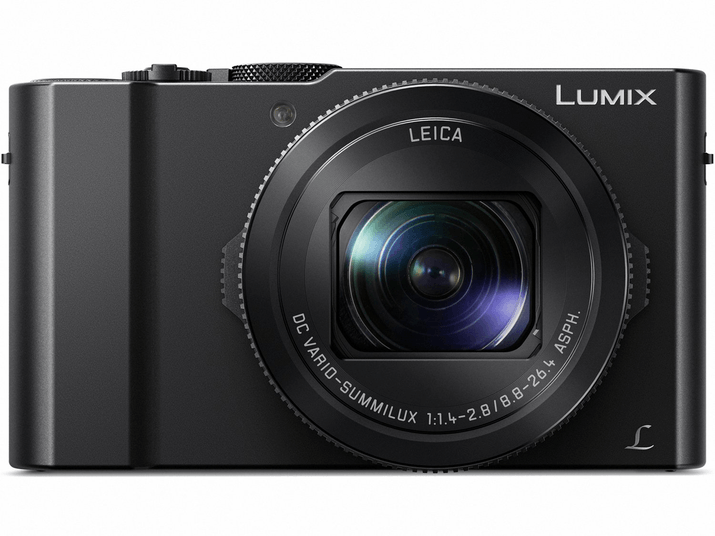
11. Panasonic Lumix DMC-LX10 (LX15)
| Brand |
Brand
Panasonic
|
| Sensor Format |
Sensor Format
1"
|
| Megapixels |
Megapixels
20 MP
|
| In-body Stabilization |
In-body Stabilization
1
|
| Autofocus Points |
Autofocus Points
49
|
| Minimum ISO (Native) |
Minimum ISO (Native)
125
|
| Maximum ISO (Native) |
Maximum ISO (Native)
12800
|
| Frame Rate |
Frame Rate
10 fps
|
| Video |
Video
1
|
| Screen Size |
Screen Size
3
|
| Weight |
Weight
310 g
|
| Size |
Size
106 x 60 x 42 mm
|
| Best For |
Best For
Low-light photography
|
The max aperture of f/1.4 on the Lumix DMC-LX10 (LX15) is remarkable for a compact camera. Even at full telephoto, it is a respectable f/2.8. And this is in a Leica lens, known for crisp, clear photos.
It’s neat and stylish in a smooth, modern, and understated way. That styling complements its youth-oriented vlogging capabilities and the selfie-friendly articulating screen.
Autofocus performance is fast and accurate. And this Leica camera is equally at home capturing video or stills with its 20 MP one-inch sensor.
This compact camera outperforms my very expensive DSLR in at least one area—shutter speed. The Lumix boasts a 1/16,000 s shutter speed. So you can freeze even the most fast-paced subjects.
The Panasonic Lumix DMC-LX10 (LX15) is a very capable camera. It is always easy to take with you and delivers great results.
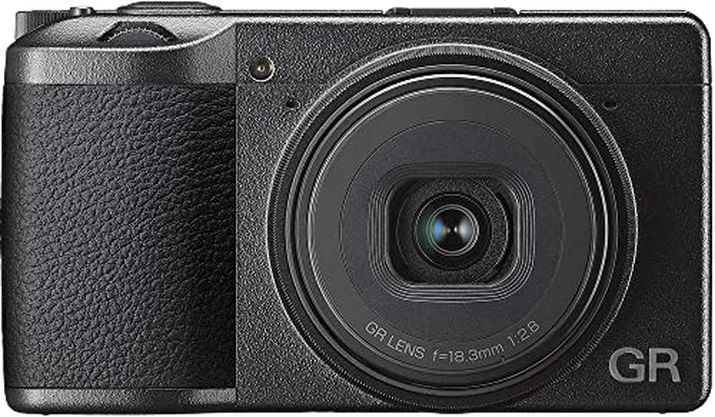
12. Ricoh GR III
| Brand |
Brand
Ricoh
|
| Sensor Format |
Sensor Format
APS-C
|
| Megapixels |
Megapixels
24 MP
|
| In-body Stabilization |
In-body Stabilization
1
|
| Autofocus Points |
Autofocus Points
1
|
| Minimum ISO (Native) |
Minimum ISO (Native)
100
|
| Maximum ISO (Native) |
Maximum ISO (Native)
102400
|
| Frame Rate |
Frame Rate
4 fps
|
| Video |
Video
1
|
| Screen Size |
Screen Size
3
|
| Weight |
Weight
257 g
|
| Size |
Size
109 x 62 x 33 mm
|
| Best For |
Best For
Anyone looking for a very portable, capable all-rounder
|
If size is important in selecting a compact camera, then the Ricoh GR III won’t disappoint. It is neat and compact with an attractive style to it.
It has clear and clearly understood controls. And the images this Ricoh camera produces are excellent. That is partly due to the generously sized APS-C sensor with 24 MP resolution.
It is also because of its fast and effective autofocus, which even has a Snap Focus function. This allows the preselection of a focus point using the touchscreen.
With a very large ISO range of 100 to 102,400, the Ricoh GR III also has two selectable built-in neutral density filters. It’s good to see, as I have long thought it would be useful even on high-end cameras.
This is a stylish, highly-capable camera that is easy to carry and just as easy to use. You can read our full review of the Ricoh GR III for more info.
Is It Worth Buying a Compact Camera?
Yes, compact cameras are serious options. They’re powerful and robust. And they take outstanding photos. They pack a punch, but they’re still small and compact.
In the past, compact digital cameras had a bad name. They were seen as a bit amateur and dull. They were for holiday snaps and family vacations. But things have changed.
Sony, Canon, and Fujifilm all put a lot of effort into developing their compact cameras. And the effort is paying off. As a result, they all have excellent compact camera options on the market.
Conclusion: Best Compact Cameras
The compact camera market is really under pressure from ever-improving smartphone cameras. For the consumer, that’s good news. It means manufacturers have to make their compact options even better!
As you can see from our list, there are some outstanding compact cameras. All of them are excellent in one or many ways. But our top pick is the Fujifilm X100V. It has the looks and the ability.
Its hybrid viewfinder, versatile controls, and compact design make it a top choice. Enthusiasts and professionals seeking a powerful and portable camera will not be disappointed.