Prime lenses are essential for photographers who prioritize image quality and portability. They generally offer superior sharpness and faster apertures compared to zoom lenses. Our guide to the 17 best prime lenses features options that cater to a variety of photography styles and needs, ensuring you find the perfect lens to enhance your photography skills.
Our top picks include the Nikon AF-S 50mm f/1.4G, celebrated for its low light performance and portability, and the Fujifilm XF 23mm f/1.4 R LM WR, chosen for its versatility and weather-resistant design. Beyond these, we’ve divided our selections into two groups: Canon and Nikon lenses, and Fujinon, Sigma, and Sony lenses, offering 15 additional prime lenses that cater to diverse photography requirements and preferences.
Our Top 2 Prime Lenses
Nikon AF-S NIKKOR 50mm F/1.4G
Nikon AF-S NIKKOR 50mm F/1.4G
Shop Offers
×
Nikon AF-S NIKKOR 50mm F/1.4G Deals
|
(second hand)
Check Price
|
(second hand)
|
Check Price
|
Buy Now!
|
If you buy a product through one of our referral links we will earn a commission (without costing you anything).
Prices last updated on .
As an Amazon Associate, I earn from qualifying purchases. Product prices and availability are accurate as of the date/time indicated and are subject to change. Any price and availability information displayed on Amazon at the time of purchase will apply to the purchase of this product.
Unavailable
Fujifilm FUJINON XF 23mm F/1.4 R LM WR
Fujifilm FUJINON XF 23mm F/1.4 R LM WR
Shop Offers
×
Fujifilm FUJINON XF 23mm F/1.4 R LM WR Deals
|
(second hand)
Check Price
|
(second hand)
|
Check Price
|
Buy Now!
|
If you buy a product through one of our referral links we will earn a commission (without costing you anything).
Prices last updated on .
As an Amazon Associate, I earn from qualifying purchases. Product prices and availability are accurate as of the date/time indicated and are subject to change. Any price and availability information displayed on Amazon at the time of purchase will apply to the purchase of this product.
Unavailable
What Is the Best Nikon and Canon Prime Lens?
Selecting the best prime lens involves considering sharpness, bokeh quality, and versatility across various photography styles. Our list, featuring Nikon and Canon lenses, prioritizes these aspects, ensuring each recommendation excels in professional photography, from portraits to macro shots. These lenses stand out for their optical performance and build quality, making them very useful for both enthusiasts and professionals.
Our Top Pick
Nikon AF-S NIKKOR 50mm F/1.4G
Nikon AF-S NIKKOR 50mm F/1.4G
- Exceptional low light performance with f/1.4 aperture
- Ideal for portrait and street photography
- Compact and lightweight for everyday use
- Quick, accurate autofocus with manual override
- Produces beautiful, creamy bokeh
Shop Offers
×
Nikon AF-S NIKKOR 50mm F/1.4G Deals
|
(second hand)
Check Price
|
(second hand)
|
Check Price
|
Buy Now!
|
If you buy a product through one of our referral links we will earn a commission (without costing you anything).
Prices last updated on .
As an Amazon Associate, I earn from qualifying purchases. Product prices and availability are accurate as of the date/time indicated and are subject to change. Any price and availability information displayed on Amazon at the time of purchase will apply to the purchase of this product.
Unavailable
Best Portrait Prime Lens
Nikon AF-S NIKKOR 105mm F/1.4E ED
Nikon AF-S NIKKOR 105mm F/1.4E ED
- Flattering compression for portrait photography
- Superior low-light capability with f/1.4 aperture
- Robust build quality for professional use
- Minimal chromatic aberration, sharp images
- Quick, silent autofocus with precision
Shop Offers
×
Nikon AF-S NIKKOR 105mm F/1.4E ED Deals
|
(second hand)
Check Price
|
(second hand)
|
Check Price
|
Buy Now!
|
If you buy a product through one of our referral links we will earn a commission (without costing you anything).
Prices last updated on .
As an Amazon Associate, I earn from qualifying purchases. Product prices and availability are accurate as of the date/time indicated and are subject to change. Any price and availability information displayed on Amazon at the time of purchase will apply to the purchase of this product.
Unavailable
Best Macro Lens for Nikon Z
Nikon NIKKOR Z MC 105mm F/2.8 VR S
Nikon NIKKOR Z MC 105mm F/2.8 VR S
- True 1:1 macro capability for detailed close-ups
- Built-in VR for sharp images in low light
- Optimized for Nikon Z series mirrorless cameras
- Fast, silent autofocus ideal for video and stills
- Superior optical design minimizes aberrations and distortions
Shop Offers
×
Nikon NIKKOR Z MC 105mm F/2.8 VR S Deals
|
(second hand)
Check Price
|
(second hand)
|
Check Price
|
Buy Now!
|
If you buy a product through one of our referral links we will earn a commission (without costing you anything).
Prices last updated on .
As an Amazon Associate, I earn from qualifying purchases. Product prices and availability are accurate as of the date/time indicated and are subject to change. Any price and availability information displayed on Amazon at the time of purchase will apply to the purchase of this product.
Unavailable
Best Portrait Lens for Nikon Z
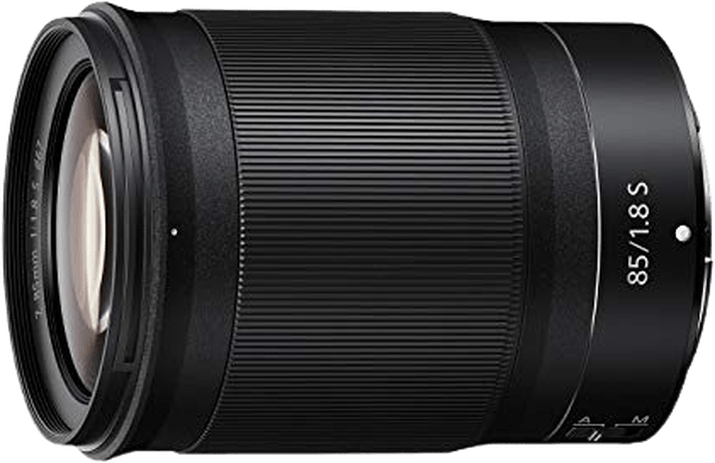
Nikon NIKKOR Z 85mm F/1.8 S
Nikon NIKKOR Z 85mm F/1.8 S
- Ideal for portrait photography with flattering focal length
- Outstanding low-light performance with f/1.8 aperture
- Razor-sharp images across the frame
- Fast, silent autofocus perfect for video and stills
- Lightweight, balanced design for comfortable shooting
Shop Offers
×
Nikon NIKKOR Z 85mm F/1.8 S Deals
|
(second hand)
Check Price
|
(second hand)
|
Check Price
|
Buy Now!
|
If you buy a product through one of our referral links we will earn a commission (without costing you anything).
Prices last updated on .
As an Amazon Associate, I earn from qualifying purchases. Product prices and availability are accurate as of the date/time indicated and are subject to change. Any price and availability information displayed on Amazon at the time of purchase will apply to the purchase of this product.
Unavailable
Best Compact Prime Lens
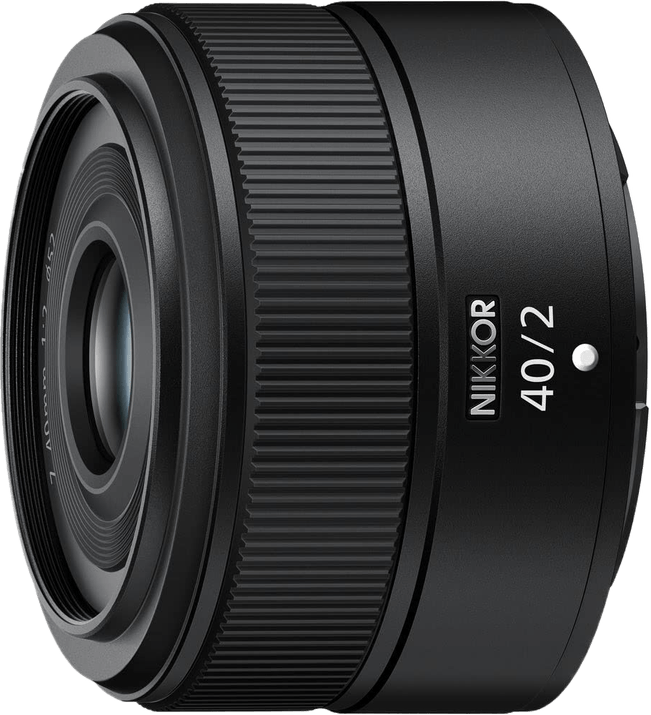
Nikon NIKKOR Z 40mm F/2
Nikon NIKKOR Z 40mm F/2
- Compact and versatile for everyday photography
- Bright f/2 aperture enhances low-light shooting
- Sharp, clear images with minimal distortion
- Quick, silent autofocus for discreet shooting
- Lightweight design perfect for travel and street photography
Shop Offers
×
Nikon NIKKOR Z 40mm F/2 Deals
|
(second hand)
Check Price
|
(second hand)
|
Check Price
|
Buy Now!
|
If you buy a product through one of our referral links we will earn a commission (without costing you anything).
Prices last updated on .
As an Amazon Associate, I earn from qualifying purchases. Product prices and availability are accurate as of the date/time indicated and are subject to change. Any price and availability information displayed on Amazon at the time of purchase will apply to the purchase of this product.
Unavailable
Best Telephoto Prime Lens
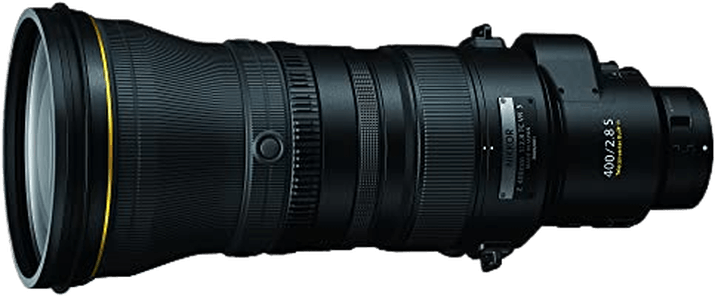
Nikon NIKKOR Z 400mm F/2.8 TC VR S
Nikon NIKKOR Z 400mm F/2.8 TC VR S
- Unmatched reach with built-in 1.4x teleconverter
- Exceptional sharpness, even at maximum aperture
- Advanced VR for steady shots at 400mm
- Robust, weather-sealed construction for outdoor reliability
- Fast, precise autofocus perfect for dynamic subjects
Shop Offers
×
Nikon NIKKOR Z 400mm F/2.8 TC VR S Deals
|
(second hand)
Check Price
|
(second hand)
|
Check Price
|
Buy Now!
|
If you buy a product through one of our referral links we will earn a commission (without costing you anything).
Prices last updated on .
As an Amazon Associate, I earn from qualifying purchases. Product prices and availability are accurate as of the date/time indicated and are subject to change. Any price and availability information displayed on Amazon at the time of purchase will apply to the purchase of this product.
Unavailable
Best Wide-Angle Macro Lens
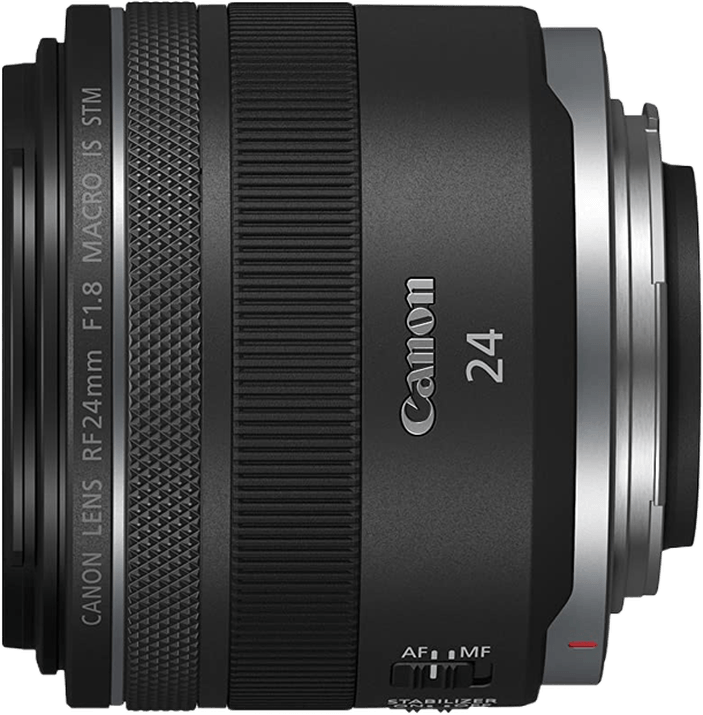
Canon RF 24mm F/1.8 Macro IS STM
Canon RF 24mm F/1.8 Macro IS STM
- Wide f/1.8 aperture for stunning low-light shots
- Macro capability with 0.5x magnification for close-ups
- Compact, lightweight design enhances portability
- 5-stop Image Stabilization for sharp, handheld images
- Fast, silent STM autofocus, perfect for video and stills
Shop Offers
×
Canon RF 24mm F/1.8 Macro IS STM Deals
|
(second hand)
Check Price
|
(second hand)
|
Check Price
|
Buy Now!
|
If you buy a product through one of our referral links we will earn a commission (without costing you anything).
Prices last updated on .
As an Amazon Associate, I earn from qualifying purchases. Product prices and availability are accurate as of the date/time indicated and are subject to change. Any price and availability information displayed on Amazon at the time of purchase will apply to the purchase of this product.
Unavailable
Best Low-Light Prime Lens
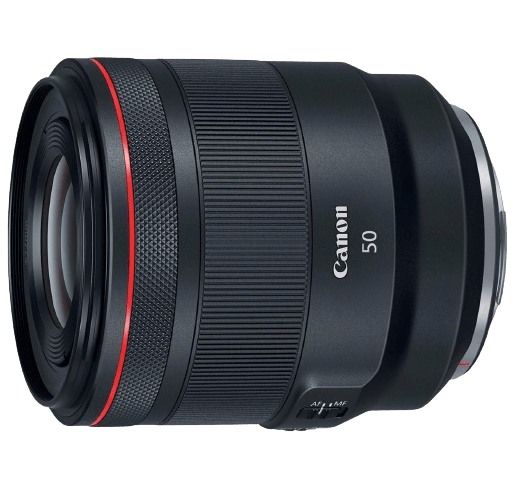
Canon RF 50mm F/1.2L USM
Canon RF 50mm F/1.2L USM
- Exceptional low-light performance with f/1.2 aperture
- Unparalleled sharpness and image quality
- Robust L-series build quality and weather sealing
- Fast, accurate USM autofocus system
- Ideal for portrait photography with beautiful bokeh
Shop Offers
×
Canon RF 50mm F/1.2L USM Deals
|
(second hand)
Check Price
|
(second hand)
|
Check Price
|
Buy Now!
|
If you buy a product through one of our referral links we will earn a commission (without costing you anything).
Prices last updated on .
As an Amazon Associate, I earn from qualifying purchases. Product prices and availability are accurate as of the date/time indicated and are subject to change. Any price and availability information displayed on Amazon at the time of purchase will apply to the purchase of this product.
Unavailable
Best Macro Lens for Detail
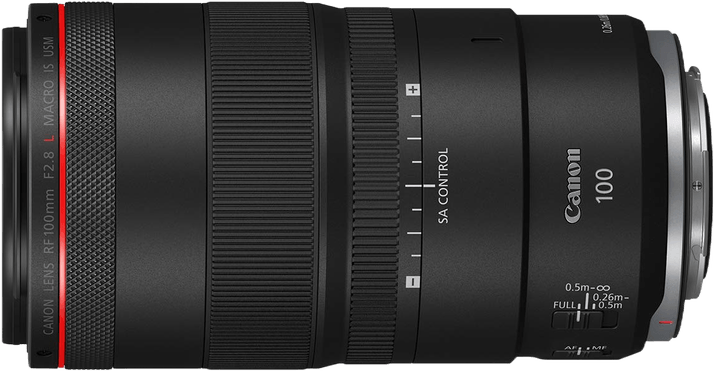
Canon RF 100mm F/2.8L Macro IS USM
Canon RF 100mm F/2.8L Macro IS USM
- Unrivaled macro magnification at 1.4x life-size
- Advanced Image Stabilization for steady close-up shots
- L-series quality ensures durability and weather resistance
- SA Control ring for creative bokeh adjustments
- Fast, silent autofocus with USM for precise shooting
Shop Offers
×
Canon RF 100mm F/2.8L Macro IS USM Deals
|
(second hand)
Check Price
|
(second hand)
|
Check Price
|
Buy Now!
|
If you buy a product through one of our referral links we will earn a commission (without costing you anything).
Prices last updated on .
As an Amazon Associate, I earn from qualifying purchases. Product prices and availability are accurate as of the date/time indicated and are subject to change. Any price and availability information displayed on Amazon at the time of purchase will apply to the purchase of this product.
Unavailable
Our Favorite Nikon and Canon Prime Lenses
Let’s take a closer look at our favorite prime lenses. From capturing expansive landscapes to intricate details in macro photography, there’s a lens here for every style and requirement.
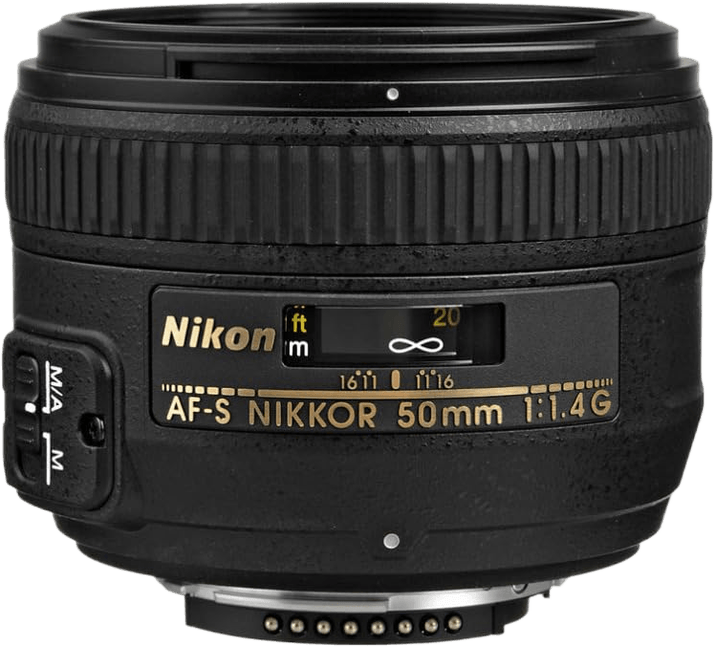
1. Nikon AF-S 50mm f/1.4G
Our Top Pick
Shop Offers
×
Nikon AF-S NIKKOR 50mm F/1.4G Deals
|
(second hand)
Check Price
|
(second hand)
|
Check Price
|
Buy Now!
|
If you buy a product through one of our referral links we will earn a commission (without costing you anything).
Prices last updated on .
As an Amazon Associate, I earn from qualifying purchases. Product prices and availability are accurate as of the date/time indicated and are subject to change. Any price and availability information displayed on Amazon at the time of purchase will apply to the purchase of this product.
Unavailable
|
Brand |
Brand
Nikon
|
|
Lens Weight |
Lens Weight
280 g
|
|
Maximum Aperture |
Maximum Aperture
f/ 1.4
|
|
Focal Length Range |
Focal Length Range
50 mm
|
|
Image Stabilization |
Image Stabilization
|
Nikon AF-S NIKKOR 50mm F/1.4G
Amazon.com
$406.95 $449.95
The
Nikon AF-S 50mm f/1.4G excels in low light and portrait photography. Its f/1.4 aperture allows for sharp images with a shallow depth of field, making it perfect for isolating subjects. The lens is lightweight at 280 grams, making it easy to carry for long periods.
Although this lens isn’t the cheapest 50mm available, it is very good value for a lens with a maximum f/1.4 aperture. It is notably sharp at all apertures, and gives lovely punchy and contrasty images. The bokeh is also very good indeed.
This 50mm is well suited for a wide range of photography styles, including street and everyday shooting. Of all the standard lenses available for Nikon’s F-mount cameras, this is the best balance between performance and price.
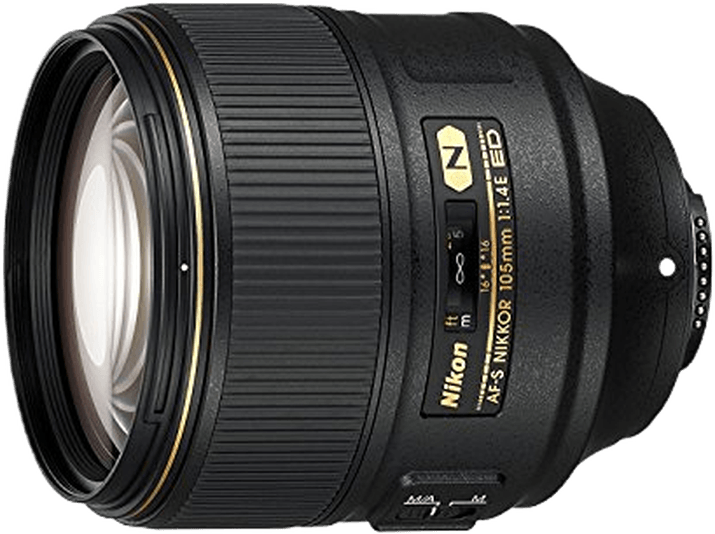
2. Nikon AF-S 105mm f/1.4E ED
Best Portrait Prime Lens
Shop Offers
×
Nikon AF-S NIKKOR 105mm F/1.4E ED Deals
|
(second hand)
Check Price
|
(second hand)
|
Check Price
|
Buy Now!
|
If you buy a product through one of our referral links we will earn a commission (without costing you anything).
Prices last updated on .
As an Amazon Associate, I earn from qualifying purchases. Product prices and availability are accurate as of the date/time indicated and are subject to change. Any price and availability information displayed on Amazon at the time of purchase will apply to the purchase of this product.
Unavailable
|
Brand |
Brand
Nikon
|
|
Lens Weight |
Lens Weight
985 g
|
|
Maximum Aperture |
Maximum Aperture
f/ 1.4
|
|
Focal Length Range |
Focal Length Range
105 mm
|
|
Image Stabilization |
Image Stabilization
|
Nikon AF-S NIKKOR 105mm F/1.4E ED
Amazon.com
$1,896.95 $2,096.95
The
Nikon AF-S 105mm f/1.4E ED shines in portrait photography, thanks to its 105mm focal length and f/1.4 aperture. This combination offers a flattering compression of subjects and a smooth, blurred background, or bokeh, that makes subjects stand out. It’s not just about looks; the lens also performs well in low light, allowing photographers to capture clear shots without a flash.
This is a well-built lens designed for professional use. It weighs 2.17 lbs (985 g), which is hefty but adds to its feel of quality. The weather sealing is a big plus, letting you shoot in less-than-ideal conditions without worry. Optically, it’s a powerhouse, with minimal distortion and chromatic aberration, thanks to its three extra-low dispersion elements.
However, it lacks image stabilization, a feature some might miss in very low light or video work. But, its quick and accurate autofocus, combined with the ability to manually fine-tune focus, makes it a reliable choice for serious photographers. Overall, the Nikon AF-S 105mm f/1.4E ED is a top pick for those who need outstanding sharpness and beautiful bokeh in their portraits and close-up work.
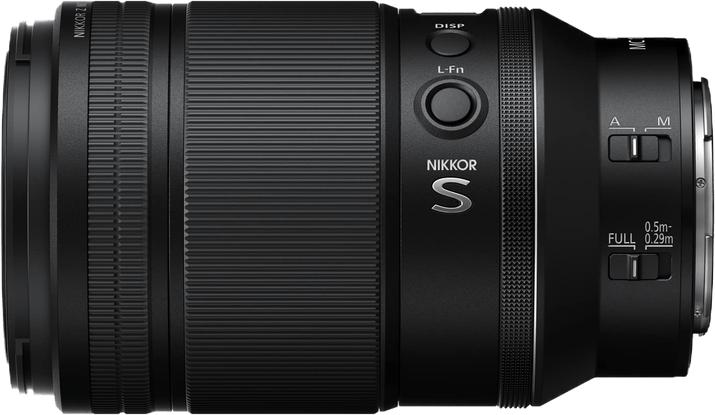
3. Nikon Z MC 105mm f/2.8 VR S
Best Macro Lens for Nikon Z
Shop Offers
×
Nikon NIKKOR Z MC 105mm F/2.8 VR S Deals
|
(second hand)
Check Price
|
(second hand)
|
Check Price
|
Buy Now!
|
If you buy a product through one of our referral links we will earn a commission (without costing you anything).
Prices last updated on .
As an Amazon Associate, I earn from qualifying purchases. Product prices and availability are accurate as of the date/time indicated and are subject to change. Any price and availability information displayed on Amazon at the time of purchase will apply to the purchase of this product.
Unavailable
|
Brand |
Brand
Nikon
|
|
Lens Weight |
Lens Weight
630 g
|
|
Maximum Aperture |
Maximum Aperture
f/ 2.8
|
|
Focal Length Range |
Focal Length Range
105 mm
|
|
Image Stabilization |
Image Stabilization
|
Nikon NIKKOR Z MC 105mm F/2.8 VR S
Amazon.com
$846.95 $1,046.95
The
Nikon Z MC 105mm f/2.8 VR S stands out for its macro capabilities and image stabilization. With a 1:1 magnification ratio, it captures tiny details sharply. Its VR system, compensating for up to 4.5 stops, is a big help in low light. This lens is a solid choice for macro and portrait photographers looking for quality and flexibility.
Weighing 1.39 lbs (630 g), it’s relatively light for its class. The weather sealing adds confidence for outdoor shoots. Optically, it impresses with minimal distortion and chromatic aberration, thanks to its ED glass elements. The bokeh quality is pleasing, enhancing portrait and close-up shots.
With its combination of ideal portrait focal length, wide aperture and macro capability the Nikon Z MC 105mm f/2.8 VR S is a very useful lens for those needing precision in macro work and a reliable telephoto option for portraits. Its build and optical performance justify its place in any Nikon mirrorless professional’s bag.
4. Nikon Z 85mm f/1.8 S
Best Portrait Lens for Nikon Z
Shop Offers
×
Nikon NIKKOR Z 85mm F/1.8 S Deals
|
(second hand)
Check Price
|
(second hand)
|
Check Price
|
Buy Now!
|
If you buy a product through one of our referral links we will earn a commission (without costing you anything).
Prices last updated on .
As an Amazon Associate, I earn from qualifying purchases. Product prices and availability are accurate as of the date/time indicated and are subject to change. Any price and availability information displayed on Amazon at the time of purchase will apply to the purchase of this product.
Unavailable
|
Brand |
Brand
Nikon
|
|
Lens Weight |
Lens Weight
470 g
|
|
Maximum Aperture |
Maximum Aperture
f/ 1.8
|
|
Focal Length Range |
Focal Length Range
85 mm
|
|
Image Stabilization |
Image Stabilization
|
Nikon NIKKOR Z 85mm F/1.8 S
Amazon.com
$696.95 $799.95
The
Nikon Z 85mm f/1.8 S excels in portrait photography, offering a flattering perspective and minimal distortion. Its f/1.8 aperture allows for stunning bokeh and excellent low-light performance, making it a favorite among photographers who prioritize subject isolation and mood in their images. Weighing just over 1 lb (470g), it’s both light and compact, ensuring it doesn’t become a burden during long shoots.
Optically, this lens is a standout, with ED glass elements reducing chromatic aberrations and ensuring sharp, clear images. The autofocus is quick and silent, ideal for capturing candid moments without drawing attention. While it lacks built-in image stabilization, its performance on Nikon Z series cameras with in-body stabilization is impressive, allowing for sharp images even in challenging light.
The Nikon Z 85mm f/1.8 S is a very useful lens for portrait and event photographers. Its build quality, optical performance, and autofocus capabilities make it a valuable addition to any Nikon Z shooter’s bag. Despite its higher price point, the quality it delivers justifies the investment for professionals and serious enthusiasts alike.
5. Nikon Z 40mm f/2
Best Compact Prime Lens
Shop Offers
×
Nikon NIKKOR Z 40mm F/2 Deals
|
(second hand)
Check Price
|
(second hand)
|
Check Price
|
Buy Now!
|
If you buy a product through one of our referral links we will earn a commission (without costing you anything).
Prices last updated on .
As an Amazon Associate, I earn from qualifying purchases. Product prices and availability are accurate as of the date/time indicated and are subject to change. Any price and availability information displayed on Amazon at the time of purchase will apply to the purchase of this product.
Unavailable
|
Brand |
Brand
Nikon
|
|
Lens Weight |
Lens Weight
170 g
|
|
Maximum Aperture |
Maximum Aperture
f/ 2.0
|
|
Focal Length Range |
Focal Length Range
40 mm
|
|
Image Stabilization |
Image Stabilization
|
The
Nikon Z 40mm f/2 is a prime lens celebrated for its compactness and versatility. Its f/2 aperture and 40mm focal length make it ideal for a wide range of photography styles, from street scenes to environmental portraits. Weighing just 6 ounces (170 g), it’s incredibly light and easy to carry, perfect for photographers on the move.
Optically, this lens impresses with sharp, clear images and minimal distortion. The two aspherical elements help control aberrations, ensuring photos are crisp from edge to edge. While it lacks built-in image stabilization, pairing it with a Nikon Z series camera that has in-body stabilization offers a good solution for low-light shooting.
The Nikon Z 40mm f/2 stands out as a very useful and popular choice for those seeking quality and portability. It gives the sense of a “normal” perspective that you find with 50mm lenses, but is able to take in just that little extra view. It’s a nice blend for day-to-day use. Its affordability and optical performance make it a good option for both professionals and enthusiasts looking to expand their lens collection without breaking the bank.
6. Nikon Z 400mm f/2.8 TC VR S
Best Telephoto Prime Lens
Shop Offers
×
Nikon NIKKOR Z 400mm F/2.8 TC VR S Deals
|
(second hand)
Check Price
|
(second hand)
|
Check Price
|
Buy Now!
|
If you buy a product through one of our referral links we will earn a commission (without costing you anything).
Prices last updated on .
As an Amazon Associate, I earn from qualifying purchases. Product prices and availability are accurate as of the date/time indicated and are subject to change. Any price and availability information displayed on Amazon at the time of purchase will apply to the purchase of this product.
Unavailable
|
Brand |
Brand
Nikon
|
|
Lens Weight |
Lens Weight
2950 g
|
|
Maximum Aperture |
Maximum Aperture
f/ 2.8
|
|
Focal Length Range |
Focal Length Range
400 mm
|
|
Image Stabilization |
Image Stabilization
|
Nikon NIKKOR Z 400mm F/2.8 TC VR S
The
Nikon Z 400mm f/2.8 TC VR S is a very expensive, highly specialized lens designed for those who demand exceptional sharpness and performance. Its 400mm focal length, combined with an f/2.8 aperture, makes it perfect for wildlife and sports photography, offering the ability to capture distant subjects with stunning detail and beautiful background blur. The built-in 1.4x teleconverter is a significant advantage, extending its reach without sacrificing image quality.
Even though it weighs 6.5 lbs (6 kg), it’s relatively light for its class. That’s because lenses that are long and wide need a lot of glass. This lens makes use of magnesium alloy and carbon fiber to reduce weight. This makes it easier to handle, especially for extended periods. The lens’s weather sealing ensures it can withstand challenging conditions, crucial for outdoor shooting scenarios.
The Nikon Z 400mm f/2.8 TC VR S will have very limited appeal, mainly because of its price. But if you are a professional in wildlife and sports photography, it brings a whole new level of performance to your field. Its combination of optical excellence, versatility with the teleconverter, and durable build make it a valuable asset for those looking to capture the best possible images in their specialized fields.
7. Canon RF 24mm f/1.8 Macro IS STM
Best Wide-Angle Macro Lens
Shop Offers
×
Canon RF 24mm F/1.8 Macro IS STM Deals
|
(second hand)
Check Price
|
(second hand)
|
Check Price
|
Buy Now!
|
If you buy a product through one of our referral links we will earn a commission (without costing you anything).
Prices last updated on .
As an Amazon Associate, I earn from qualifying purchases. Product prices and availability are accurate as of the date/time indicated and are subject to change. Any price and availability information displayed on Amazon at the time of purchase will apply to the purchase of this product.
Unavailable
|
Brand |
Brand
Canon
|
|
Lens Weight |
Lens Weight
270 g
|
|
Maximum Aperture |
Maximum Aperture
f/ 1.8
|
|
Focal Length Range |
Focal Length Range
24 mm
|
|
Image Stabilization |
Image Stabilization
|
Canon RF 24mm F/1.8 Macro IS STM
The
Canon RF 24mm f/1.8 Macro IS STM is a versatile wide-angle prime lens for Canon mirrorless cameras, ideal for photographers keen on capturing expansive landscapes, intricate architectural details, or vibrant street scenes. Its f/1.8 aperture not only excels in low light conditions but also allows for a shallow depth of field, creating images with a beautifully blurred background that makes subjects pop. Weighing just over 9 ounces (270 g), it’s notably lightweight and compact, making it an excellent companion for day-long shoots or travel photography.
Optically, this lens impresses with sharp, clear images across the frame, minimal distortion, and well-controlled chromatic aberrations, thanks to its UD and aspherical elements. The close focus capability isn’t true macro, with only a 0.5x magnification and a 14cm minimum focusing distance, but it does open up the chance to explore detailed close-up photography. You’ll want a longer focal length for serious macro work, so you don’t block your own light.
Despite lacking some pro-level features like extensive weather sealing, its performance, combined with effective image stabilization and a customizable control ring, makes it a very useful option for both enthusiasts and professionals within the Canon RF system. Most notably, the superb sharpness at all apertures, and the lovely contrasty images it produces.
8. Canon RF 50mm f/1.2L USM
Best Low-Light Prime Lens
Shop Offers
×
Canon RF 50mm F/1.2L USM Deals

|
(second hand)
Check Price
|
(second hand)
|
Check Price
|
Buy Now!
|
If you buy a product through one of our referral links we will earn a commission (without costing you anything).
Prices last updated on .
As an Amazon Associate, I earn from qualifying purchases. Product prices and availability are accurate as of the date/time indicated and are subject to change. Any price and availability information displayed on Amazon at the time of purchase will apply to the purchase of this product.
Unavailable
Shop Offers
×
Canon RF 50mm F/1.2L USM Deals
|
(second hand)
Check Price
|
(second hand)
|
Check Price
|
Buy Now!
|
If you buy a product through one of our referral links we will earn a commission (without costing you anything).
Prices last updated on .
As an Amazon Associate, I earn from qualifying purchases. Product prices and availability are accurate as of the date/time indicated and are subject to change. Any price and availability information displayed on Amazon at the time of purchase will apply to the purchase of this product.
Unavailable
|
Brand |
Brand
Canon
|
|
Lens Weight |
Lens Weight
950 g
|
|
Maximum Aperture |
Maximum Aperture
f/ 1.2
|
|
Focal Length Range |
Focal Length Range
50 mm
|
|
Image Stabilization |
Image Stabilization
|
The
Canon RF 50mm f/1.2L USM is a prime lens that sets a high standard for optical excellence in the Canon lineup. Its f/1.2 aperture not only excels in low-light conditions but also provides photographers with the ability to create images with a shallow depth of field, making it perfect for portraits where a creamy bokeh is desired. Weighing in at 2.09 lbs (950 g), it’s a solid piece of glass, indicative of its premium build and image quality.
Optically, this lens is a powerhouse, delivering sharp, detailed images across the frame, even when wide open. The use of UD elements effectively minimizes chromatic aberrations, ensuring that photos are not only sharp but also free of unwanted color fringing. Despite its heft, the RF 50mm f/1.2L USM is a favorite among Canon shooters for its unmatched clarity and bokeh, making it a very useful tool for professional portrait and street photographers alike.
9. Canon RF 100mm f/2.8L Macro IS USM
Best Macro Lens for Detail
Shop Offers
×
Canon RF 100mm F/2.8L Macro IS USM Deals
|
(second hand)
Check Price
|
(second hand)
|
Check Price
|
Buy Now!
|
If you buy a product through one of our referral links we will earn a commission (without costing you anything).
Prices last updated on .
As an Amazon Associate, I earn from qualifying purchases. Product prices and availability are accurate as of the date/time indicated and are subject to change. Any price and availability information displayed on Amazon at the time of purchase will apply to the purchase of this product.
Unavailable
|
Brand |
Brand
Canon
|
|
Lens Weight |
Lens Weight
730 g
|
|
Maximum Aperture |
Maximum Aperture
f/ 2.8
|
|
Focal Length Range |
Focal Length Range
100 mm
|
|
Image Stabilization |
Image Stabilization
|
Canon RF 100mm F/2.8L Macro IS USM
The
Canon RF 100mm f/2.8L Macro IS USM is a standout lens for those delving into the detailed world of macro photography. Its ability to achieve a 1.4:1 magnification ratio surpasses the standard, allowing photographers to capture subjects with exceptional detail. The inclusion of the Spherical Aberration (SA) control ring adds a layer of creative control, enabling users to fine-tune the bokeh effect, enhancing both macro and portrait shots. Even with the SA set to zero, the bokeh is outstanding.
Although this is a pro-level L-Series lens, it only weighs 1.6 lbs (730 g), thanks to the use of high-quality but lightweight components. It’s relatively lightweight for a lens of its caliber, making it manageable for handheld shooting sessions. The image stabilization is superb, offering up to five stops of compensation. The dual Nano USM motors ensure exceptionally quick and silent focusing. Despite its specialized features, the lens remains versatile, proving itself useful for a variety of photography styles beyond macro, including portraits and detailed product shots.
The Canon RF 100mm f/2.8L Macro IS USM is a very useful tool for photographers looking to expand their creative boundaries. Its build quality, optical performance, and unique features like the SA control ring make it a valuable addition to the Canon RF lineup, appealing to both macro enthusiasts and portrait photographers alike.
What is the Best Fujifilm, Sigma, and Sony Prime Lens?
For the second part of our review, we take a look at Fujifilm, Sigma, and Sony prime lenses. We have taken into account image quality, versatility, and build. Each lens excels in specific photography areas, ensuring you find the perfect match for your needs.
Our Top Pick
Fujifilm FUJINON XF 23mm F/1.4 R LM WR
Fujifilm FUJINON XF 23mm F/1.4 R LM WR
- Exceptional low-light performance with f/1.4 aperture
- Weather-sealed design for outdoor reliability
- Fast, silent autofocus for stills and video
- Superior sharpness and minimal aberrations
- Compact and well-balanced for handheld shooting
Shop Offers
×
Fujifilm FUJINON XF 23mm F/1.4 R LM WR Deals
|
(second hand)
Check Price
|
(second hand)
|
Check Price
|
Buy Now!
|
If you buy a product through one of our referral links we will earn a commission (without costing you anything).
Prices last updated on .
As an Amazon Associate, I earn from qualifying purchases. Product prices and availability are accurate as of the date/time indicated and are subject to change. Any price and availability information displayed on Amazon at the time of purchase will apply to the purchase of this product.
Unavailable
Best for Natural Perspectives
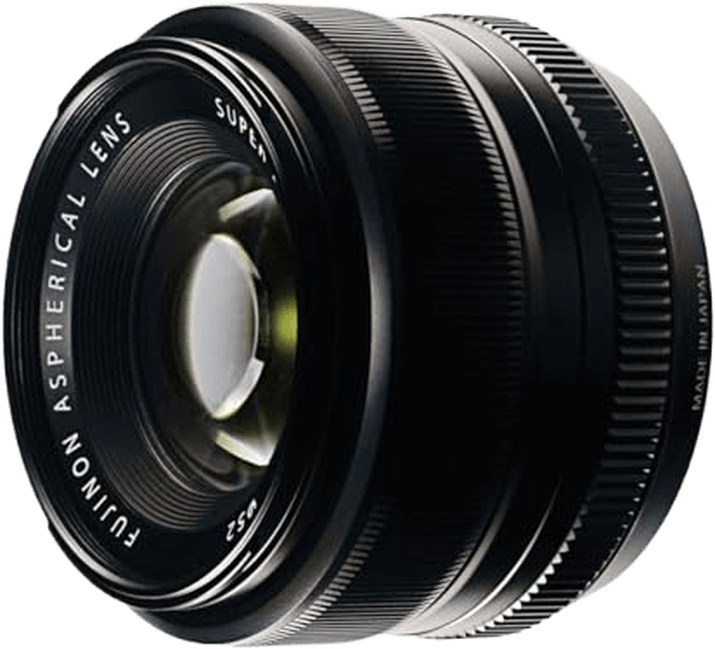
Fujifilm FUJINON XF 35mm F/1.4 R
Fujifilm FUJINON XF 35mm F/1.4 R
- Natural perspective close to human eye view
- Large f/1.4 aperture for beautiful bokeh
- Compact, lightweight design enhances portability
- Solid metal construction ensures durability
- Delivers sharp images with minimal aberration
Shop Offers
×
Fujifilm FUJINON XF 35mm F/1.4 R Deals
|
(second hand)
Check Price
|
(second hand)
|
Check Price
|
Buy Now!
|
If you buy a product through one of our referral links we will earn a commission (without costing you anything).
Prices last updated on .
As an Amazon Associate, I earn from qualifying purchases. Product prices and availability are accurate as of the date/time indicated and are subject to change. Any price and availability information displayed on Amazon at the time of purchase will apply to the purchase of this product.
Unavailable
Best Portrait Prime Lens
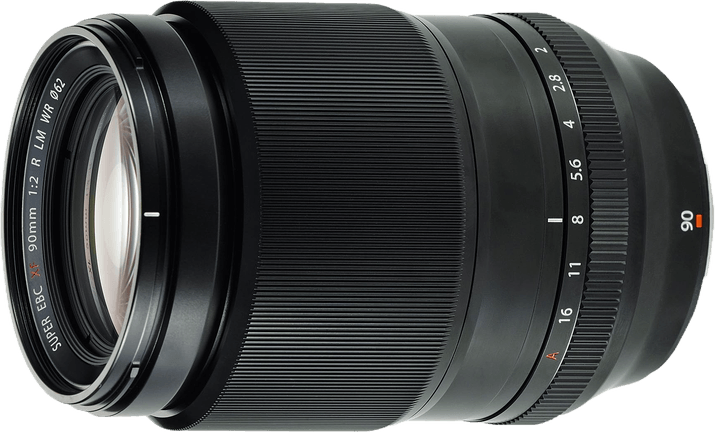
Fujifilm FUJINON XF 90mm F/2 R LM WR
Fujifilm FUJINON XF 90mm F/2 R LM WR
- Ideal for portraits with flattering compression
- Fast f/2 aperture for low-light shooting
- Weather-resistant build for outdoor reliability
- Quick, silent autofocus with linear motor
- Exceptional sharpness and minimal optical aberrations
Shop Offers
×
Fujifilm FUJINON XF 90mm F/2 R LM WR Deals
|
(second hand)
Check Price
|
(second hand)
|
Check Price
|
Buy Now!
|
If you buy a product through one of our referral links we will earn a commission (without costing you anything).
Prices last updated on .
As an Amazon Associate, I earn from qualifying purchases. Product prices and availability are accurate as of the date/time indicated and are subject to change. Any price and availability information displayed on Amazon at the time of purchase will apply to the purchase of this product.
Unavailable
Best Wide-Angle Art Lens
Sigma 24mm F/1.4 DG HSM | A
Sigma 24mm F/1.4 DG HSM | A
- Wide 24mm focal length for expansive shots
- Large f/1.4 aperture enhances low-light photography
- Art series quality ensures superior image sharpness
- Hyper Sonic Motor for fast, silent focusing
- Designed for full-frame and APS-C sensors
Shop 5 Versions
Canon EF Mount
×
Deals
|
(second hand)
Check Price
|
(second hand)
|
Check Price
|
Buy Now!
|
If you buy a product through one of our referral links we will earn a commission (without costing you anything).
Prices last updated on .
As an Amazon Associate, I earn from qualifying purchases. Product prices and availability are accurate as of the date/time indicated and are subject to change. Any price and availability information displayed on Amazon at the time of purchase will apply to the purchase of this product.
Unavailable
Nikon F Mount
×
Deals
|
(second hand)
Check Price
|
(second hand)
|
Check Price
|
Buy Now!
|
If you buy a product through one of our referral links we will earn a commission (without costing you anything).
Prices last updated on .
As an Amazon Associate, I earn from qualifying purchases. Product prices and availability are accurate as of the date/time indicated and are subject to change. Any price and availability information displayed on Amazon at the time of purchase will apply to the purchase of this product.
Unavailable
Sigma SA Mount
×
Deals
|
(second hand)
Check Price
|
(second hand)
|
Check Price
|
Buy Now!
|
If you buy a product through one of our referral links we will earn a commission (without costing you anything).
Prices last updated on .
As an Amazon Associate, I earn from qualifying purchases. Product prices and availability are accurate as of the date/time indicated and are subject to change. Any price and availability information displayed on Amazon at the time of purchase will apply to the purchase of this product.
Unavailable
Leica L Mount
×
Deals
|
(second hand)
Check Price
|
(second hand)
|
Check Price
|
Buy Now!
|
If you buy a product through one of our referral links we will earn a commission (without costing you anything).
Prices last updated on .
As an Amazon Associate, I earn from qualifying purchases. Product prices and availability are accurate as of the date/time indicated and are subject to change. Any price and availability information displayed on Amazon at the time of purchase will apply to the purchase of this product.
Unavailable
Sony E Mount
×
Deals
|
(second hand)
Check Price
|
(second hand)
|
Check Price
|
Buy Now!
|
If you buy a product through one of our referral links we will earn a commission (without costing you anything).
Prices last updated on .
As an Amazon Associate, I earn from qualifying purchases. Product prices and availability are accurate as of the date/time indicated and are subject to change. Any price and availability information displayed on Amazon at the time of purchase will apply to the purchase of this product.
Unavailable
Best Portrait Art Lens
Sigma 85mm F/1.4 DG HSM | A
Sigma 85mm F/1.4 DG HSM | A
- Perfect for portraits with beautiful bokeh effect
- Exceptional low-light capability with f/1.4 aperture
- Art series ensures top-tier image quality
- Fast and accurate autofocus system
- Durable build with professional-grade materials
Shop 5 Versions
Canon EF Mount
×
Deals
|
(second hand)
Check Price
|
(second hand)
|
Check Price
|
Buy Now!
|
If you buy a product through one of our referral links we will earn a commission (without costing you anything).
Prices last updated on .
As an Amazon Associate, I earn from qualifying purchases. Product prices and availability are accurate as of the date/time indicated and are subject to change. Any price and availability information displayed on Amazon at the time of purchase will apply to the purchase of this product.
Unavailable
Nikon F Mount
×
Deals
|
(second hand)
Check Price
|
(second hand)
|
Check Price
|
Buy Now!
|
If you buy a product through one of our referral links we will earn a commission (without costing you anything).
Prices last updated on .
As an Amazon Associate, I earn from qualifying purchases. Product prices and availability are accurate as of the date/time indicated and are subject to change. Any price and availability information displayed on Amazon at the time of purchase will apply to the purchase of this product.
Unavailable
Sigma SA Mount
×
Deals
|
(second hand)
Check Price
|
(second hand)
|
Check Price
|
Buy Now!
|
If you buy a product through one of our referral links we will earn a commission (without costing you anything).
Prices last updated on .
As an Amazon Associate, I earn from qualifying purchases. Product prices and availability are accurate as of the date/time indicated and are subject to change. Any price and availability information displayed on Amazon at the time of purchase will apply to the purchase of this product.
Unavailable
Leica L Mount
×
Deals
|
(second hand)
Check Price
|
(second hand)
|
Check Price
|
Buy Now!
|
If you buy a product through one of our referral links we will earn a commission (without costing you anything).
Prices last updated on .
As an Amazon Associate, I earn from qualifying purchases. Product prices and availability are accurate as of the date/time indicated and are subject to change. Any price and availability information displayed on Amazon at the time of purchase will apply to the purchase of this product.
Unavailable
Sony E Mount
×
Deals
|
(second hand)
Check Price
|
(second hand)
|
Check Price
|
Buy Now!
|
If you buy a product through one of our referral links we will earn a commission (without costing you anything).
Prices last updated on .
As an Amazon Associate, I earn from qualifying purchases. Product prices and availability are accurate as of the date/time indicated and are subject to change. Any price and availability information displayed on Amazon at the time of purchase will apply to the purchase of this product.
Unavailable
Best Budget Portrait Lens
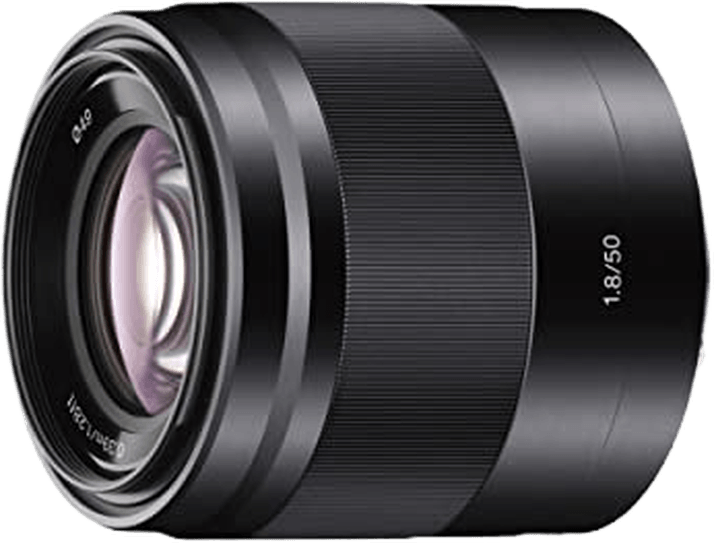
Sony E 50mm F/1.8 OSS SEL50F18
Sony E 50mm F/1.8 OSS SEL50F18
- Optical SteadyShot for sharp, stable images
- Compact, lightweight design for easy portability
- Fast f/1.8 aperture for beautiful bokeh
- Affordable option for quality portrait photography
- Silent autofocus ideal for video recording
Shop Offers
×
Sony E 50mm F/1.8 OSS SEL50F18 Deals
|
(second hand)
Check Price
|
(second hand)
|
Check Price
|
Buy Now!
|
If you buy a product through one of our referral links we will earn a commission (without costing you anything).
Prices last updated on .
As an Amazon Associate, I earn from qualifying purchases. Product prices and availability are accurate as of the date/time indicated and are subject to change. Any price and availability information displayed on Amazon at the time of purchase will apply to the purchase of this product.
Unavailable
Best Telephoto Portrait Lens
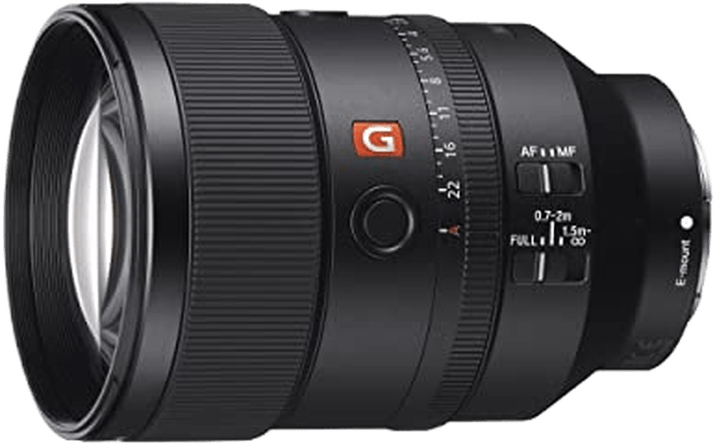
Sony FE 135mm F/1.8 GM SEL135F18GM
Sony FE 135mm F/1.8 GM SEL135F18GM
- Exceptional sharpness and clarity across the frame
- Fast f/1.8 aperture for stunning bokeh
- G Master quality ensures professional performance
- Dual XD Linear Motors for rapid autofocus
- Dust and moisture resistant for reliability
Shop Offers
×
Sony FE 135mm F/1.8 GM SEL135F18GM Deals
|
(second hand)
Check Price
|
(second hand)
|
Check Price
|
Buy Now!
|
If you buy a product through one of our referral links we will earn a commission (without costing you anything).
Prices last updated on .
As an Amazon Associate, I earn from qualifying purchases. Product prices and availability are accurate as of the date/time indicated and are subject to change. Any price and availability information displayed on Amazon at the time of purchase will apply to the purchase of this product.
Unavailable
Best Super-Telephoto Lens
Sony FE 600mm F/4 GM OSS SEL600F40GM
Sony FE 600mm F/4 GM OSS SEL600F40GM
- Unmatched clarity with G Master optical quality
- Fast f/4 aperture for exceptional low-light performance
- Dual XD Linear Motors ensure rapid, precise autofocus
- Lightweight design for its class enhances portability
- Built-in Optical SteadyShot stabilization for sharp images
Shop Offers
×
Sony FE 600mm F/4 GM OSS SEL600F40GM Deals
|
(second hand)
Check Price
|
(second hand)
|
Check Price
|
Buy Now!
|
If you buy a product through one of our referral links we will earn a commission (without costing you anything).
Prices last updated on .
As an Amazon Associate, I earn from qualifying purchases. Product prices and availability are accurate as of the date/time indicated and are subject to change. Any price and availability information displayed on Amazon at the time of purchase will apply to the purchase of this product.
Unavailable
Our Favorite Fujifilm, Sigma, and Sony Prime Lenses
Let’s take a closer look at our favorite Fujifilm, Sigma, and Sony prime lenses. From wide angles perfect for landscapes to telephoto options ideal for portraits, there’s a lens here for every style and situation. With these options photographers have a rich selection to choose from, ensuring they find the perfect tool to enhance their skills and creativity. Whether you’re shooting in low light or aiming for that perfect blur background, these lenses are designed to help you achieve the best results.
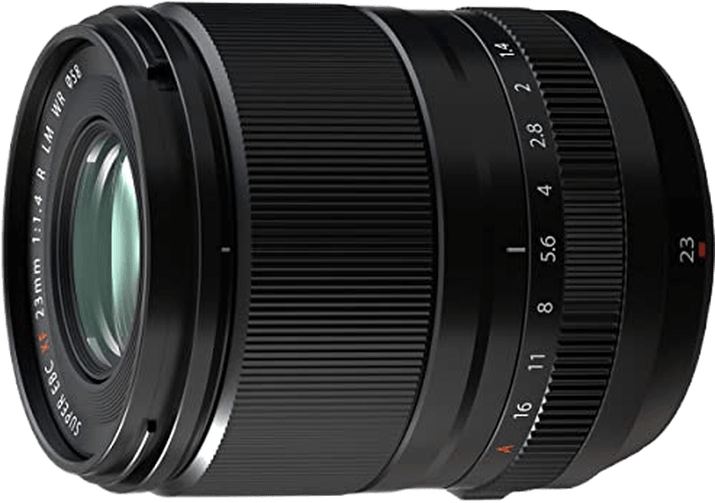
1. Fujifilm XF 23mm f/1.4 R LM WR
Our Top Pick
Shop Offers
×
Fujifilm FUJINON XF 23mm F/1.4 R LM WR Deals
|
(second hand)
Check Price
|
(second hand)
|
Check Price
|
Buy Now!
|
If you buy a product through one of our referral links we will earn a commission (without costing you anything).
Prices last updated on .
As an Amazon Associate, I earn from qualifying purchases. Product prices and availability are accurate as of the date/time indicated and are subject to change. Any price and availability information displayed on Amazon at the time of purchase will apply to the purchase of this product.
Unavailable
|
Brand |
Brand
Fujifilm
|
|
Lens Weight |
Lens Weight
375 g
|
|
Maximum Aperture |
Maximum Aperture
f/ 1.4
|
|
Focal Length Range |
Focal Length Range
23 mm
|
|
Image Stabilization |
Image Stabilization
|
Fujifilm FUJINON XF 23mm F/1.4 R LM WR
Amazon.com
$799.00 $899.95
The
Fujifilm XF 23mm f/1.4 R LM WR stands out for its wide f/1.4 aperture, making it a good option for low light photography and achieving a shallow depth of field. This feature is particularly important for photographers looking to isolate their subjects from the background, a common requirement in portrait and street photography. The lens’s ability to maintain sharpness across the frame, even when wide open, is a testament to its superior optical design.
With a focal length of 23mm, this lens offers a versatile field of view equivalent to 35mm on a full-frame camera. This makes it well-suited for a variety of photography styles, from environmental portraits to everyday street scenes. Whatever your sensor size, this lens is about as optically perfect as you can find anywhere.
The lens’s build quality is another highlight, featuring weather sealing that protects it against dust and moisture. This makes it reliable for outdoor shooting, even in challenging weather conditions. The Fujifilm XF 23mm f/1.4 R LM WR’s optical excellence and durable construction make it a top choice for photographers prioritizing image quality and versatility.
2. Fujifilm XF 35mm f/1.4 R
Best for Natural Perspectives
Shop Offers
×
Fujifilm FUJINON XF 35mm F/1.4 R Deals
|
(second hand)
Check Price
|
(second hand)
|
Check Price
|
Buy Now!
|
If you buy a product through one of our referral links we will earn a commission (without costing you anything).
Prices last updated on .
As an Amazon Associate, I earn from qualifying purchases. Product prices and availability are accurate as of the date/time indicated and are subject to change. Any price and availability information displayed on Amazon at the time of purchase will apply to the purchase of this product.
Unavailable
|
Brand |
Brand
Fujifilm
|
|
Lens Weight |
Lens Weight
187 g
|
|
Maximum Aperture |
Maximum Aperture
f/ 1.4
|
|
Focal Length Range |
Focal Length Range
35 mm
|
Fujifilm FUJINON XF 35mm F/1.4 R
The
Fujifilm XF 35mm f/1.4 R shines with its f/1.4 aperture, making it a prime choice for those shooting in low light or aiming for a shallow depth of field. This lens allows for crisp, isolated subjects against a smoothly blurred background, a look many photographers strive for in portraits and street photography. Its 35mm focal length, equivalent to 53mm on a full frame, offers a natural view, closely mirroring human sight, which is perfect for capturing everyday moments with authenticity.
This is another lens from Fujifilm that is just about optically perfect. No detectable distortion or aberration, and sharp across the whole frame at every aperture. The lens’s metal construction adds a durable, quality feel, but the lack of weather sealing means caution is advised in harsh conditions. Weighing just 6.5 ounces (187 g), it’s light and easy to carry around, ideal for photographers on the move.
Autofocus is fast, even in darker environments, and it’s accurate too. For those who like to take control, the manual focus ring offers precise adjustments. While the lens lacks image stabilization, its wide aperture often compensates by allowing faster shutter speeds to avoid blur. The Fujifilm XF 35mm f/1.4 R is a solid option for photographers who value image quality and portability over speed and weather resistance.
3. Fujifilm XF 90mm f/2 R LM WR
Best Portrait Prime Lens
Shop Offers
×
Fujifilm FUJINON XF 90mm F/2 R LM WR Deals
|
(second hand)
Check Price
|
(second hand)
|
Check Price
|
Buy Now!
|
If you buy a product through one of our referral links we will earn a commission (without costing you anything).
Prices last updated on .
As an Amazon Associate, I earn from qualifying purchases. Product prices and availability are accurate as of the date/time indicated and are subject to change. Any price and availability information displayed on Amazon at the time of purchase will apply to the purchase of this product.
Unavailable
|
Brand |
Brand
Fujifilm
|
|
Lens Weight |
Lens Weight
540 g
|
|
Maximum Aperture |
Maximum Aperture
f/ 2.0
|
|
Focal Length Range |
Focal Length Range
90 mm
|
Fujifilm FUJINON XF 90mm F/2 R LM WR
The
Fujifilm XF 90mm f/2 R LM WR excels with its f/2 aperture, ideal for those seeking to shoot in low light or aiming for a shallow depth of field. This lens is particularly good for portrait photography, offering a flattering compression and smooth background blur that makes subjects stand out. Its telephoto reach also suits detailed landscape shots and certain sports or event photography, where getting closer to the action is challenging.
Built to last, this lens combines a metal barrel with high-grade plastics, ensuring it can handle the demands of professional use. Its weather sealing is a big advantage for shooting in less-than-ideal conditions, providing peace of mind when out in the field. It weighs 1.2 lbs (540 g), so it’s surprisingly light for its capabilities, making it a practical choice for photographers on the move.
Optically, the XF 90mm f/2 R LM WR is absolutely outstanding, delivering sharp, clear images with no detectable distortion or chromatic aberration. The bokeh quality is jsut about as good as you could wish for. While the lens lacks built-in image stabilization, its fast aperture and quick autofocus system, powered by a quad linear motor, more than compensate, ensuring crisp images in a variety of settings. This lens is a solid choice for Fujifilm users looking for a high-quality telephoto prime that combines portability with exceptional optical performance. It’s hard to imagine a better portrait lens for Fujifilm cameras.
4. Sigma 24mm f/1.4 DG HSM | A
Best Wide-Angle Art Lens
Shop 5 Versions
Canon EF Mount
×
Deals
|
(second hand)
Check Price
|
(second hand)
|
Check Price
|
Buy Now!
|
If you buy a product through one of our referral links we will earn a commission (without costing you anything).
Prices last updated on .
As an Amazon Associate, I earn from qualifying purchases. Product prices and availability are accurate as of the date/time indicated and are subject to change. Any price and availability information displayed on Amazon at the time of purchase will apply to the purchase of this product.
Unavailable
Nikon F Mount
×
Deals
|
(second hand)
Check Price
|
(second hand)
|
Check Price
|
Buy Now!
|
If you buy a product through one of our referral links we will earn a commission (without costing you anything).
Prices last updated on .
As an Amazon Associate, I earn from qualifying purchases. Product prices and availability are accurate as of the date/time indicated and are subject to change. Any price and availability information displayed on Amazon at the time of purchase will apply to the purchase of this product.
Unavailable
Sigma SA Mount
×
Deals
|
(second hand)
Check Price
|
(second hand)
|
Check Price
|
Buy Now!
|
If you buy a product through one of our referral links we will earn a commission (without costing you anything).
Prices last updated on .
As an Amazon Associate, I earn from qualifying purchases. Product prices and availability are accurate as of the date/time indicated and are subject to change. Any price and availability information displayed on Amazon at the time of purchase will apply to the purchase of this product.
Unavailable
Leica L Mount
×
Deals
|
(second hand)
Check Price
|
(second hand)
|
Check Price
|
Buy Now!
|
If you buy a product through one of our referral links we will earn a commission (without costing you anything).
Prices last updated on .
As an Amazon Associate, I earn from qualifying purchases. Product prices and availability are accurate as of the date/time indicated and are subject to change. Any price and availability information displayed on Amazon at the time of purchase will apply to the purchase of this product.
Unavailable
Sony E Mount
×
Deals
|
(second hand)
Check Price
|
(second hand)
|
Check Price
|
Buy Now!
|
If you buy a product through one of our referral links we will earn a commission (without costing you anything).
Prices last updated on .
As an Amazon Associate, I earn from qualifying purchases. Product prices and availability are accurate as of the date/time indicated and are subject to change. Any price and availability information displayed on Amazon at the time of purchase will apply to the purchase of this product.
Unavailable
|
Brand |
Brand
Sigma
|
|
Lens Weight |
Lens Weight
665 g
|
|
Maximum Aperture |
Maximum Aperture
f/ 1.4
|
|
Focal Length Range |
Focal Length Range
24 mm
|
|
Image Stabilization |
Image Stabilization
|
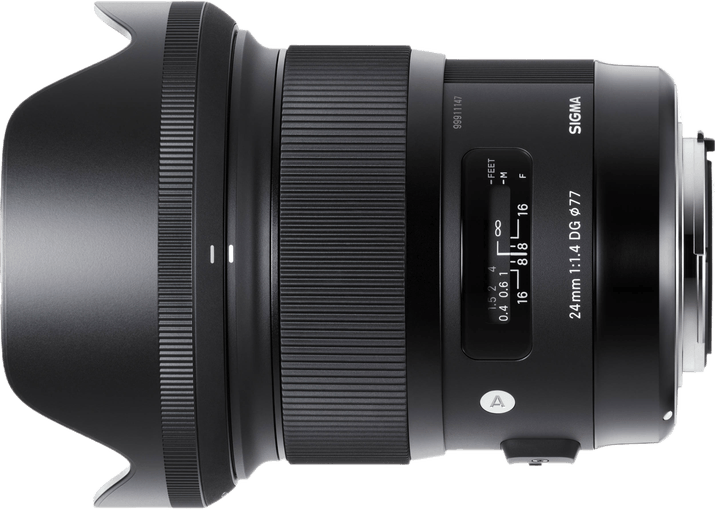
Sigma 24mm F/1.4 DG HSM | A
The
Sigma 24mm f/1.4 DG HSM | A stands out for its wide f/1.4 aperture, making it a prime choice for photographers looking to shoot in low light or achieve a shallow depth of field. This lens is especially useful for landscape and architectural photography, where its wide-angle view can capture expansive scenes with clarity and detail. Its ability to isolate subjects with smooth background blur also makes it suitable for environmental portraits and street photography.
Constructed with high-quality materials, this lens is both durable and lightweight, balancing well on DSLR cameras. Despite lacking extensive weather sealing, it offers basic protection against dust and moisture, making it reliable for outdoor use. The optical performance is impressive, with minimal distortion and chromatic aberration, thanks to the use of SLD and FLD glass elements.
Autofocus is quick and quiet, courtesy of the Hyper Sonic Motor, ensuring sharp images in various shooting conditions. While the lens does not feature image stabilization, its wide aperture allows for faster shutter speeds, helping to mitigate camera shake. The Sigma 24mm f/1.4 DG HSM | A is a solid option for those seeking a high-quality wide-angle prime lens, offering excellent optical performance and build quality at a competitive price point.
5. Sigma 85mm f/1.4 DG HSM | A
Best Portrait Art Lens
Shop 5 Versions
Canon EF Mount
×
Deals
|
(second hand)
Check Price
|
(second hand)
|
Check Price
|
Buy Now!
|
If you buy a product through one of our referral links we will earn a commission (without costing you anything).
Prices last updated on .
As an Amazon Associate, I earn from qualifying purchases. Product prices and availability are accurate as of the date/time indicated and are subject to change. Any price and availability information displayed on Amazon at the time of purchase will apply to the purchase of this product.
Unavailable
Nikon F Mount
×
Deals
|
(second hand)
Check Price
|
(second hand)
|
Check Price
|
Buy Now!
|
If you buy a product through one of our referral links we will earn a commission (without costing you anything).
Prices last updated on .
As an Amazon Associate, I earn from qualifying purchases. Product prices and availability are accurate as of the date/time indicated and are subject to change. Any price and availability information displayed on Amazon at the time of purchase will apply to the purchase of this product.
Unavailable
Sigma SA Mount
×
Deals
|
(second hand)
Check Price
|
(second hand)
|
Check Price
|
Buy Now!
|
If you buy a product through one of our referral links we will earn a commission (without costing you anything).
Prices last updated on .
As an Amazon Associate, I earn from qualifying purchases. Product prices and availability are accurate as of the date/time indicated and are subject to change. Any price and availability information displayed on Amazon at the time of purchase will apply to the purchase of this product.
Unavailable
Leica L Mount
×
Deals
|
(second hand)
Check Price
|
(second hand)
|
Check Price
|
Buy Now!
|
If you buy a product through one of our referral links we will earn a commission (without costing you anything).
Prices last updated on .
As an Amazon Associate, I earn from qualifying purchases. Product prices and availability are accurate as of the date/time indicated and are subject to change. Any price and availability information displayed on Amazon at the time of purchase will apply to the purchase of this product.
Unavailable
Sony E Mount
×
Deals
|
(second hand)
Check Price
|
(second hand)
|
Check Price
|
Buy Now!
|
If you buy a product through one of our referral links we will earn a commission (without costing you anything).
Prices last updated on .
As an Amazon Associate, I earn from qualifying purchases. Product prices and availability are accurate as of the date/time indicated and are subject to change. Any price and availability information displayed on Amazon at the time of purchase will apply to the purchase of this product.
Unavailable
|
Brand |
Brand
Sigma
|
|
Lens Weight |
Lens Weight
1130 g
|
|
Maximum Aperture |
Maximum Aperture
f/ 1.4
|
|
Focal Length Range |
Focal Length Range
85 mm
|
|
Image Stabilization |
Image Stabilization
|
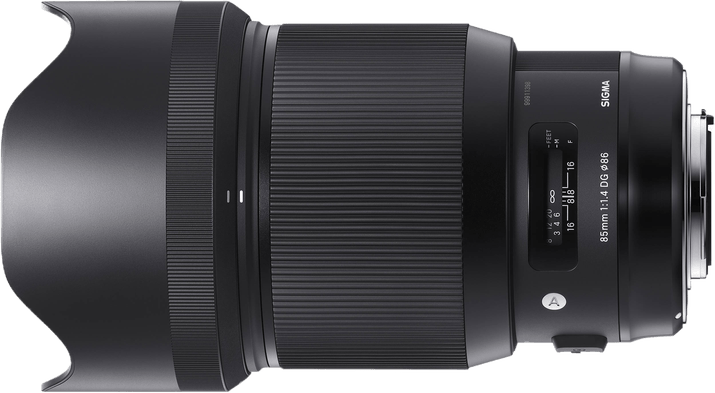
Sigma 85mm F/1.4 DG HSM | A
The
Sigma 85mm f/1.4 DG HSM | A is a standout lens for portrait photography, offering a wide f/1.4 aperture that excels in low light and creates stunning bokeh. This lens is part of Sigma’s Art line, known for its exceptional sharpness and optical quality. Its focal length is ideal for flattering portraits, providing enough distance to make subjects comfortable while compressing the background beautifully.
Built with a mix of metal and Thermally Stable Composite materials, it feels solid yet manageable for extended use. The weather sealing adds confidence for outdoor shoots, though its weight, at 2.5 lbs (1.1 kg), is something to consider for handheld shooting. Optically, the lens impresses with minimal distortion and chromatic aberration, thanks to its advanced glass elements.
Autofocus is quick and reliable, making it easy to capture fleeting moments with precision. While the lack of image stabilization might be seen as a downside, the lens’s wide aperture often compensates by allowing faster shutter speeds. The Sigma 85mm f/1.4 DG HSM | A is a good value lens for photographers who prioritize image quality and artistic control, making it a valuable addition to any camera bag.
6. Sony E 50mm f/1.8 OSS
Best Budget Portrait Lens
Shop Offers
×
Sony E 50mm F/1.8 OSS SEL50F18 Deals
|
(second hand)
Check Price
|
(second hand)
|
Check Price
|
Buy Now!
|
If you buy a product through one of our referral links we will earn a commission (without costing you anything).
Prices last updated on .
As an Amazon Associate, I earn from qualifying purchases. Product prices and availability are accurate as of the date/time indicated and are subject to change. Any price and availability information displayed on Amazon at the time of purchase will apply to the purchase of this product.
Unavailable
|
Brand |
Brand
Sony
|
|
Lens Weight |
Lens Weight
202 g
|
|
Maximum Aperture |
Maximum Aperture
f/ 1.8
|
|
Focal Length Range |
Focal Length Range
50 mm
|
|
Image Stabilization |
Image Stabilization
|
Sony E 50mm F/1.8 OSS SEL50F18
Amazon.com
$298.00 $348.00
The
Sony E 50mm f/1.8 OSS is a prime lens that shines in portrait and street photography, thanks to its 75mm equivalent focal length on APS-C sensors. Its f/1.8 aperture excels in low light, allowing photographers to capture sharp, detailed images with a beautifully blurred background. This lens is particularly valued for its Optical SteadyShot (OSS) stabilization, which is a significant advantage in handheld shooting, reducing camera shake and enabling clearer shots in challenging lighting conditions.
Constructed from high-quality plastics with a metal mount, it strikes a balance between durability and lightweight design, weighing just about 7.13oz (202g). This makes it an easy companion for day-long shooting sessions, fitting comfortably on Sony’s APS-C cameras. Despite its lack of weather sealing, its build quality is reliable for everyday use.
Optically, the lens delivers impressive sharpness and clarity, with minimal distortion. Chromatic aberration and vignetting are present but manageable, often adding character to the images. The bokeh quality, enhanced by the seven rounded aperture blades, adds to the lens’s appeal for portrait photography.
The Sony E 50mm f/1.8 OSS is a versatile and affordable option for Sony APS-C camera users. Its combination of a fast aperture, effective stabilization, and compact form factor makes it a valuable lens for capturing a wide range of subjects. While it may show some optical imperfections, its overall performance and features offer great value, making it a popular choice among photographers looking to expand their lens collection.
7. Sony FE 135mm f/1.8 GM
Best Telephoto Portrait Lens
Shop Offers
×
Sony FE 135mm F/1.8 GM SEL135F18GM Deals
|
(second hand)
Check Price
|
(second hand)
|
Check Price
|
Buy Now!
|
If you buy a product through one of our referral links we will earn a commission (without costing you anything).
Prices last updated on .
As an Amazon Associate, I earn from qualifying purchases. Product prices and availability are accurate as of the date/time indicated and are subject to change. Any price and availability information displayed on Amazon at the time of purchase will apply to the purchase of this product.
Unavailable
|
Brand |
Brand
Sony
|
|
Lens Weight |
Lens Weight
950 g
|
|
Maximum Aperture |
Maximum Aperture
f/ 1.8
|
|
Focal Length Range |
Focal Length Range
135 mm
|
|
Image Stabilization |
Image Stabilization
|
Sony FE 135mm F/1.8 GM SEL135F18GM
Amazon.com
$1,611.91 $2,098.00
The
Sony FE 135mm f/1.8 GM is a prime lens celebrated for its exceptional sharpness and beautiful bokeh, making it a favorite among portrait photographers. Its f/1.8 aperture not only excels in low light conditions but also provides a shallow depth of field, ideal for isolating subjects from the background. This lens, part of Sony’s prestigious G Master series, is designed to deliver unparalleled image quality, with minimal distortion and chromatic aberrations, ensuring crisp, clear images across the frame.
Weighing in at just over 2 lbs (950 g), it balances well on Sony’s full-frame cameras, offering a comfortable shooting experience. Despite lacking built-in image stabilization, its compatibility with cameras equipped with IBIS compensates for this, allowing for sharp images even in challenging lighting conditions. The lens’s construction is robust, featuring weather sealing that protects it against the elements, making it a reliable choice for outdoor shoots.
Autofocus performance is both quick and precise, thanks to the advanced motor system, ensuring that photographers never miss a moment. While the lens’s 135mm focal length may limit its versatility in tight spaces, its optical excellence makes it a valuable asset for those focused on portrait, event, and certain sports photography. The Sony FE 135mm f/1.8 GM stands as a testament to Sony’s commitment to providing photographers with lenses that offer both high performance and artistic freedom.
8. Sony FE 600mm f/4 GM OSS
Best Super-Telephoto Lens
Shop Offers
×
Sony FE 600mm F/4 GM OSS SEL600F40GM Deals
|
(second hand)
Check Price
|
(second hand)
|
Check Price
|
Buy Now!
|
If you buy a product through one of our referral links we will earn a commission (without costing you anything).
Prices last updated on .
As an Amazon Associate, I earn from qualifying purchases. Product prices and availability are accurate as of the date/time indicated and are subject to change. Any price and availability information displayed on Amazon at the time of purchase will apply to the purchase of this product.
Unavailable
|
Brand |
Brand
Sony
|
|
Lens Weight |
Lens Weight
3040 g
|
|
Maximum Aperture |
Maximum Aperture
f/ 4.0
|
|
Focal Length Range |
Focal Length Range
600 mm
|
|
Image Stabilization |
Image Stabilization
|
Sony FE 600mm F/4 GM OSS SEL600F40GM
The
Sony FE 600mm f/4 GM OSS stands as a pinnacle of long-range photography excellence, tailored for those who demand unparalleled reach and clarity. Its 600mm focal length is a game-changer for wildlife and sports photographers, offering the ability to capture distant subjects with stunning detail and clarity. The fast f/4 aperture ensures brilliant performance in low light and provides a shallow depth of field, allowing subjects to stand out against beautifully blurred backgrounds.
Constructed with advanced materials like magnesium alloy and carbon fiber, this lens is surprisingly manageable for its size, weighing 6.7 lbs (3 kg). It’s equipped with comprehensive weather sealing, ensuring reliability in harsh conditions. Optically, it’s a masterpiece, with elements that minimize aberrations and deliver edge-to-edge sharpness.
Autofocus is swift and silent, thanks to the dual XD Linear Motors, ensuring that even the fastest-moving subjects are captured with precision. While it lacks built-in stabilization, its compatibility with Sony’s IBIS-equipped cameras mitigates this, allowing for sharp images in challenging conditions. For professionals and serious enthusiasts focusing on distant, fast-moving subjects, the Sony FE 600mm f/4 GM OSS is an invaluable tool, offering performance that justifies its premium stature.
Conclusion: The Best Prime Lenses
Prime lenses offer sharp images and a shallow depth of field. They are light and perfect for various photography styles. Although zoom lenses are very popular, and offer many advantages, prime lenses still have their place and are valued by many photographers.
The Nikon AF-S 50mm f/1.4G is great in low light; the Fujifilm XF 23mm f/1.4 R LM WR excels in sharpness. Wr think that amonsgt the other fifteen other lenses you’ll find something you want to try.
Our Top 2 Prime Lenses
Nikon AF-S NIKKOR 50mm F/1.4G
Nikon AF-S NIKKOR 50mm F/1.4G
Shop Offers
×
Nikon AF-S NIKKOR 50mm F/1.4G Deals
|
(second hand)
Check Price
|
(second hand)
|
Check Price
|
Buy Now!
|
If you buy a product through one of our referral links we will earn a commission (without costing you anything).
Prices last updated on .
As an Amazon Associate, I earn from qualifying purchases. Product prices and availability are accurate as of the date/time indicated and are subject to change. Any price and availability information displayed on Amazon at the time of purchase will apply to the purchase of this product.
Unavailable
Fujifilm FUJINON XF 23mm F/1.4 R LM WR
Fujifilm FUJINON XF 23mm F/1.4 R LM WR
Shop Offers
×
Fujifilm FUJINON XF 23mm F/1.4 R LM WR Deals
|
(second hand)
Check Price
|
(second hand)
|
Check Price
|
Buy Now!
|
If you buy a product through one of our referral links we will earn a commission (without costing you anything).
Prices last updated on .
As an Amazon Associate, I earn from qualifying purchases. Product prices and availability are accurate as of the date/time indicated and are subject to change. Any price and availability information displayed on Amazon at the time of purchase will apply to the purchase of this product.
Unavailable

