Abstract body photography is all about capturing the shapes, lines and textures of the human form in a creative way. It can be a very challenging genre to master, but with a little practice, you can create some stunning images. Here are seven tips to help you get started.
What is Abstract Body Photography?
Abstract photography covers a wide gamut of styles and techniques. It’s also known as non-objective, experimental or conceptual photography. But it can be a little tricky to nail down.
Abstract photography conveys emotion without relying on the depiction of obvious subject matter. Through compositional rules, abstract photographers skew, re-emphasize or deconstruct an image.
Photography of the body explores the way we visually relate to ourselves and others. Abstraction takes out the problems of the rigid subject matter.
A viewer can experience a unique study of the body as an abstract concept in itself.
An abstract photograph of the body may delineate a recognizable feature. But the emphasis shifts from the body as a familiar physical structure to that of an impactful form of art.
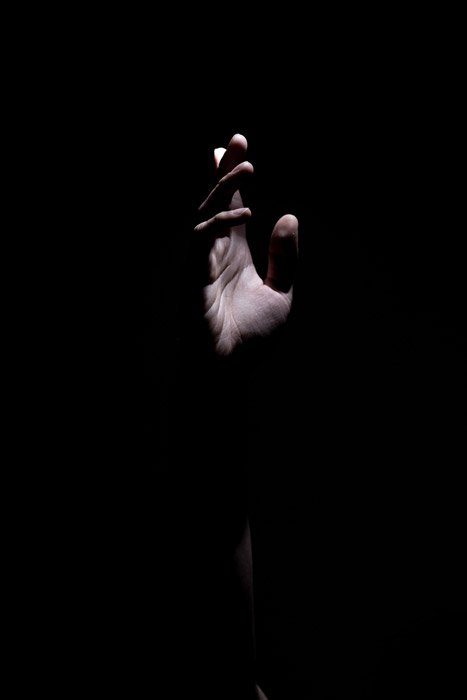
Paint With Light to Emphasise Forms
Light is the driving force behind all photography. Abstract photography of the body shows the play between light and the physical form.
You can use either a studio or natural light. The point is to sculpt the subject material, creating emphasis and form.
Light is a changeable resource. Artificial light has a different color temperature than a natural light source. Depending on the location and time of day, natural light can behave in different ways.
Light can also be soft or hard, again depending on the light source.
In abstract body photography, these variables come together. They investigate the materiality of the body as an interactive canvas.
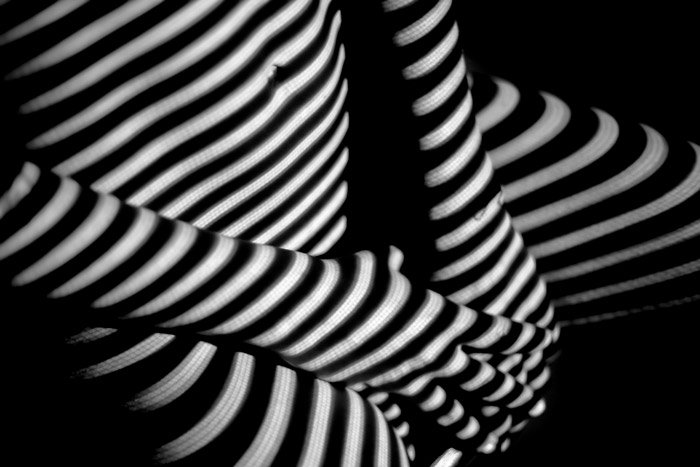
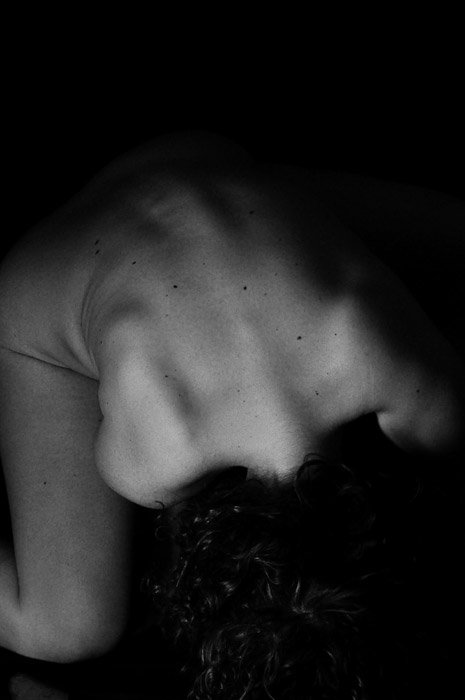
Go Black and White to Remove Distractions
Abstract and black and white photography are similar. They both cultivate a sense of distance between the viewer and the image.
Most of us see in color. So black and white photography denotes a sense of surrealism. The photographer places greater emphasis on the distance between the photograph and reality.
The greater the distance, the more impetus the viewer has to bring their own meaning to a photograph.
Removing colorful clothing, ambient lighting or color temperature gets rid of the distraction. Through this, black and white photography renders a sense of timelessness.
This connects a viewer to the image without depicting times and places that age or date.
At the same time, black and white photography creates a greater sense of depth in an image. By rendering an image in greyscale, the subtle tonalities of light are more visible.
These connect elements within a frame where color would create separation.
Black and white is used in abstract photography of the body. The combination of timelessness and depth helps create a dynamic image.
It offers both a study of the body and frames it as a concept of its own.
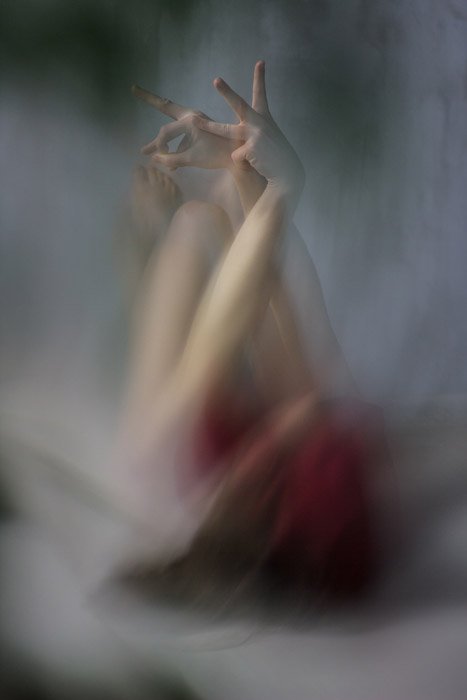
Add Movement to Create Timelessness
Much of photography is based around freezing movement. Abstract photography embraces the visual qualities of motion.
Incorporating movement into photography of the body condenses physicality into a single photographic frame. And it creates a record of the body over a given amount of time.
Intentional camera movement (or ICM) is the deliberate movement of the camera. It’s done over the course of a long exposure. ICM cultivates a sense of materiality. It communicates the artistic processes of a photographer to an audience.
Combining ICM and abstract photography also introduces a layer of voyeurism. This traces the active body under the gaze of the lens.
Motion blur depicts the movement of a subject during exposure. However, motion blur is distinct in that it relies on the movement of a subject to convey an image.
Motion blur speaks to the nature of physicality through time and space. It does this by documenting the quality of a moving body.
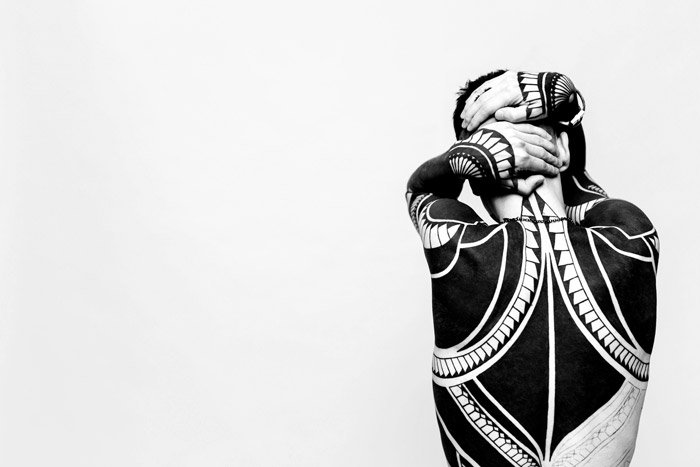
Photograph Tattoos for More Creative Body Photography
Try incorporating tattoos into abstract photography of the human body. You’ll create a visual study of culture and tradition.
Tattoos are heavily influenced by the experiences of the wearer. Use this to articulate a sense of history in an image.
Each tattoo marks an ongoing story. It provides an intimate insight into the visual impact of the human experience.
Change Your Perspective to Add a 3D Feel
Perspective describes the nature of a subject within in a photographic plane. But a great deal of the world is experienced at eye-level.
The use of a unique perspective can give a 3D feel to a 2D subject. Perspective imbues a sense of physicality in an image. It plays with our perceptions of space and our sense of place.
A bird’s eye view of a subject creates tension but also feeds curiosity. A ground-up perspective amplifies scale, making the viewer feel smaller in an environment.
The camera lens itself also acts as a door, dictating the entry point of the viewer. A telephoto lens pushes the foreground and background together.
A fisheye or ultra-wide angle lens warps perspective in the center of the image. It makes a central subject seem bigger.
Perspective orients a viewer within a photograph. You can use these tricks in abstract photography of the body, to emphasize form or texture.
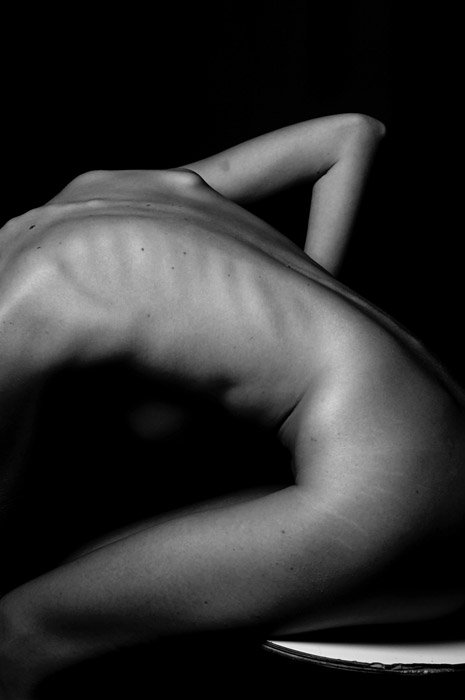
Use Lines to Emphasise the Structure of the Human Body
The visual integrity of the body is dictated by line. The line separates a subject from its surroundings. This creates a buffer between the body and the environment.
By isolating the figure, the body is defined in space. This definition delivers impact, shape, and form.
The line also constructs the inner structure of the body. Look for the natural lines of the body, such as the curvature of the ribs or the extension of the hands. These lines invigorate the tangible qualities of the body in an image.
Line forms visual paths, focal points, and frames. When used as an anchor, line hitches the image to a seam which creates balance and divides space.
Horizontal lines convey a sense of rest and balance. And diagonal lines foster an impression of movement and depth.
Bonus: Photograph Animal Bodies
From axolotls to zebras. Abstract photography of the body isn’t limited to the human form. People have been photographing animals since photography was invented.
You can try abstract photography of animal bodies too. Include close-ups of colorful feathers, fur patterns or beautiful animal eyes.
It can be a challenge though. Many animals don’t take direction as readily as human subjects
Focus on compositional tenets such as texture, line, and color. This creates abstract studies that speak to the nature of the physical body.
Just make sure it’s as fun for the animal as it is for you photographing them!

Conclusion
Abstract photography of the body creates a study of our own physicality.
Photographers can explore the nature of human and animal forms. You’ll create beautiful images that speak to the character of life itself.
Abstraction emphasizes or deconstructs an image. It relies instead on a viewer’s innate responses to visual stimuli.
When combined with abstraction, photography of the body and nude photography explores the way we visually relate to ourselves and others.